Using ZOOM X via Web Browser
Requirements:
- You are using Chrome as a browser (this includes Mac users).
Notes:
- Please note that functionality of ZOOM X is limited when participating in a meeting via the browser.


Requirements:
Notes:
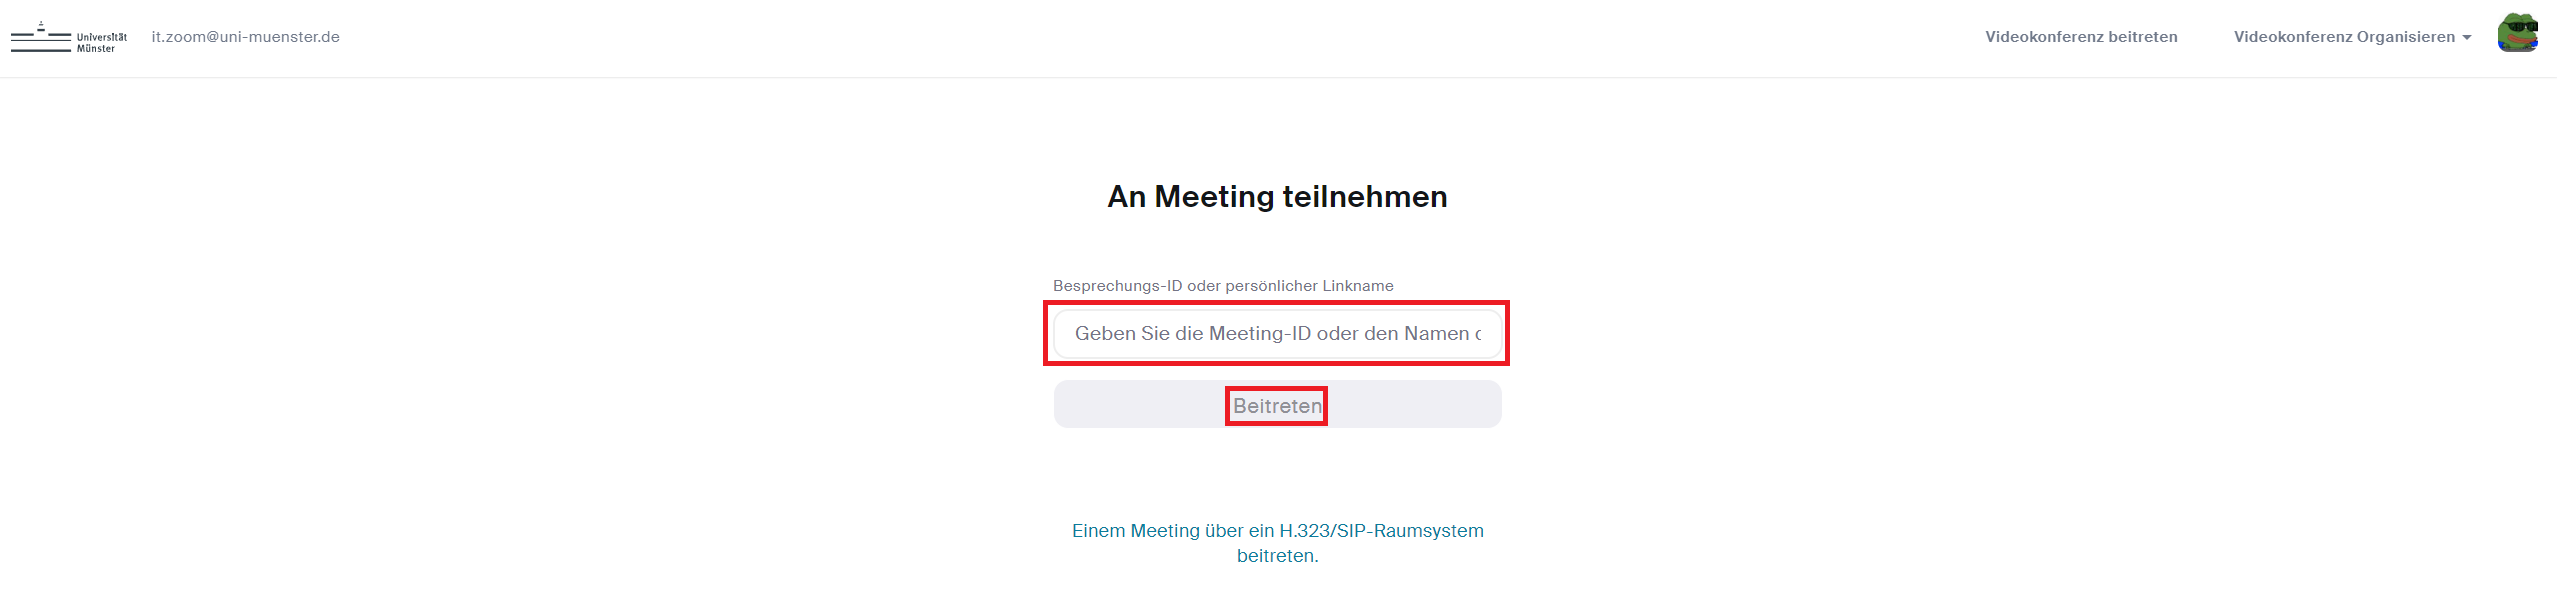
Go to uni-ms.zoom.us and click "Einem Meeting beitreten" ("Join a meeting") to join an existing meeting. You will need the meeting ID and the meeting password from the moderator.

Enter the meeting ID and click "Join".
Click on "cancel".

After entering a meeting ID, two options are displayed:

The use of Zoom via the browser requires agreement to the terms of use and privacy policy. Click on "I agree".

Allow your microphone and camera.

Now enter the meeting password and your name. This name will be displayed to the other participants of the meeting. Click on "Join".

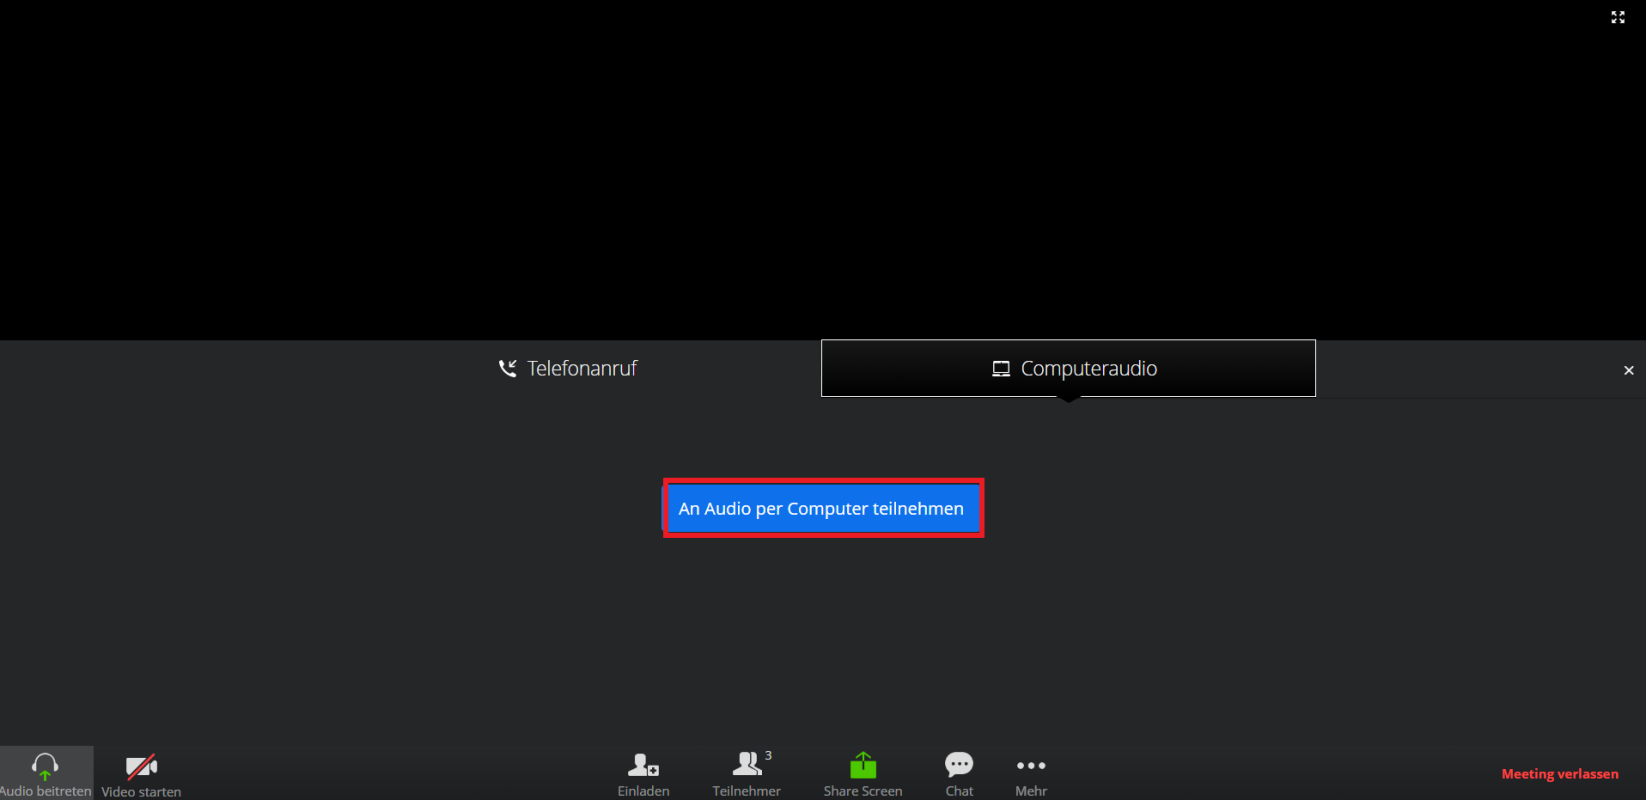
Click "Join the audio by computer" to enter the meeting room.

You are now in the meeting room. Here you can make further settings:

Go to https://wwu.zoom.us and click "Ein Meeting starten" ("Start a meeting") to schedule a meeting.

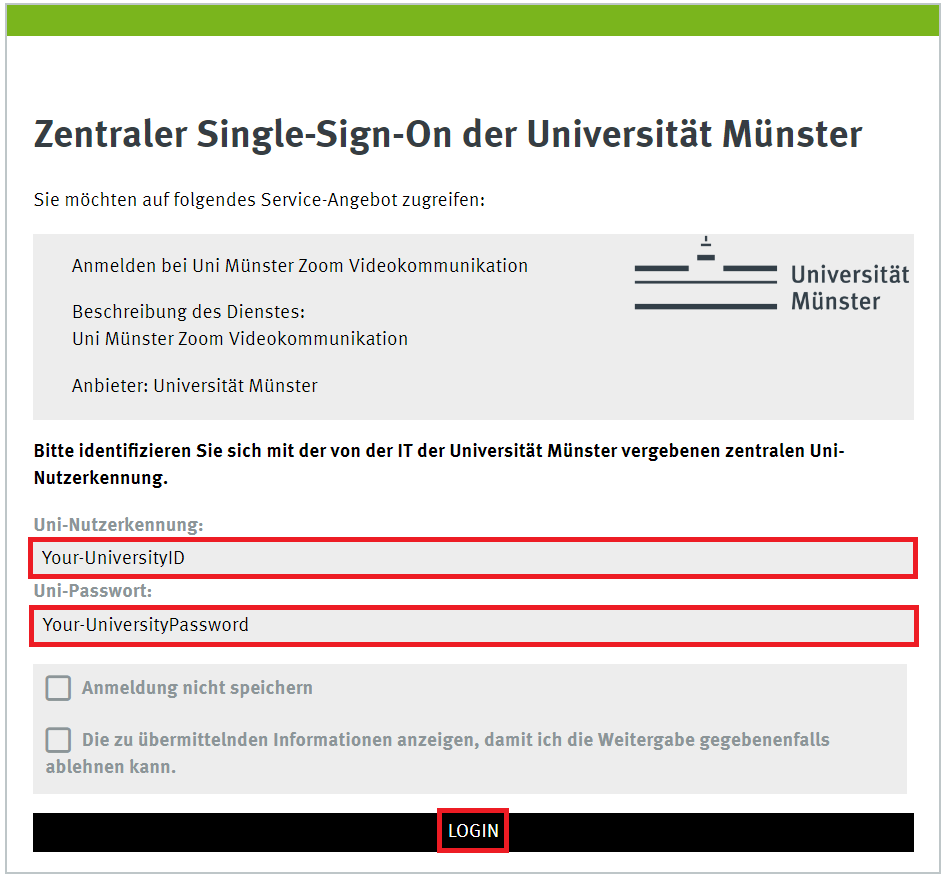
You will get to the Münster University login page. Enter your university ID and your university password and click on "LOGIN".
Click on "cancel".

After entering a meeting ID, two options are displayed:

Now you are asked to select your audio channel. Click on "Participate in audio by computer". You may have to grant access rights to the camera in your browser.
You can then invite participants to your meeting. To do this, click on the "participants" icon in the lower menu bar copy the link.

A window will open in which you will see your meeting ID and your passcode at the bottom left. Click "Copy Invitation" in the lower left corner to copy a ready-made invitation text to the clipboard. You can then paste the text into your invitation e-mail.

Go to https://wwu.zoom.us and click "Anmelden" ("Login") to schedule a meeting.

You will get to the Münster University login page. Enter your university ID and your university password and click on "LOGIN".
You are now in your ZOOM X account. Click on "Meetings". To schedule a new meeting, click on "Schedule New Meeting".

Enter the required information about the meeting:


To view the key data of your meeting (ID, password), click on the name of the meeting. The settings overview appears. Here you can copy the invitation text with all necessary information and send it to the participants by e-mail.

In the "Meetings" section, your upcoming meetings are displayed. If you click on a meeting, you have the following options:
