Login via SSO
Open the zoom desktop client "Start Zoom" or "Zoom". Click on "Sign in".
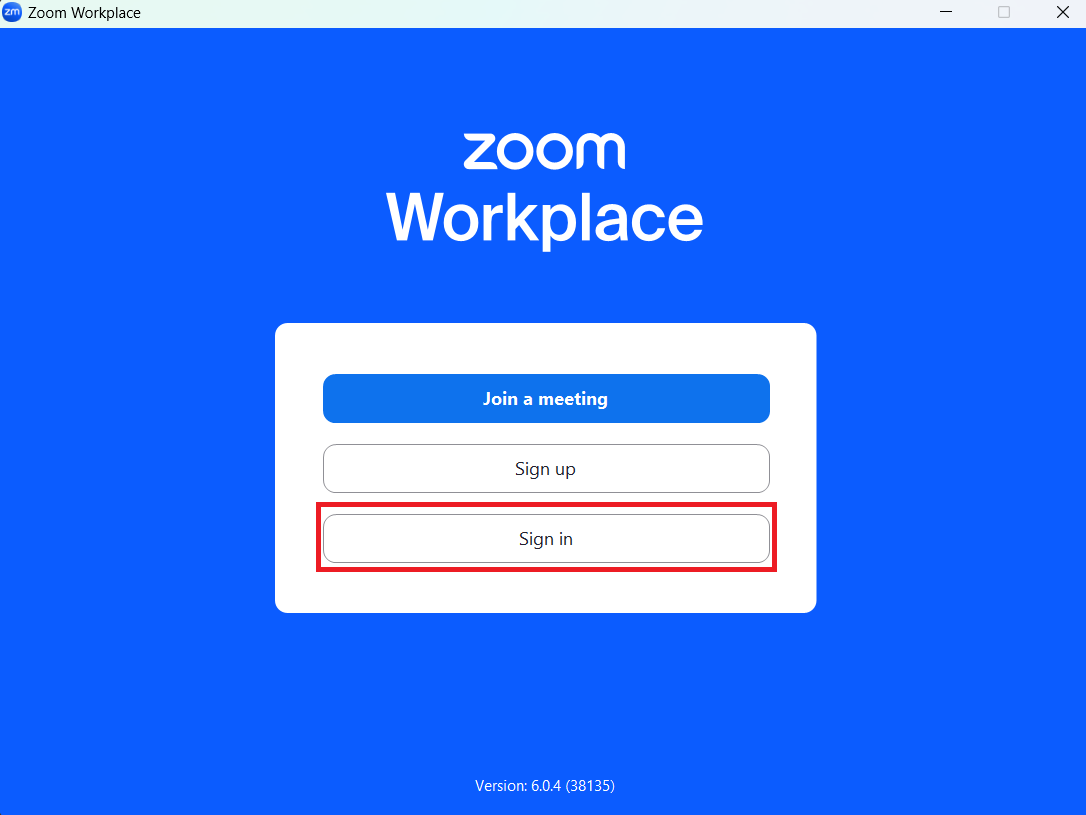
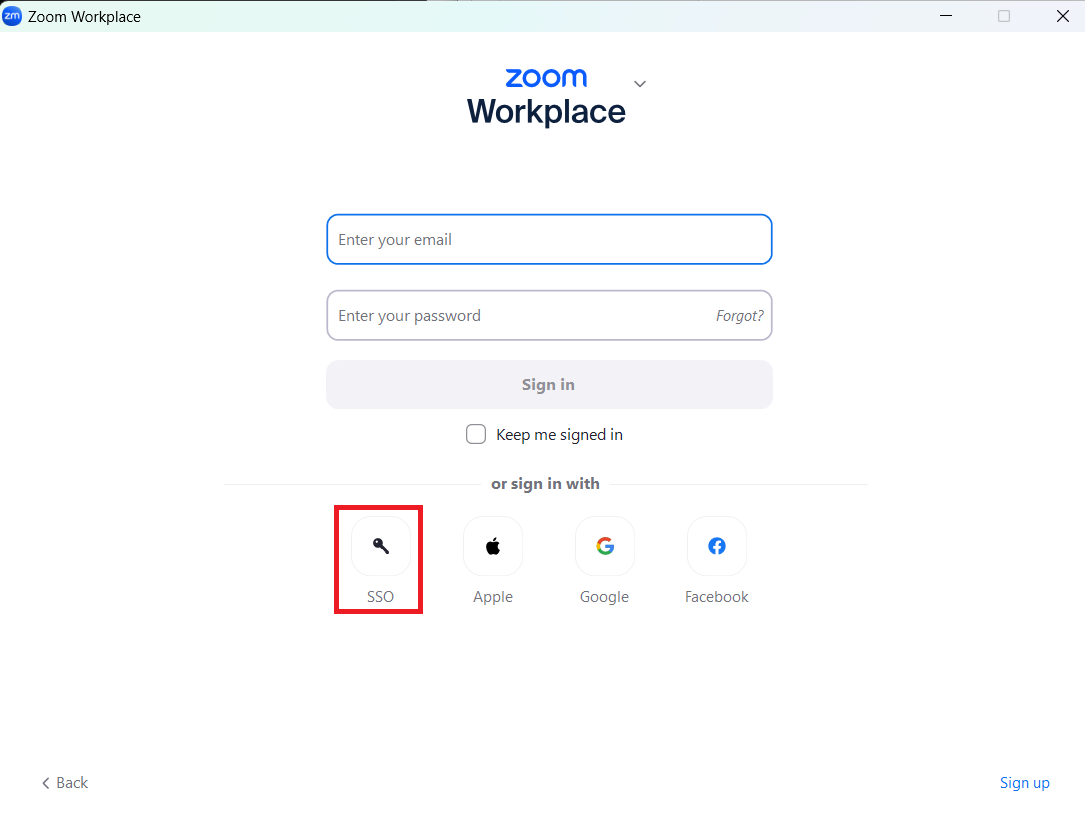
© CIT Do not enter your login data in this step, but click on "SSO".
© CIT In the following step you will be asked to select the company domain. Enter "uni-ms" and then click on "Continue".

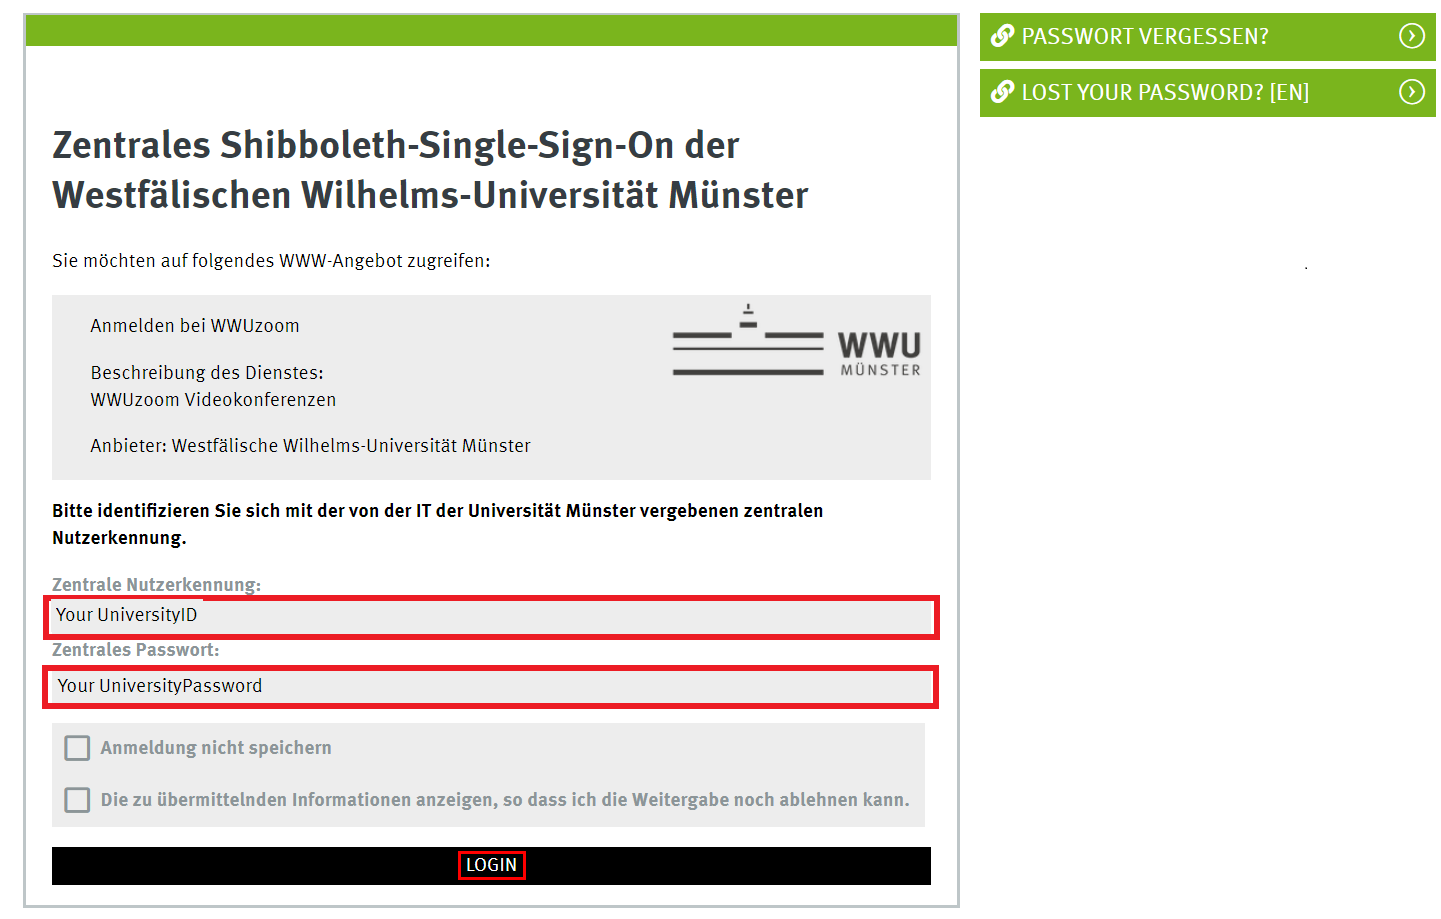
© CIT Now enter your university ID and your university password and click on "LOGIN".
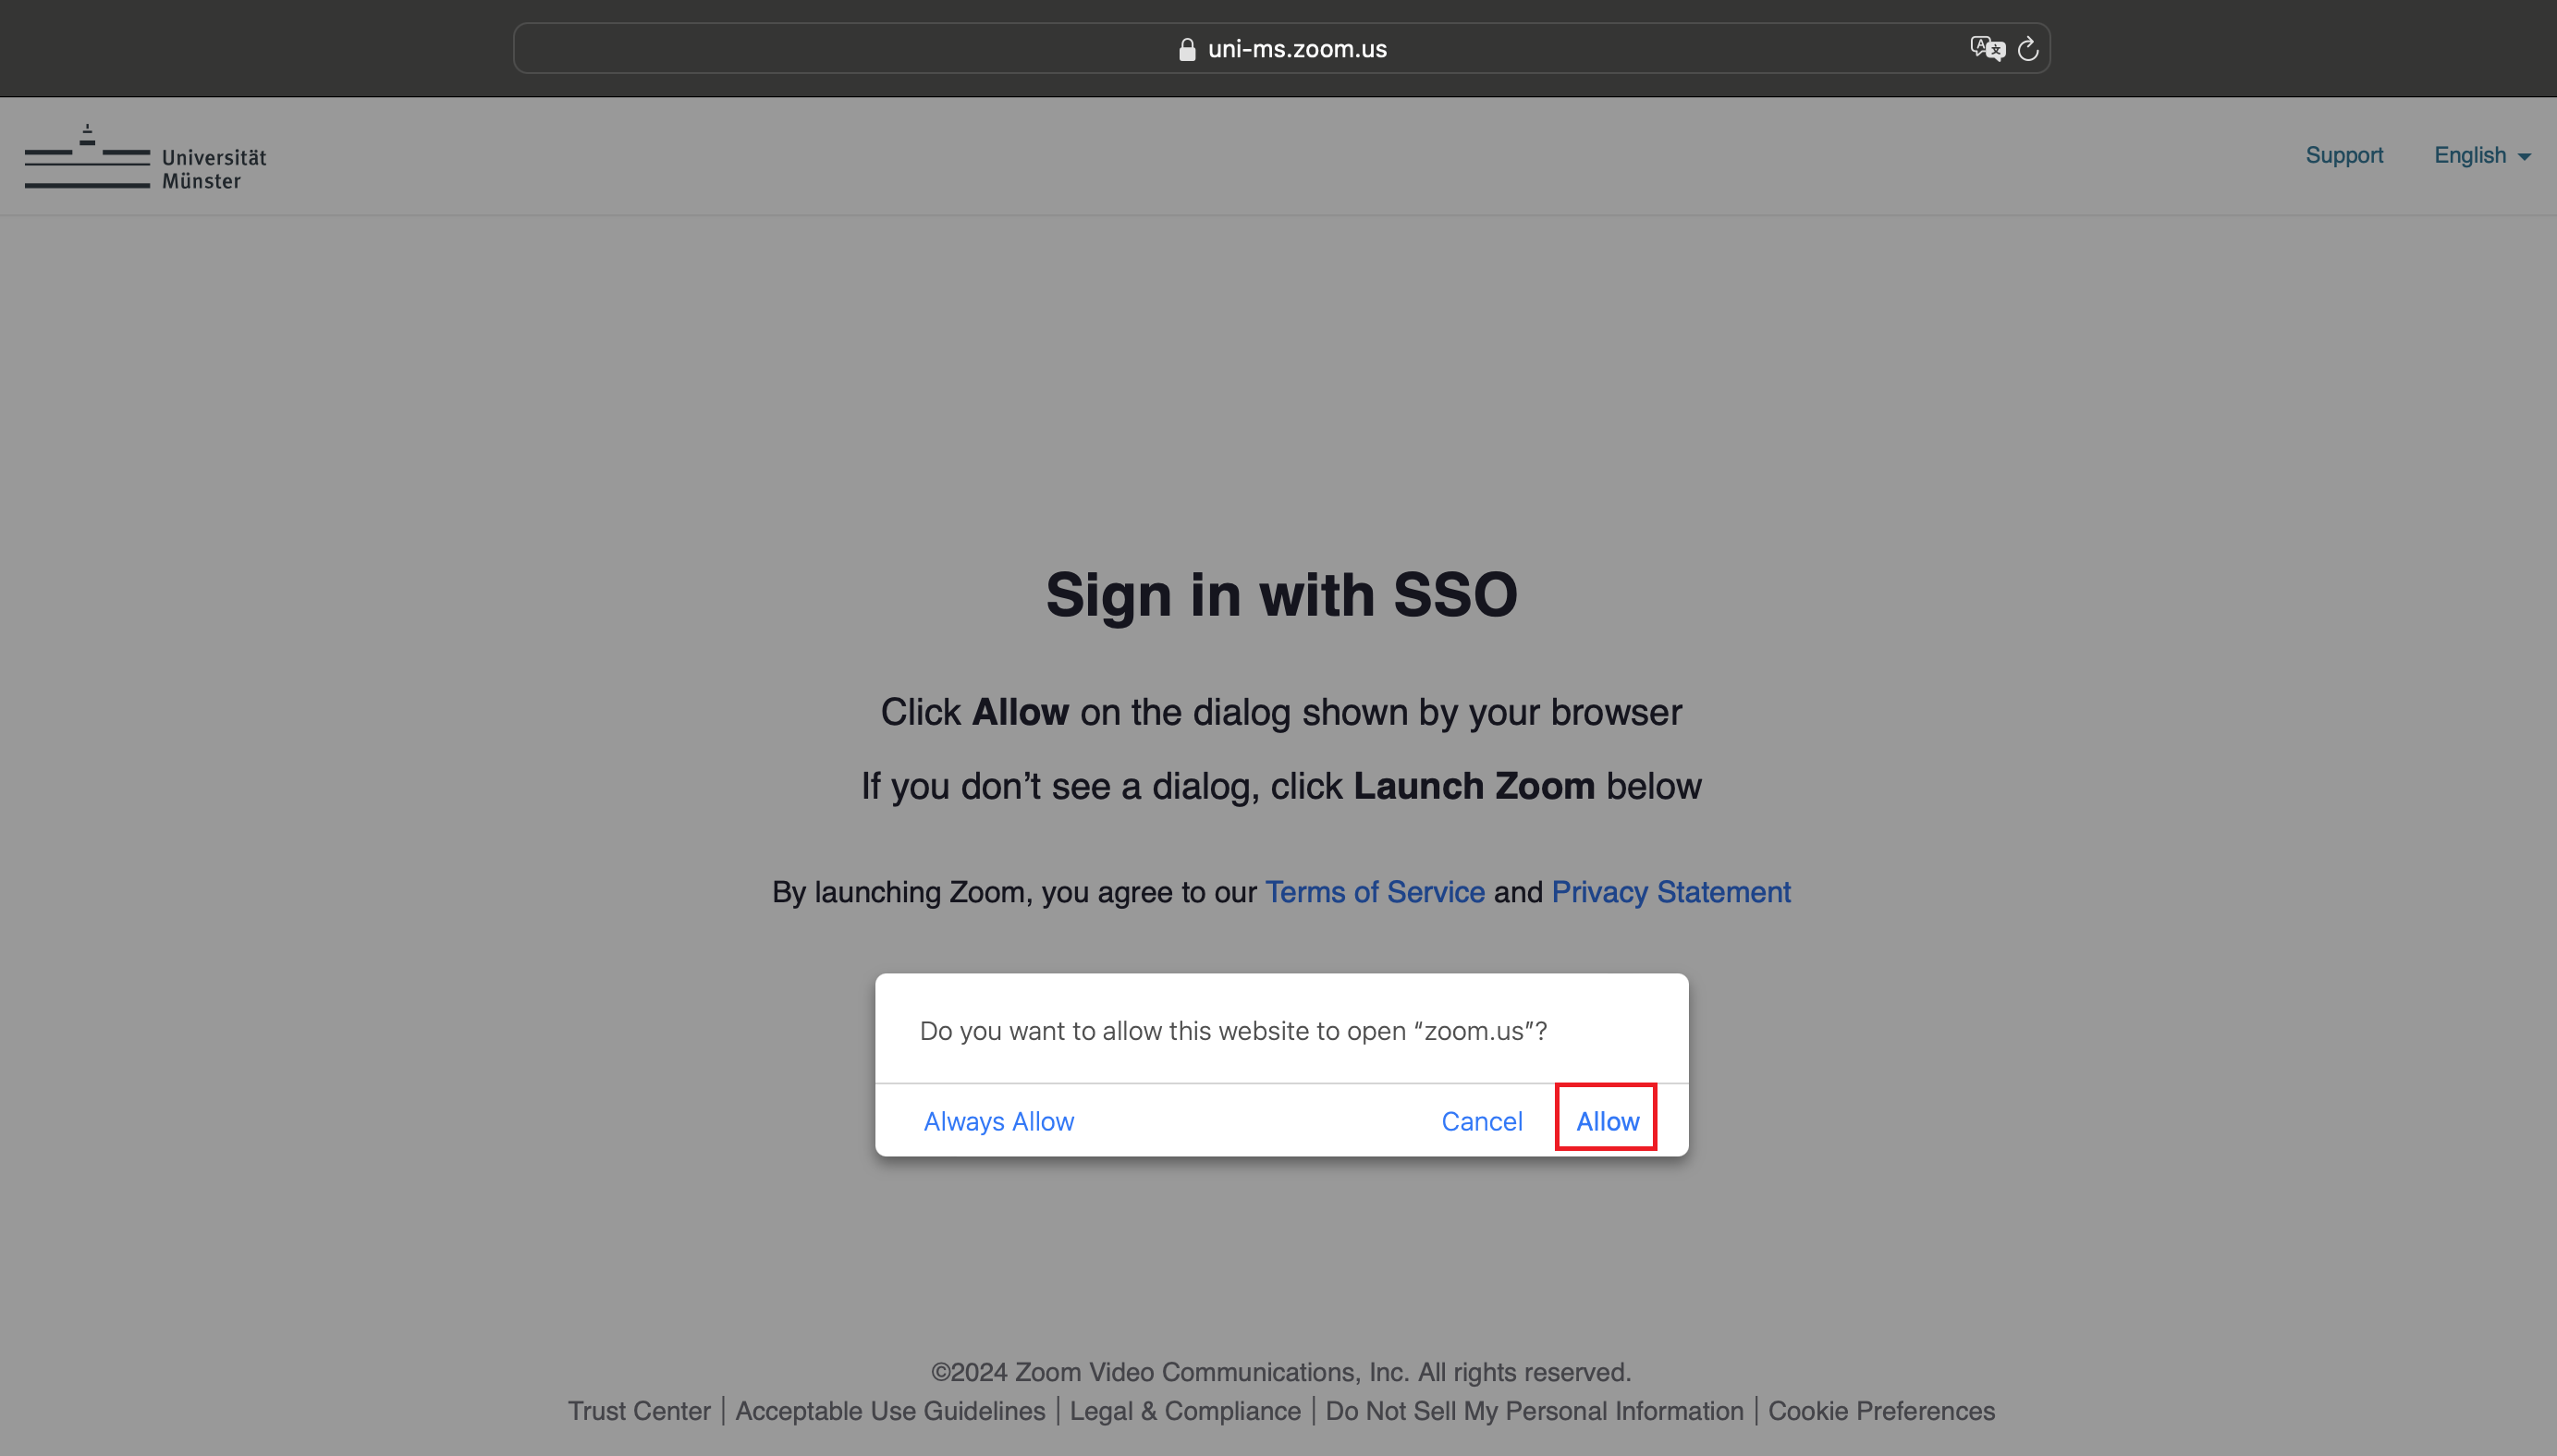
© CIT Allow the connection to your desktop application.
© CIT You will now return to the client.
© Uni MS IT Join a Meeting
1. Join a Meeting
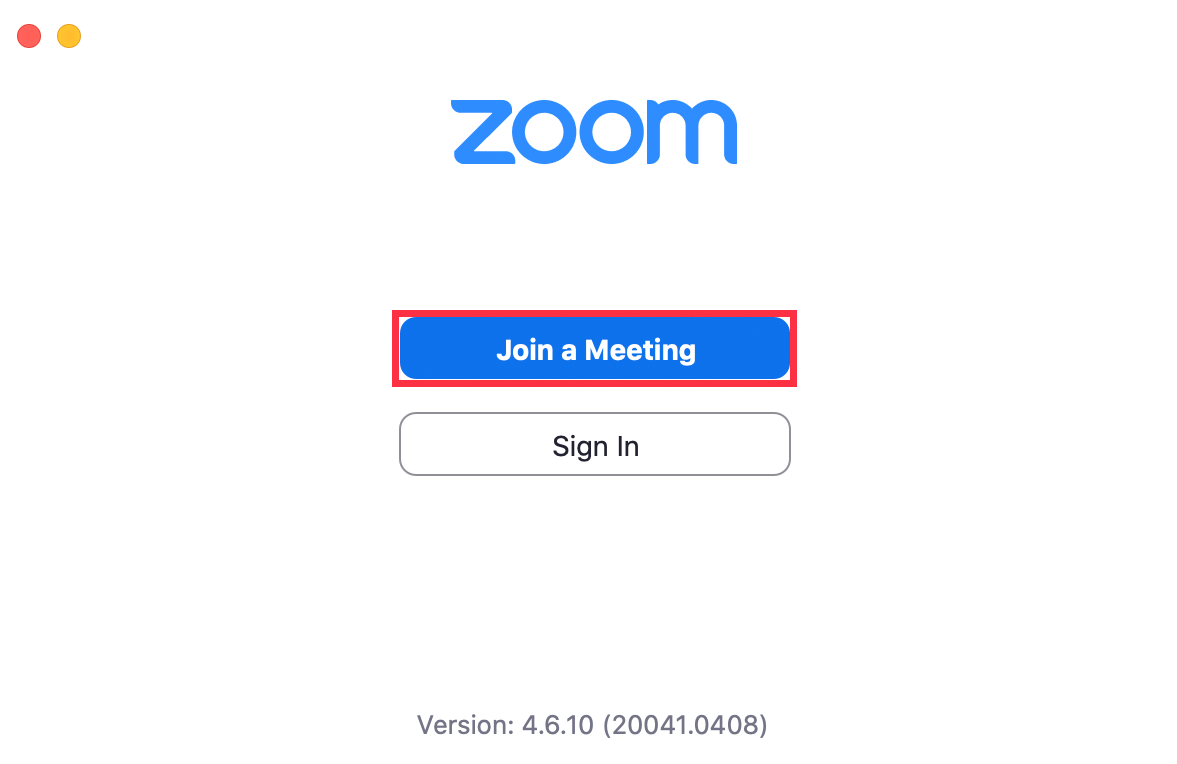
To participate in a meeting, you need the meeting ID and the meeting password from the moderator. Open the desktop client and click "Join a meeting". If you have already opened the desktop client, click "Home" in the top menu bar and then click "Join".
© Uni MS IT Enter the meeting ID and your name. This is displayed to the other participants in the meeting. Click on "Join".

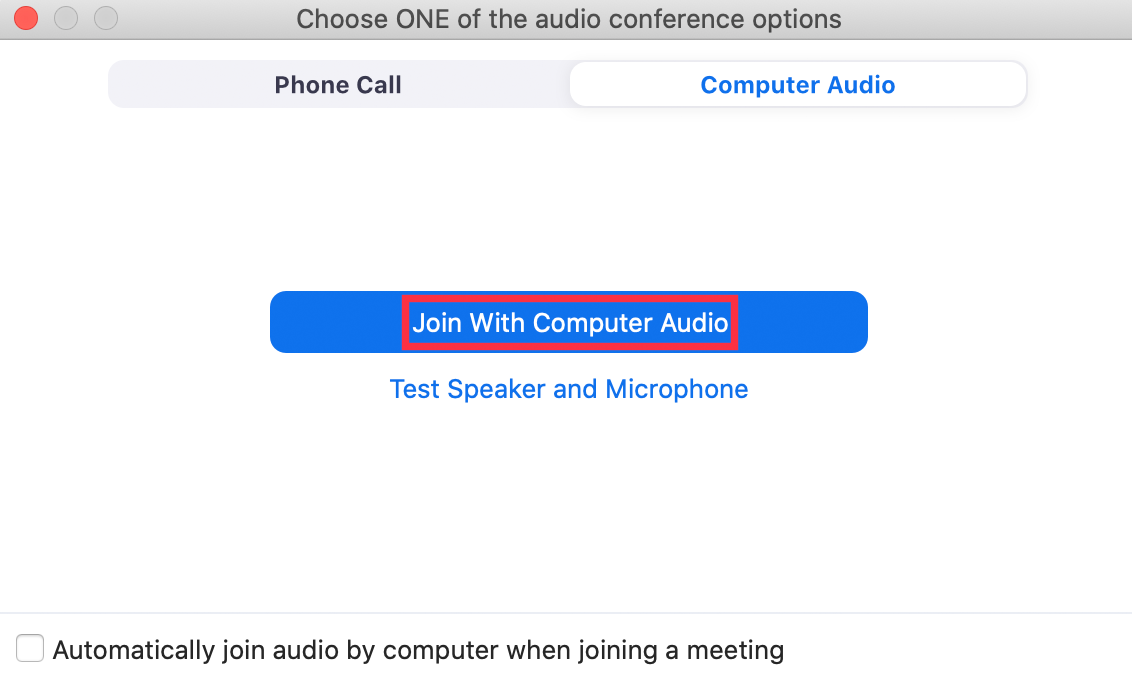
© Uni MS IT Now click on "Join the audio by computer" to enter the meeting room.
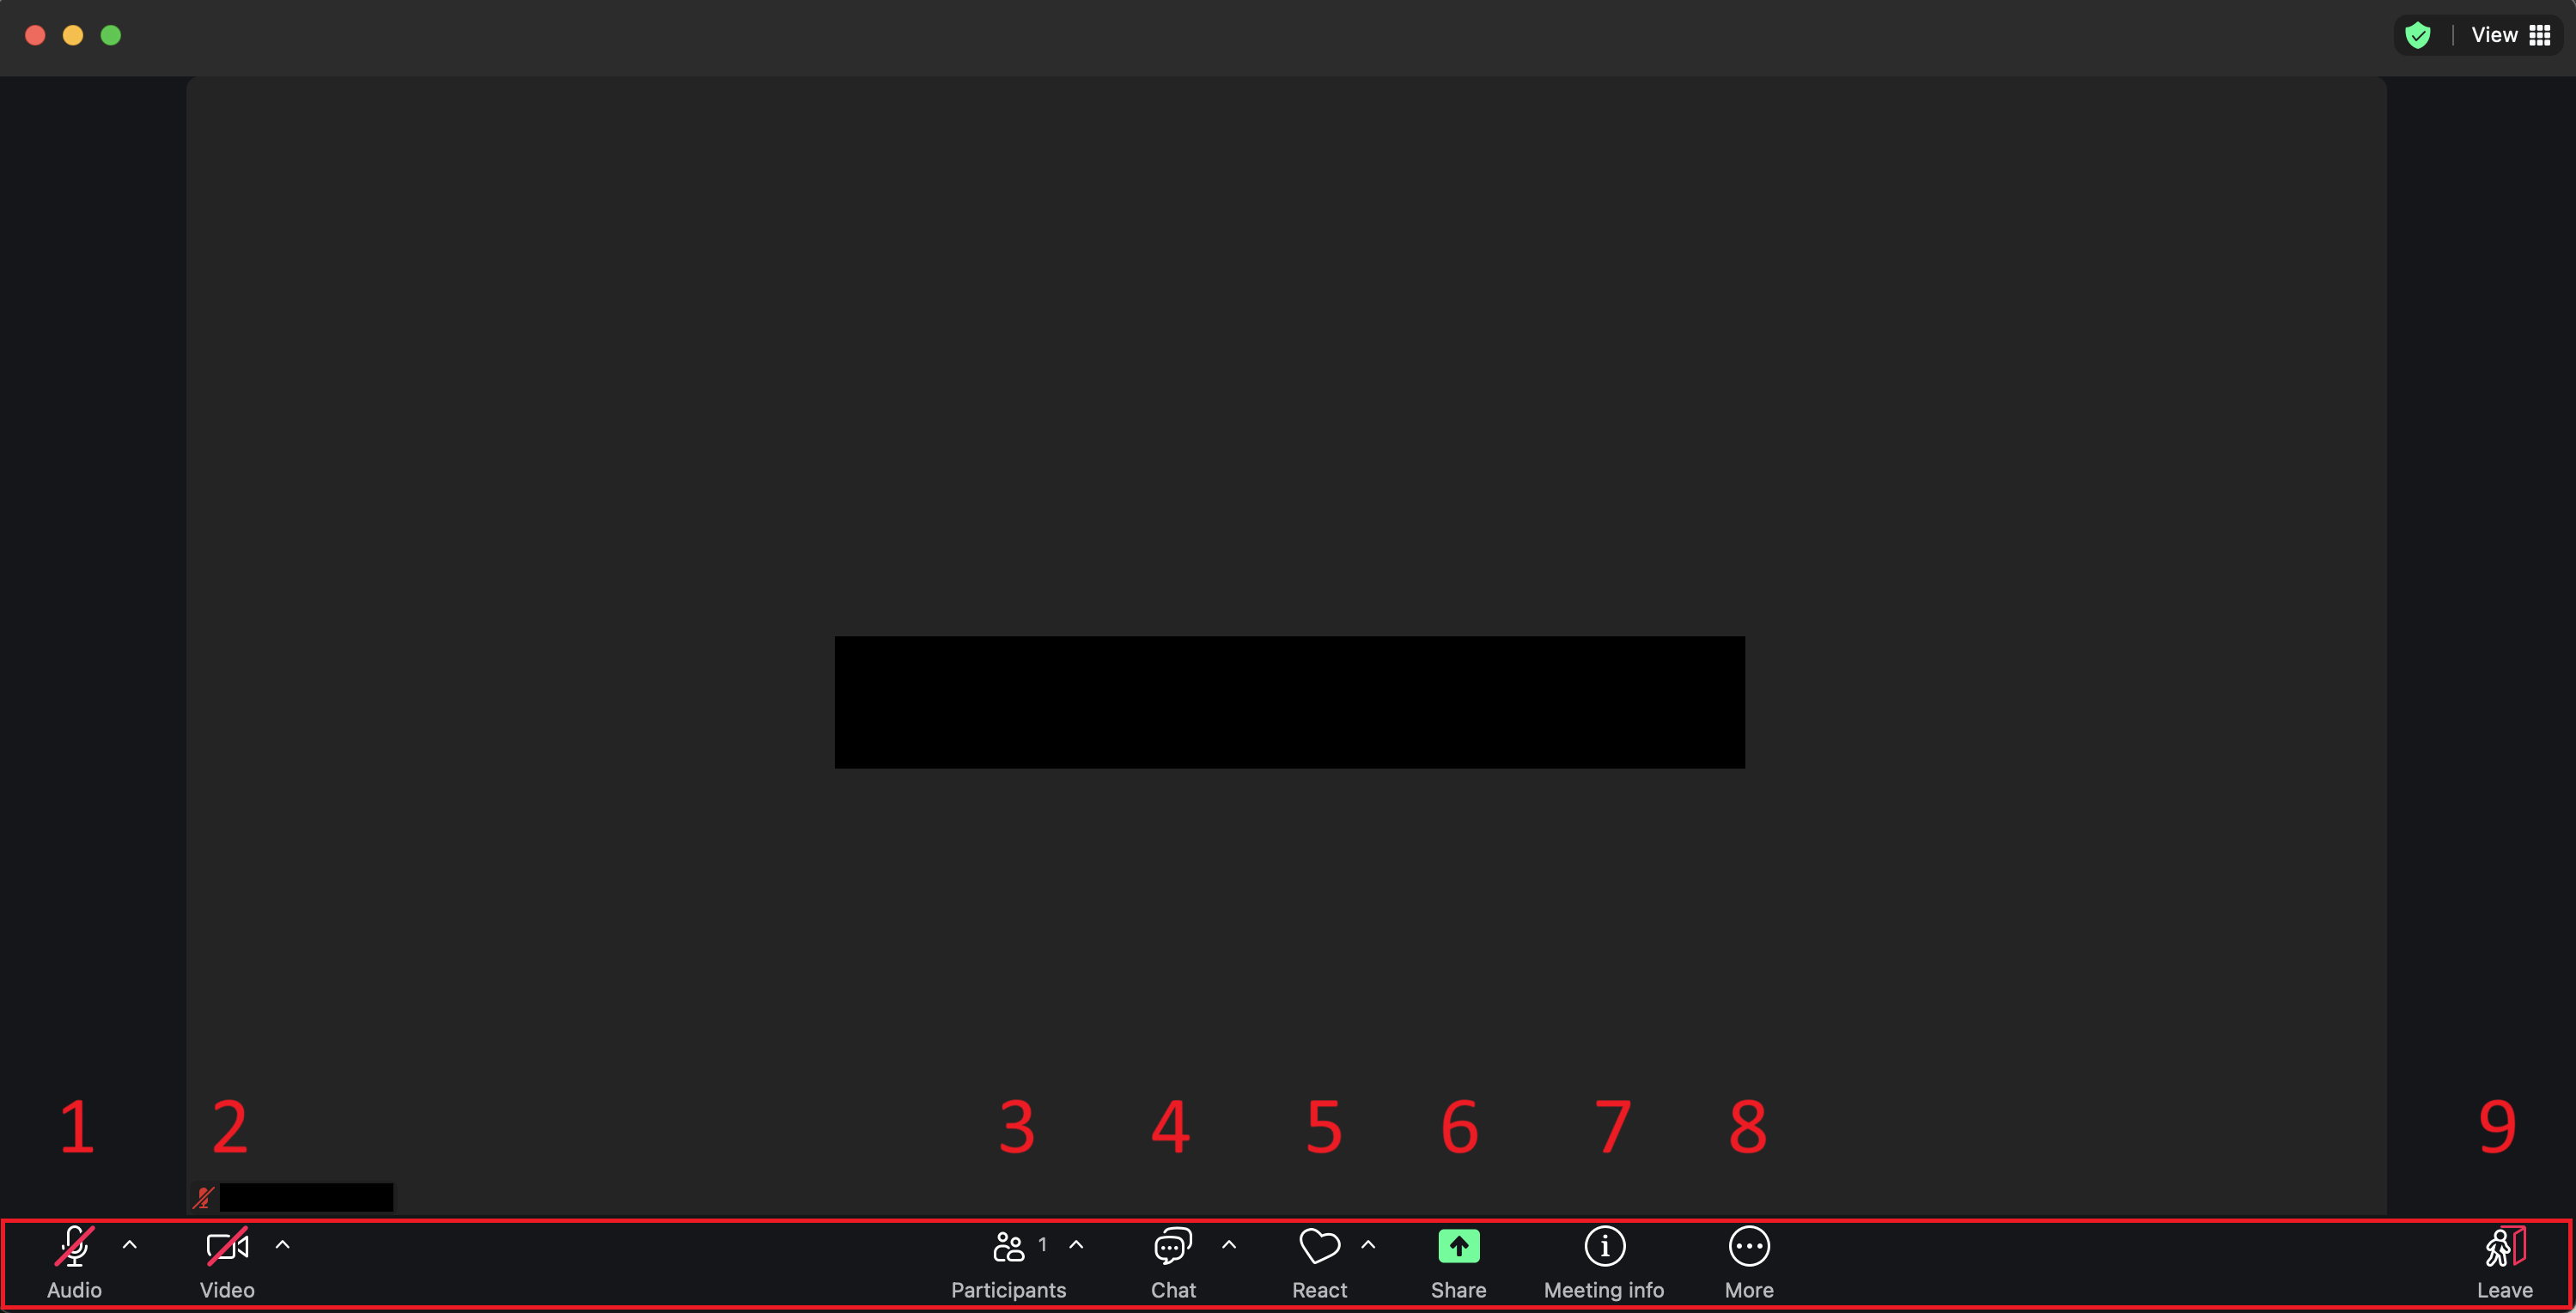
© Uni MS IT 2. Control Options
You can make further settings in the meeting room:
- Audio (1): device selection, settings, mute
- Video (2): device selection, settings
- Participants (3): list of participants
- Chat (4): You can send messages to individual or all participants.
- React (5): You can react to the call.
- Share (6): share your screen with other participants (You can show your entire desktop, an application window, a browser tab, or a whiteboard. In addition, screens of connected Apple devices can be shared. You can also share computer audio to show a video/presentation with sound).
- Meeting Info (7)
- More options (8)
- Leave the meeting (9)
© CIT Start a Meeting (Moderator)
1a. Start a Meeting
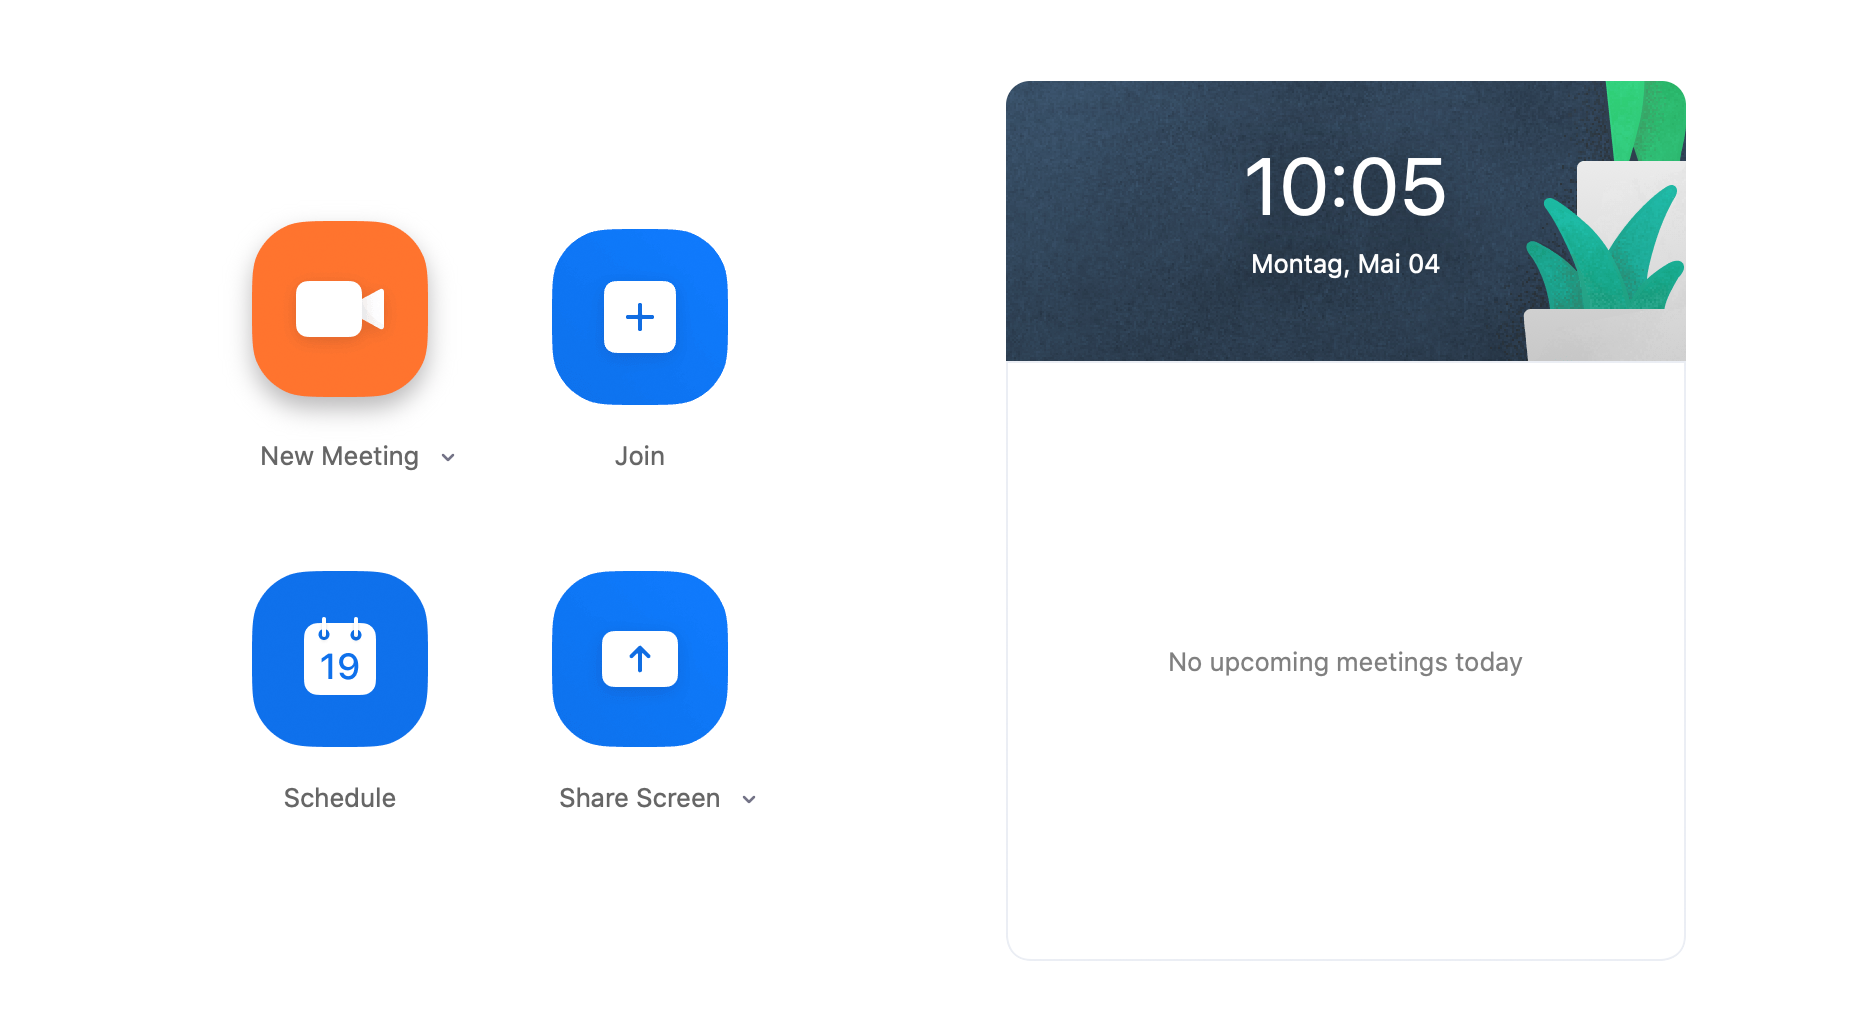
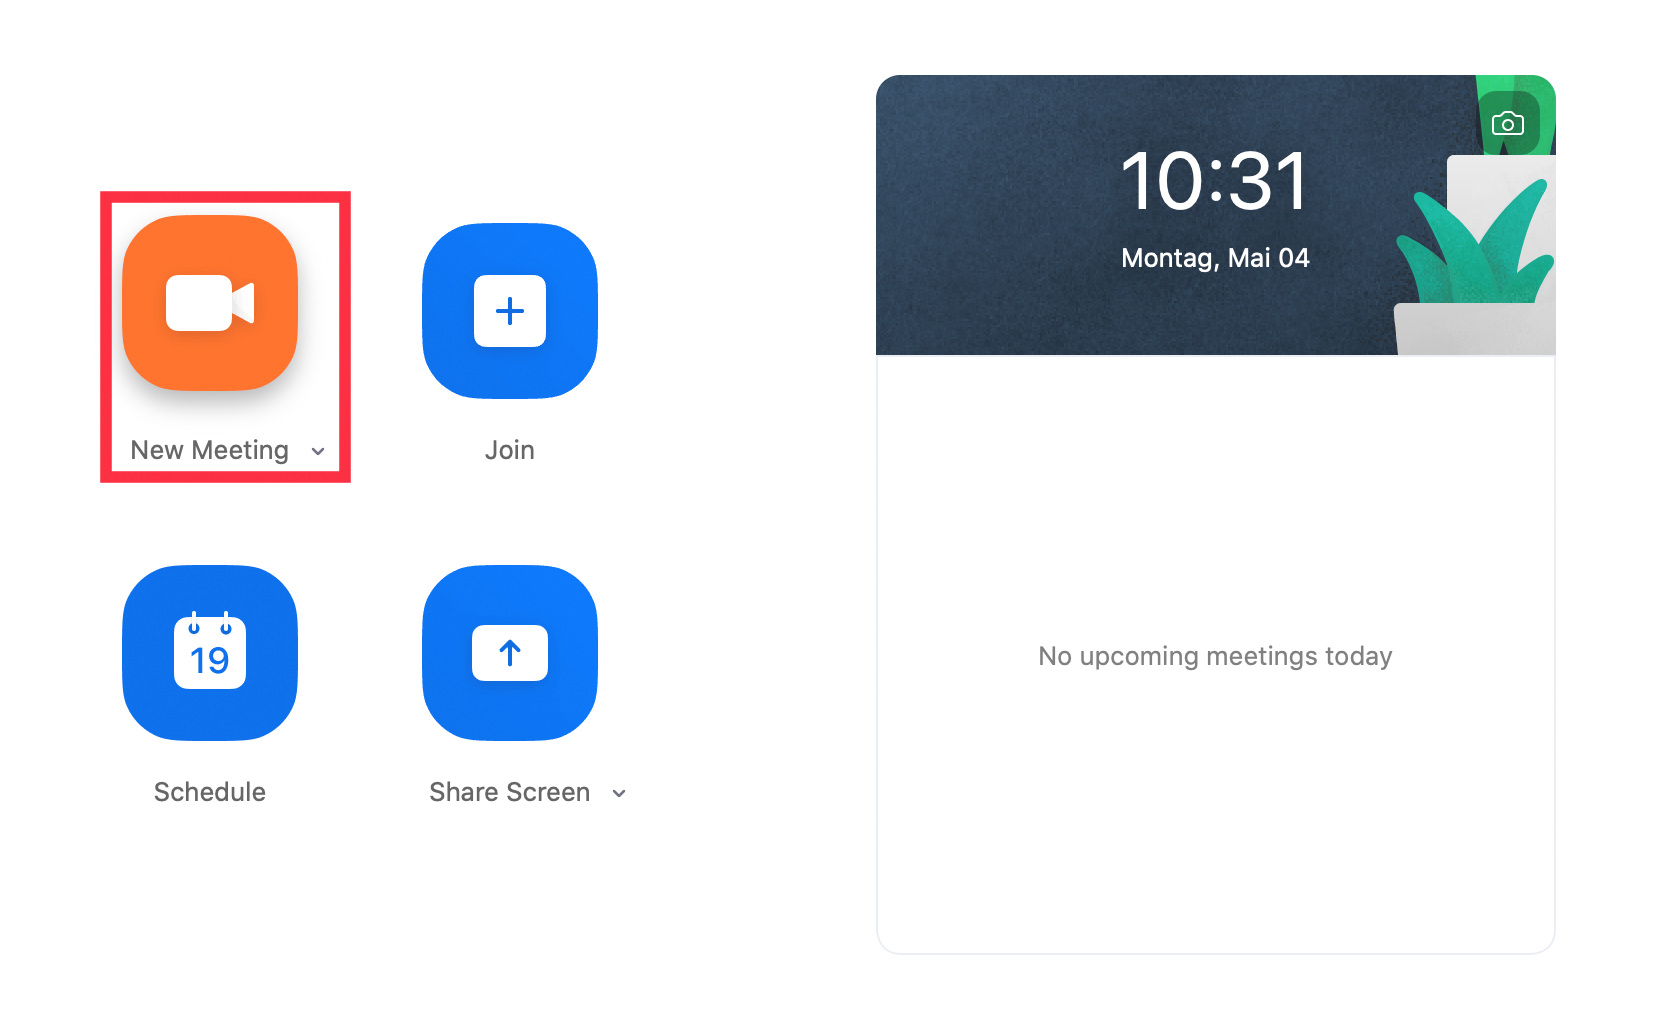
Open the Zoom desktop client and log in via SSO. Then click on "New meeting". Then click on "Join the audio by computer" to enter the meeting room.

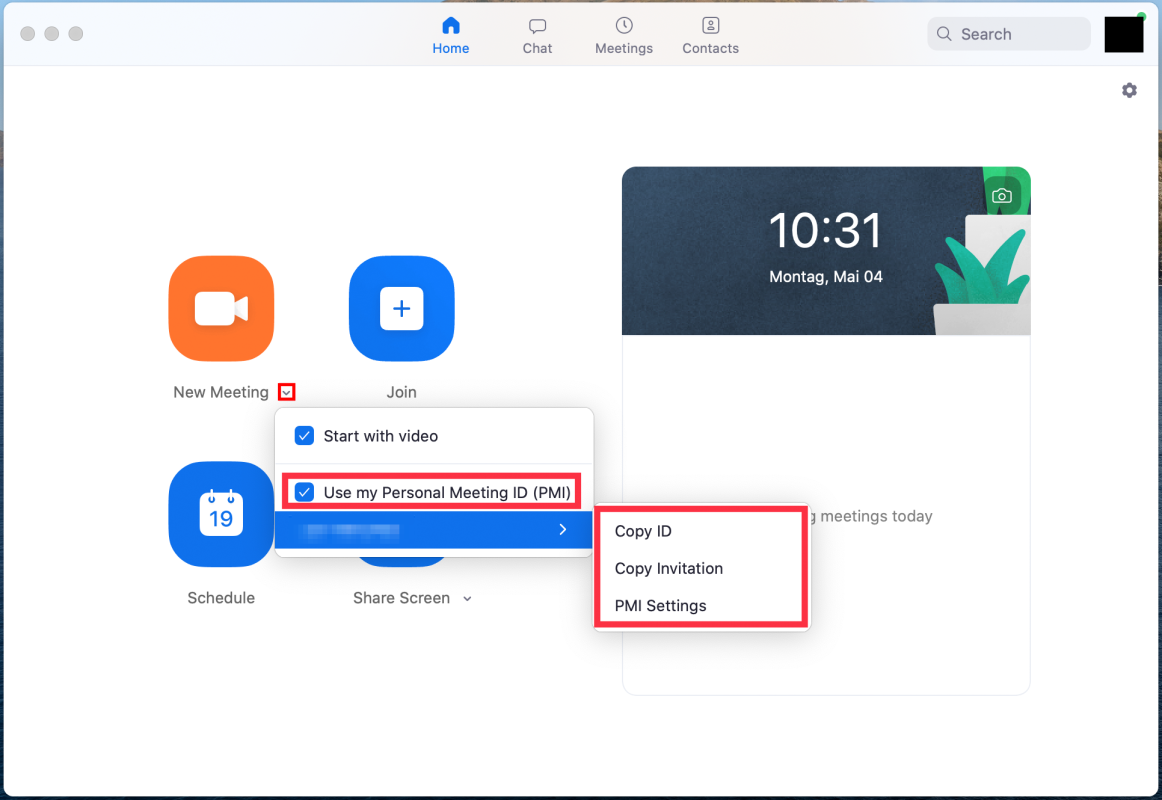
© Uni MS IT Note: Your personal meeting room is a meeting room permanently reserved for you, comparable to an office. The personal meeting room has a fixed meeting ID and can always be reached via the same link, so you should not pass on this information at will. Only use the room for meetings with people you meet regularly.
Open the Zoom desktop client and log in. To start a meeting with the personal meeting ID, click on the small arrow next to the "New Meeting" button. Check the box "Use my Personal Meeting ID (PMI)" (- make sure at your next meeting that the box is unchecked again). Move your mouse over your ID in the area below. You now have the following options:- Copy ID
- Copy Invitation
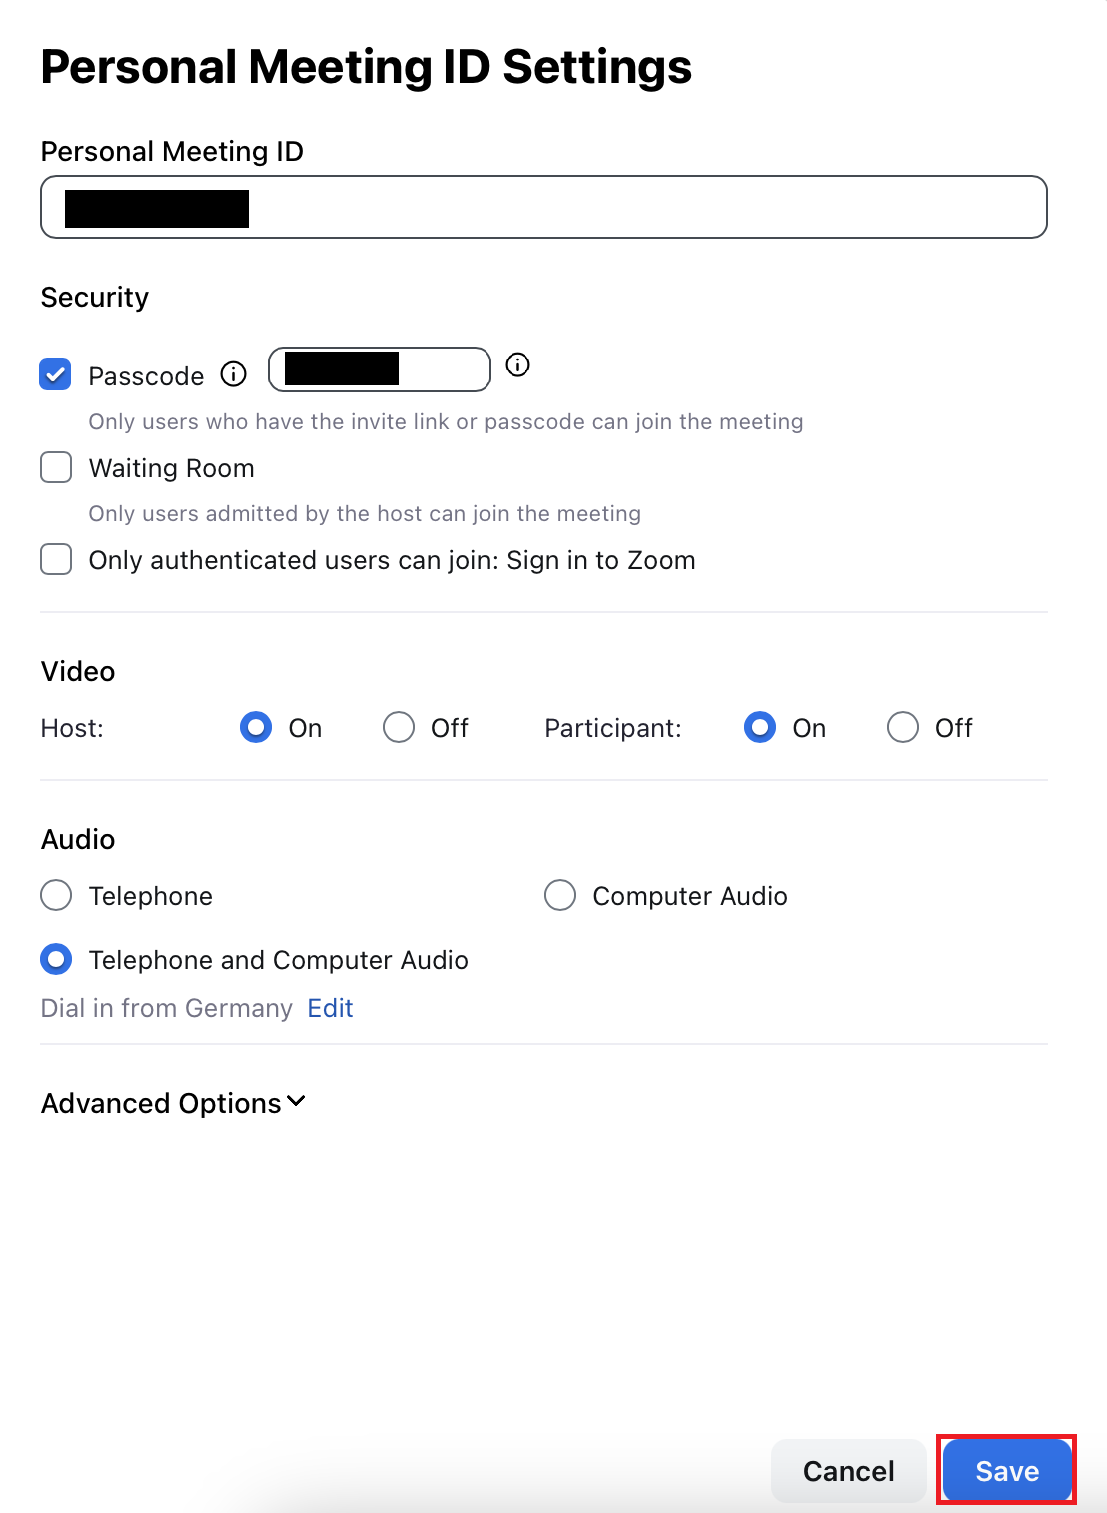
- PMI Settings

© Uni MS IT Make the following settings:
- Passcode: tick
- Waiting Room: Enable the waiting room for smaller meetings. You must manually allow every participant to join the meeting. This allows you to prevent unwanted people from joining the meeting.
- Authorized participants only: Participants must be logged in to Zoom to join your meeting.
- Video:
- Host: on
- Participants: depending on size and type of event
- Audio: Telephone and Computer Audio
- Audio Dial In: Dial in from Germany (If "Dial in from United States" is displayed here, click "Edit". Tick "Germany" and untick "United States" and confirm with "Done".)
- Advanced options:
- Attend before host: Enable this feature for large meetings. Participants can enter the meeting before you are present. If the waiting room is activated, the function is disabled automatically.
- Mute participants at entry: Activate this function for large events. Participants are muted when joining the meeting, but can activate their microphones.
- Record the meeting automatically: Deactivate this function. If you want to record meetings, you should start the recording manually and follow our instructions.
- Alternative moderators: If you specify a co-moderator, you do not need to attend your meeting yourself. The co-moderator can represent you and has the same rights as you.
© CIT Now click on "New meeting". Then click on "Join the audio by computer" to enter the meeting room.
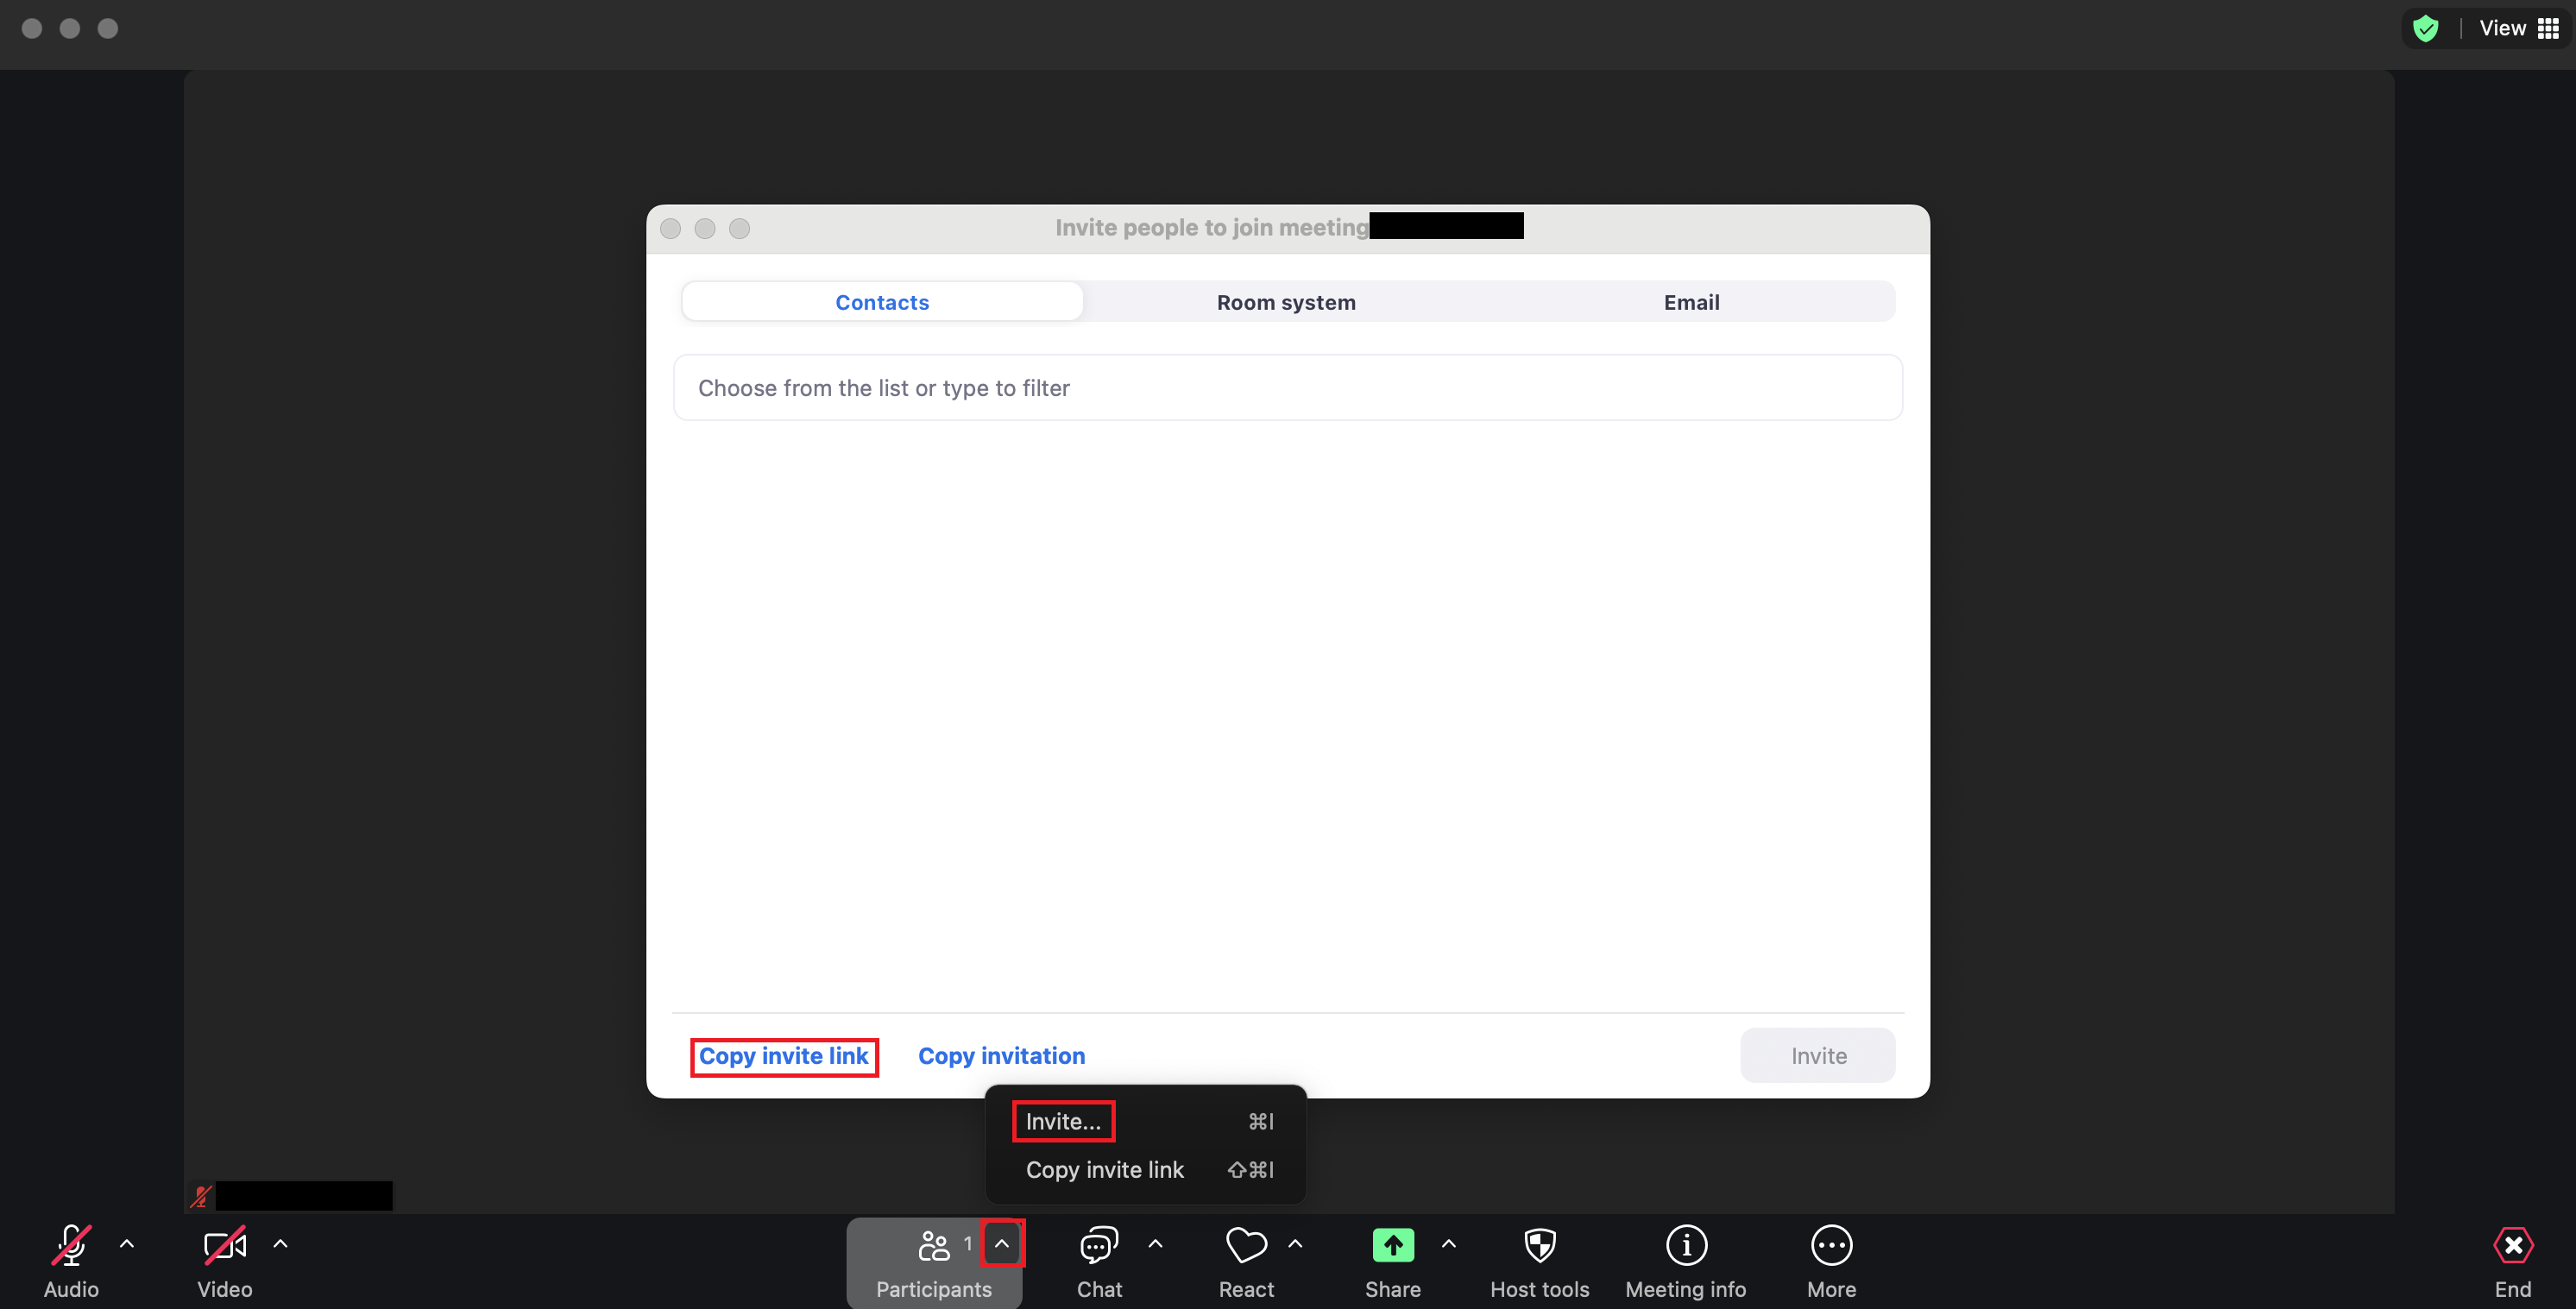
© Uni MS IT 2. Send Invitation
You can invite participants using the arrow under Participants. You can either copy the invitation link or the complete invitation.
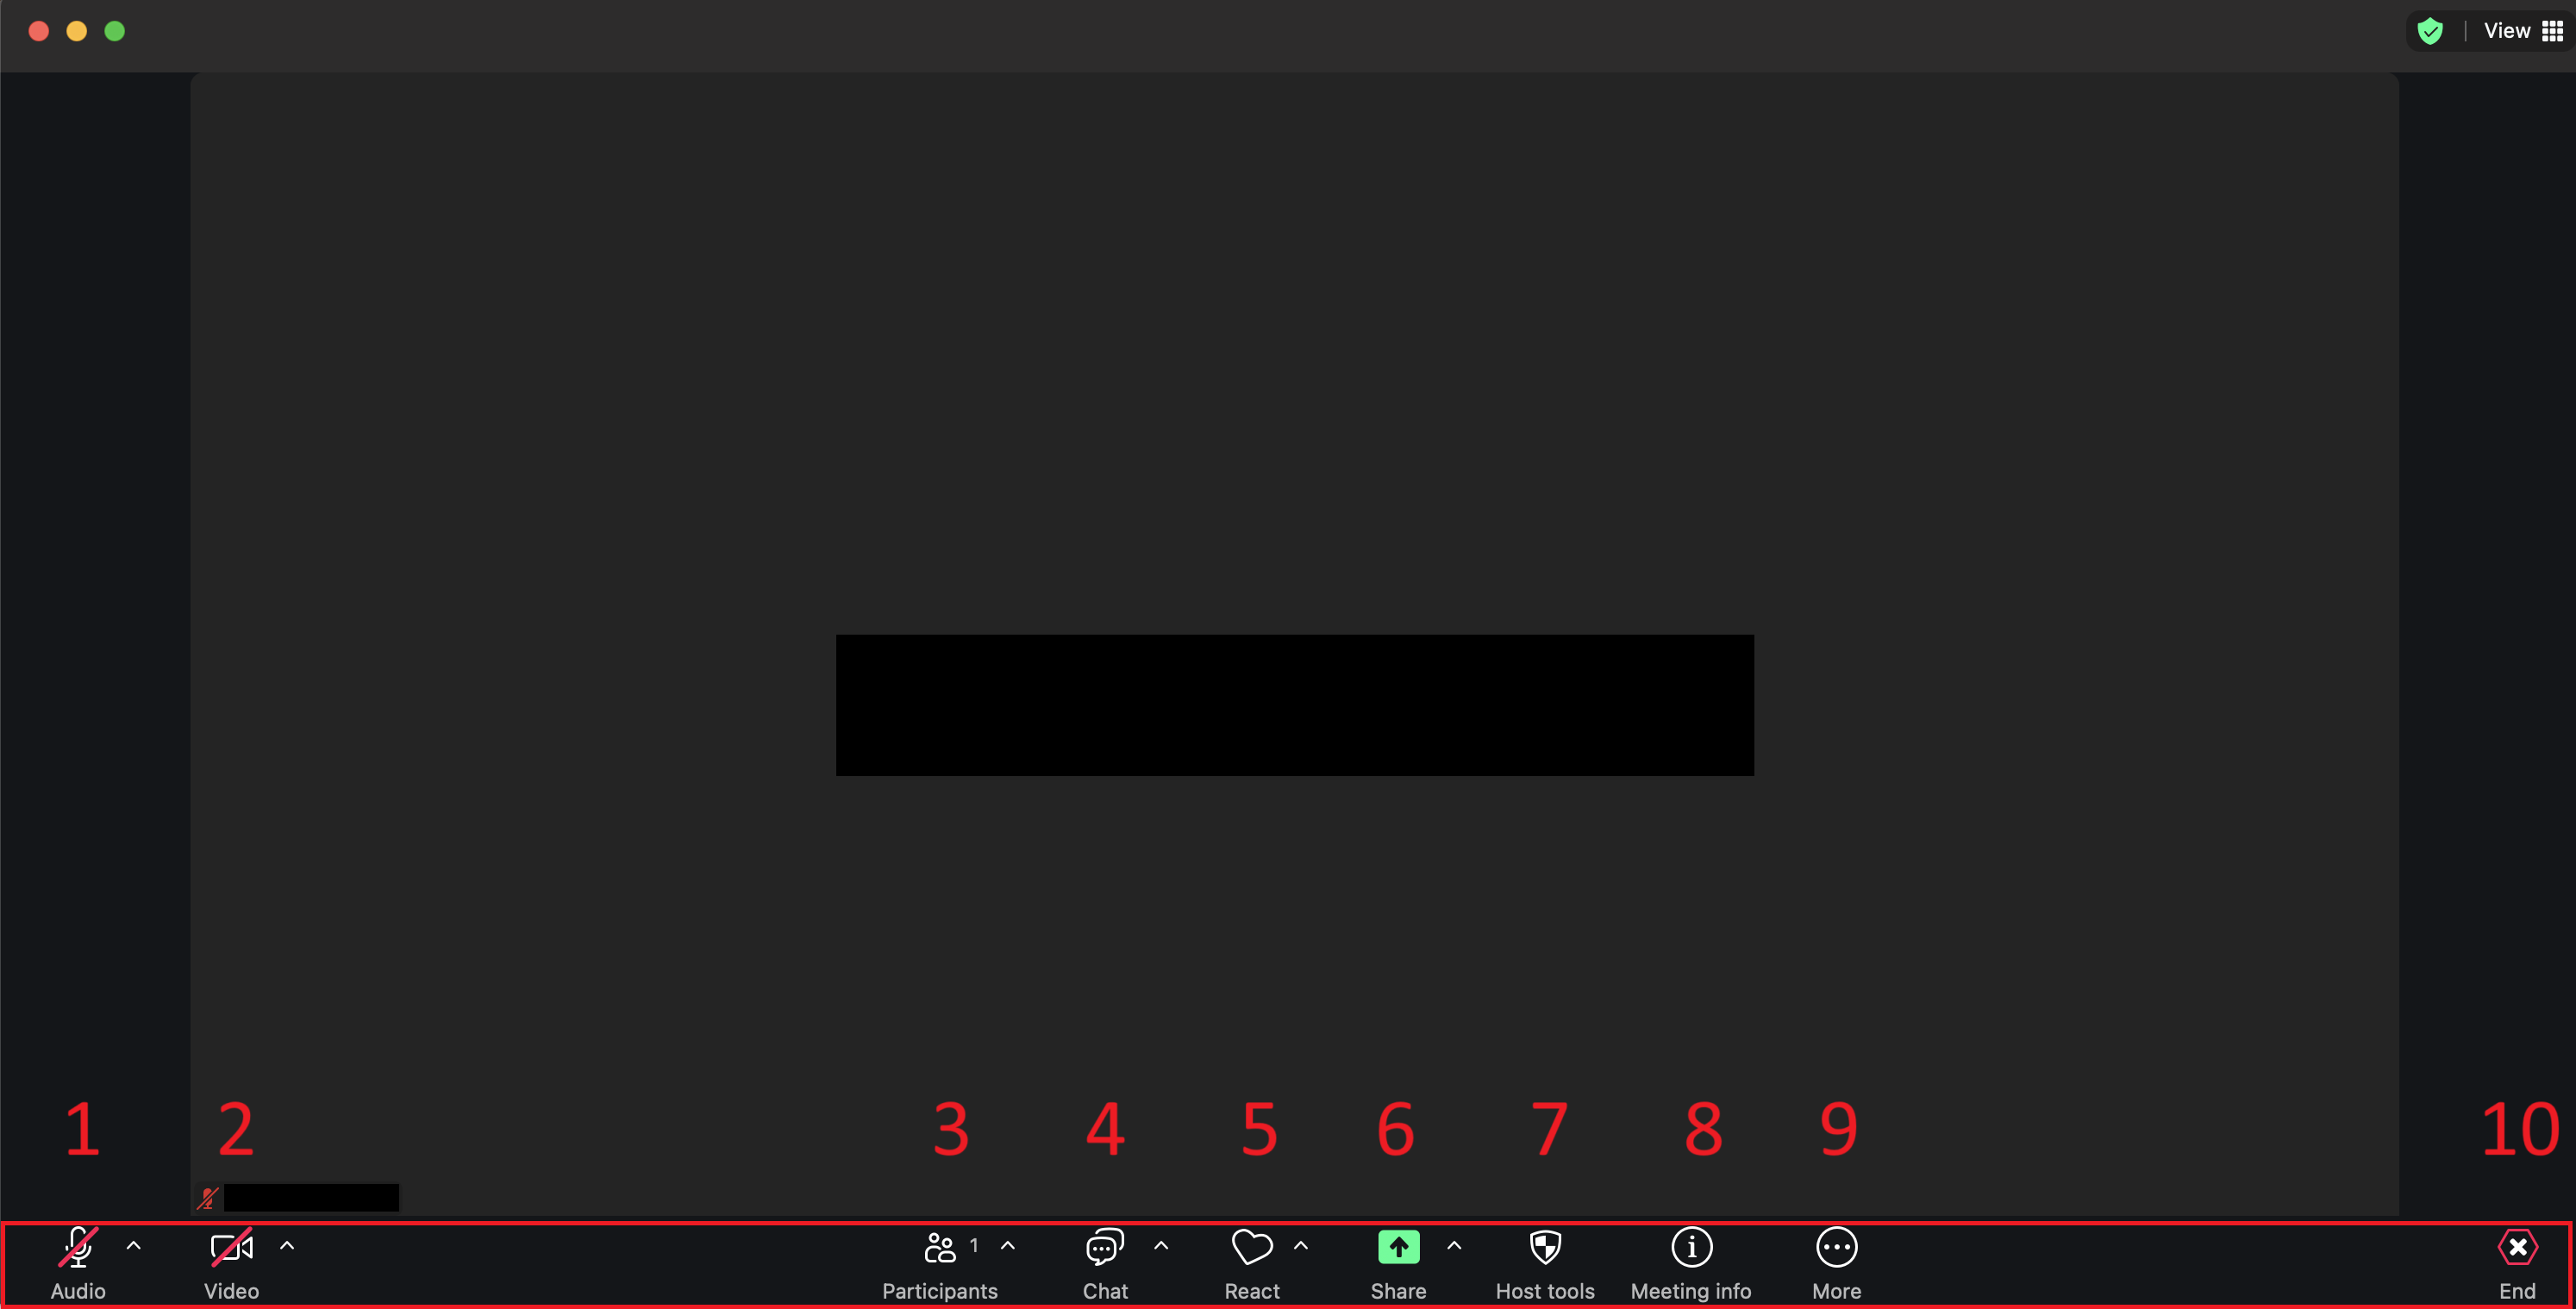
© CIT 3. Control Options
You can make further settings in the meeting room:
- Audio (1): Device selection, settings, mute
- Video (2): Device selection, settings
- Participants (3): List of participants
- Chat (4): You can send messages to individual or all participants.
- React (5): You can react to the call.
- Share (6): Share your screen with other participants (You can show your entire desktop, an application window or a browser tab).
- Host tools (7): Here you will find options for managing the meeting.
- Meeting Info (8)
- More options (9)
- Leave the meeting (10)
© CIT Schedule a Meeting (Moderator)
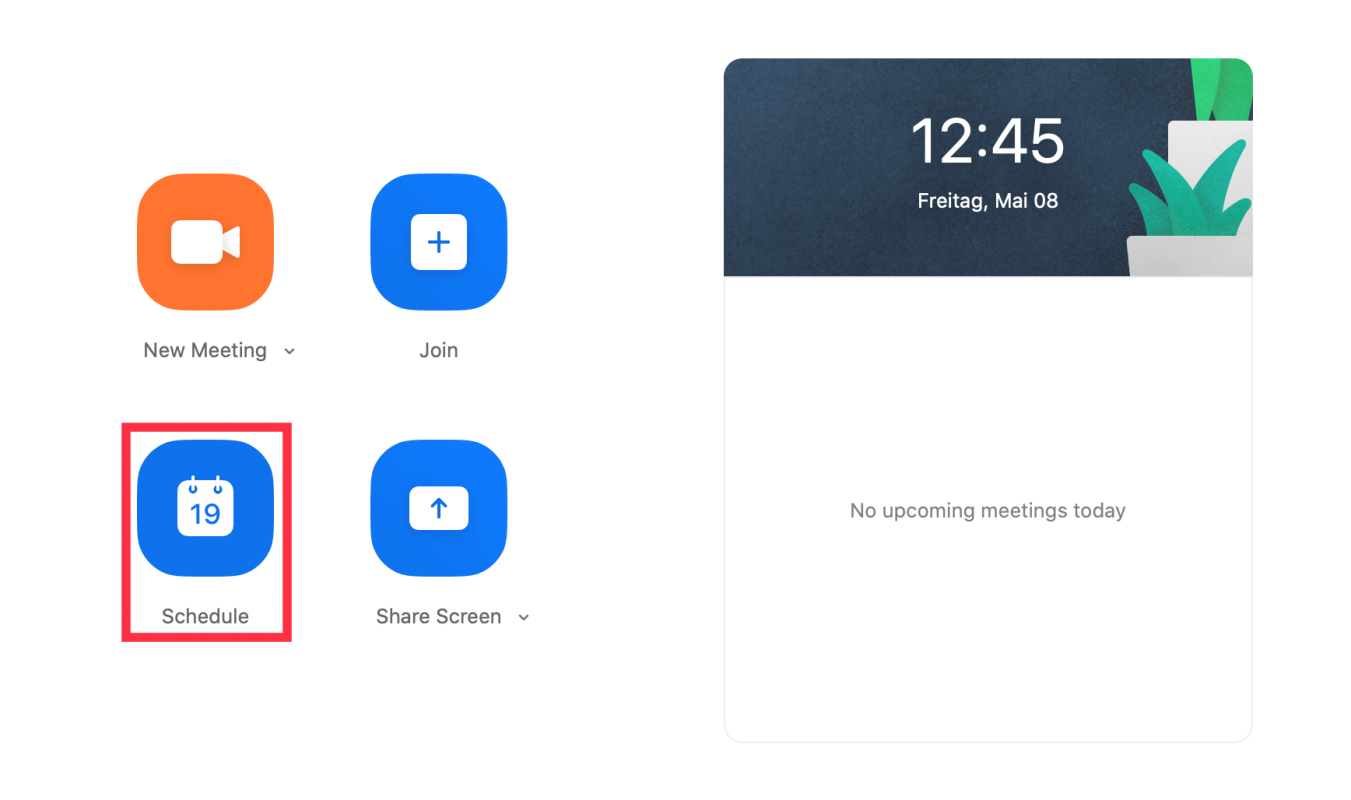
1. Open Schedule Menu
Open the Zoom desktop client and log in. Then click on "Calendar".

© Uni MS IT 2. Meeting-Settings
In the "Topic" section (1), give the event a name, and set a date and time. Make the following settings in the other sections:
- Meeting-ID (2): generate automatically
- Passcode (3): tick
- Waiting Room: Enable the waiting room for smaller meetings. You must manually allow every participant to join the meeting. This allows you to prevent unwanted people from joining the meeting.
- Authorized participants only: Participants must be logged in to Zoom to join your meeting.

© CIT - Video (4):
- Host: on
- Participants: depending on size and type of event
- Audio (5): Telephone and Computer Audio
- Audio Dial In: Dial in from Germany (If "Dial in from United States" is displayed here, click "Edit". Tick "Germany" and untick "United States" and confirm with "Done".)
- Calendar (6)
- Advanced options (7):
- Attend before host: Enable this feature for large meetings. Participants can enter the meeting before you are present. If the waiting room is activated, the function is disabled automatically.
- Mute participants at entry: Activate this function for large events. Participants are muted when joining the meeting, but can activate their microphones.
- etc.
- Interpretation (8)

© CIT 3. Start Meeting
Future meetings are displayed in the application window. To start the meeting, click "Start". You receive further Options by clicking on the three dots.

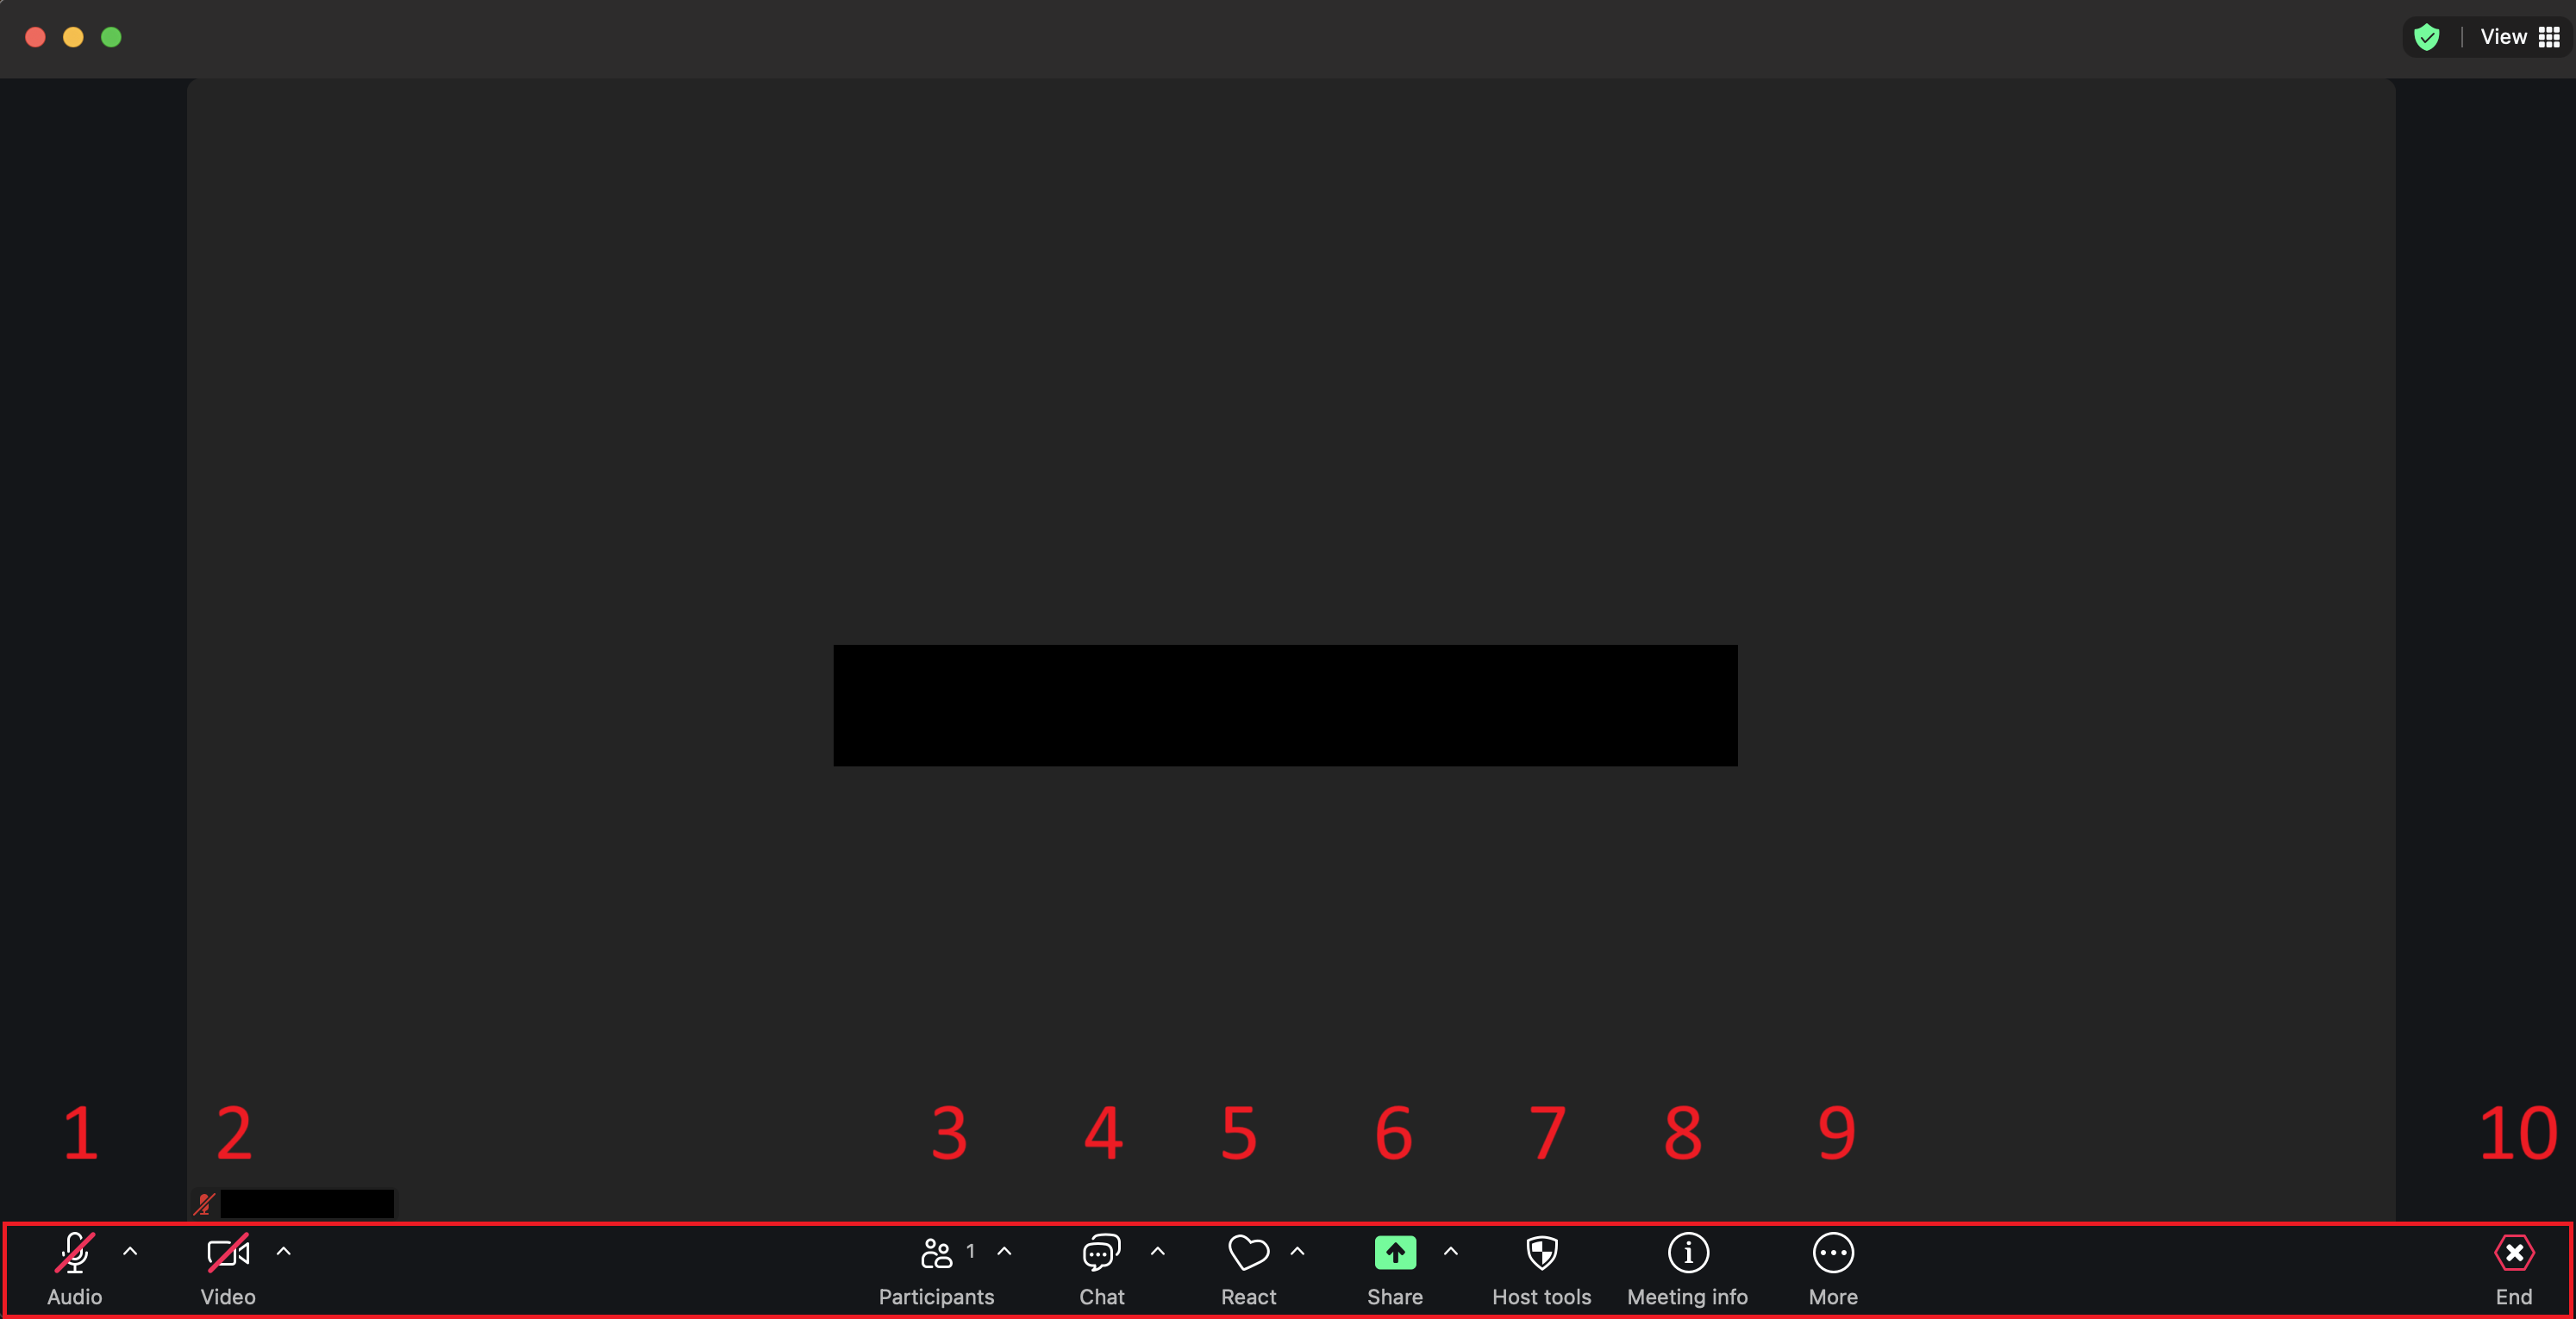
© CIT 4. Control Options
You can make further settings in the meeting room:
- Audio (1): device selection, settings, mute
- Video (2): device selection, settings
- Participants (3): list of participants
- Chat (4): You can send messages to individual or all participants.
- React (5): You can react to the call.
- Share (6): share your screen with other participants (You can show your entire desktop, an application window or a browser tab).
- Host tools (7): Here you will find options for managing the meeting.
- Meeting info (8)
- More options (9)
- Leave the meeting (10)
© CIT