

Integrating the University E-Mail Account in Outlook (IMAP-Account)
- Note: Due to recent advisories, we warn against using Outlook for macOS. When setting up IMAP accounts, the option "Synchronize with Microsoft Cloud" is enabled by default. Info
Detailed Instructions
ATTENTION!
Please note that the "new Outlook" still won't work with many email services. Unfortunately, this also includes the university's standard mailbox. Therefore, please continue using the "classic" Outlook. Or use an alternative like Thunderbird.
1. Start Setting Up the E-Mail Account
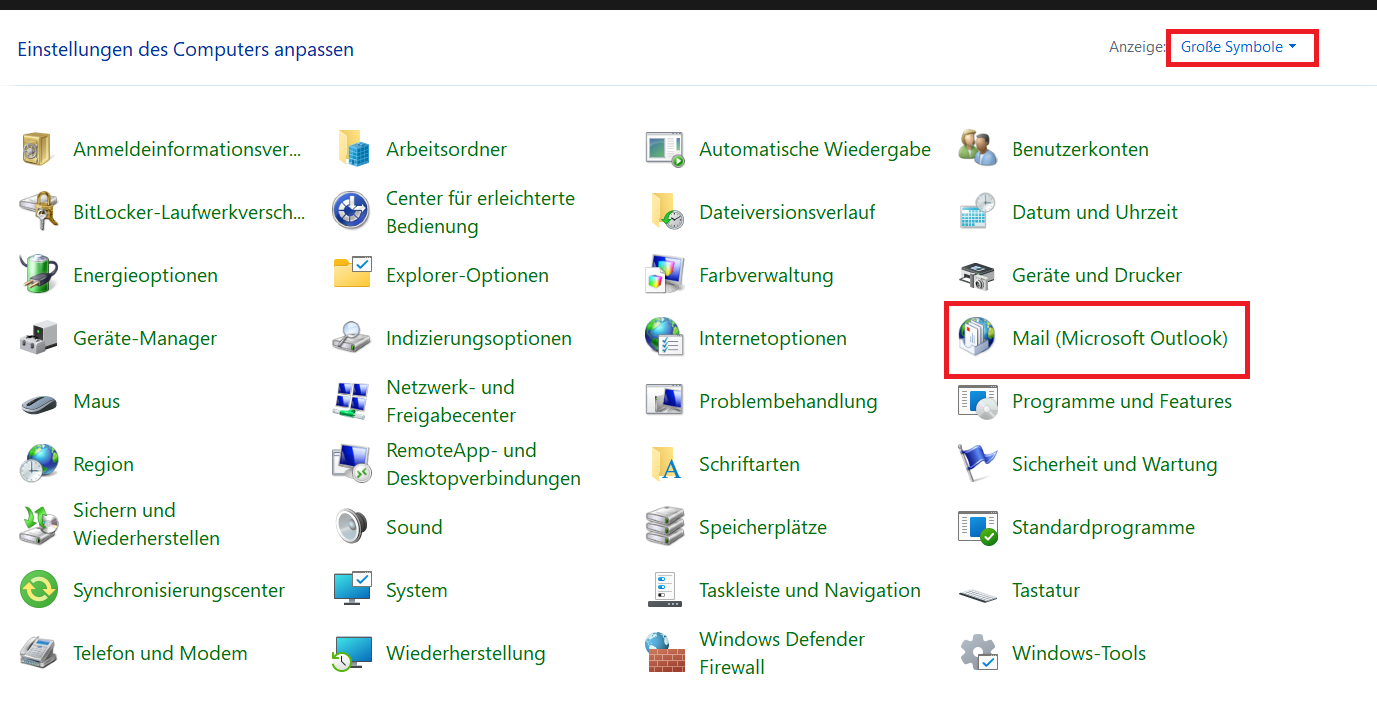
Please open the control panel (not the settings!) by clicking the windows icon or the search field next to it and entering "control panel". Change the view by switching from "Category" to "Large icons". The window should look like the screenshot. Now click on the entry "Mail (Microsoft Outlook 2016)" or "Mail (Microsoft Outlook)".
Important: You are not able to set up the university mail with the settings accessible from outlook itself or the integrated Mail-Software in Windows.
© CIT - If you have already configured another e-mail account, you can add your university account as described below via the menu item "E-Mail accounts...".
- If you have not configured another e-mail account yet, a profile must first be created. You can name it any way you want. The wizard for adding an e-mail account will open automatically and you can continue as described below.
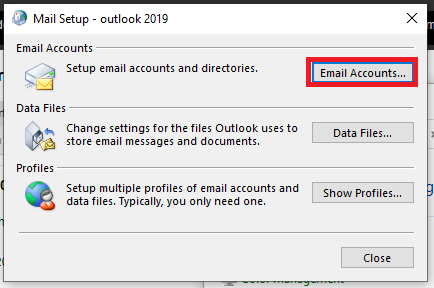
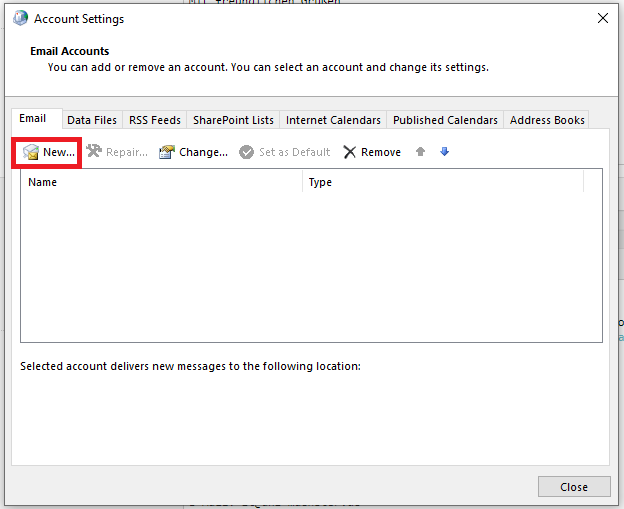
© CIT Select "New".
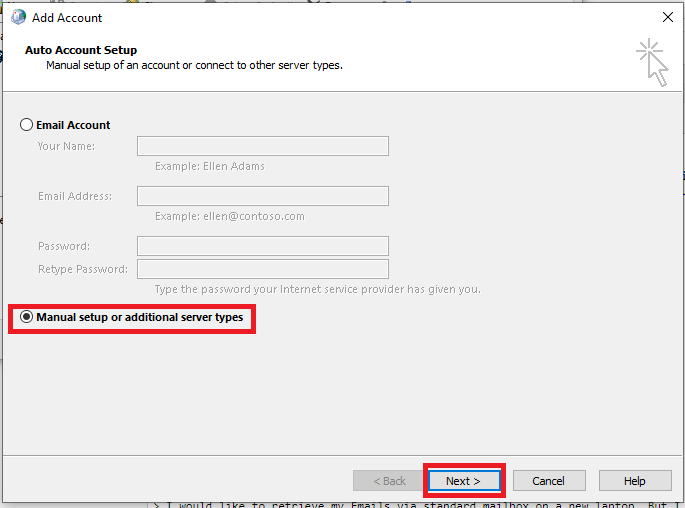
© CIT You then have the option to set up the account automatically or manually. Select "Manual configuration or additional server types" and click "Next".
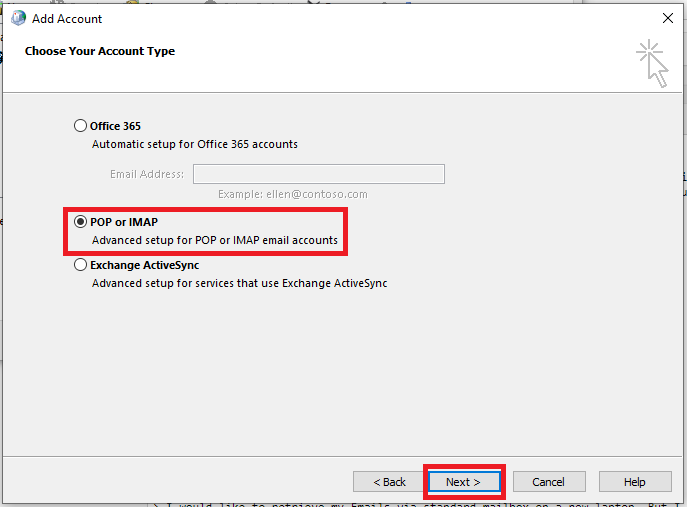
© CIT You will now be prompted to select the e-mail service. Select "POP or IMAP" and click "Next".
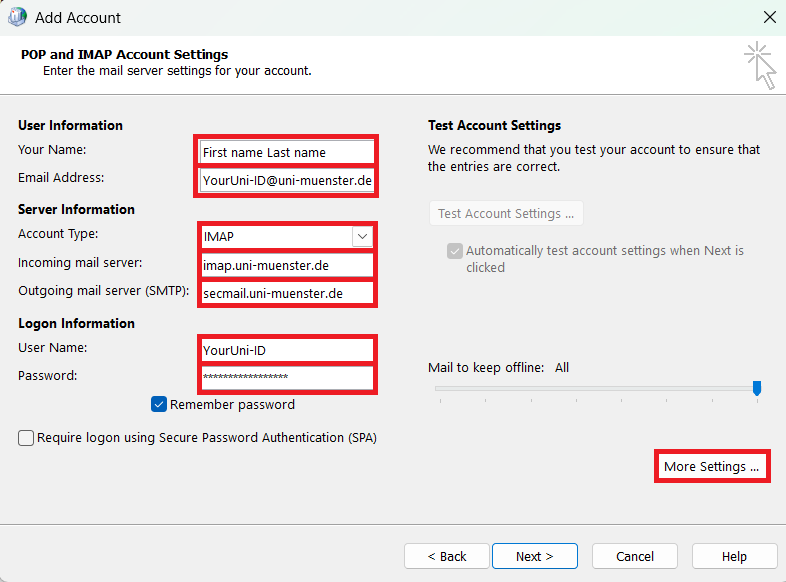
© CIT Now enter the following information:
- Your name: First name Last name (sender name of outgoing e-mails)
- E-mail address: Your university e-mail address (YourUniversity-ID@uni-muenster.de)
- Account type: IMAP
- Incoming mail server: imap.uni-muenster.de
- Outgoing mail server: secmail.uni-muenster.de
- Username: Your university ID
- Password: Your university password
- Optionally, you can set which e-mails should be available in offline mode.
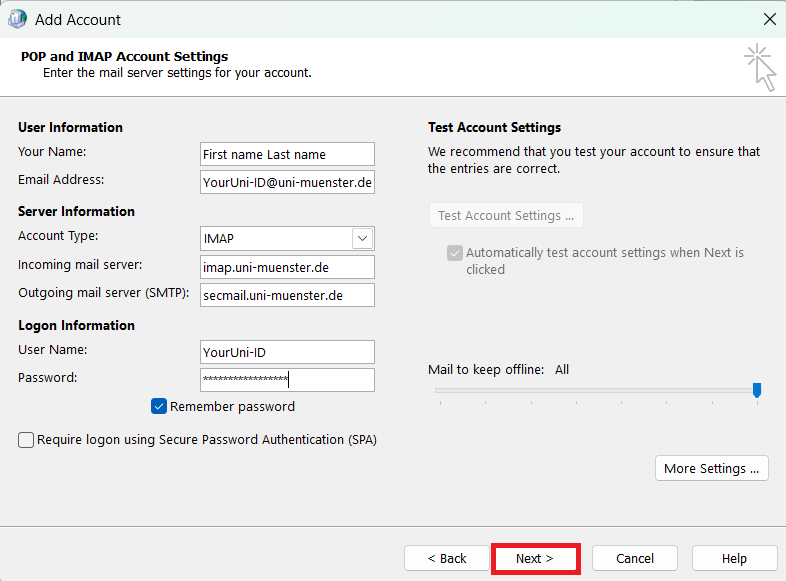
© CIT Under the tab "Outgoing Server" please activate the option that the outgoing mail server (SMTP) requires authentication.
Now switch to the "Advanced" tab.
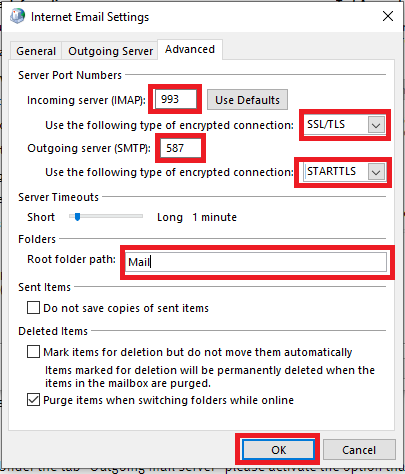
© CIT Please enter the following information in the "Advanced" tab:
- Incoming mail server (IMAP): 993
- Encryption type: SSL
- Outgoing mail server (SMTP): 587
- Encryption type: STARTTLS
- Root folder path: Mail
© CIT Click "Next".
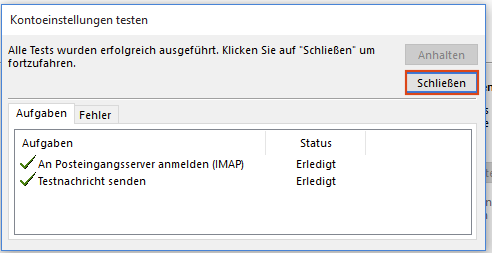
© CIT The settings are now tested and the window can be closed with "Close".
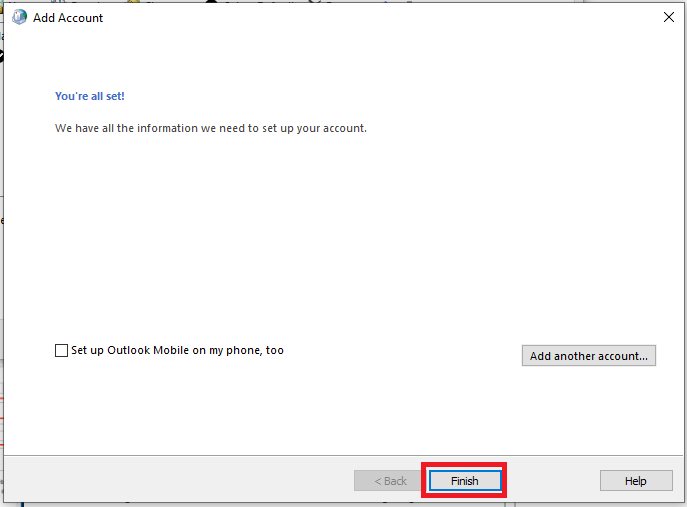
© CIT 2. Complete Configuration
The configuration is completed and can be finished with "Finish".
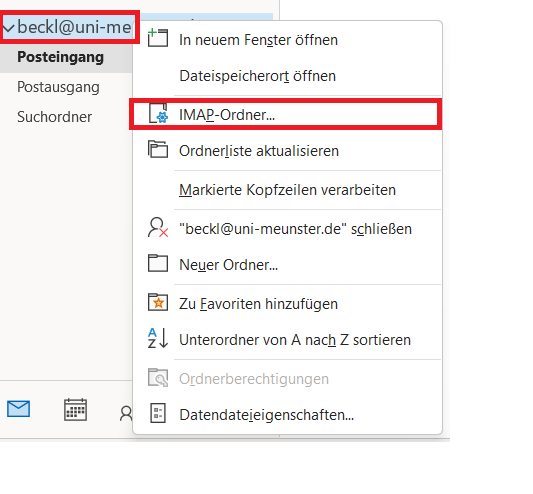
© CIT 3. Display Already Created Folders
If you have already created folders in your mailbox, you may not see them yet. To do this, right-click on the newly created mailbox and select "IMAP folder...".
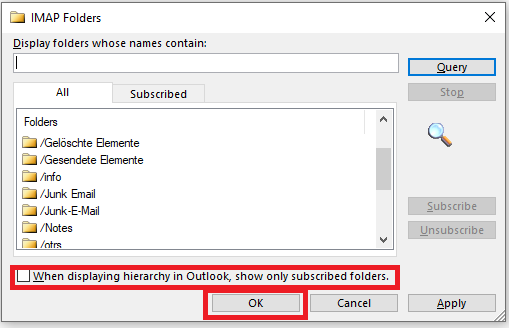
© CIT In the "IMAP Folder" window, clear the option "Show only subscribed folders in Outlook Hierarchy Display" at the bottom, and then click "OK".
© CIT