Using ZOOM X via App (Android)
Requirements:
- You have installed the "ZOOM Cloud Meetings" app.
Note: To log in, use the login via SSO (Single-Sign-On) of Münster University.


Requirements:
Note: To log in, use the login via SSO (Single-Sign-On) of Münster University.
To join a meeting, you need the meeting ID and meeting password from the moderator. First open the zoom app and select "Join a meeting".

Enter the meeting ID and your name. This name will be displayed to the other participants of the meeting. Click on "Join the meeting".

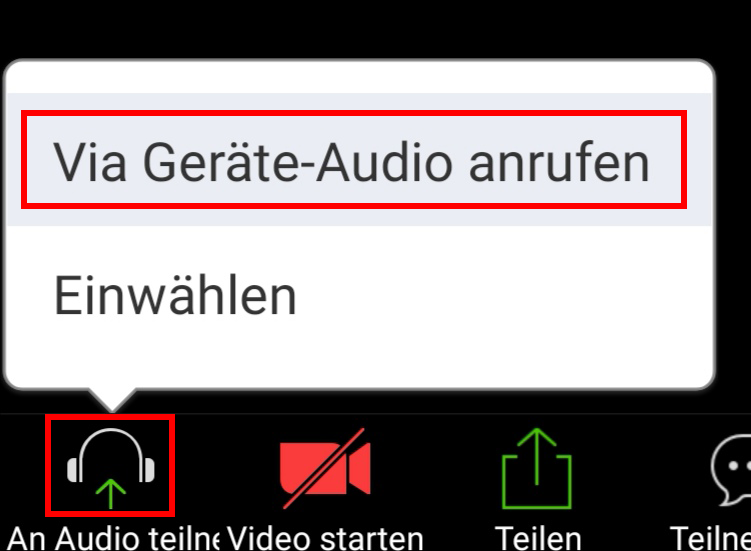
Allow Zoom to access your microphone. Then click on the "Headset" icon in the lower menu and select "Call via device audio". Then allow Zoom to access your camera.
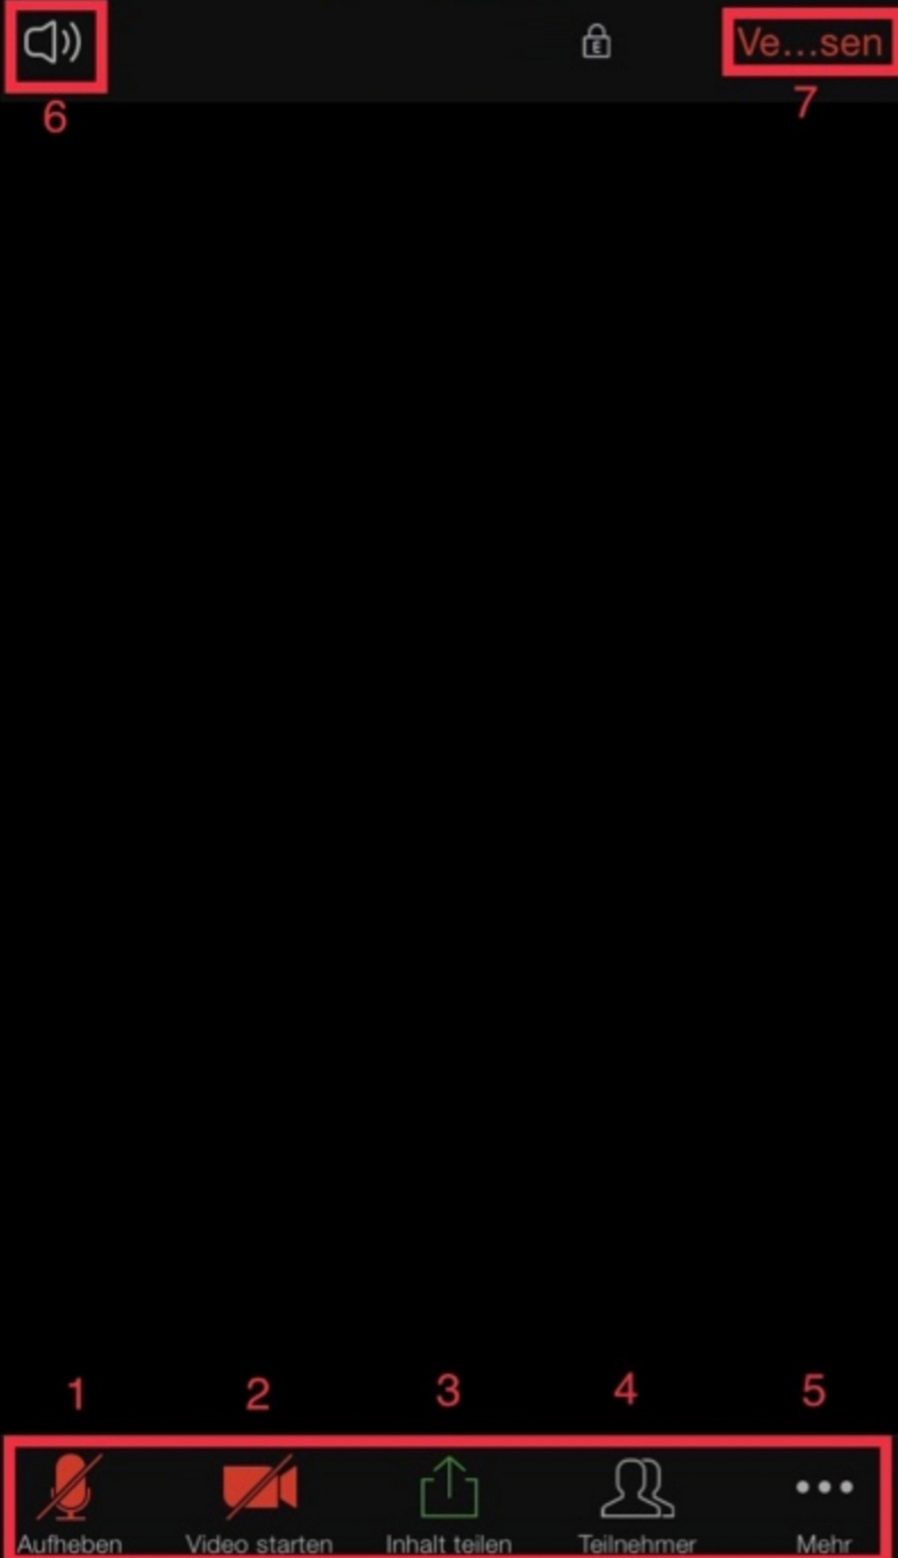
You can make further settings in the meeting room:
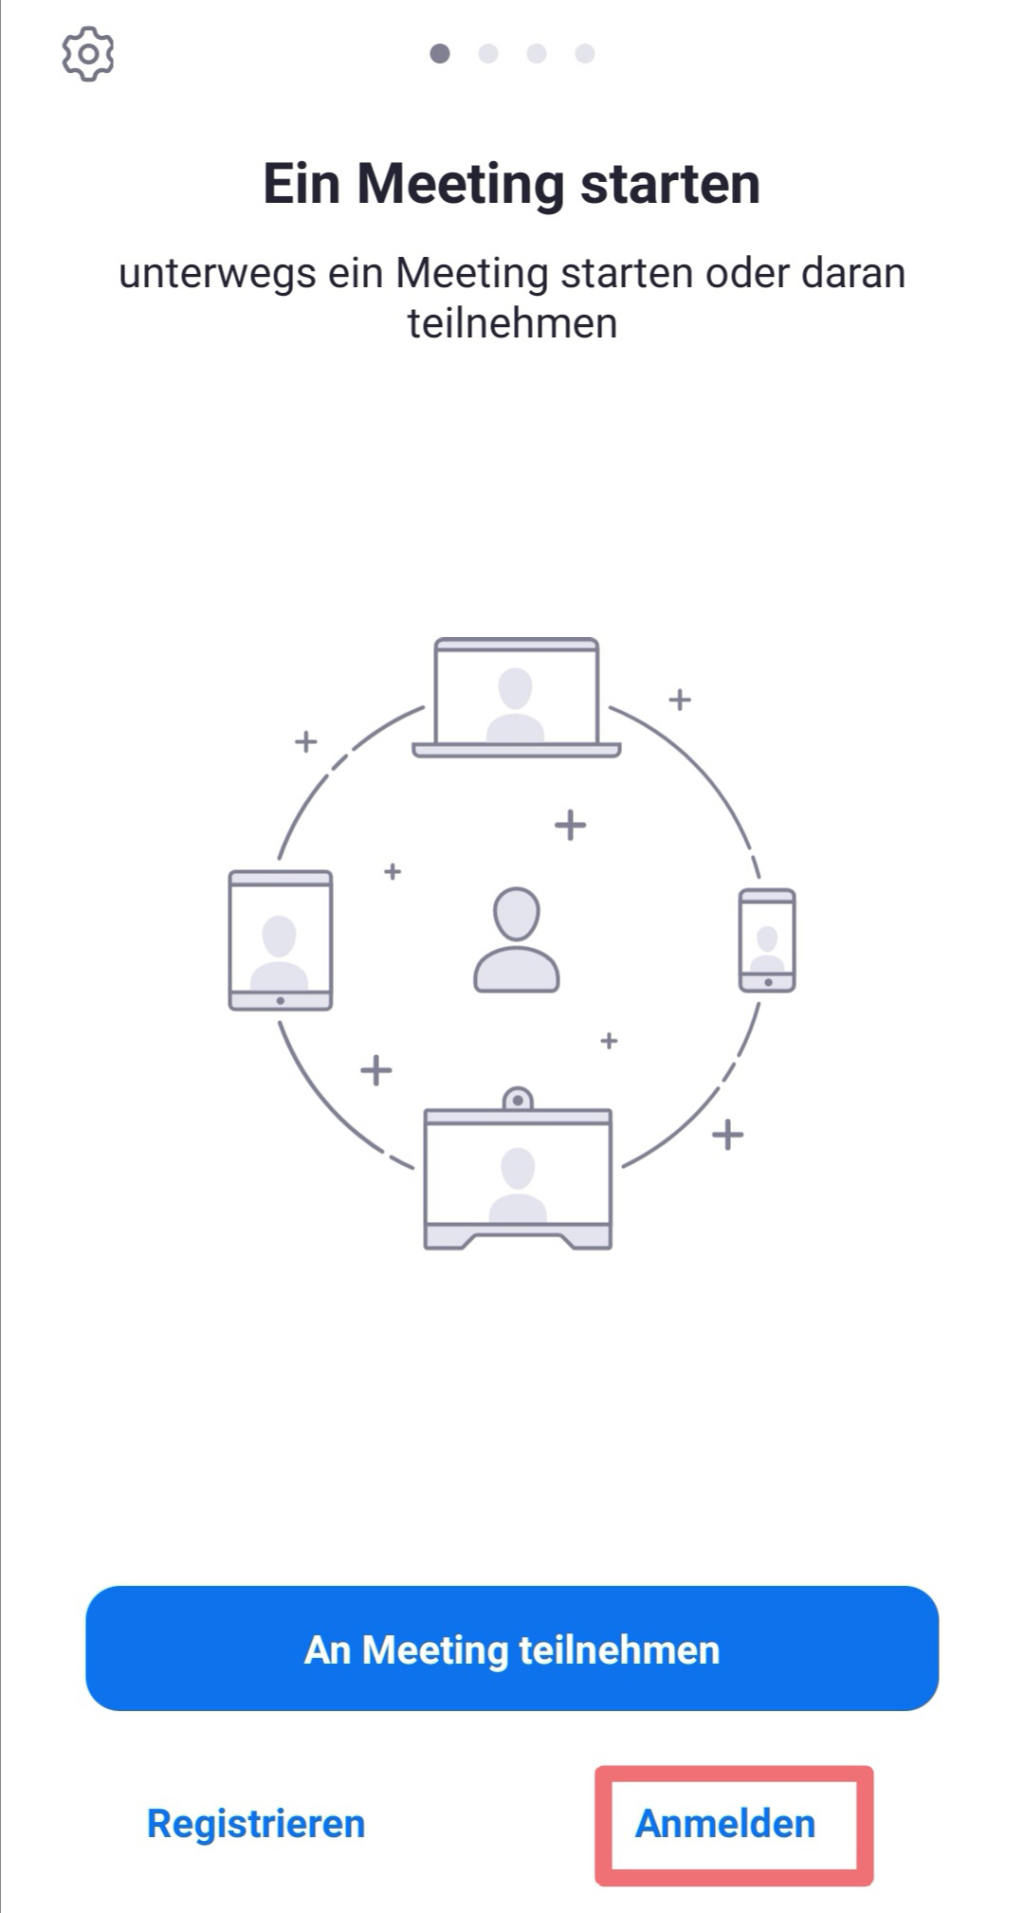
Open the zoom app and click on "Login".
Do not enter your login data in this step, but click on "SSO" (Single-Sign-On).

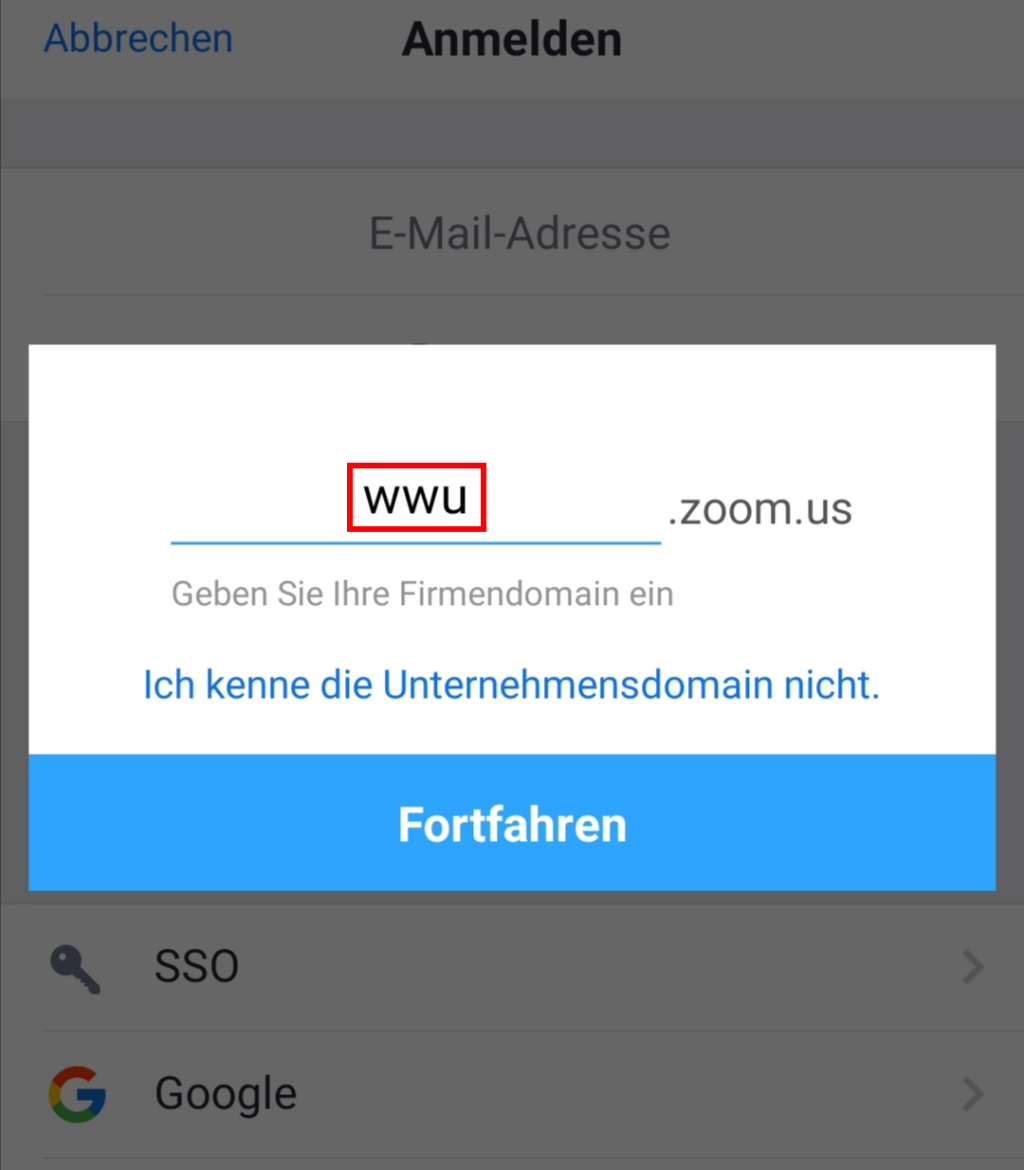
Enter "wwu" as the company domain to be redirected to the central login page of Münster University.
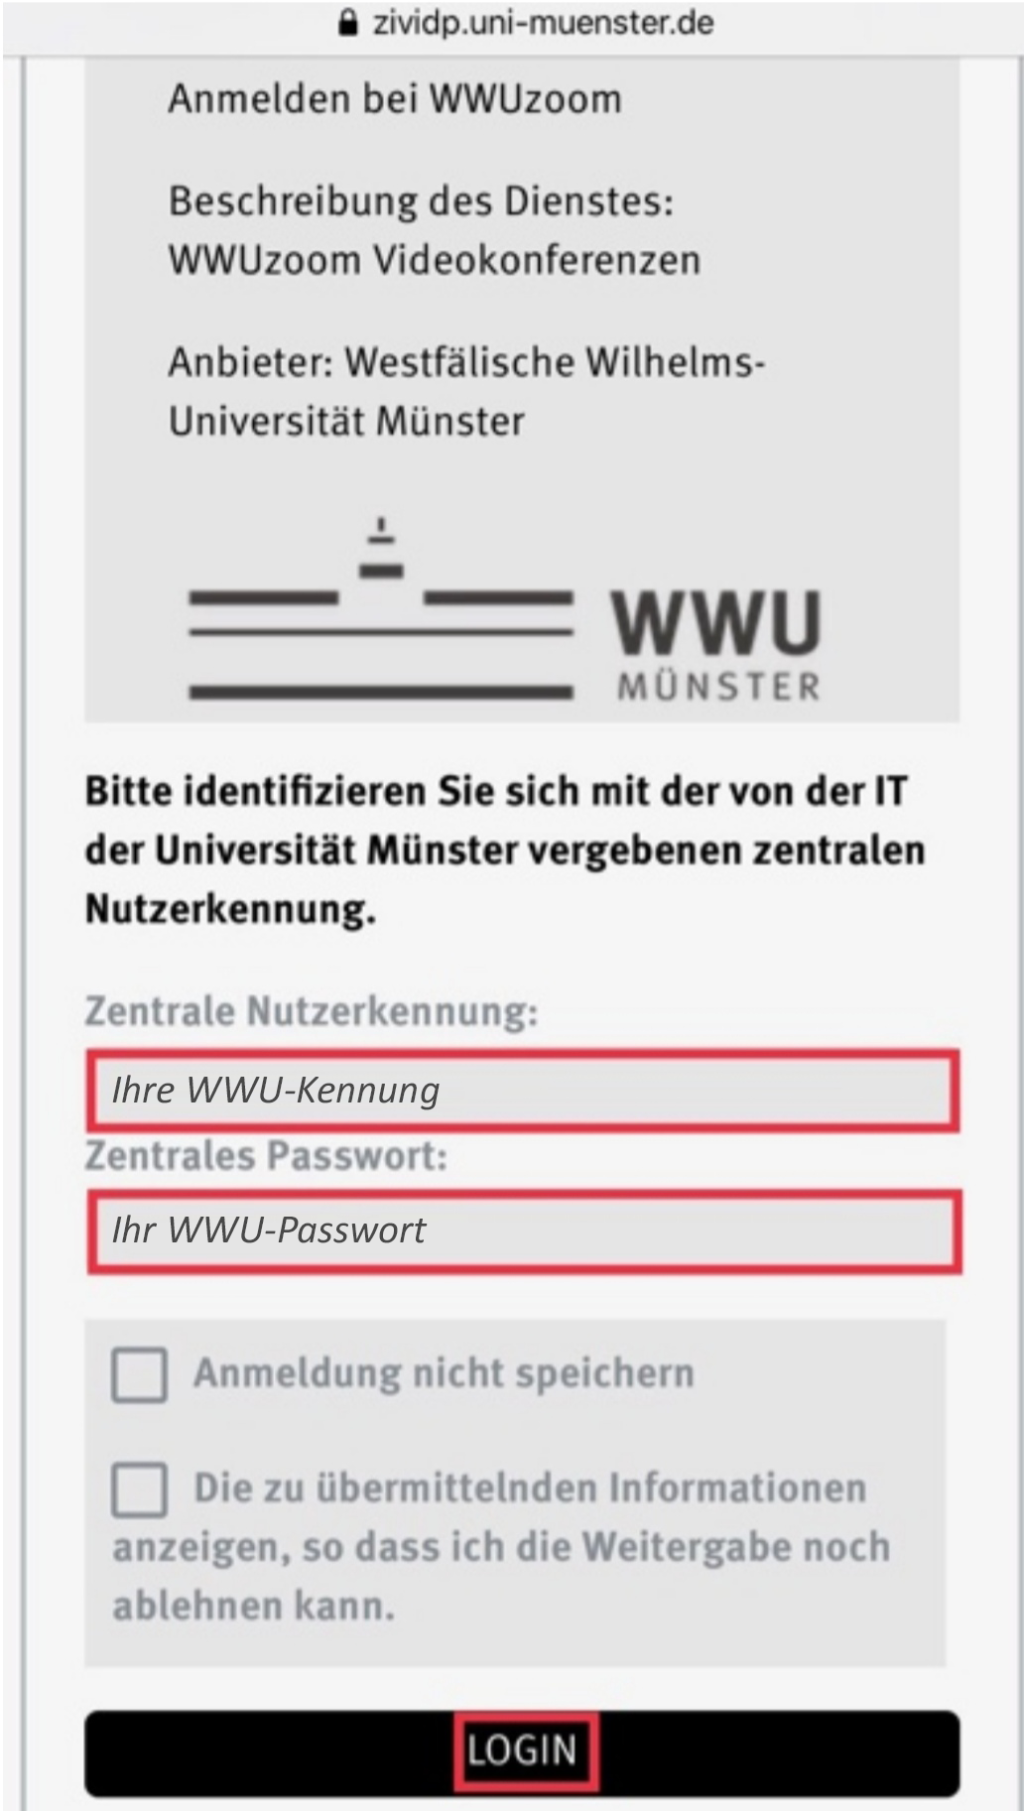
Now enter your university ID and your university password and click on "LOGIN".
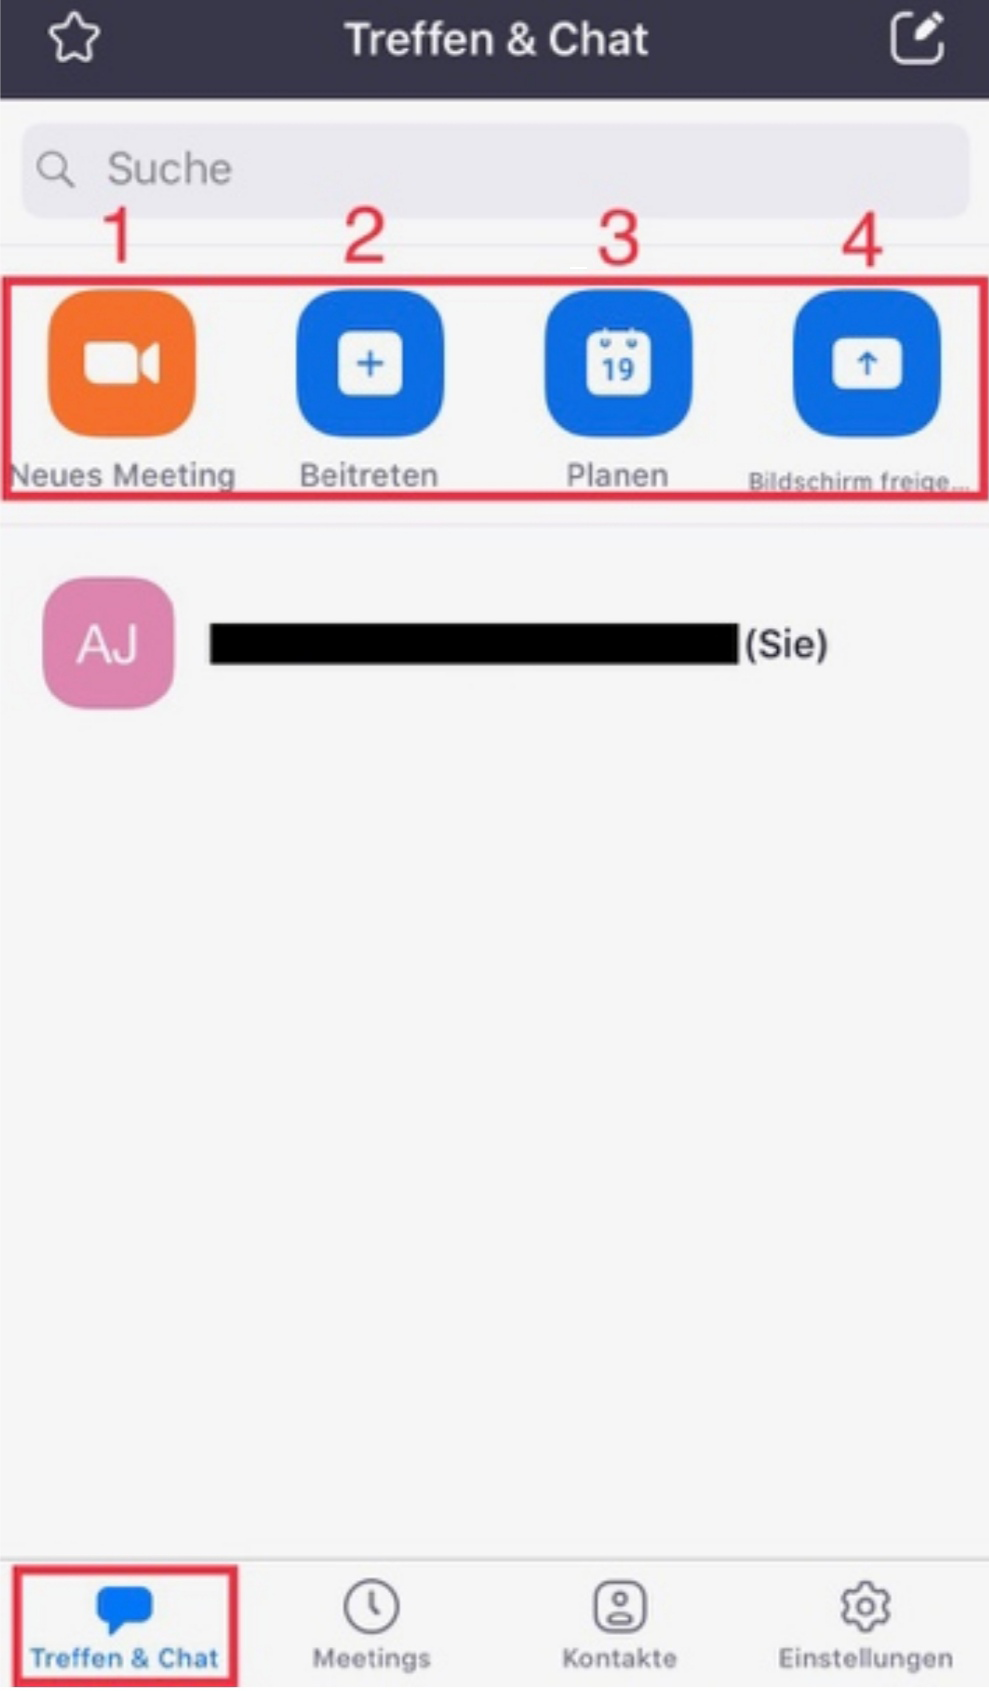
You will now return to the zoom app. In the personal overview you have the following options under the menu item "Meet & Chat":
Allow Zoom to access your microphone. Then click on the "Headset" icon in the lower menu and select "Call via device audio". Then allow Zoom to access your camera.
You can make further settings in the meeting room:
Open the zoom app and click on "Login".
Do not enter your login data in this step, but click on "SSO" (Single-Sign-On).
Enter "wwu" as the company domain to be redirected to the central login page of Münster University.
Now enter your university ID and your university password and click on "LOGIN".
You will now return to the zoom app. In the personal overview you have the following options under the menu item "Meet & Chat":
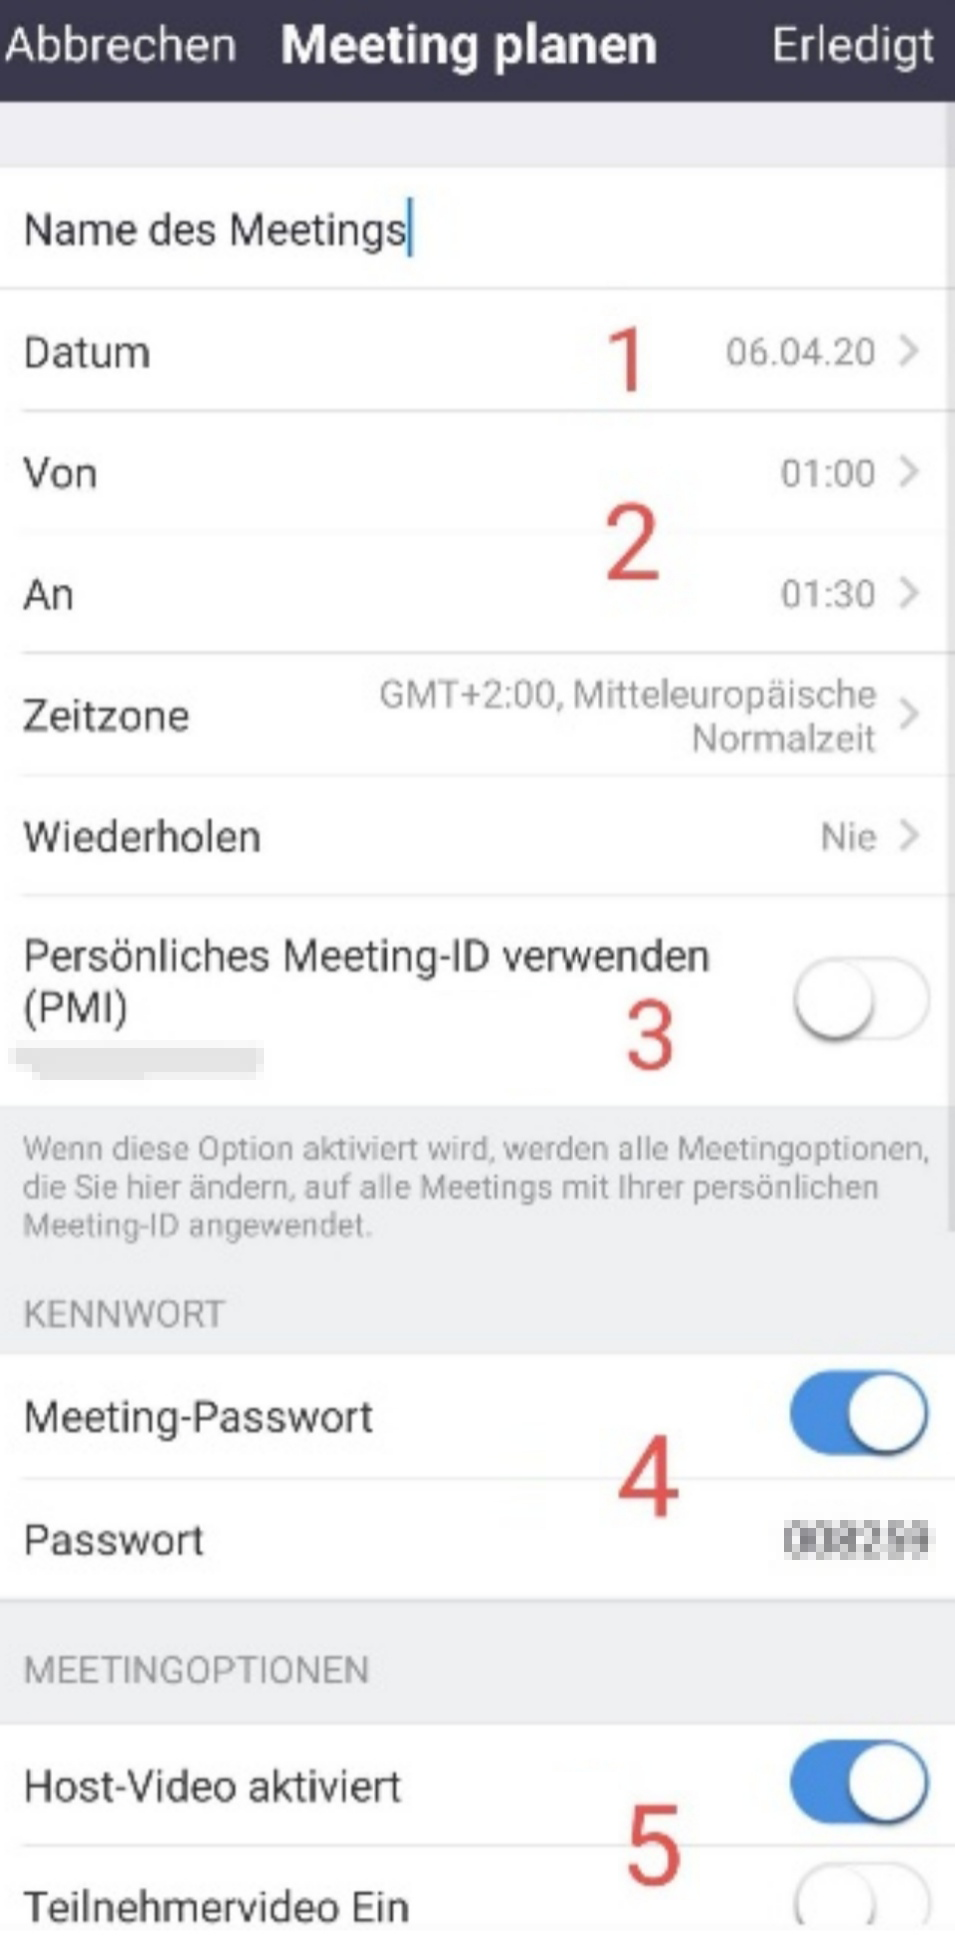
Enter a name for the meeting and make the following settings: