Setting up Wi-Fi under Windows

Requirements:

  • Your device supports WPA2
  • Windows 10 or higher

Note:

  • To download the WWU installation package or the certificate, you can use our guest WiFi GuestOnCampus.
  • We recommend that you use the WWU installation package for setting up Wi-Fi, as this will automatically set up both WiFis of the WWU (wwu, eduroam). If this is not possible, please follow the instructions "Manual installation of the Wi-Fi Certificate" first and then "Manual Configuration of the Wi-Fi" for each SSID.
  • Automatic WiFi Configuration with the WWU Installation Package (Recommended)

    1. Downloading the Installation Package

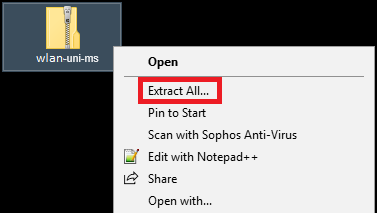
    Download the following ZIP-File: WWU WiFi Installation Package. Extract the file to your computer by right-clicking on the ZIP file and selecting "Extract all".

    1. Downloading the Installation Package
    © ZIV

    2. Installation of the Package

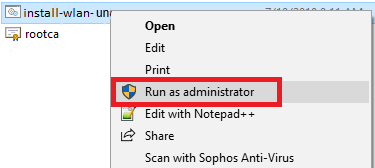
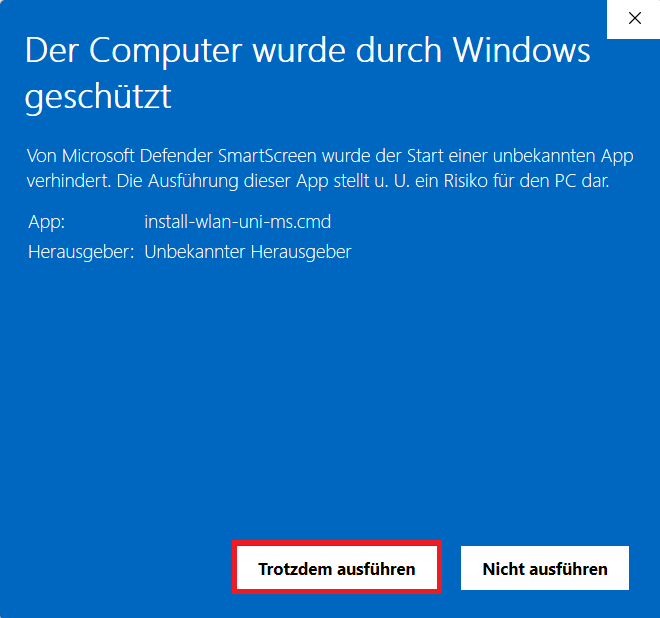
    Open the unpacked folder, right-click on the "install-wlan-wwu" file and select "Run as administrator". A black window appears, which closes automatically after a few seconds.  (Note: IF "wwu" (or "eduroam") do not appear in the list, you are not in range of the network or your WiFi is disabled.)

    2. Installation of the Package
    © ZIV

    3. Login to the WiFi

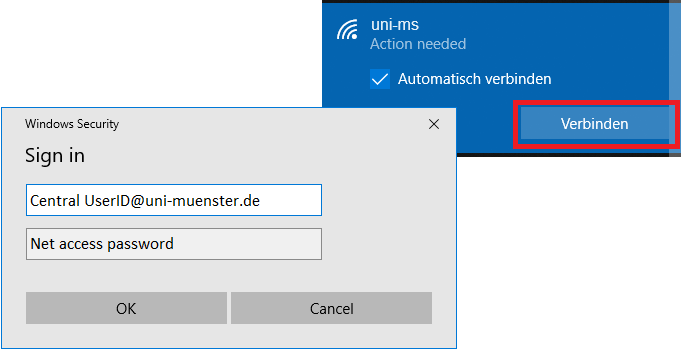
    After the window has closed, click on the WiFi symbol in the lower right corner, then on "wwu" (or uni-ms or "eduroam") and on "Connect". In the appearing login window, enter your university e-mail address (YourWWU-ID@uni-muenster.de) and your network access password and confirm with "OK".

    3. Login to the WiFi
    © ZIV
  • Manual Installation of the WiFi Certificate

    1. Download and Installation of the Certificate

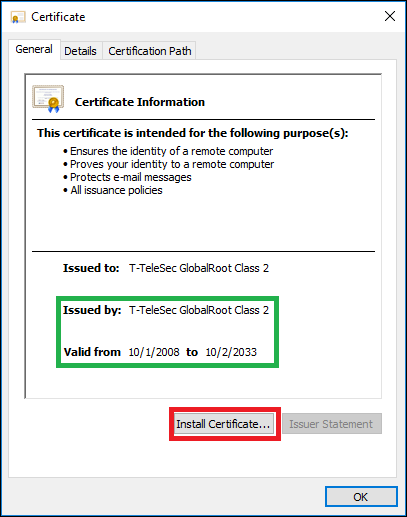
    Download the following certificate and install it: WiFi certificate.

    1. Download and Installation of the Certificate
    © ZIV

    2. Store Location of the Certificate

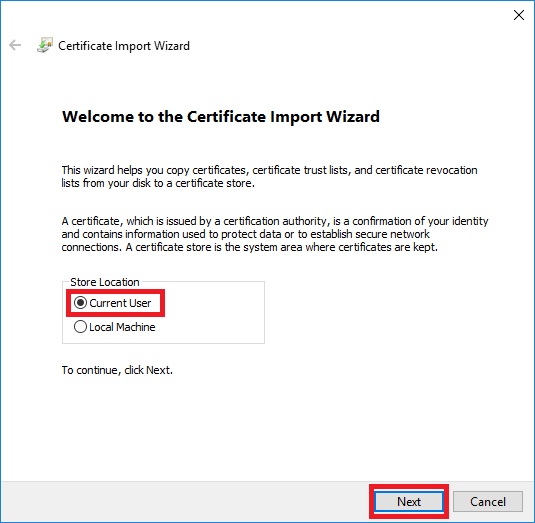
    The store location should be "Current User".

    2. Store Location of the Certificate
    © ZIV

    3. Select certificate store

    • Windows 10/8.1/8: Select "Automatically select the certificate store based on the type of certificate".
    • Windows 7: Select "Place all certificates in the following store". Click on "Browse" and "Trusted Root Certification Authorities".
    Confirm all messages.

    3. Select certificate store
    © ZIV

    4. Finish

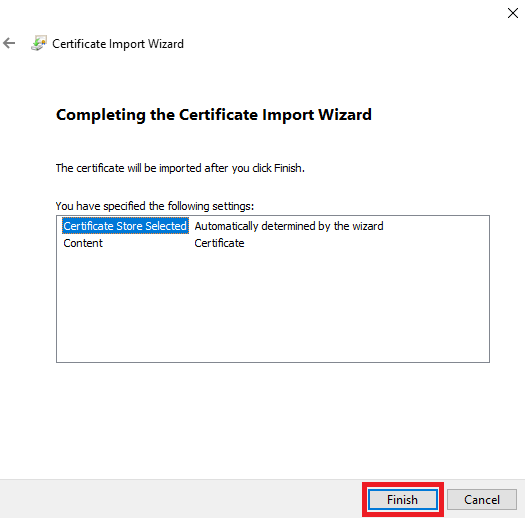
    After clicking on "Finish", a message should confirm that the import process has been completed successfully.

    4. Finish
    © ZIV
  • Manual WiFi Configuration

    1. Remove the old WiFi Connections

    • Windows 10/8.1/8: Click on the WiFi icon in the bottom right corner of the menu, right-click on "wwu" (or "eduroam") and click on "Forget (this network)".
    • Windows 7: Right-click on the WiFi icon in the bottom right corner of the menu and click on "Network and Sharing Center". In the window that opens, go to "Manage wireless networks" on the left, then select "wwu" (or "eduroam") and remove this connection.

    1. Remove the old WiFi Connections
    © ZIV

    2. Network and Sharing Center

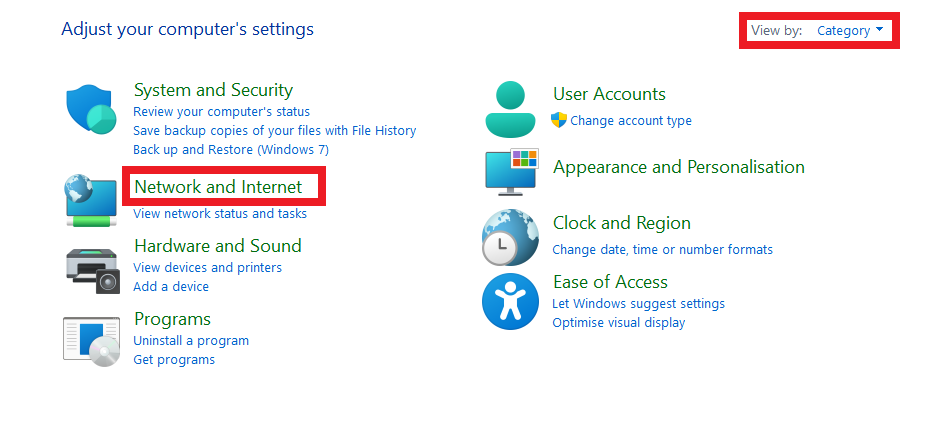
    • Windows 10: Right-click on the WiFi icon in the bottom right corner of the menu and select "Open Network & Internet Settings" and in the following window "Network and Sharing Center".
    • Windows 8.1/8/7: Right-click on the WiFi icon in the bottom right corner of the menu and select "(Open) Network and Sharing Center".

    2. Network and Sharing Center
    © ZIV

    3. Setting Up a New Connection

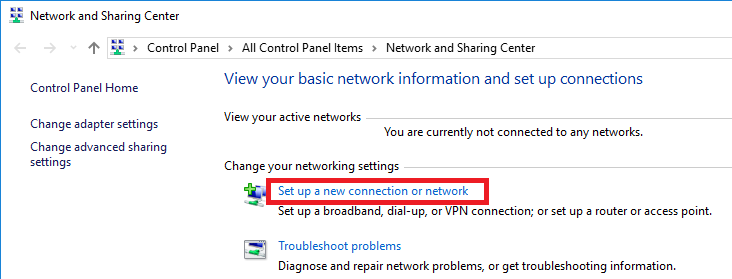
    Select "Set up a new connection or network".

    3. Setting Up a New Connection
    © ZIV

    4. Connection Option

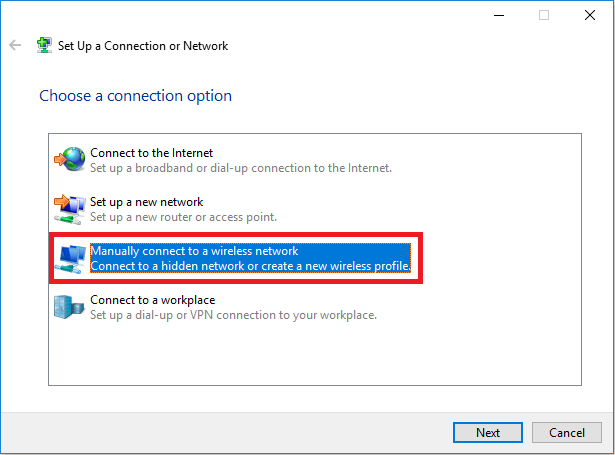
    Click "Manually connect to a wireless network" and "Next".

    4. Connection Option
    © ZIV

    5. Information for the Wireless Network

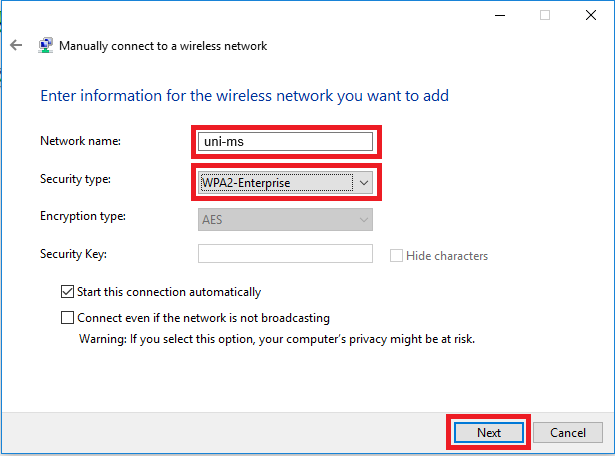
    Enter "wwu" (or "eduroam") as network name, as security type select "WPA2-Enterprise" and then click on "Next".

    5. Information for the Wireless Network
    © ZIV

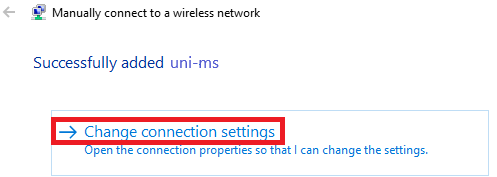
    6. Change Connection Settings

    Click on "Change connection settings".

    6. Change Connection Settings
    © ZIV

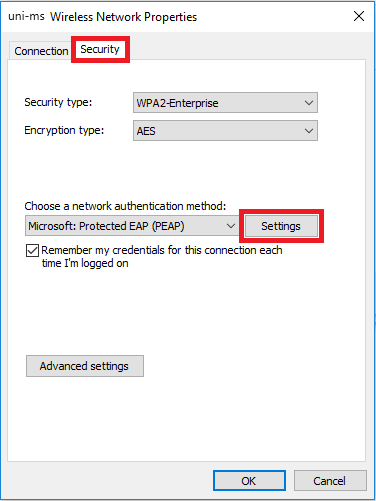
    7. Security

    Select the tab "Security" and there "Settings".

    7. Security
    © ZIV

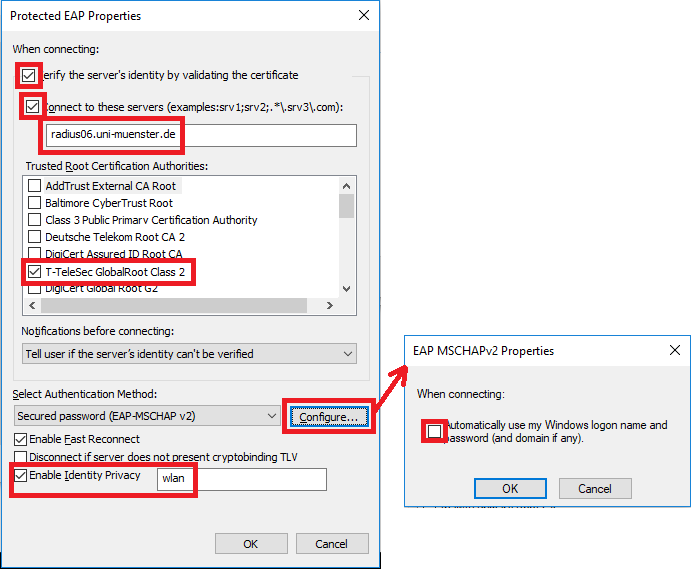
    8. Security Settings

    In the following window select the following options:

    • Verify the server’s identity by validating the certificate: Tick
    • Connect to these servers: Tick (server name "radius06.uni-muenster.de")
    • List of Trusted Root Certification Authorities: T-TeleSec GlobalRoot Class 2
    Under "Configure…" make sure that the check box is not selected. Finally enable the "Identity Privacy" at the bottom and enter "wlan" in the text field.

    8. Security Settings
    © ZIV

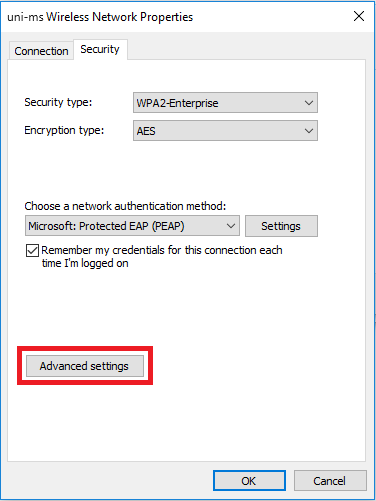
    9. Advanced Settings

    Click on "OK" to return to the previous window in which you click on "Advanced Settings".

    9. Advanced Settings
    © ZIV

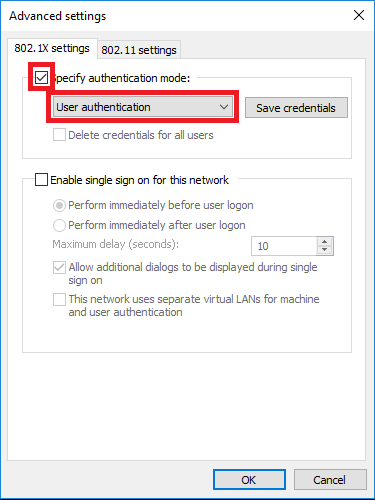
    10. User Authentication

    In the following window check "Specify authentication mode" and select "User authentication" in the drop-down menu.

    10. User Authentication
    © ZIV

    11. Connect to the WiFi

    You can now confirm / close all windwos and click on the WiFi symbol in the bottom right corner. Select the WiFi "wwu" (or "eduroam") there and click on "Connect". You will be asked to log in with your university e-mail address (YourWWU-ID@uni-muenster.de) and your net access password.

    11. Connect to the WiFi
    © ZIV

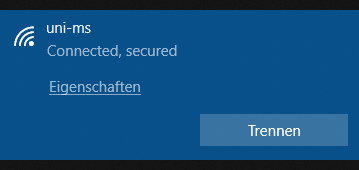
    12. Connected

    Finally the connection will be established with the Wi-Fi.

    12. Connected
    © ZIV