

Setting up a VPN Connection (VPN AnyConnect) with Android
Requirements:
- You have installed Android 14 or newer.
- You have set your network access password in the IT Portal.
- You registered an one-time passwort generator. OTP
Installation of the VPN Client
1. Download of the AnyConnect App
Download the Cisco AnyConnect VPN Client. Alternatively, you can find the app in the Play Store. Just search for cisco secure client or use the QR-Code. You may find an app there that is customized for your device.

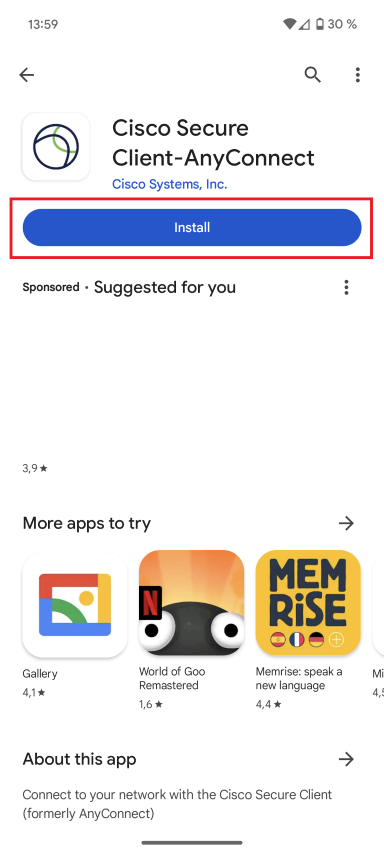
© CIT 2. Installing the AnyConnect App
Install the AnyConnect App by tapping "Install".
© CIT Establishing the VPN Connection
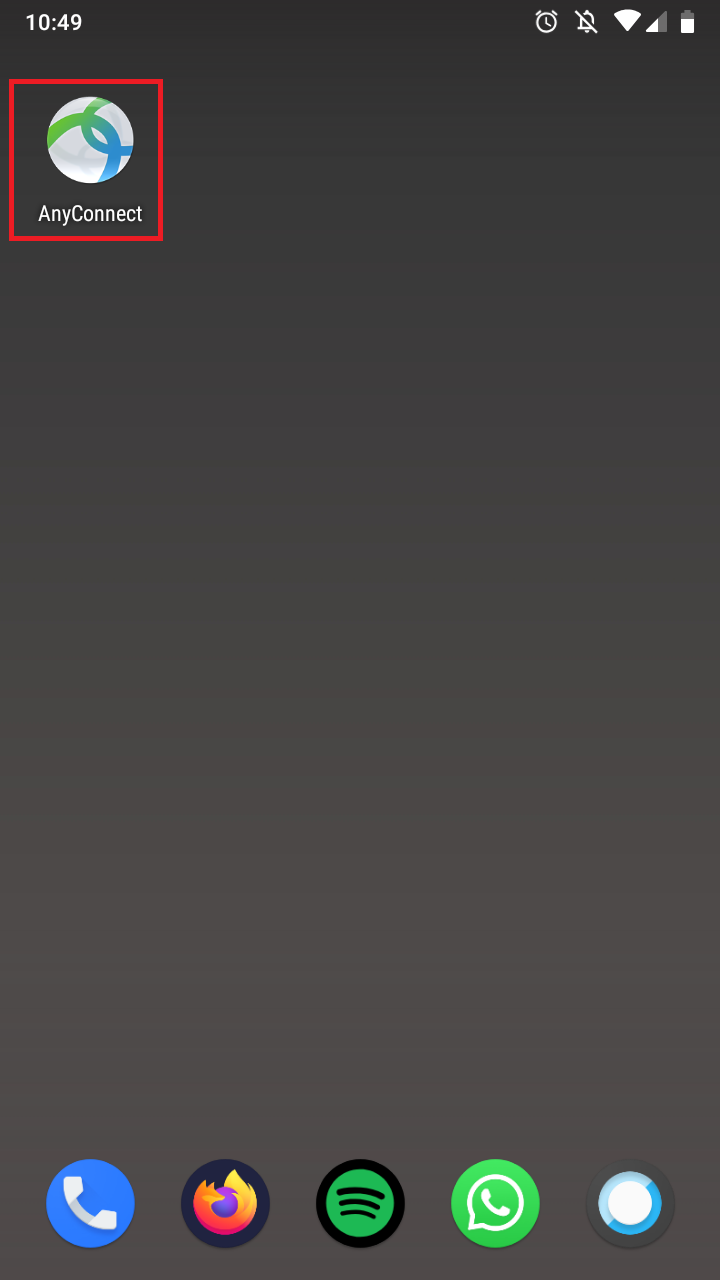
1. Starting the AnyConnect App
Start the AnyConnect App directly in the Play Store or by tapping on the corresponding app symbol.
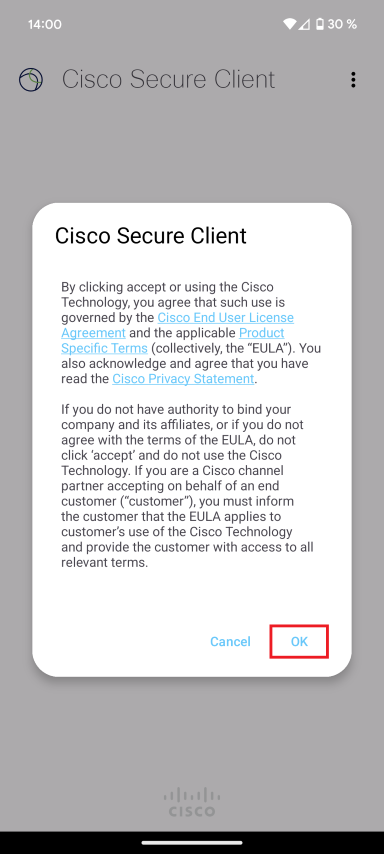
© Uni MS IT 2. Accepting the License Agreement
Accept the License Agreement by tapping "OK".
© CIT 3. Notifications
Cisco will now ask you whether you want to allow notifications. You do not need to activate this and can click on Don't allow.

© CIT 4. Notification Request
If you do not allow notifications, Cisco may ask you to allow them with this message. Tap Ok and you will be asked again whether you want to allow notifications. You can tap Don't allow again.

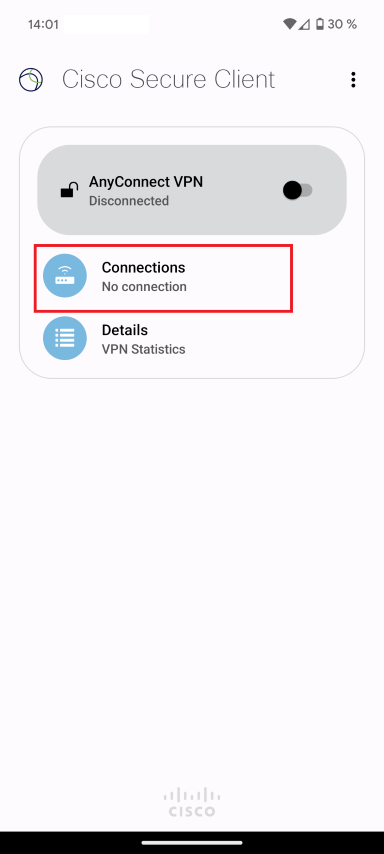
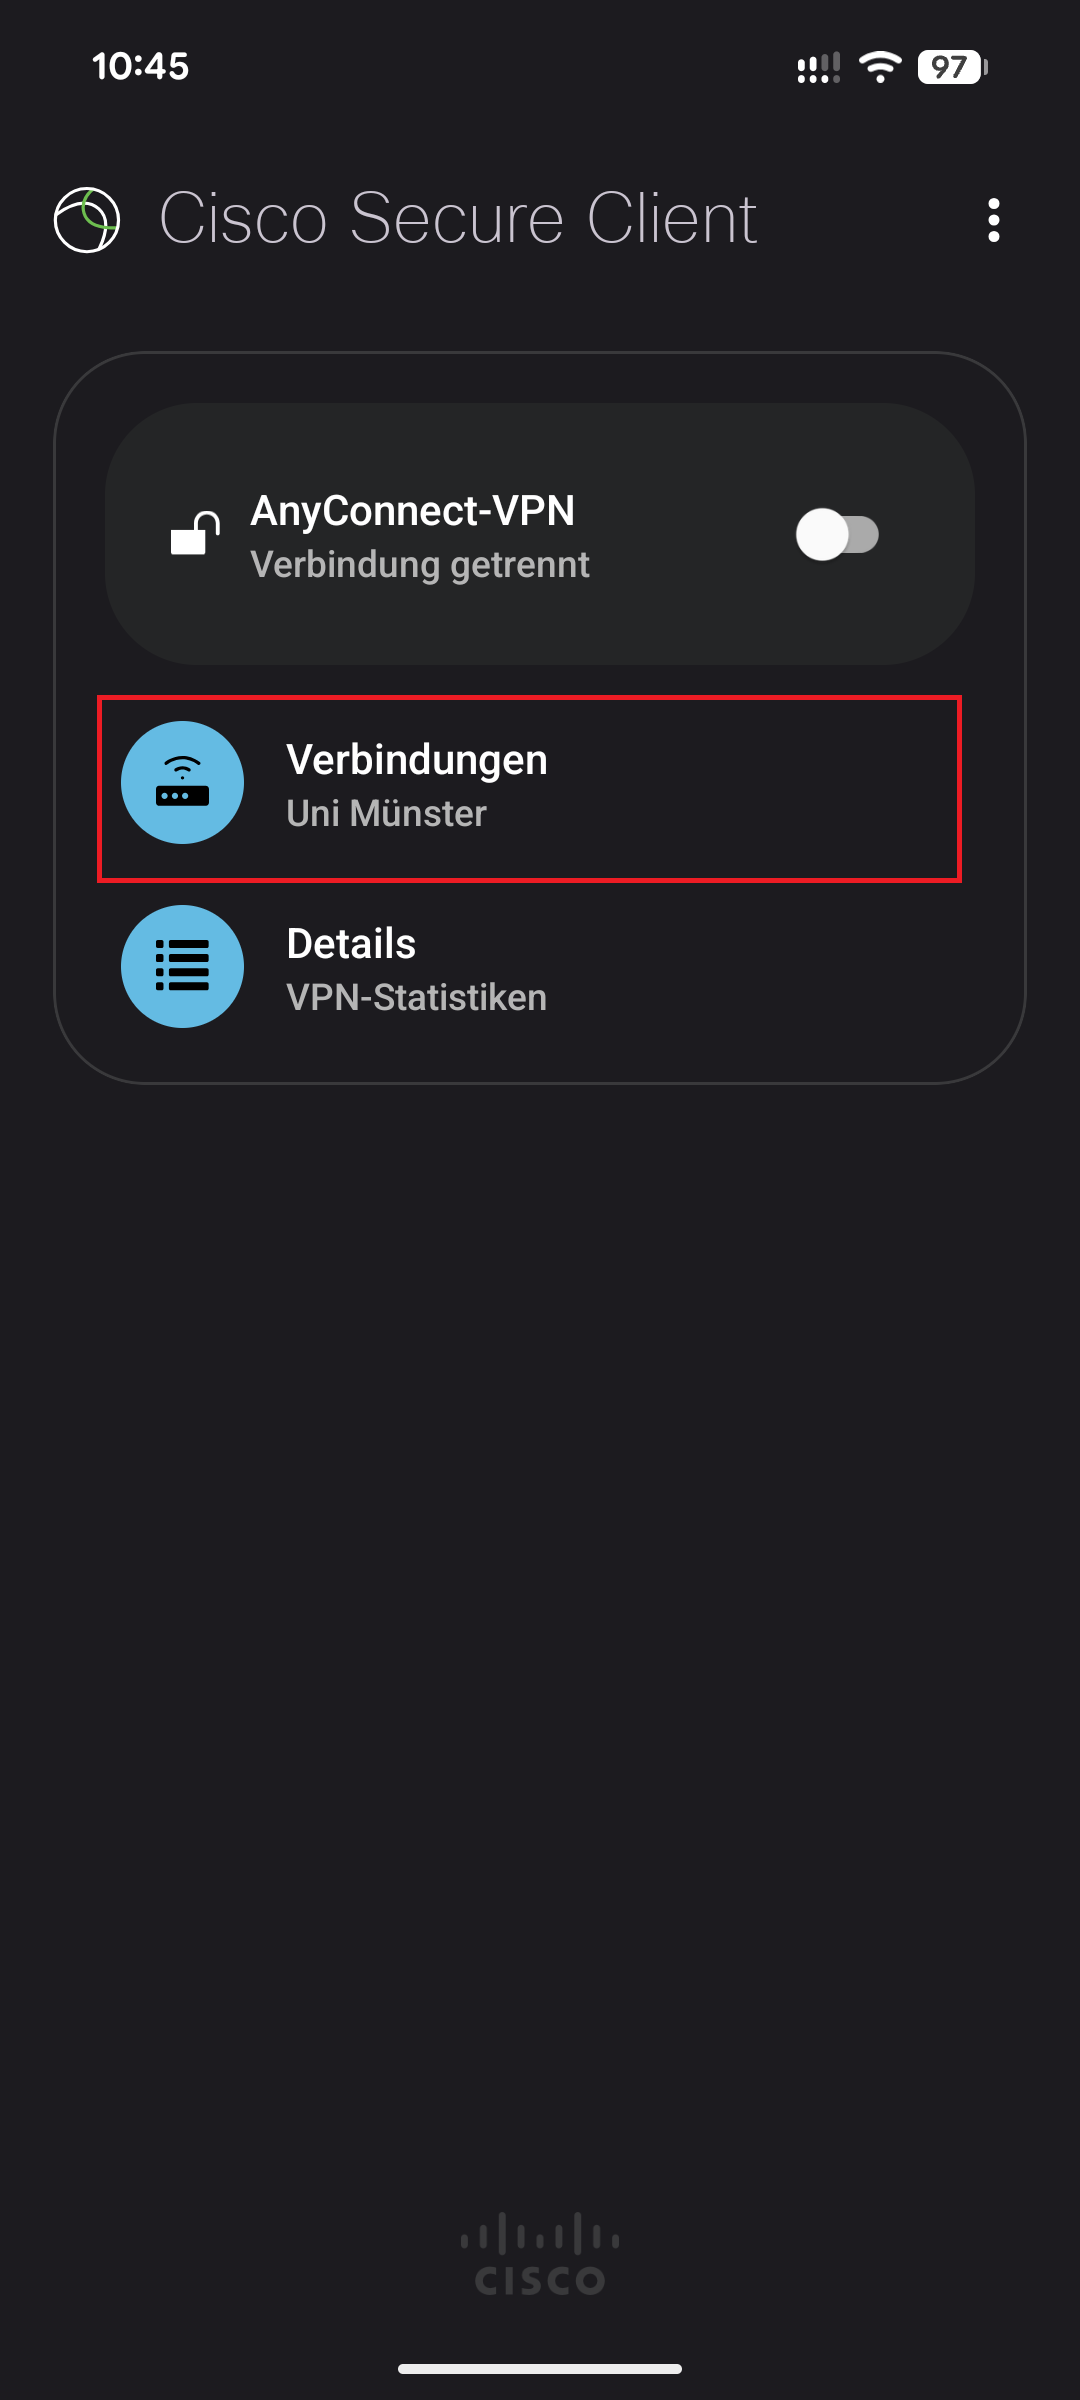
© CIT 5. Adding the VPN Connection
Add the VPN connection by choosing "Connections" first.
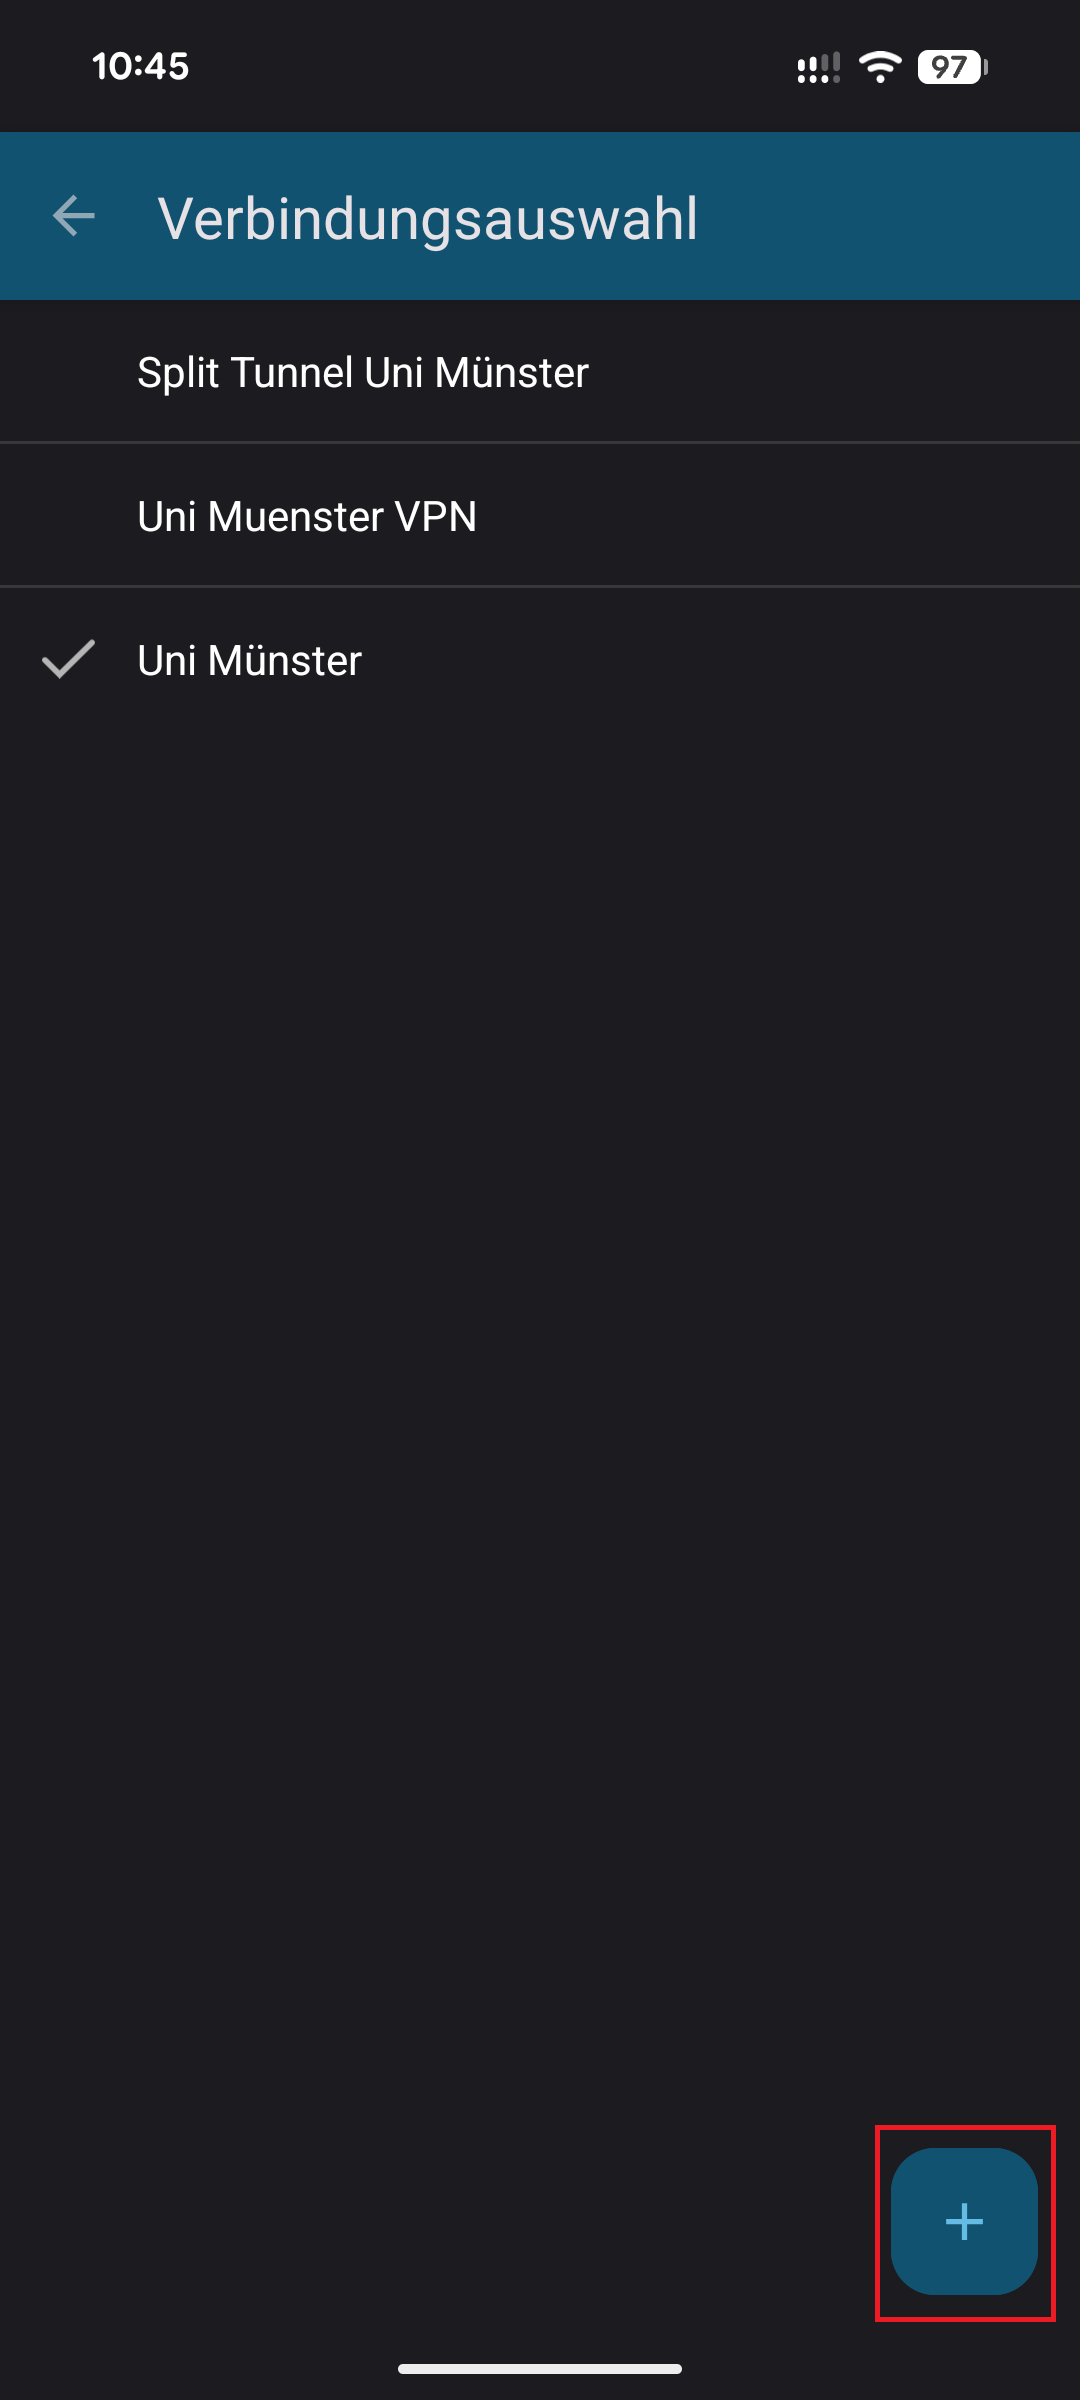
© CIT 6. Adding the VPN Connection
Then click on the plus button at the bottom right to open the connection editor.

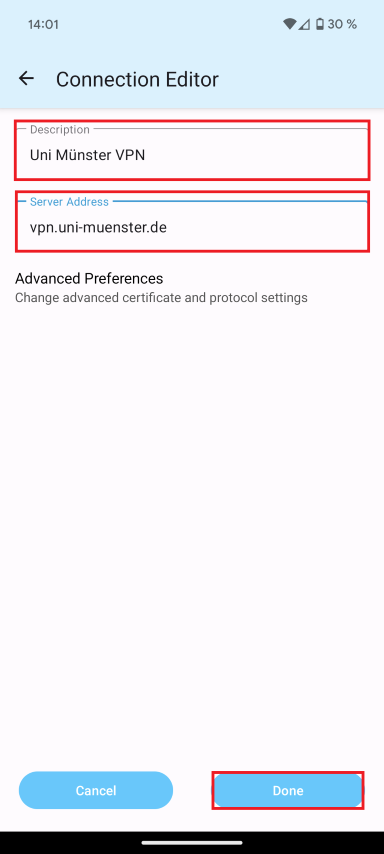
© CIT 7. Connection Editor
Choose a description for the network (e.g. Uni Münster VPN) and enter vpn.uni-muenster.de as the server address. Tap on "Done" afterwards.
© CIT Starting & Ending the VPN-Connection
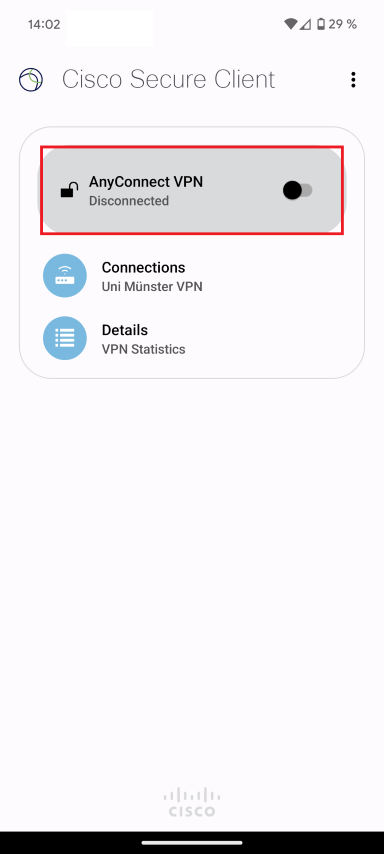
1. Turning on the VPN Connection
To start the VPN connection, activate the slider behind Anyconnect VPN.
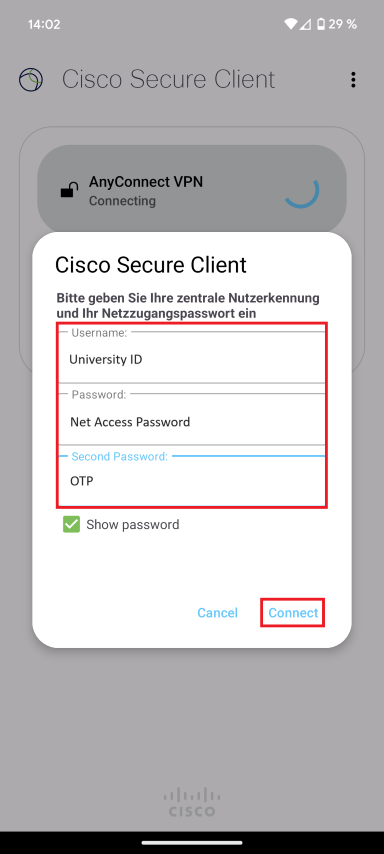
© CIT 2. Entering your user data
Enter your user ID and your net access password and the OTP (second password) and confirm your entry by tapping "OK". (Note: The net access password is not your normal university password. You can set it in the IT Portal.)
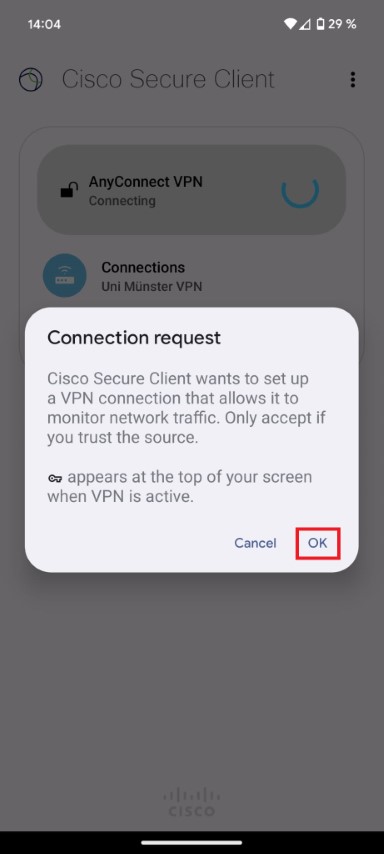
© CIT 3. Trusting the Application
Confirm the connection request by pressing "OK".
© CIT 4. Established Connection
The connection is established now. There is also an entry within your notifications.
To terminate the connection, deactivate the slider behind Anyconnect VPN.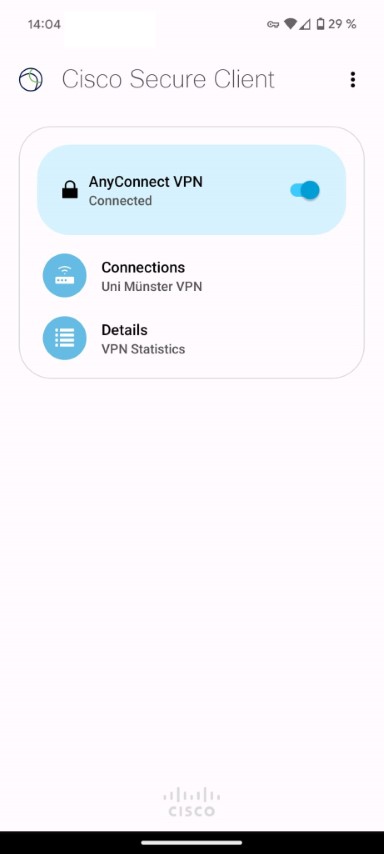
© CIT
Special VPN-Profile for Exchange and OWA
To use Exchange on personal devices, you need the following dedicated VPN connection. This connection only manages Exchange traffic and does not have access to your other data traffic. On work devices, you can use the "Standard" connection listed above.
Important: To use the VPN, you need the Cisco Secure app. Install it according to the instructions above.
© CIT 1. Select connections
Click on the ‘Connections’ tab.
© CIT 2. Add a connection
Click on the plus sign.
© CIT 3. Enter Server
Enter "Exchange" as the description and type the following server address into the field:
https://vpn.uni-muenster.de/exchange
Click Done.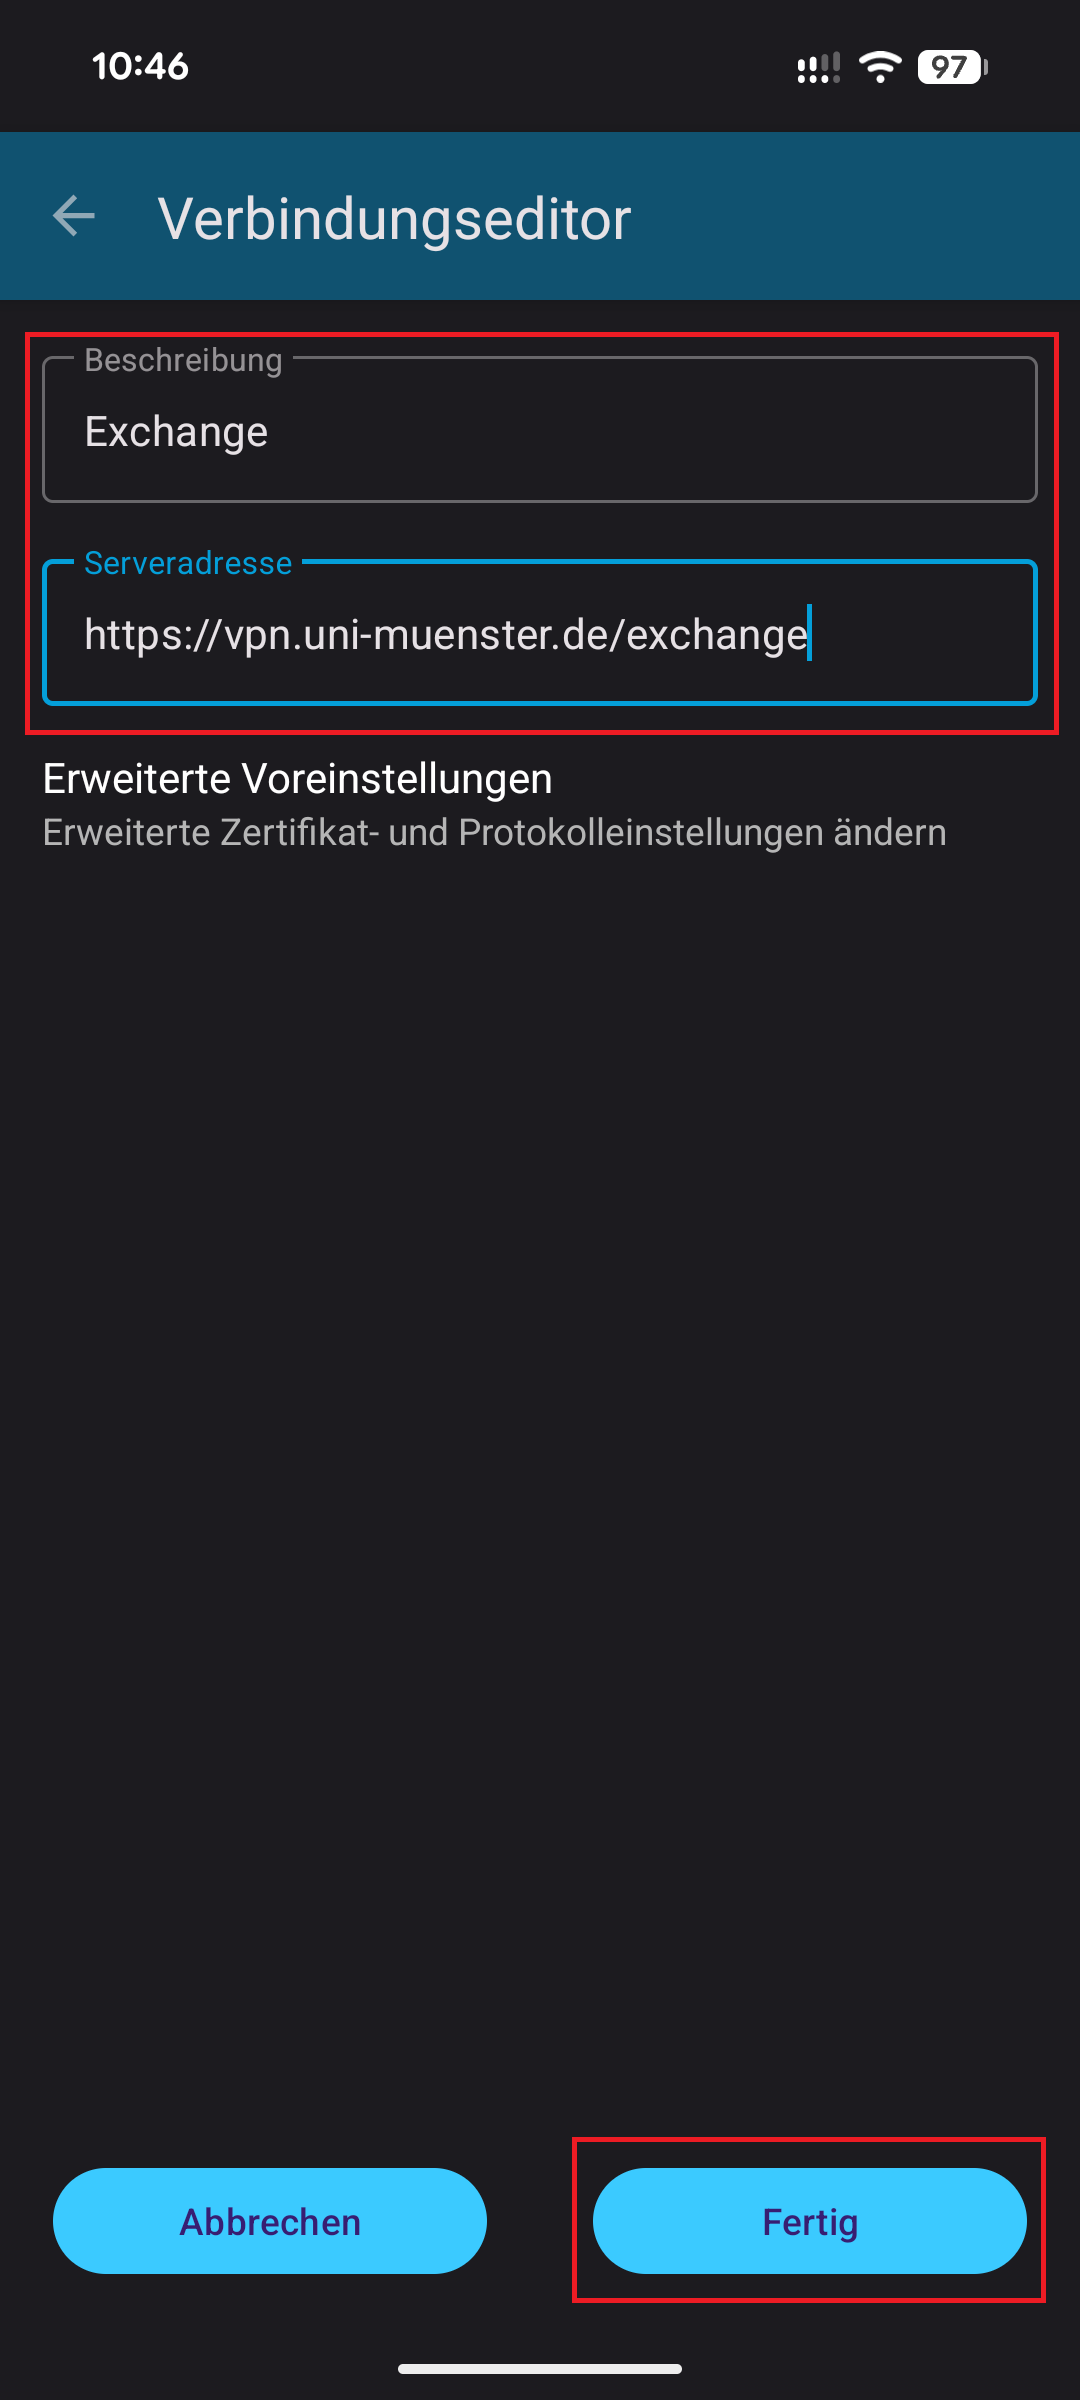
© CIT Select the "Exchange" connection.
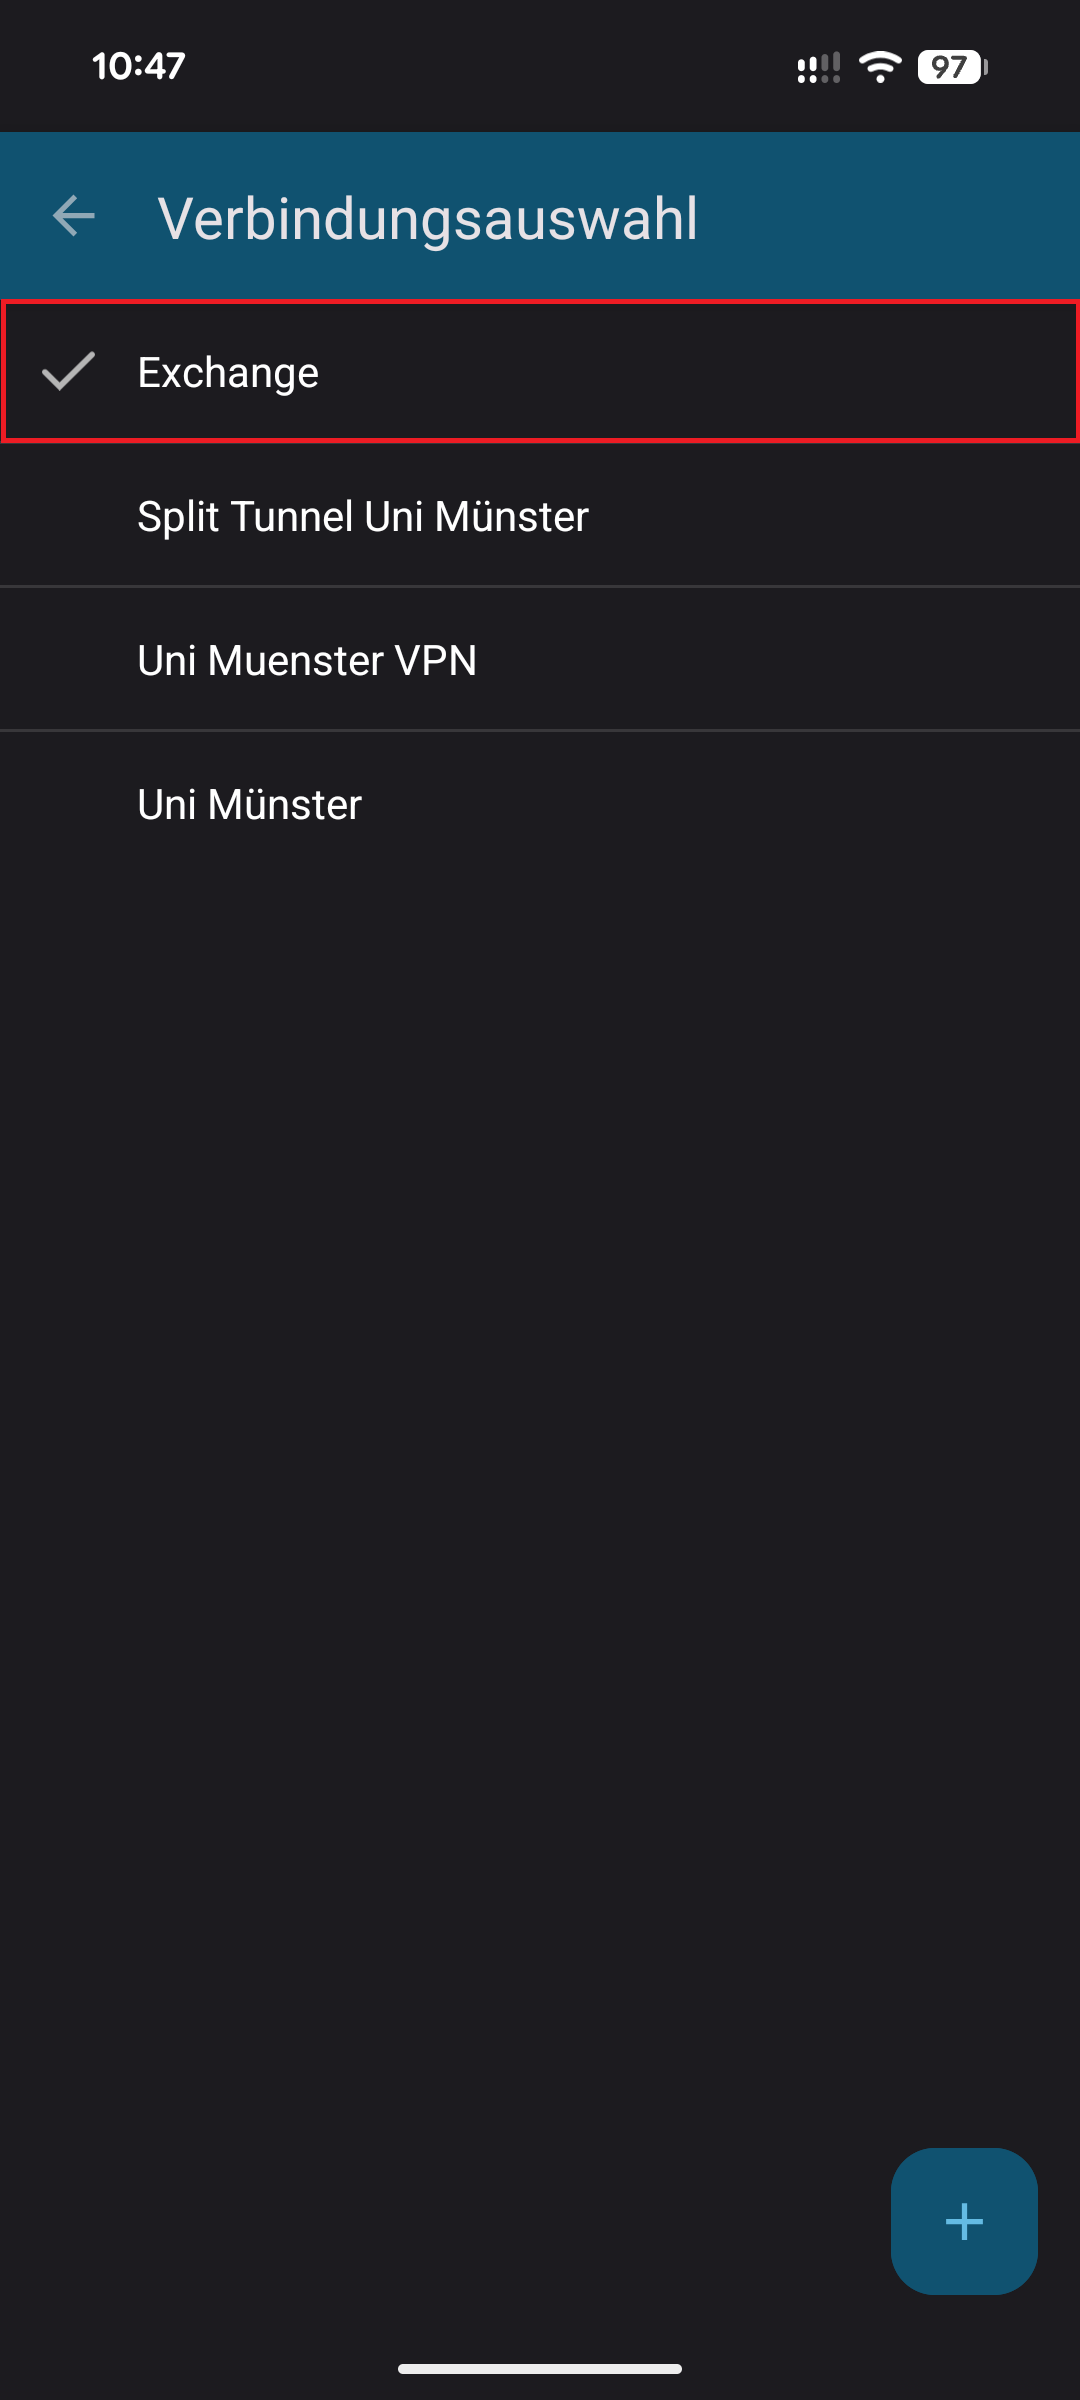
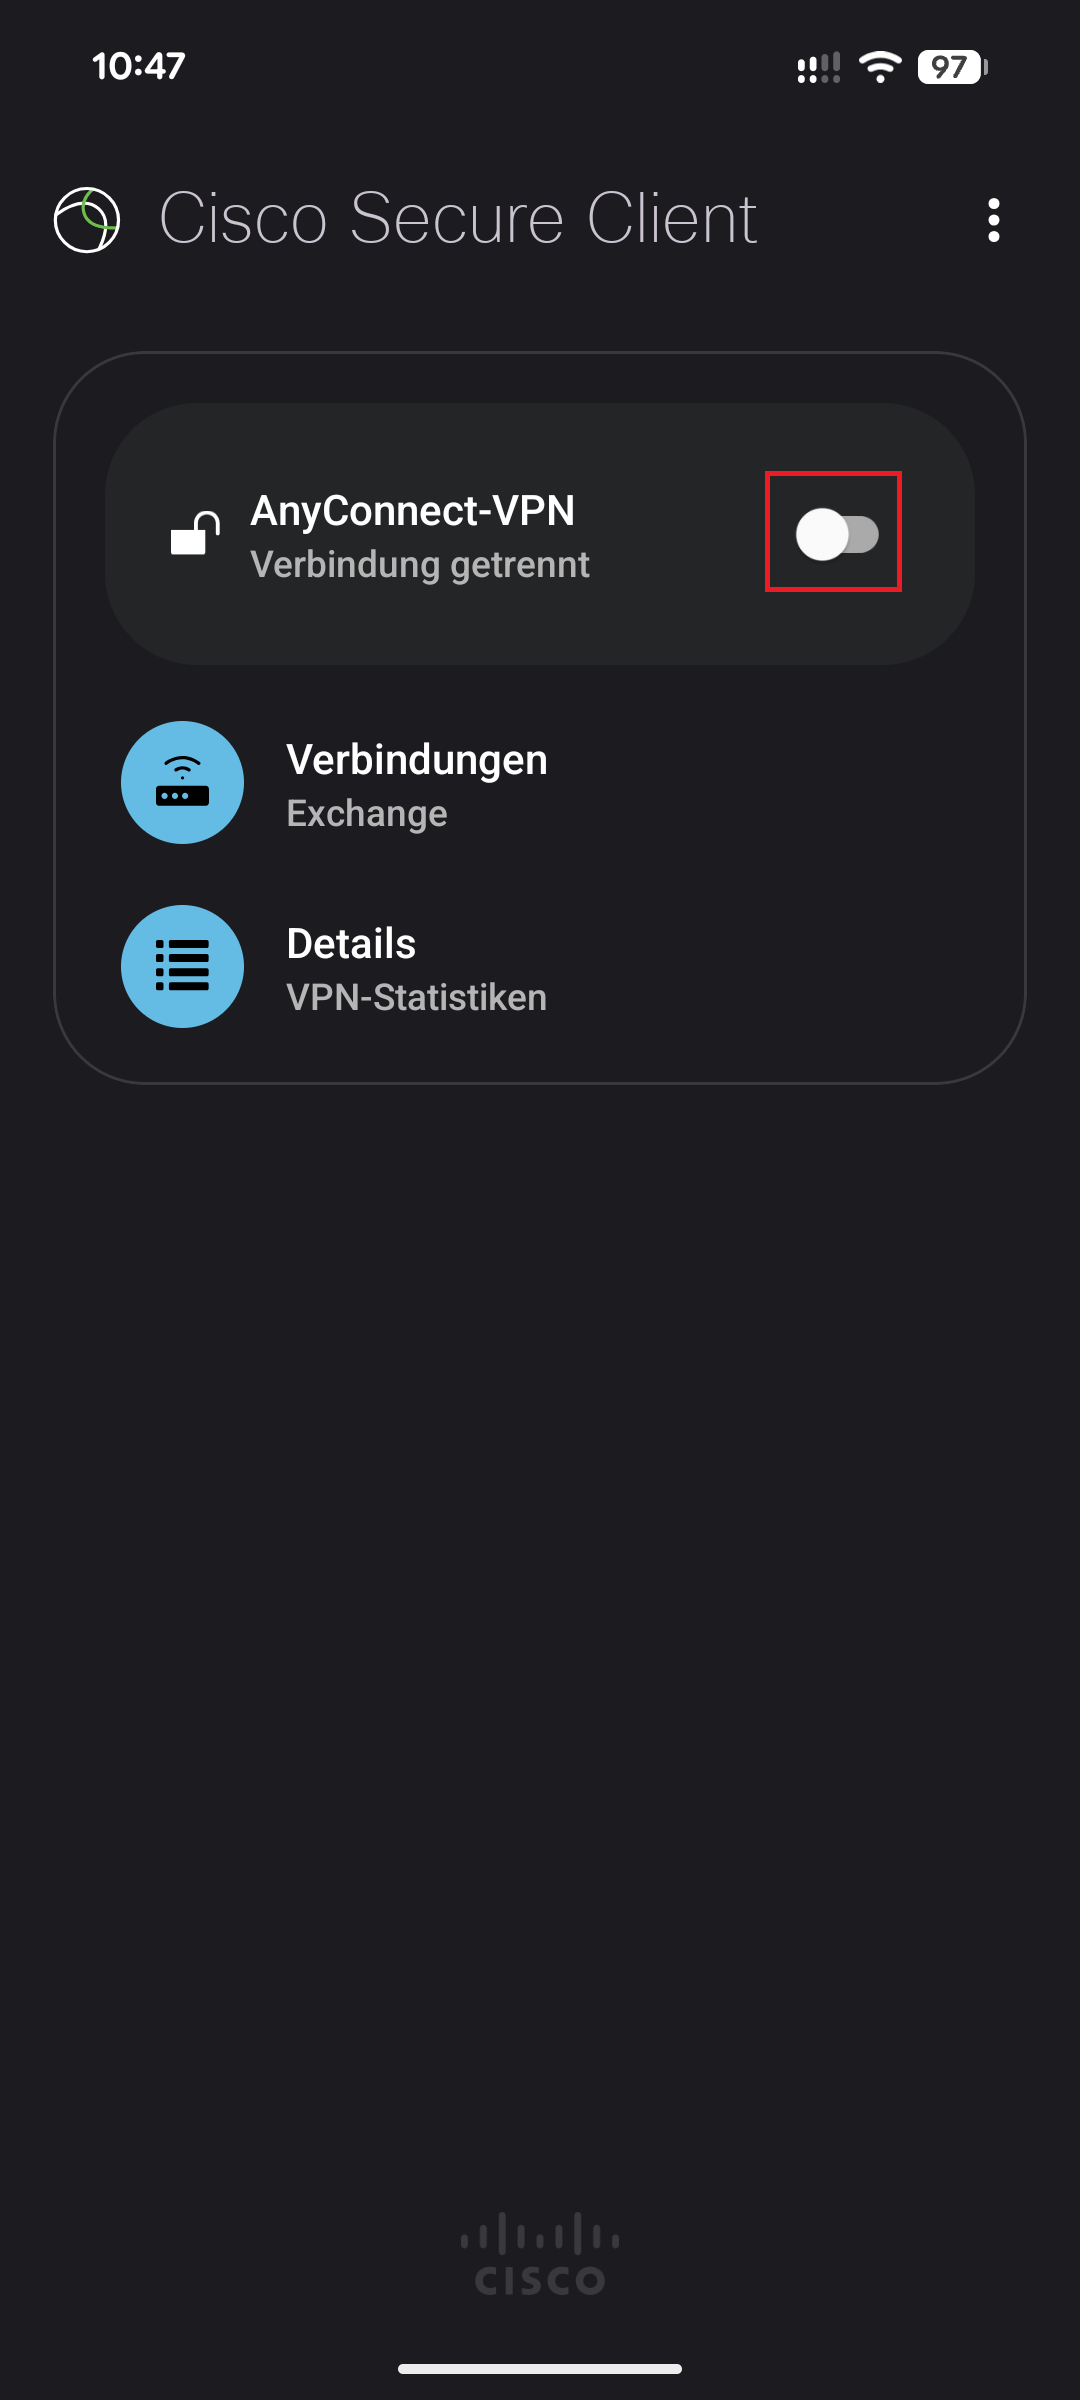
© CIT 4. Establish a connection
Now turn on the VPN connection.
© CIT 5. Login
Log in using your university ID, your network access password, and your one-time password.

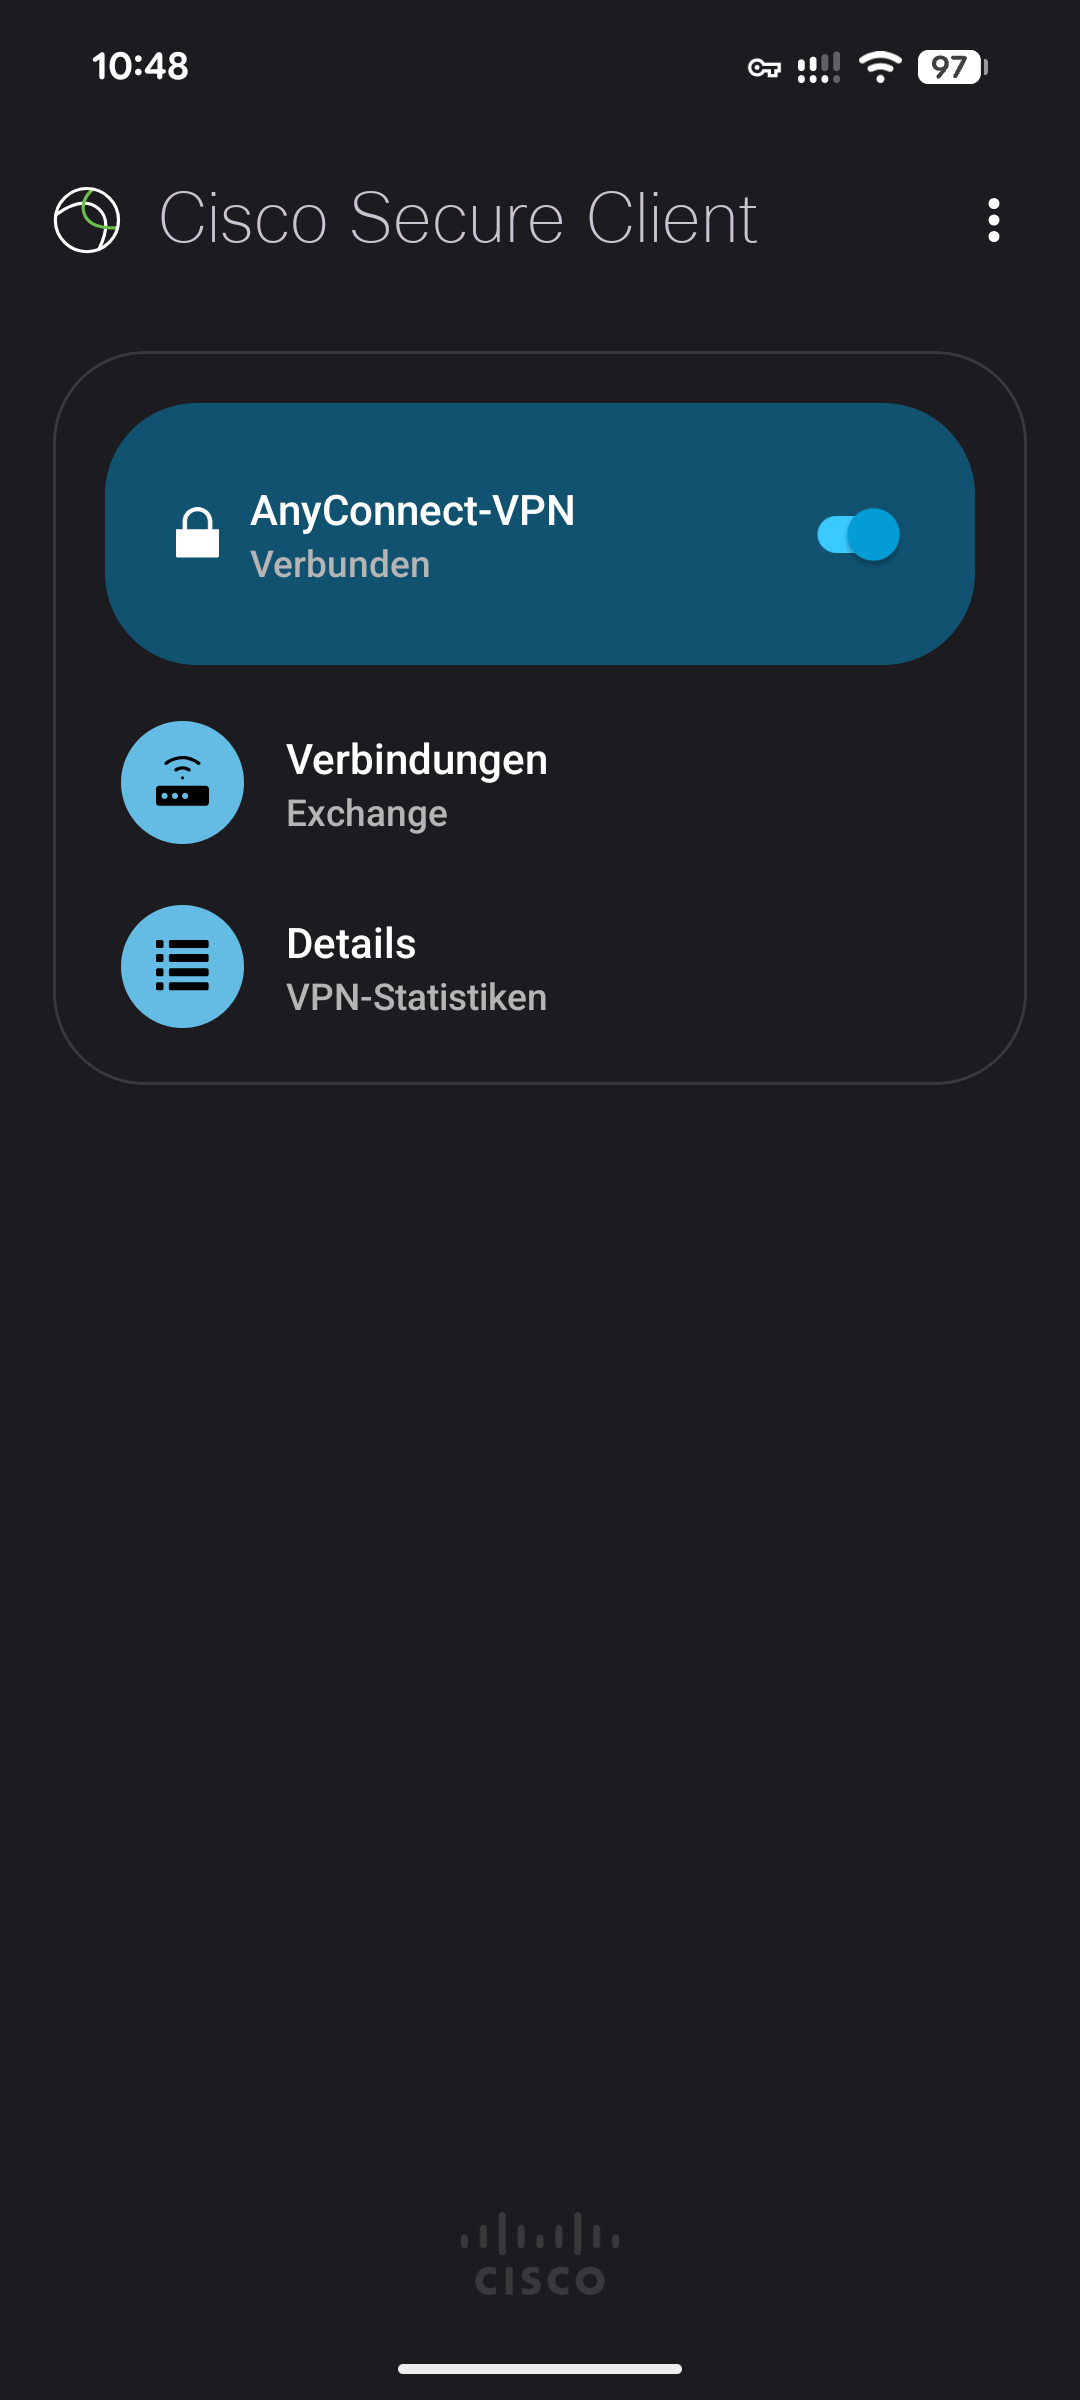
© CIT You are logged in and can use Exchange. The connection will appear as "Exchange".
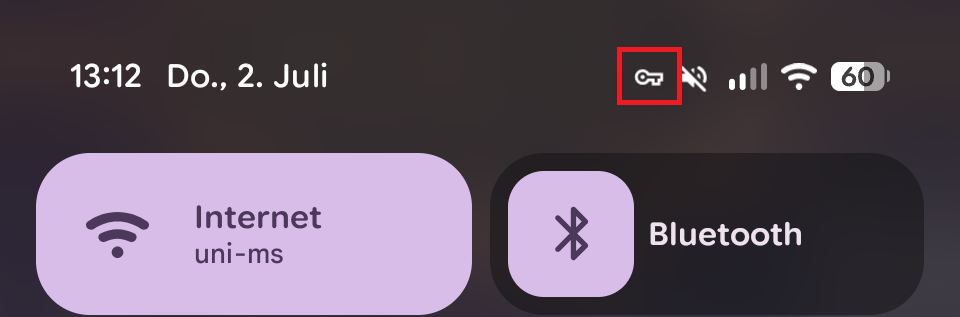
© CIT To check if your Android device is still connected to the VPN, you can look for the key icon in your notification bar. As long as you see the icon there, your device remains connected to the university's VPN service.
© CIT


