Secure Web Gateway (SWG) - Windows
To set up the Secure Web Gateway (SWG) correctly, it is important that both parts of the instructions (installing the certificate and setting up the SWG proxy) are carried out .
Contact: Network Service


To set up the Secure Web Gateway (SWG) correctly, it is important that both parts of the instructions (installing the certificate and setting up the SWG proxy) are carried out .
Contact: Network Service
Download the certificate by right-clicking on the link and selecting "Save link as ...". This will then appear in your download folder in the Explorer.
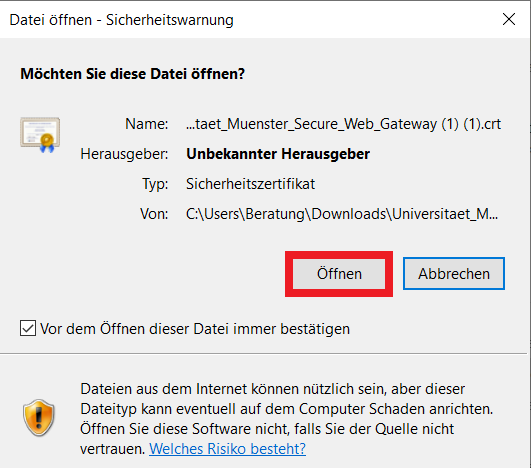
Open the downloaded file with a double click. In the following window, click Open once.
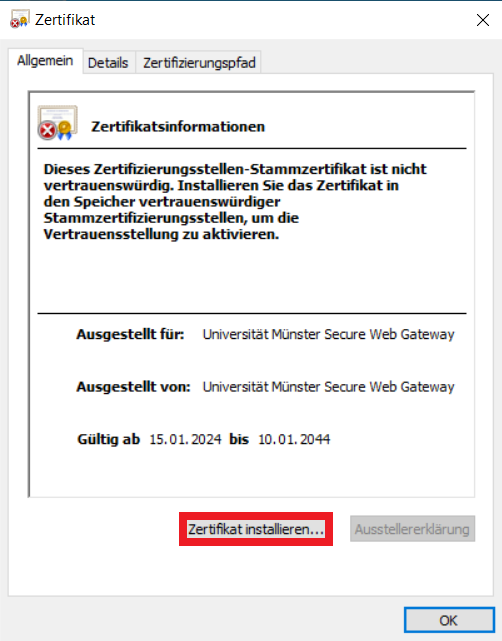
In the window that appears, select Install certificate.
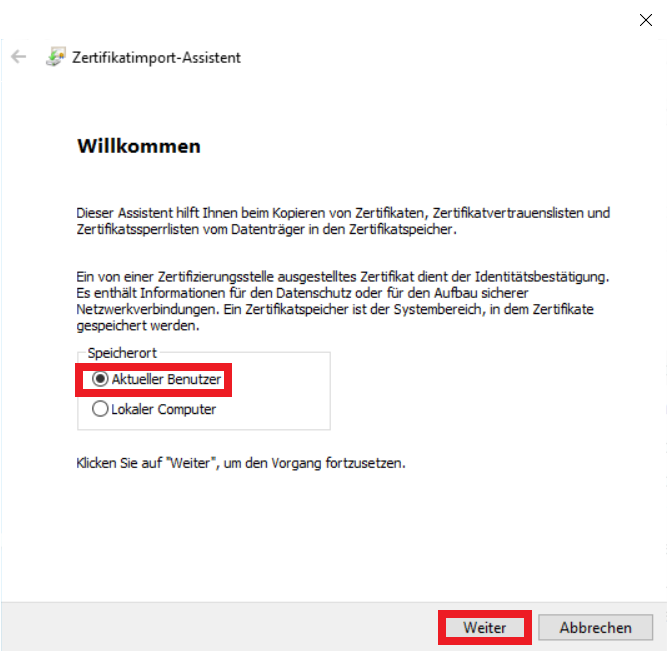
Select "Current user" as the storage location and then click Next.
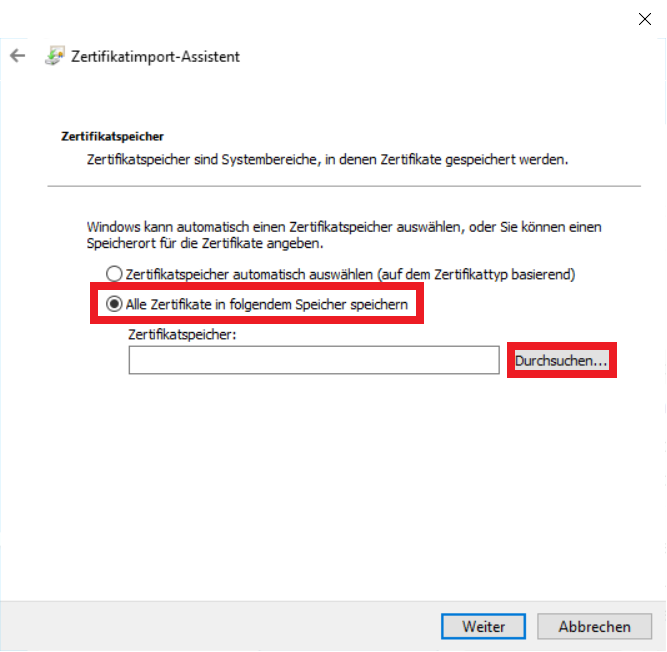
Now select the 2nd option "Save all certificates in the following memory". Then click Browse...
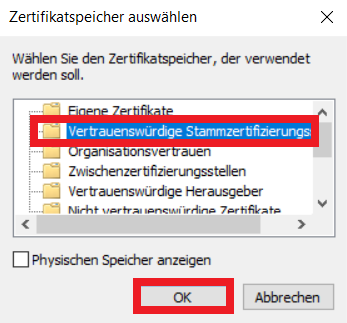
Select "Trusted root certification bodies" in the small window and confirm with OK.
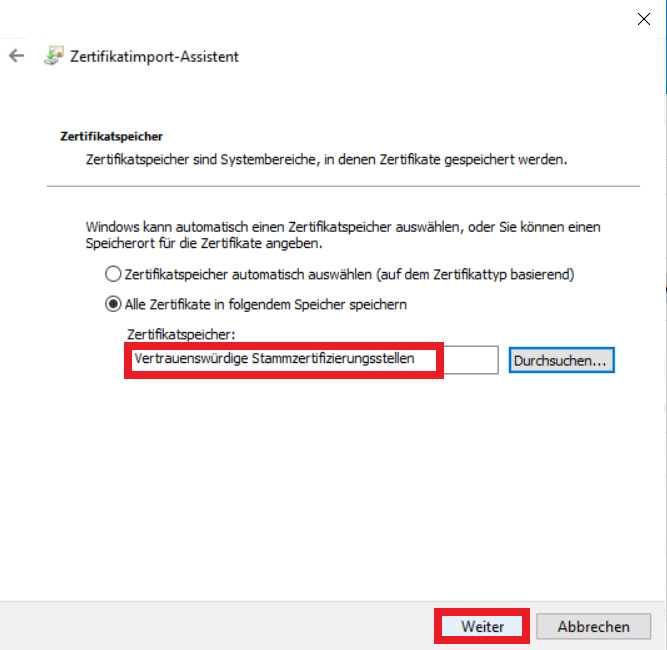
Check whether "Trusted root certification authorities" has been entered in the certificate store and then click Next.
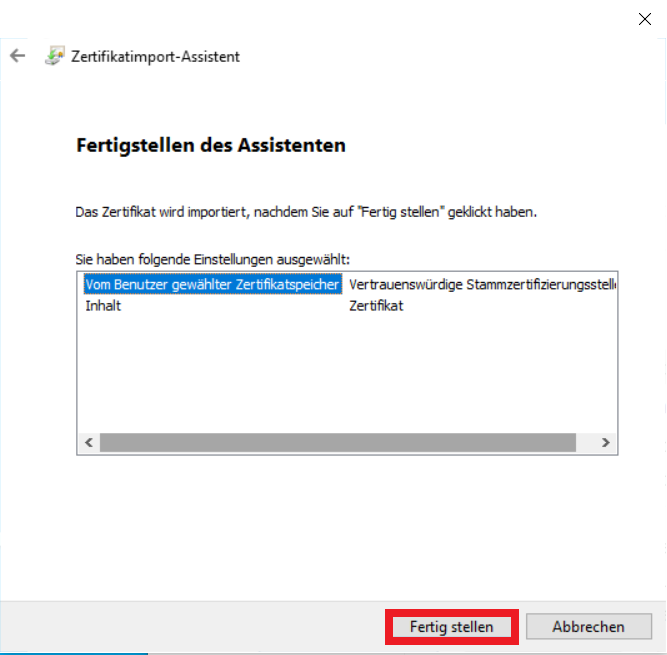
You will now be shown an overview of the settings. Click Finish and the certificate will be imported.
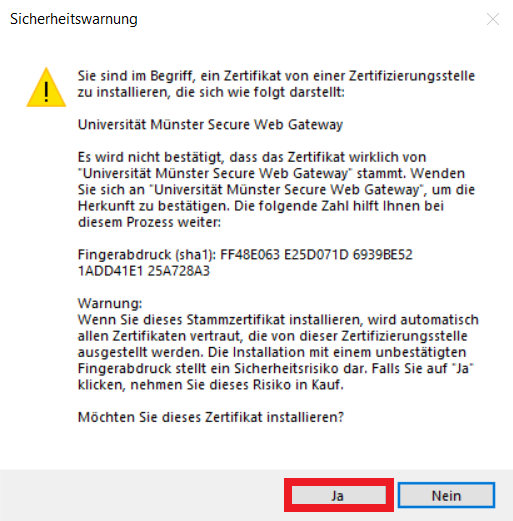
You will now be asked whether you really want to install the certificate. Confirm this with Yes.
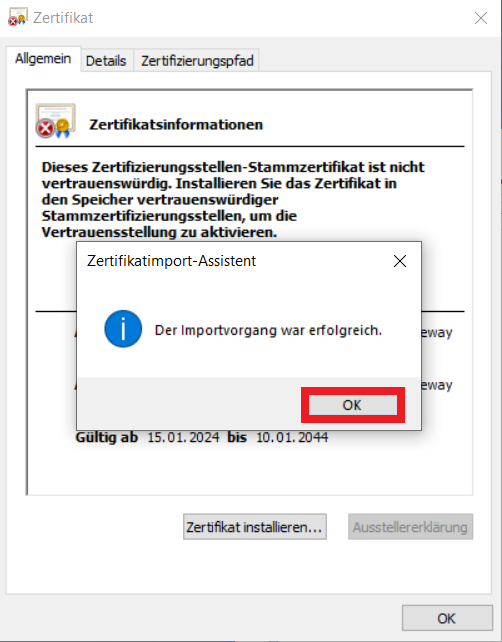
You can confirm the message "The import process was successful" with OK. You can then close the "Certificate" window.
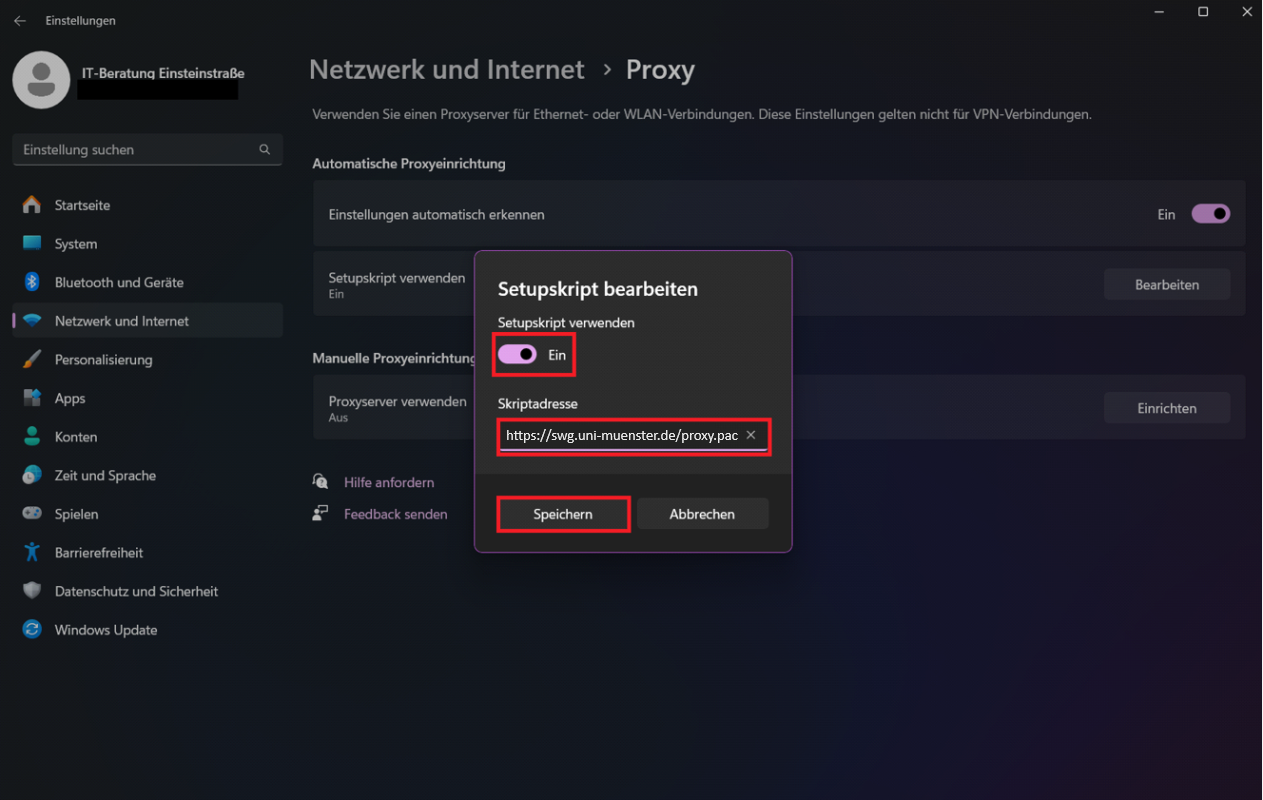
As a next step, the SWG proxy need to be installed.
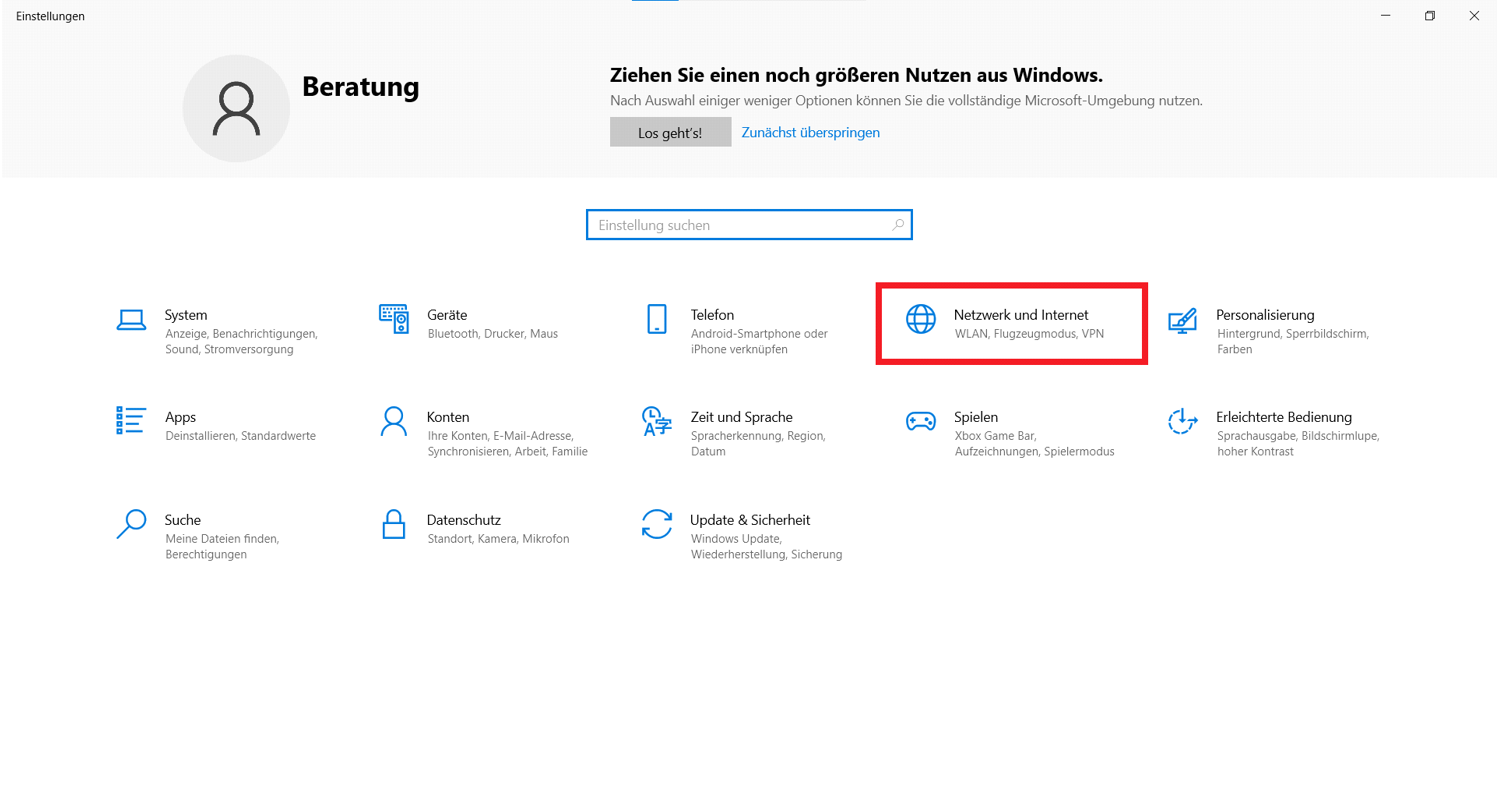
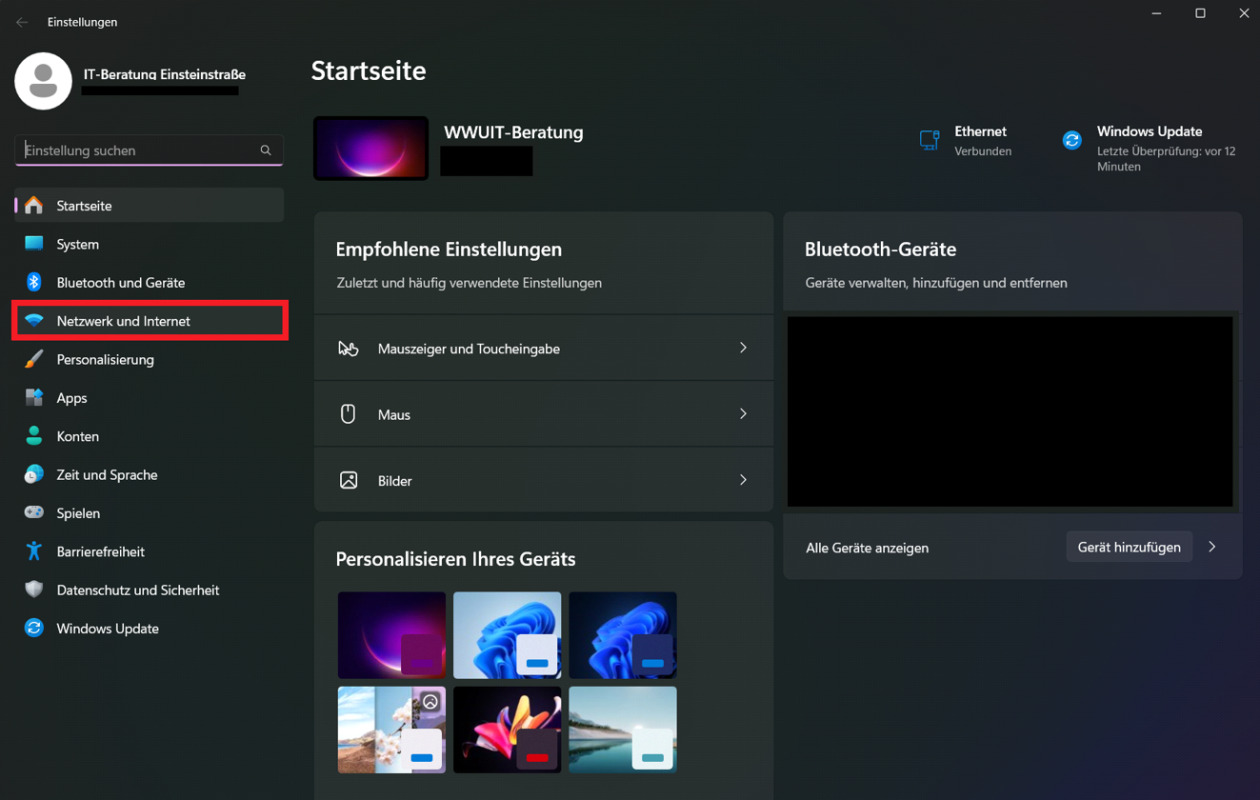
Enter Settings in the Windows search and open the system app.
Now open the "Network and Internet" settings.
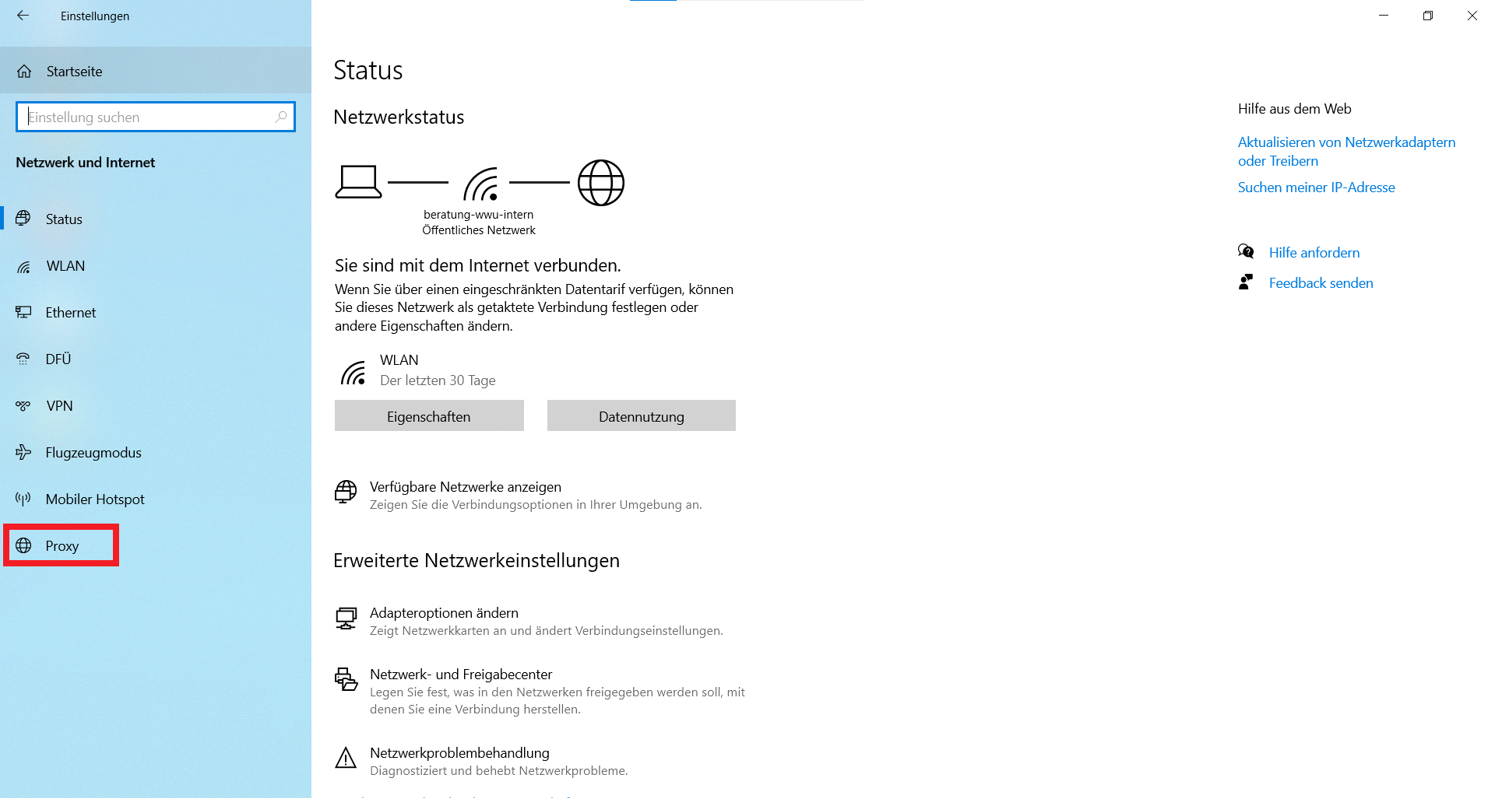
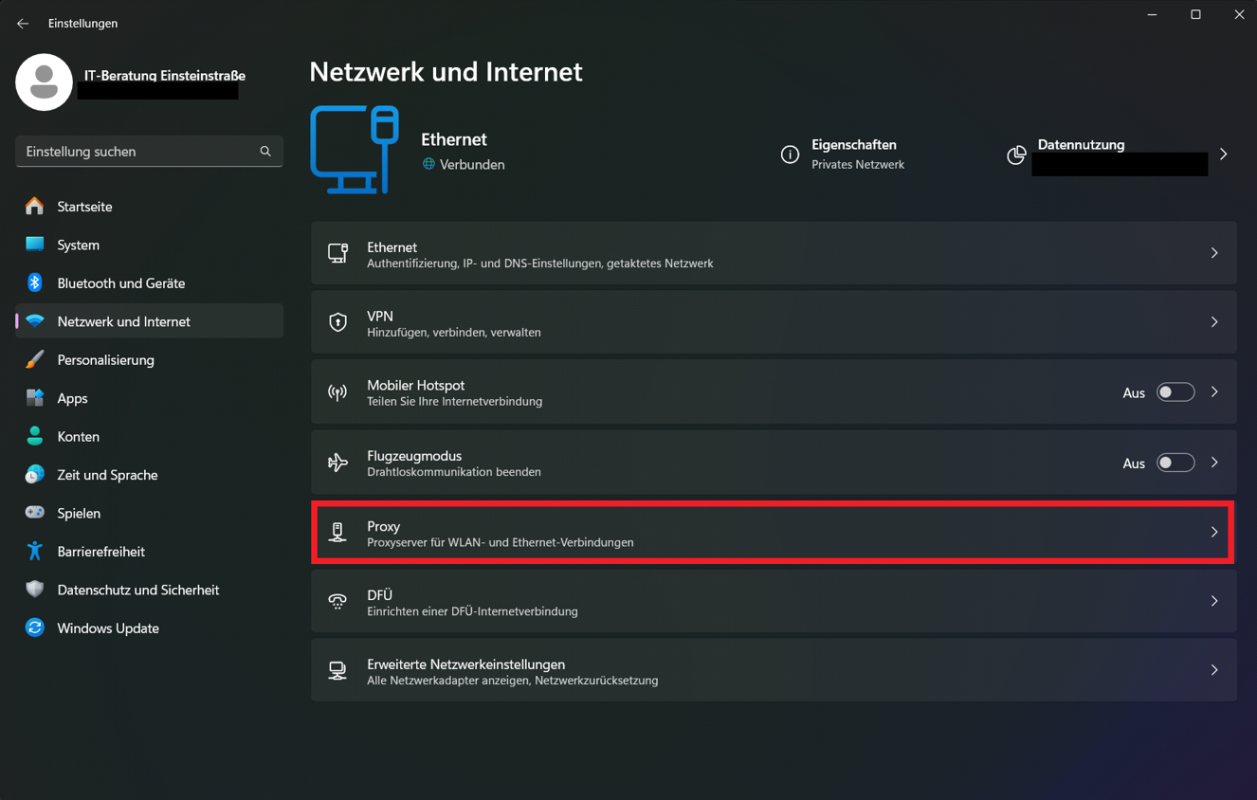
Click "Proxy" once on the left-hand side to open the proxy settings
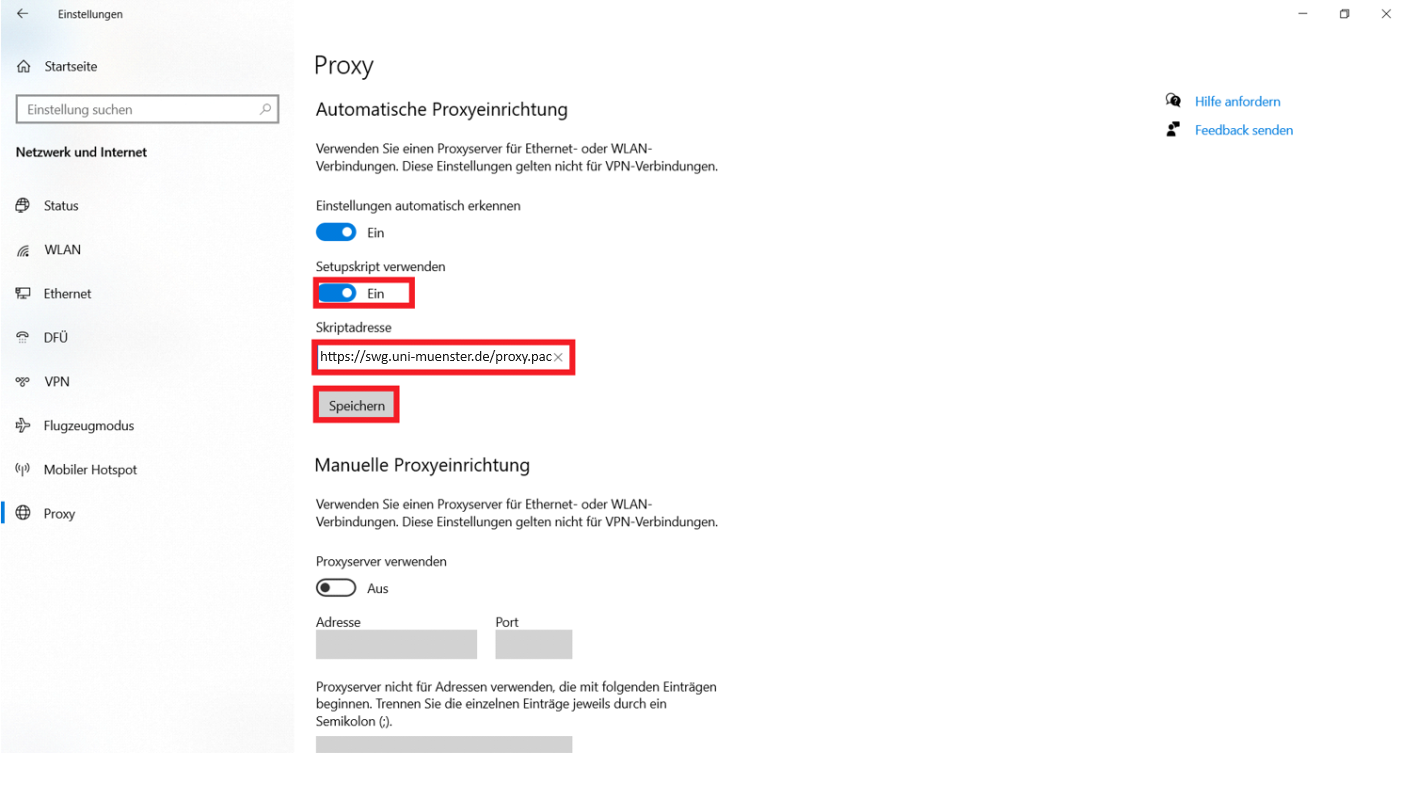
Activate the "Use setup scripts" slider. Enter https://swg.uni-muenster.de/proxy.pac in the empty field under "Script address" and confirm this by clicking on Save below.
Enter "Settings" in the Windows search and open the system app.
Now open the "Network and Internet" settings on the left-hand side.
Click on Proxy in the list to open the proxy settings.
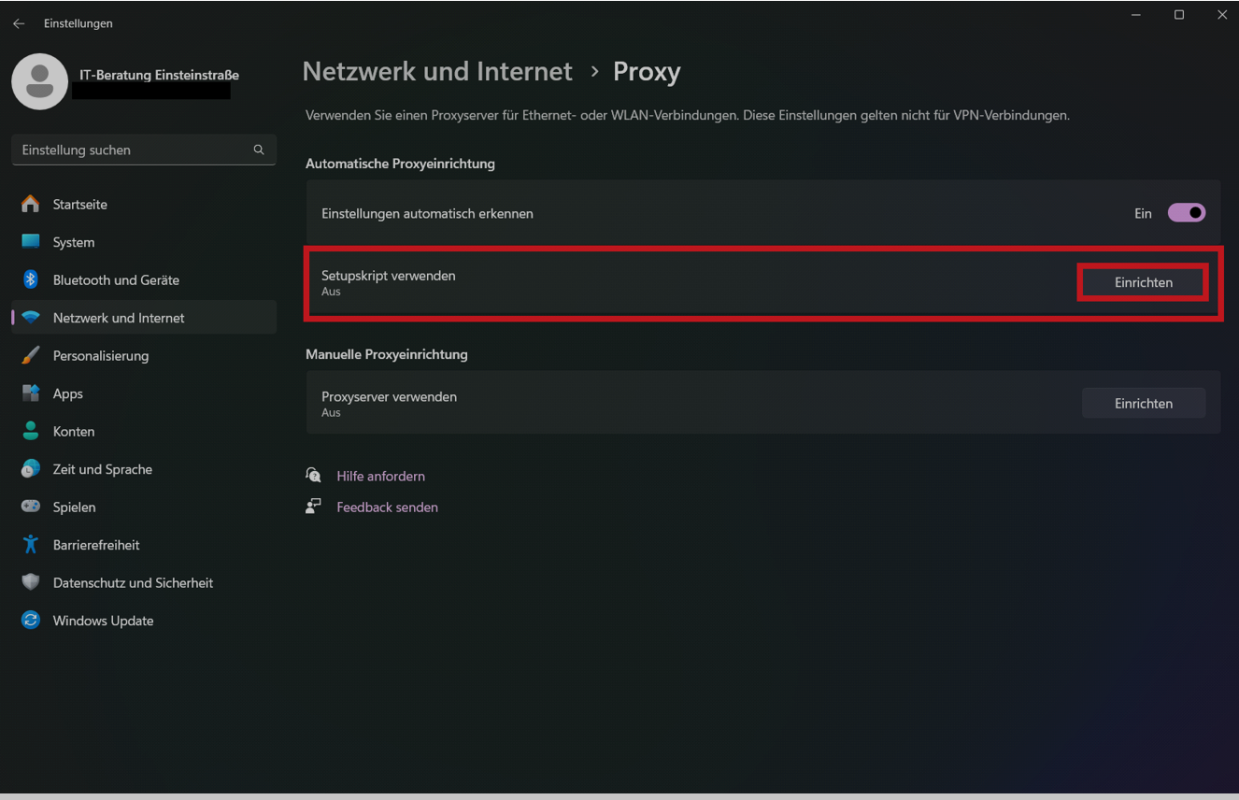
Under "Automatic proxy setup", click on Set up under "Use setup scripts".
Activate the "Use setup script" slider. Enter https://swg.uni-muenster.de/proxy.pac in the empty field under "Script address" and confirm this by clicking on Save below.
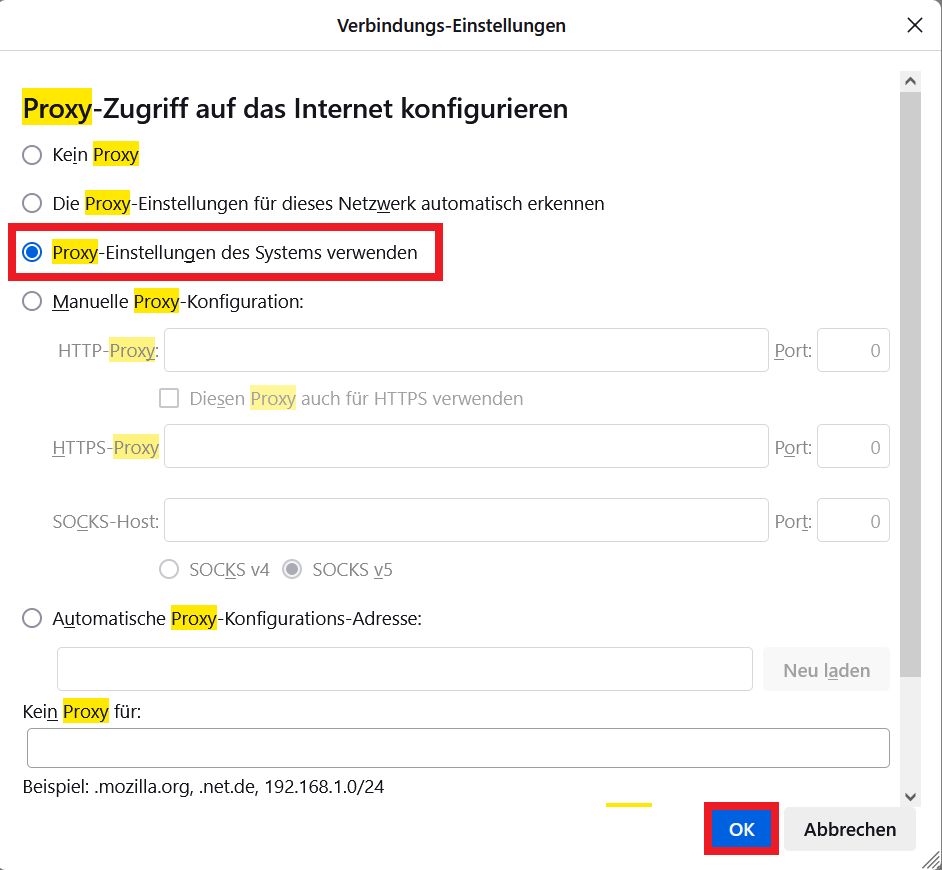
If you use Firefox as your Internet browser, please only follow these instructions!
Download the certificate . This will then appear in your download folder in Explorer.
Open Firefox and click on the three dashes in the top right-hand corner. Then click on "Settings".

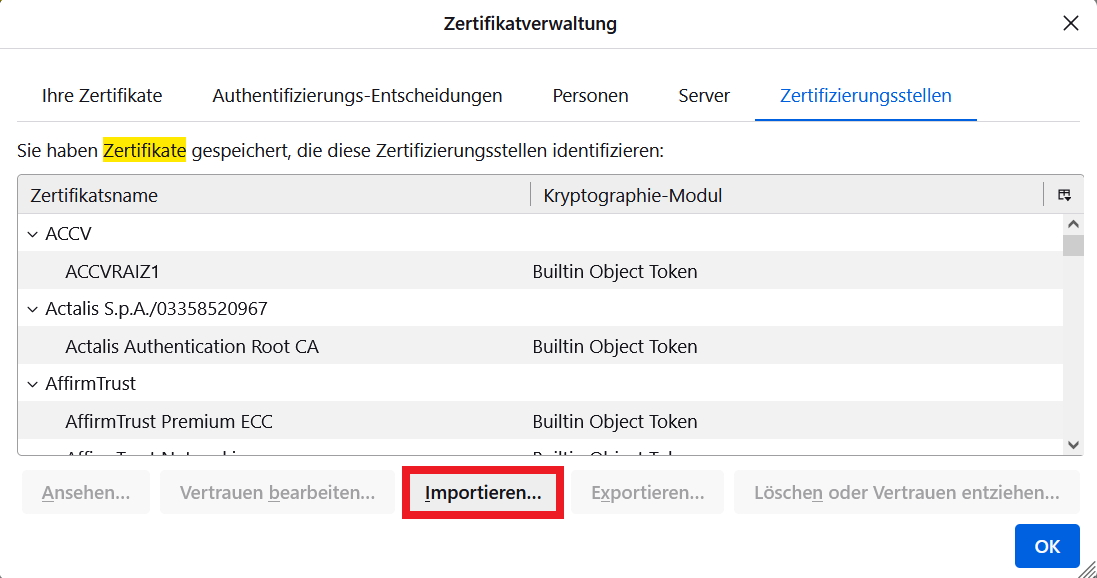
You will find a search field at the top center of the settings. Enter "Certificates" there. Then click on Show certificates.

Click Import at the bottom center of the following window.
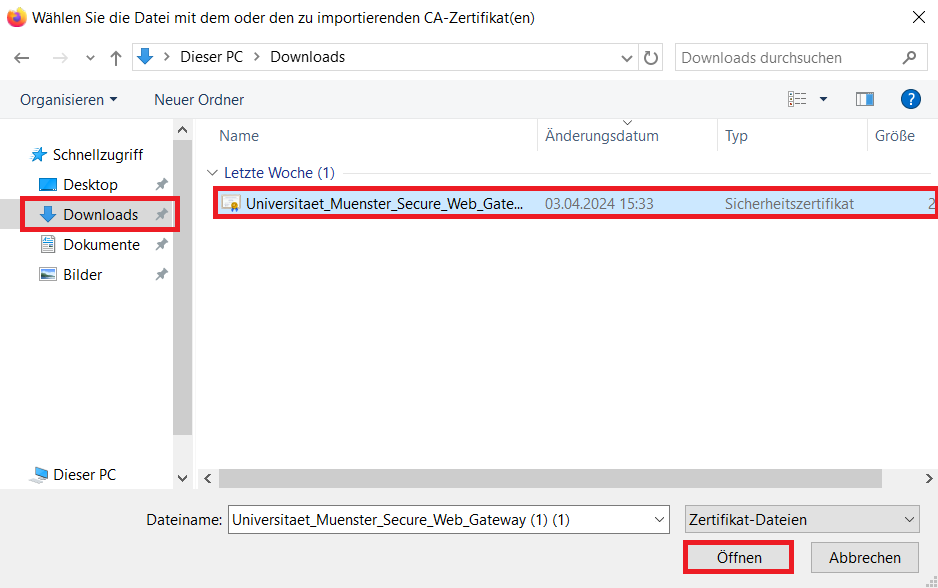
In the new window, click on "Downloads" (or the storage location of the downloaded certificate) on the left-hand side, select the certificate and confirm this with Open.
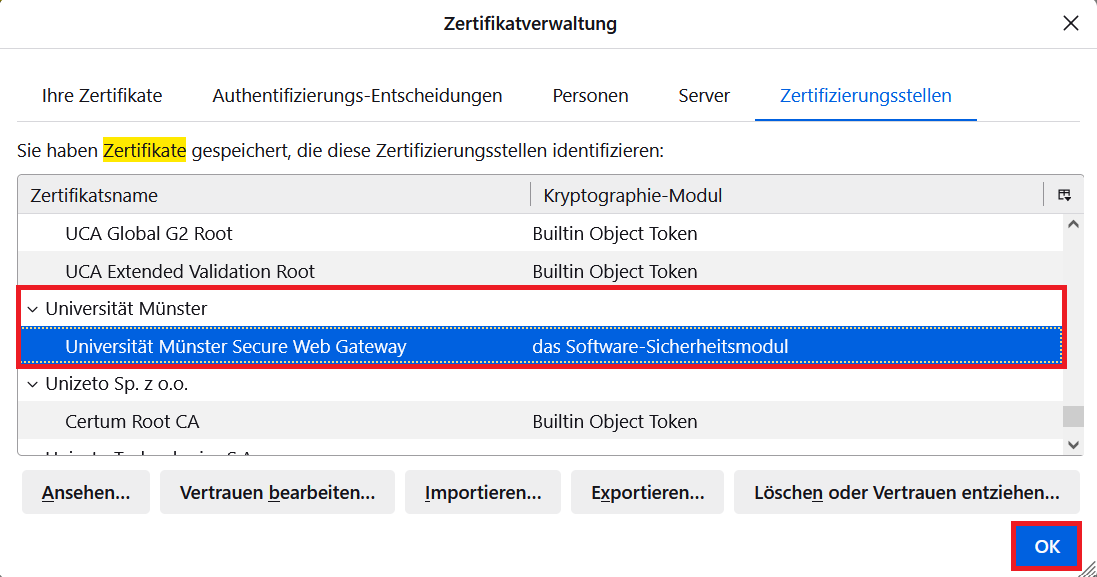
Activate the checkbox in front of "Trust CA to identify websites". Confirm this with OK.
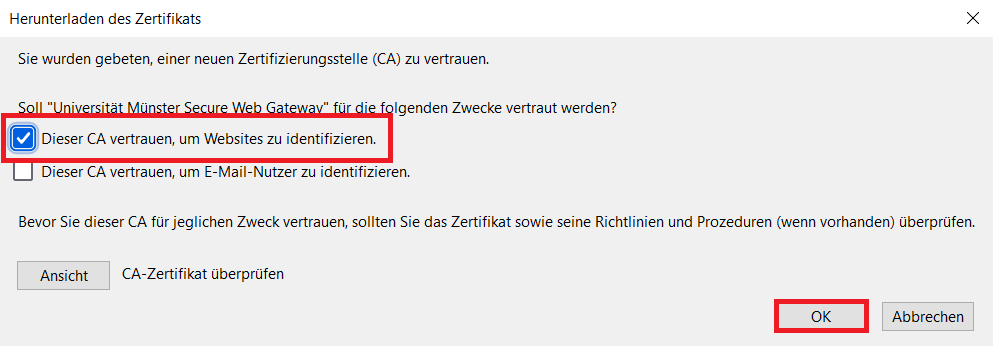
The "University of Münster Secure Web Gateway" certificate should now appear in the list under "University of Münster". Then click OK to close the window. However, leave the general Firefox settings open.
Go back to the search field at the top center and enter "Proxy". Then click on Settings (it should say "Proxy" in yellow above it).
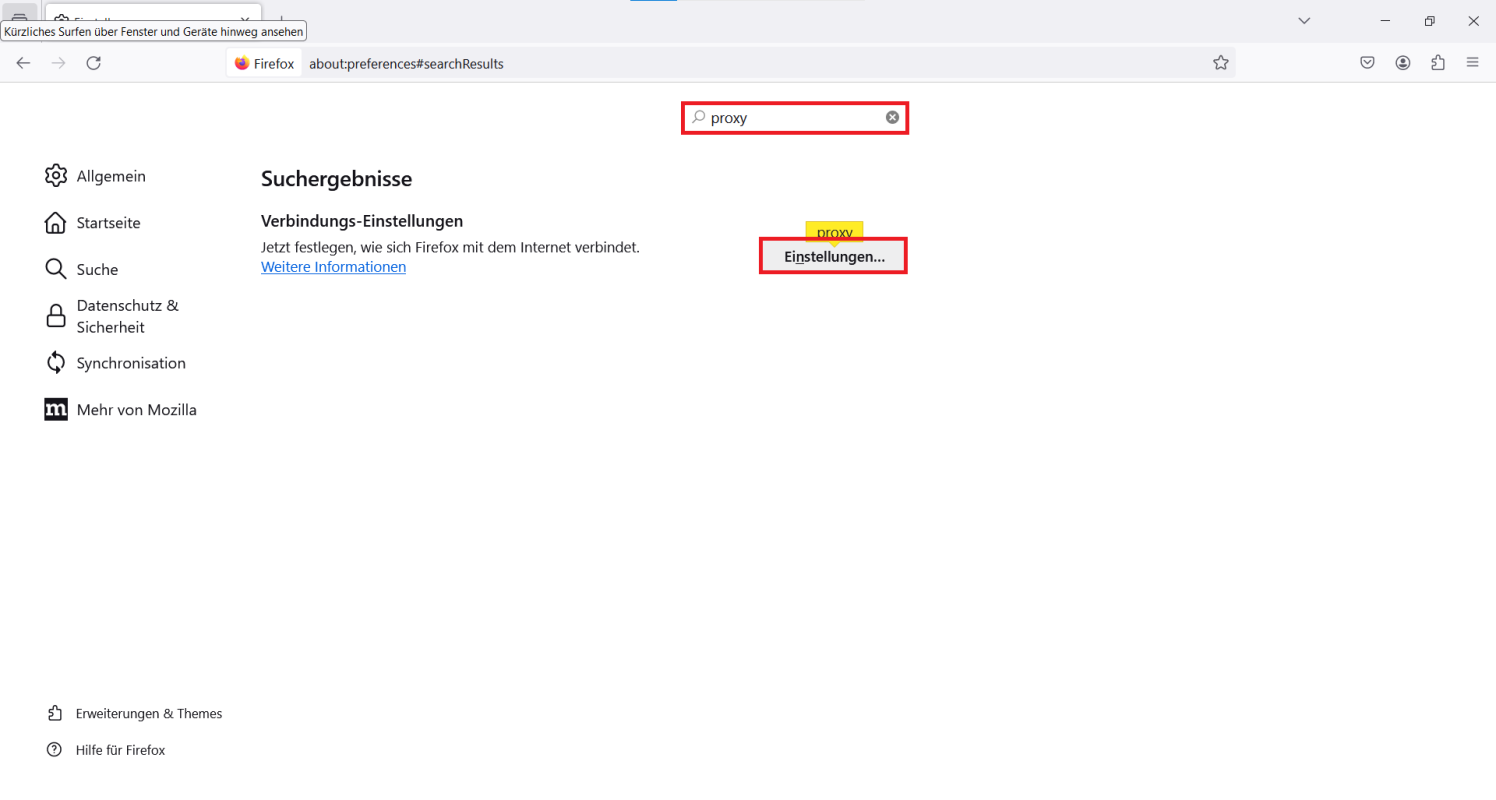
Now activate the item "Use system proxy settings". Leave the rest as it was before. Confirm with OK.