

Using pLANet.X under Linux
Requirement: You have installed the latest root certificate (CER).
Configuration under Ubuntu 18.04
1. Network Connection
Before using pLANet.X for the first time, your PC must be configured. Open the status menu in the upper right corner. Choose the option "Connecting" and click on "Wired Settings". Afterwards, add a new profile under "Wired".
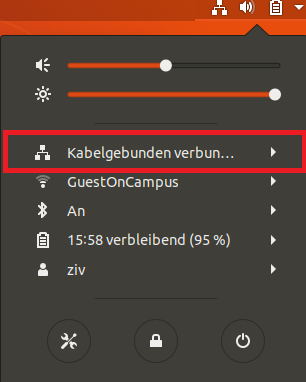
© ZIV 2. Security Settings
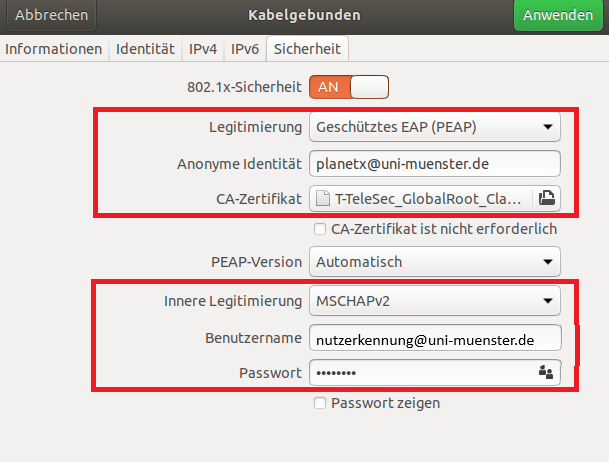
Choose the "Security" tab and make the following settings:
- 802.1x-Security: enable
- Authentication: ProtectedEAP (PEAP)
- Anonymous Identity: planetx@uni-muenster.de
- CA-certificate: T-TeleSec GlobalRoot Class 2 (if applicable install it before, see Specific Requirements)
- Inner Legitimation: MSCHAPv2
- User Name: Your University-ID@uni-muenster.de
- Password: Your password for network access
© ZIV Configuration under Ubuntu 20.04
1. Network Selection
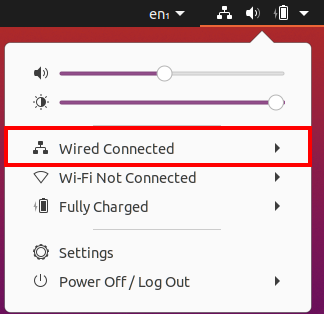
Before using pLANet.X for the first time, your PC must be configured. Open the status menu in the upper right corner. Choose the option "Connecting" and click on "Wired Settings".
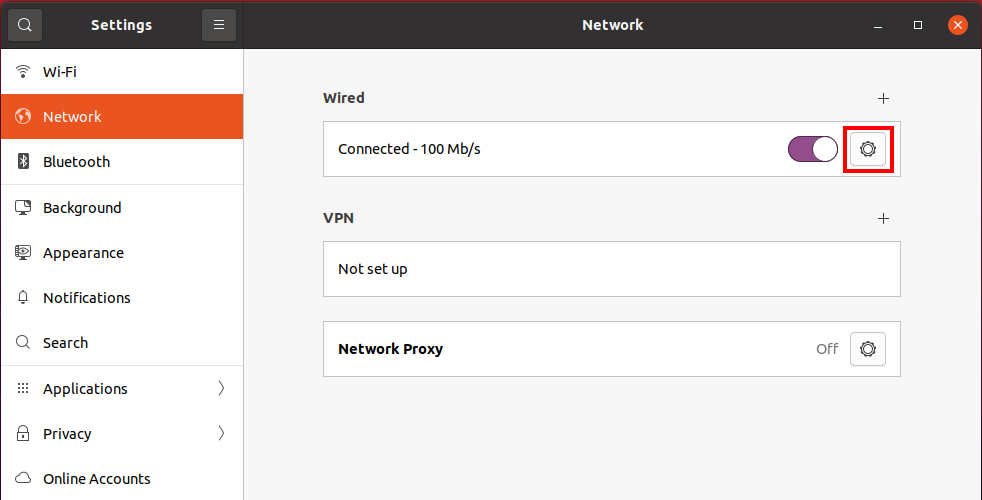
© Uni MS IT The available wired networks are shown. Click on the cogwheel symbol next to the active wired connection in order to access the security settings.
© Uni MS IT 2. Security Settings
Choose the "Security" tab and make the following settings:
- 802.1x-Security: enable
- Authentication: Protected EAP (PEAP)
- Anonymous Identity: planetx@uni-muenster.de
- CA certificate: rootca.cer or T-TeleSec GlobalRoot Class 2 (if applicable install it before, but can usually be found under the system path „file:///etc/ssl/certs/T-TeleSec_GlobalRoot_Class_2.pem“)
- Inner Legitimation: MSCHAPv2
- User Name: Your University ID@uni-muenster.de
- Password: Your password for network access
Afterwards, apply the settings by clicking on "Apply".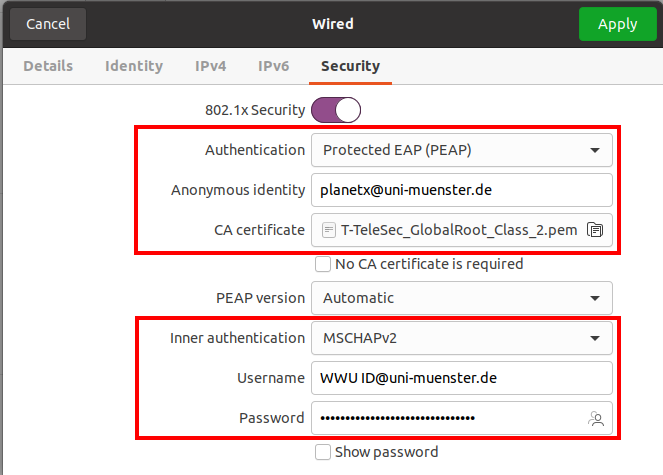
© Uni MS IT