Setting up WLAN under Android
Requirements: You have installed at least Android 4.4. (You can check this via the settings menu: Menu > Settings > About Phone / Telephone Info > Android Version.)
Note: To download the certificate, you can use our guest WiFi GuestOnCampus.
Installing the New Certificate
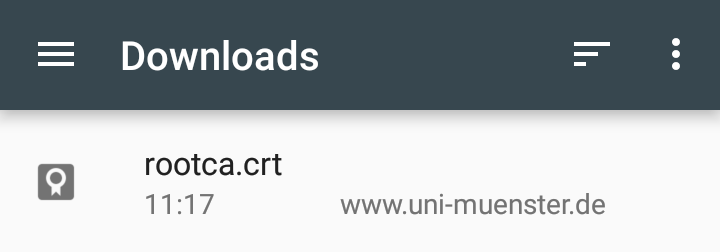
1. Download of the Certificate
Download the required certificate via this link WiFi-certificate or the shown QR code. If the installation of the certificate does not start automatically, go to "Downloads" in the file manager of your smartphone and tap the file "rootca.cer (rootca.crt)".

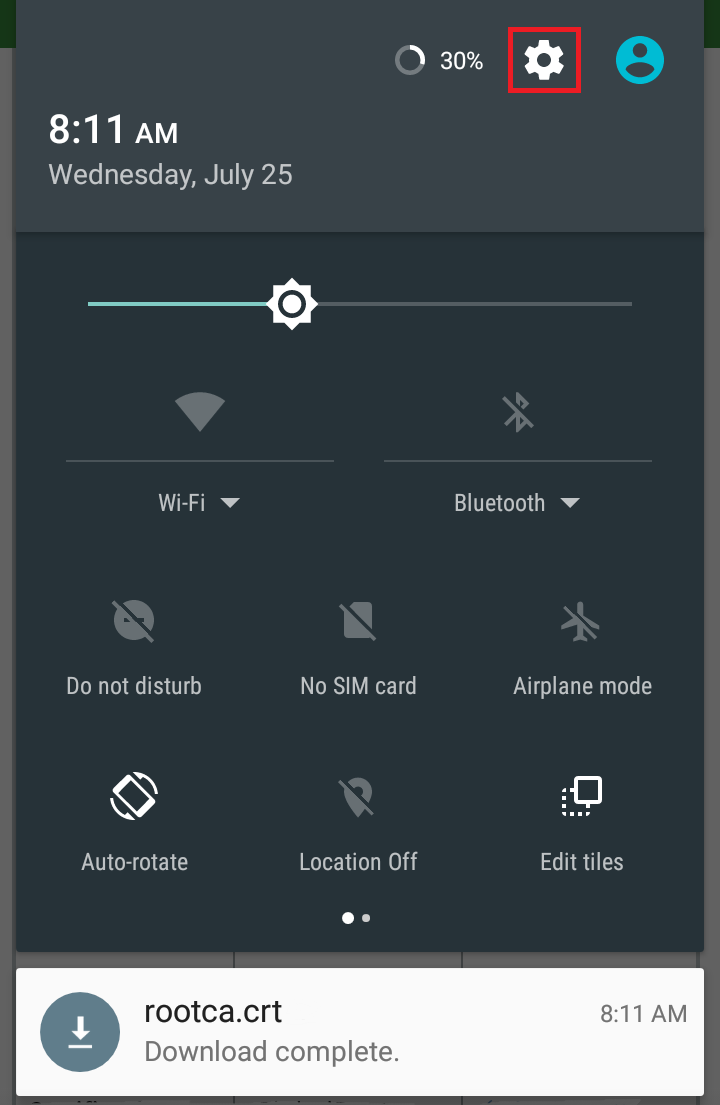
© ZIV 2. Open the Settings
If the installation of the certificate starts immediately, please go to step 6 of this manual. If you get the message "Installation not possible because the certificate file could not be read", please go to the settings of your smartphone.
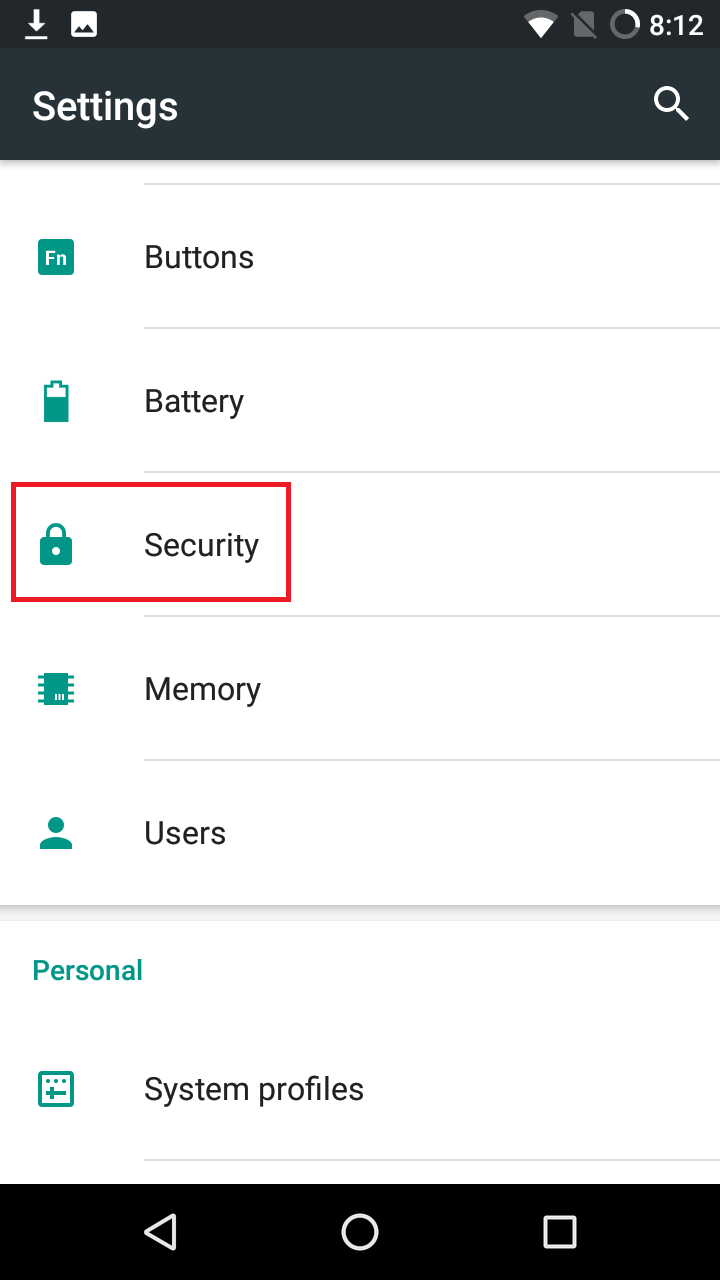
© ZIV 3. Security
Select the item "Security" in the settings (if applicable, the item is called "Biometric data and security").
© ZIV 4. Install from Storage
Then select "Install from storage" (if applicable, to be found under the item "Other security settings") -> "WLAN certificate".
If this option is not available, go to "Encryption and credentials" -> "Install a certificate" -> "WLAN certificate".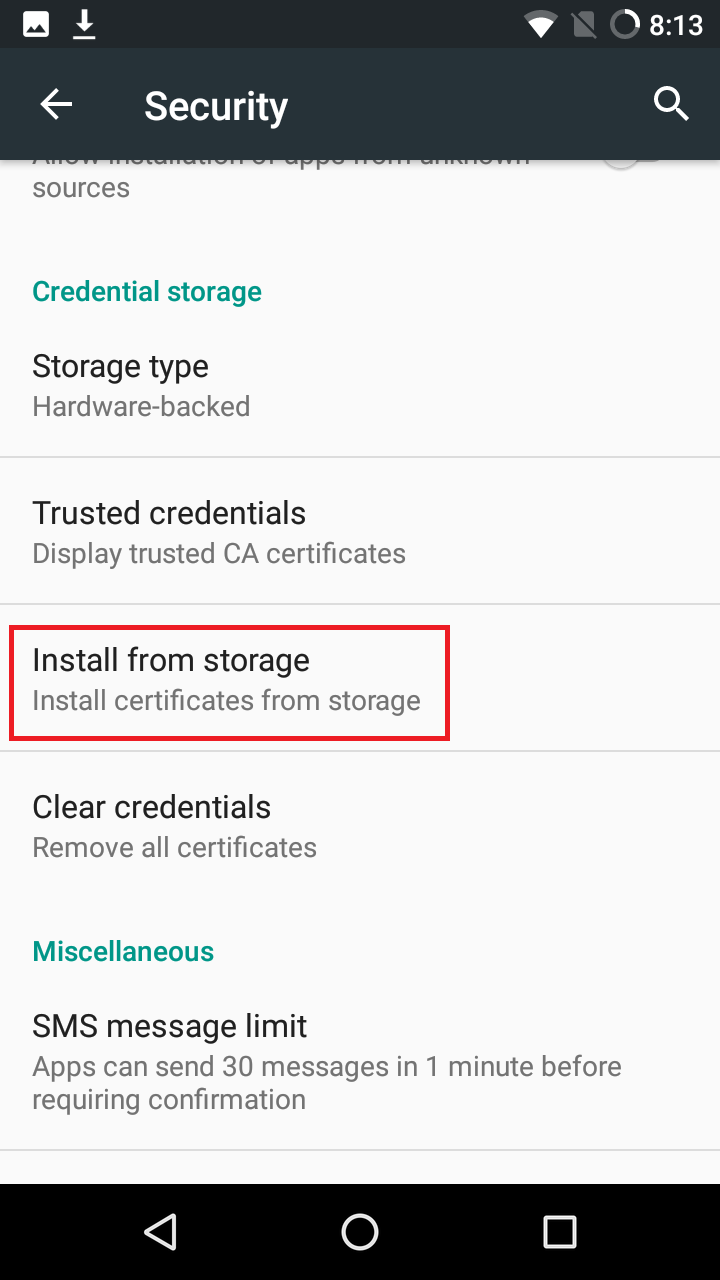
© ZIV 5. Select certificate
Tap the downloaded certificate.
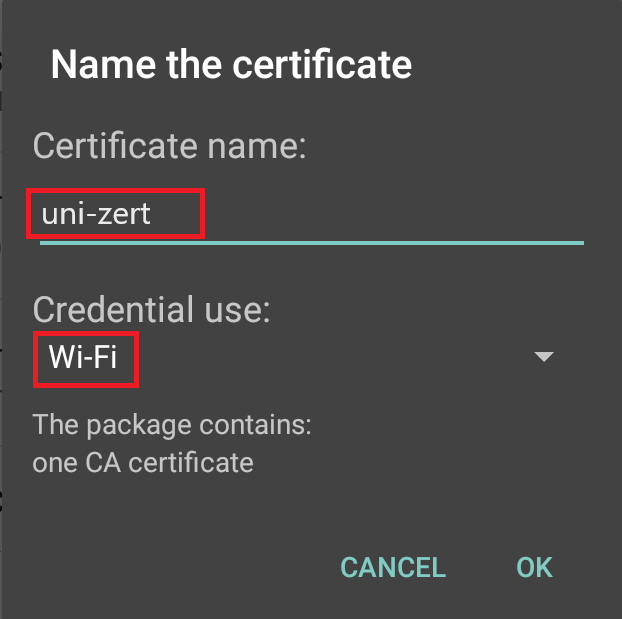
© ZIV 6. Naming the Certificate
Give the certificate a name of your choice and, if necessary, select "WiFi" for the "Credential use". (If you have not set a screen lock PIN, you will be asked to do so in the next step. If the installation of the certificate does not proceed automatically, please repeat the previous steps.) Then confirm your entries with "OK".
© CIT WiFi Setup
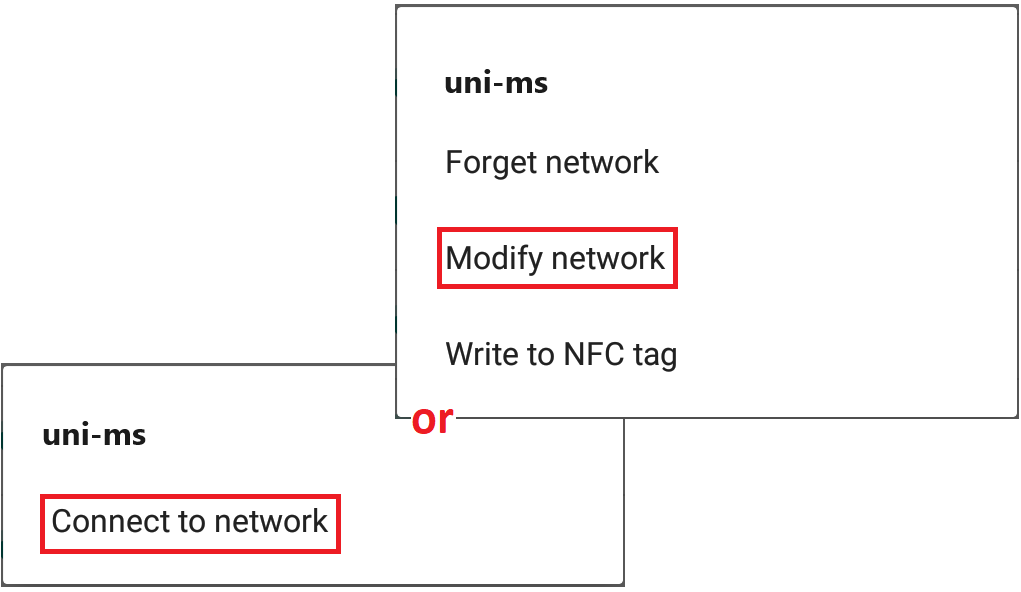
3. Opening the WLAN settings
Go to the WiFi settings of your smartphone. (For some devices, you find your WiFi settings under: Settings > Wireless > Wi-Fi.) Tap on the WiFi "uni-ms" until a context menu appears. Select either "Modify Network" or "Connect to network" (if you have never connected to this WiFi before).
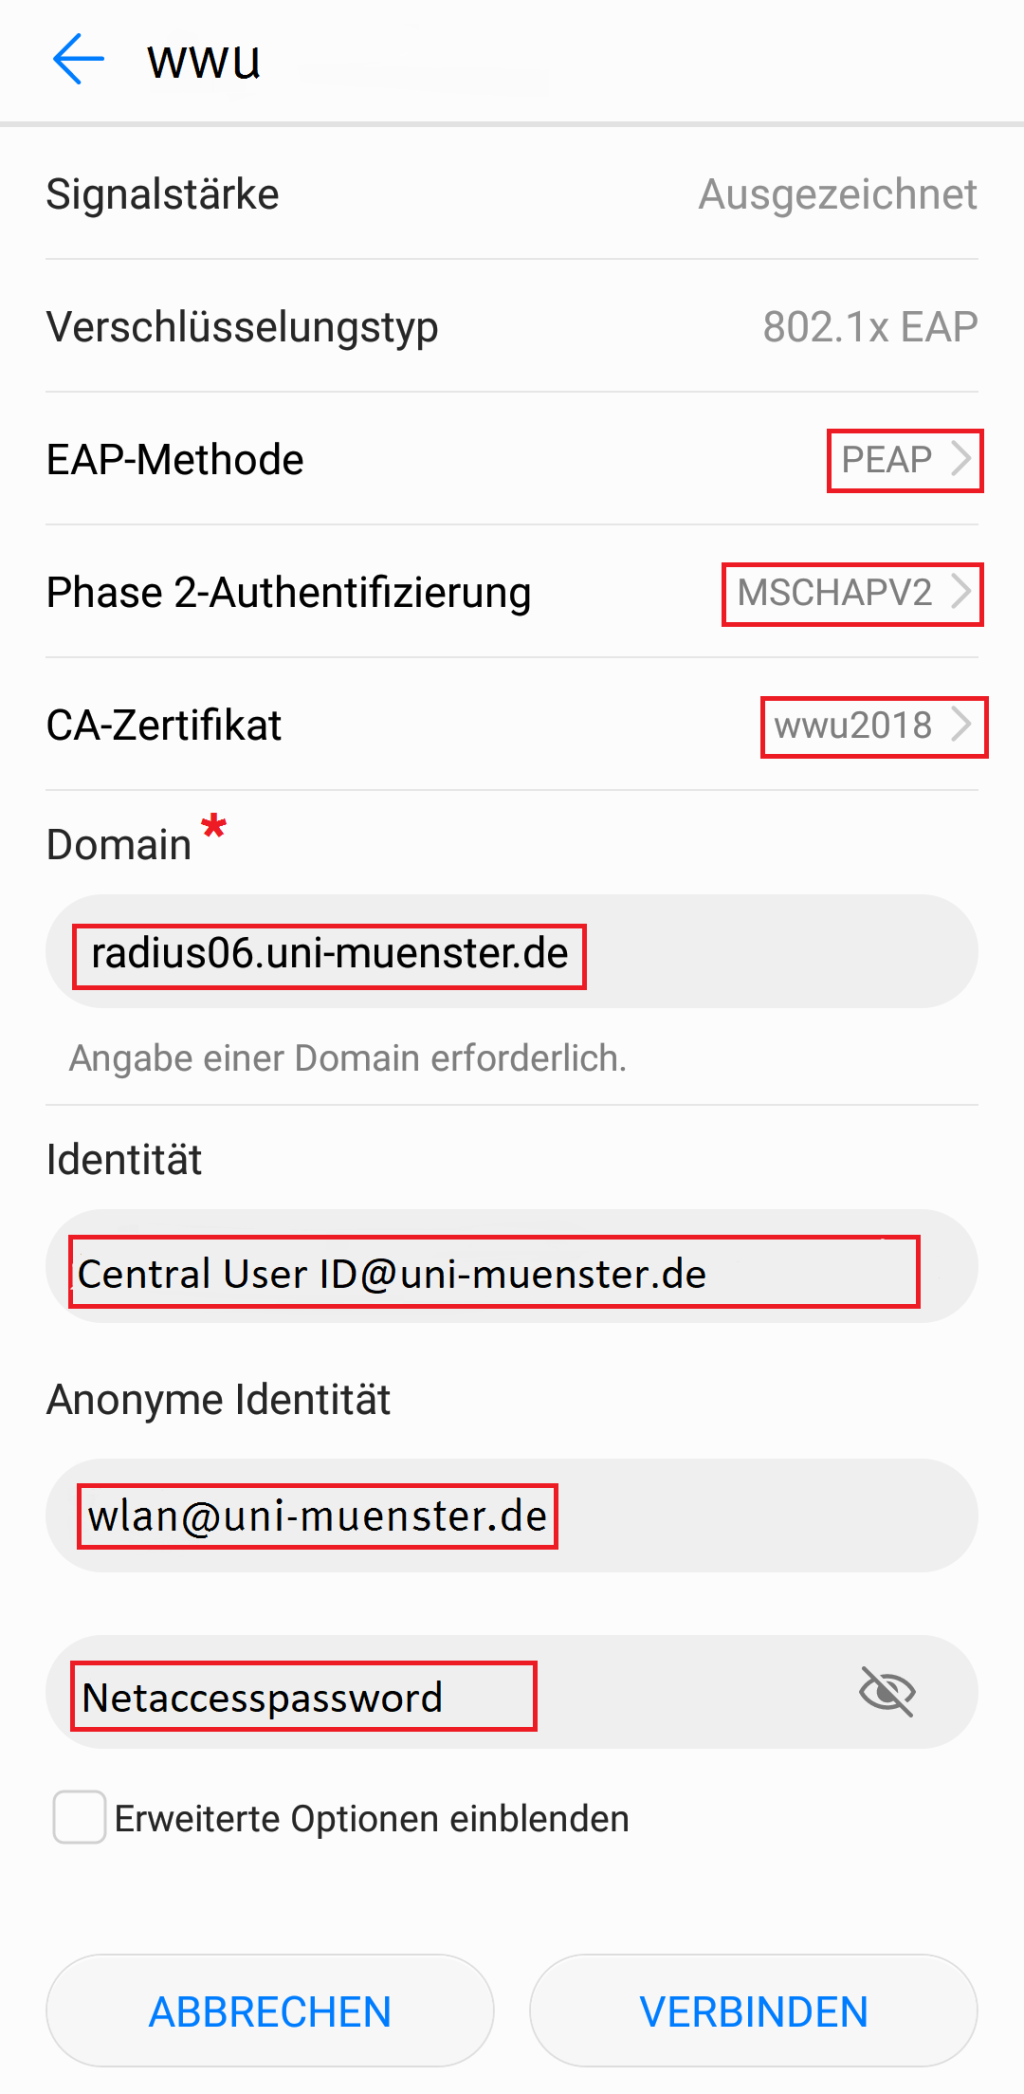
© CIT 4. Settings
Make the following settings in the window that appears:
EAP method: PEAP (ATTENTION: with Samsung devices from Android 11, TTLS may have to be set)
Phase 2 authentification: MSCHAPV2
CA certificate: the installed certificate (you chose the name by yourself)
Domain*: radius06.uni-muenster.de
Identity: YourUniversity-ID@uni-muenster.de
Anonymous Identity: wlan@uni-muenster.de
Password: Your network access password
Make sure that there are no spaces after the entries, as this will lead to errors when establishing a connection.
* Not available on all android versions, can be omitted if not available.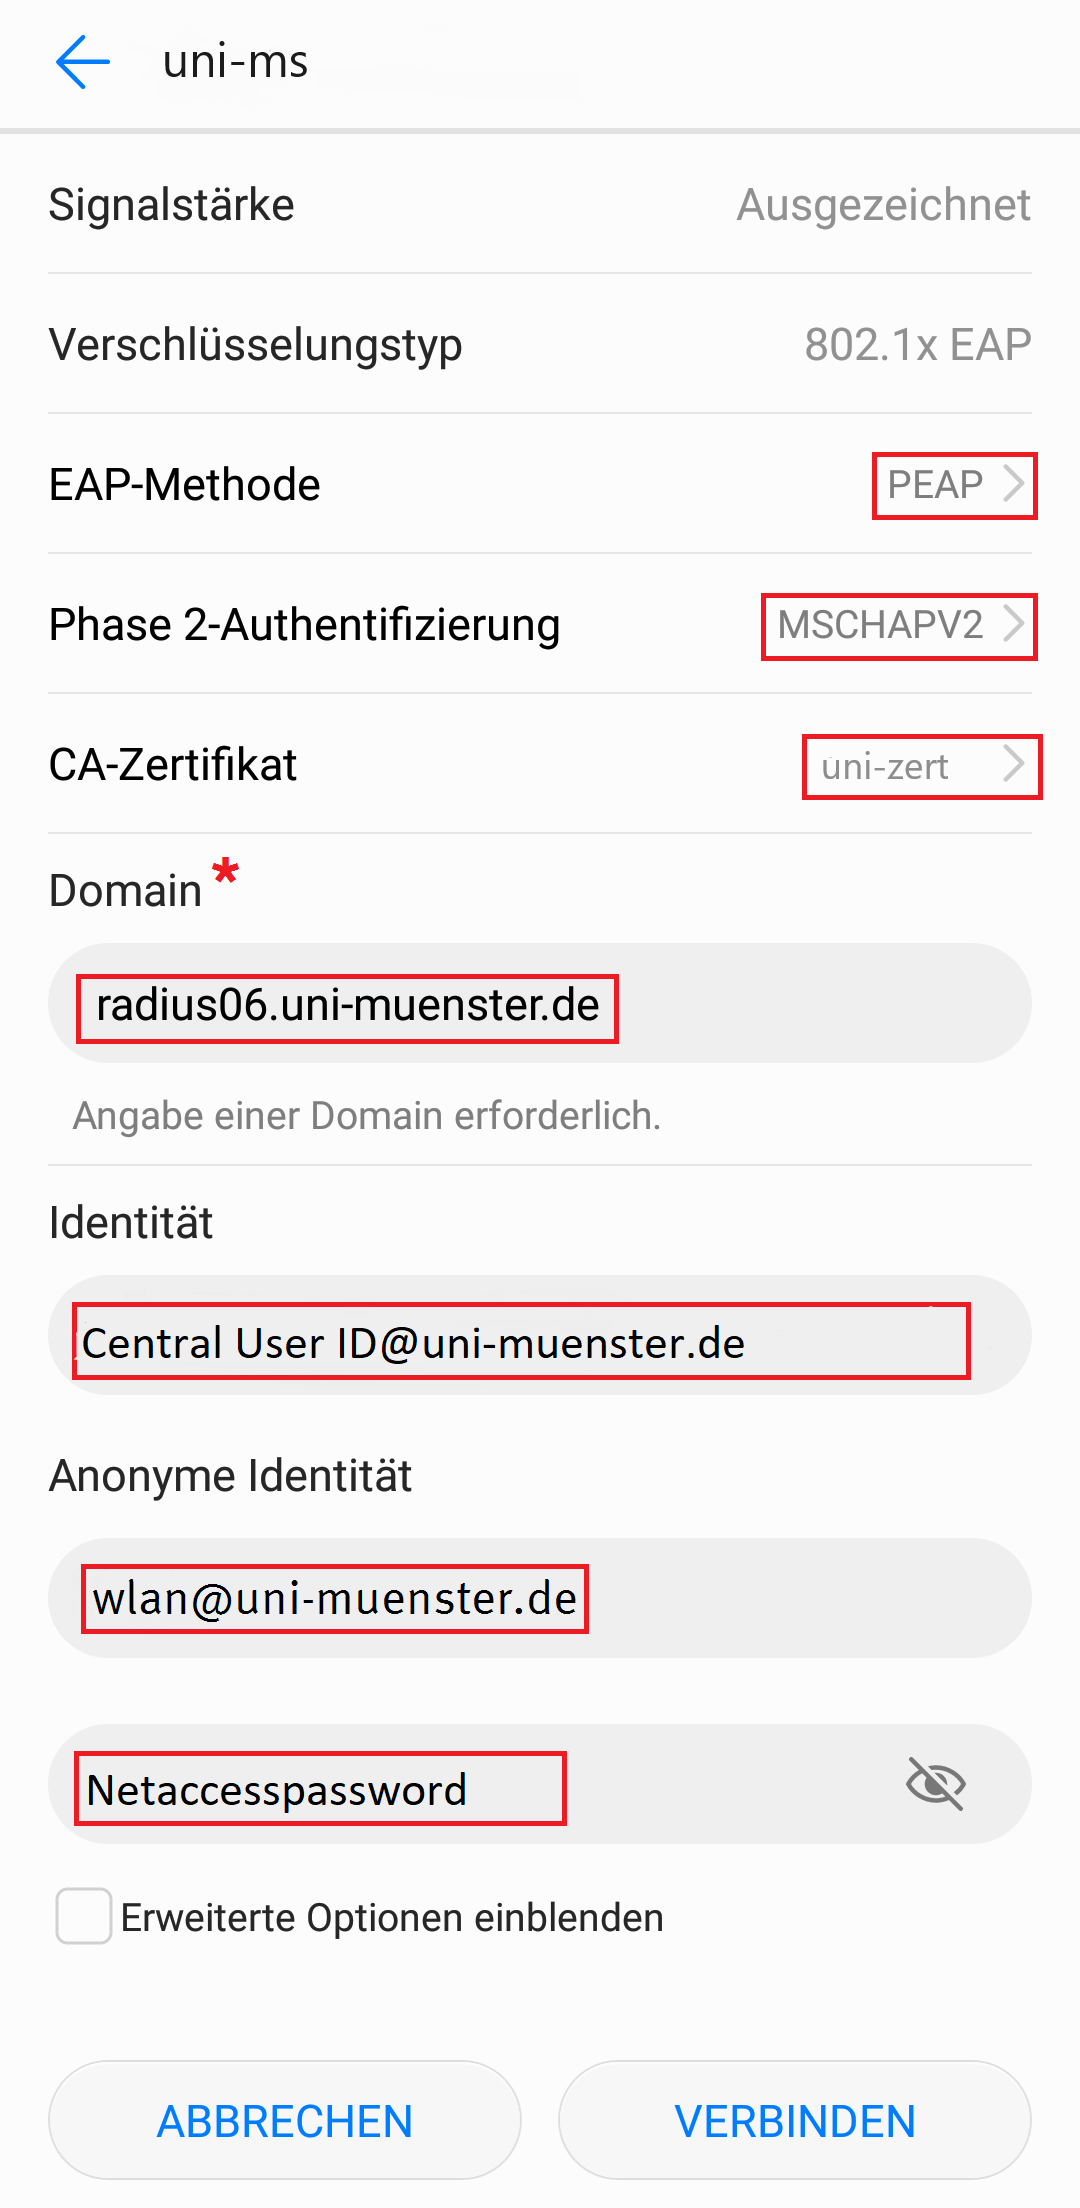
© CIT 5. WiFi Connection
After clicking "Connect", your smartphone should connect to the WiFi network.

© CIT