

Setting up a VPN Connection (VPN AnyConnect) with Windows
Requirements:
- You have installed an up-to-date version of Microsoft Windows.
- You have set your network access password in the IT Portal.
- You have registered an one-time password. OTP
Installation of the VPN-Client
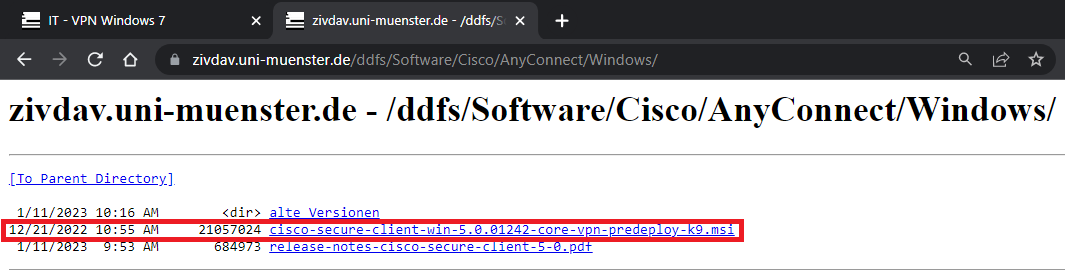
1. Software Download
Download the Cisco AnyConnect VPN Client.
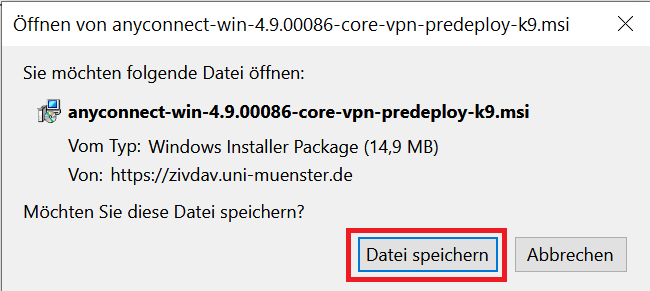
© Uni MS IT 2. Saving the File
Confirm to save the Cisco AnyConnect Software by clicking on "Save file".
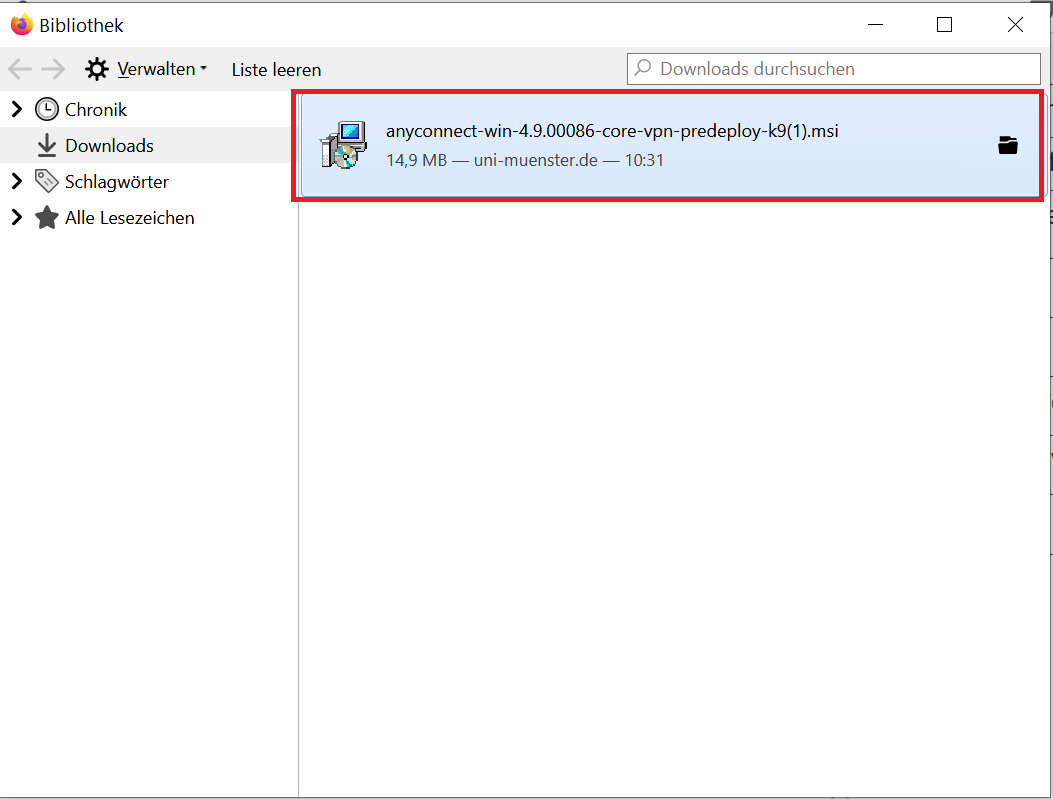
© Uni MS IT 3. Starting the Installation
Start the installation by double clicking the downloaded file.
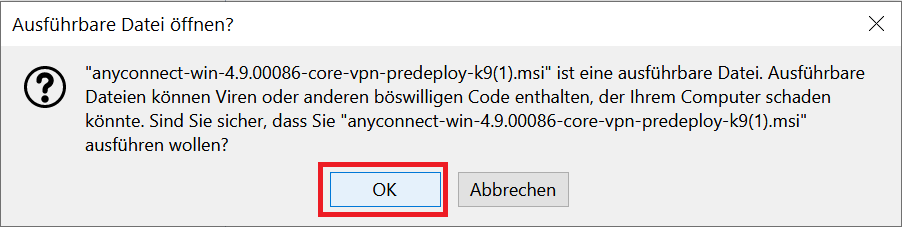
© Uni MS IT 4. Executing the Installer Package
Confirm the execution of the Installer-Package with click on "Execute".
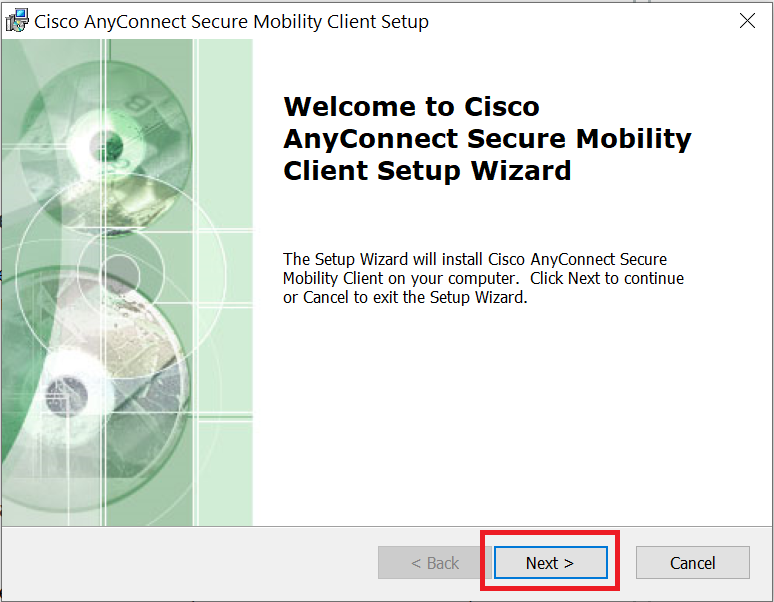
© Uni MS IT 5. Starting the Installation Client
Click "Next" to start the Cisco AnyConnect Secure Mobility Client.
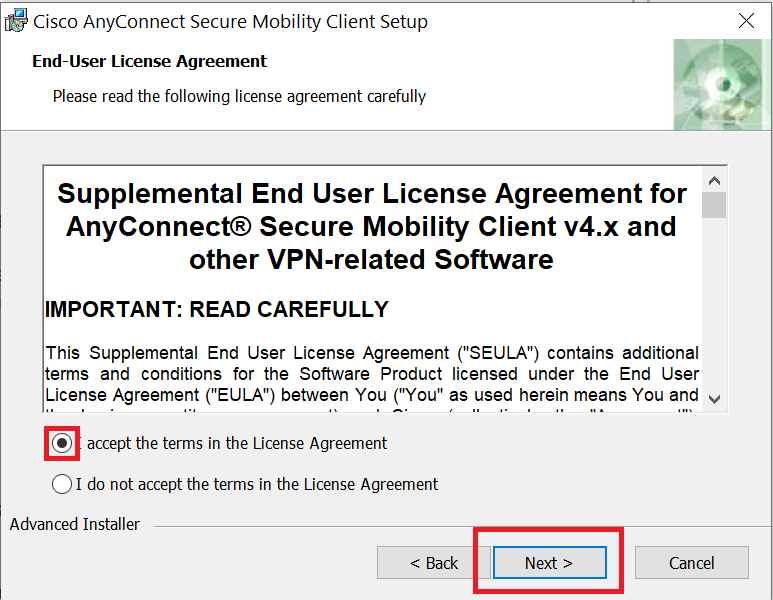
© Uni MS IT 6. Accepting the License Agreement
Accept the license terms by selecting "I accept the terms in the License Agreement". Then select "Next".
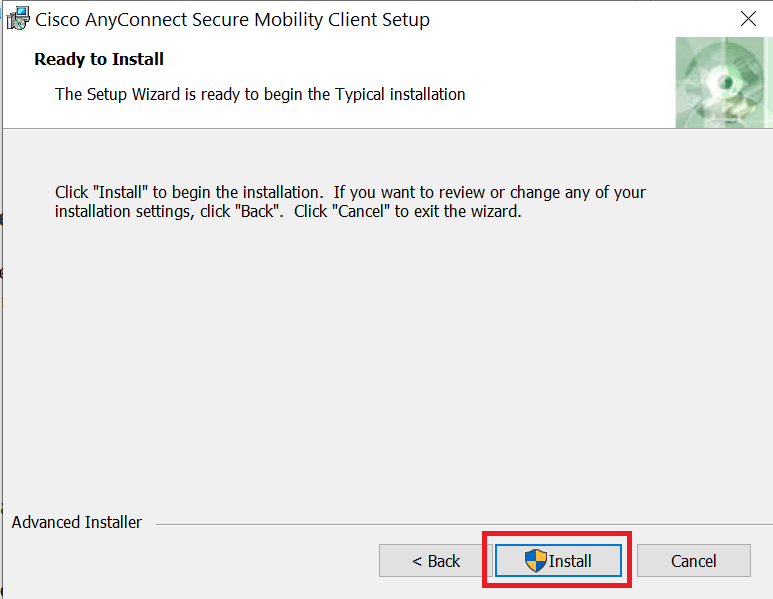
© Uni MS IT 7. Installation of the Cisco AnyConnect Client
Click "Install". You may need to confirm that new software can be installed on your computer by the Cisco AnyConnect Client. Confirm the installation with "Yes".
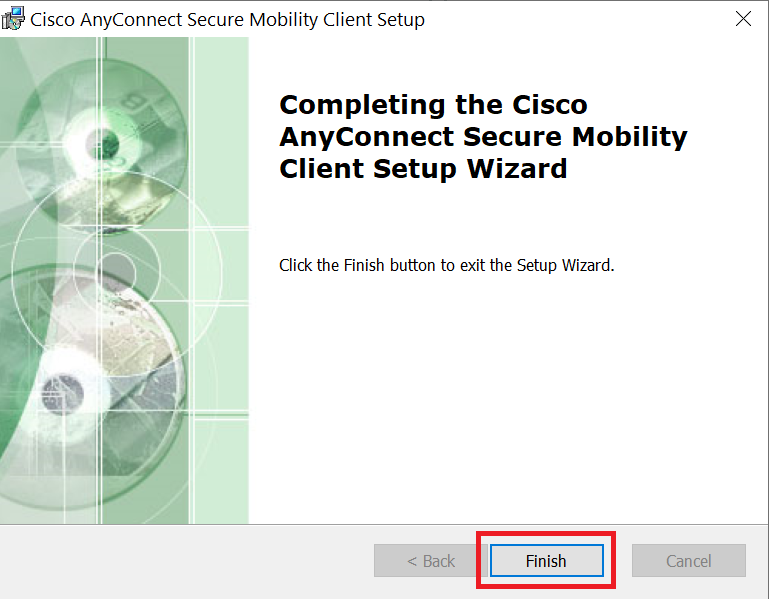
© Uni MS IT 8. Completing the Installation
Click "Finish" to complete the installation.
© Uni MS IT Starting & Ending the VPN-Connection
1. Opening the Cisco AnyConnect Client
Start the Cisco Secure Client.

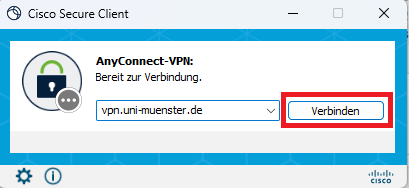
© Uni MS IT 2. Entering the VPN-Address
Enter vpn.uni-muenster.de as the VPN address and click "Connect".
ONLY for administrative staff: vpn.uni-muenster.de/zuv-home
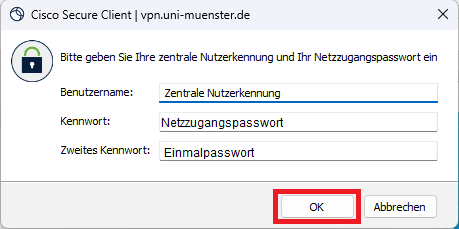
© Uni MS IT 3. Entering Your User Data
Enter your university ID, your password for network access and the One Time Password (OTP/second password) and click "OK" (Note: The network access passwork is not your normal university password. You can set it in the IT Portal). In the next step, click on the "Accept" button.
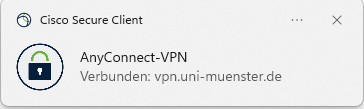
© Uni MS IT 4. Established Connection
Your connection is established. You can additionally see from the ball with the closed lock in the taskbar that a VPN connection has been established.
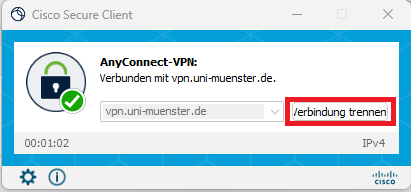
© Uni MS IT 5. Disconnecting the VPN-Connection
If the VPN connection is no longer needed, click on the icon in the taskbar and click "Disconnect".
© Uni MS IT
Special VPN-Profile for Exchange and OWA
To use Exchange on personal devices, you need the following dedicated VPN connection. This connection only manages Exchange traffic and does not have access to your other data traffic. On work devices, you can use the "Standard" connection listed above.
1. Enter Server
Enter the following server address in the field:
https://vpn.uni-muenster.de/exchange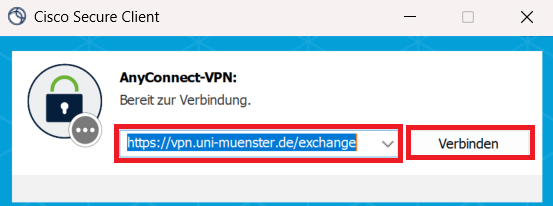
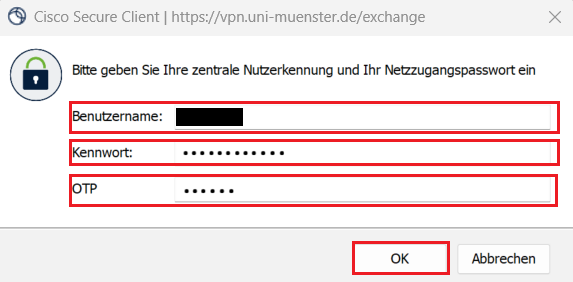
© CIT 2. Login
Log in using your university ID, your net-access password and your one-time-password.
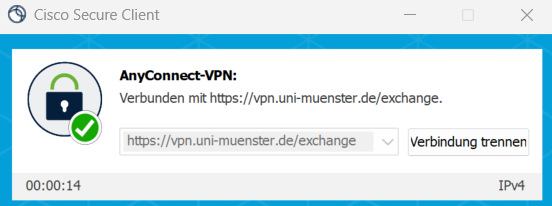
© CIT You are connected and can use Exchange. The Connection is saved as "Exchange".
© CIT