Setting up a VPN Connection (Cisco Secure Client) with macOS
Requirements:
- You have installed an up-to-date version macOS.
- You have set your network access password in the IT Portal.
- You hve set a one time password (OTP).
Installation of the VPN-Client
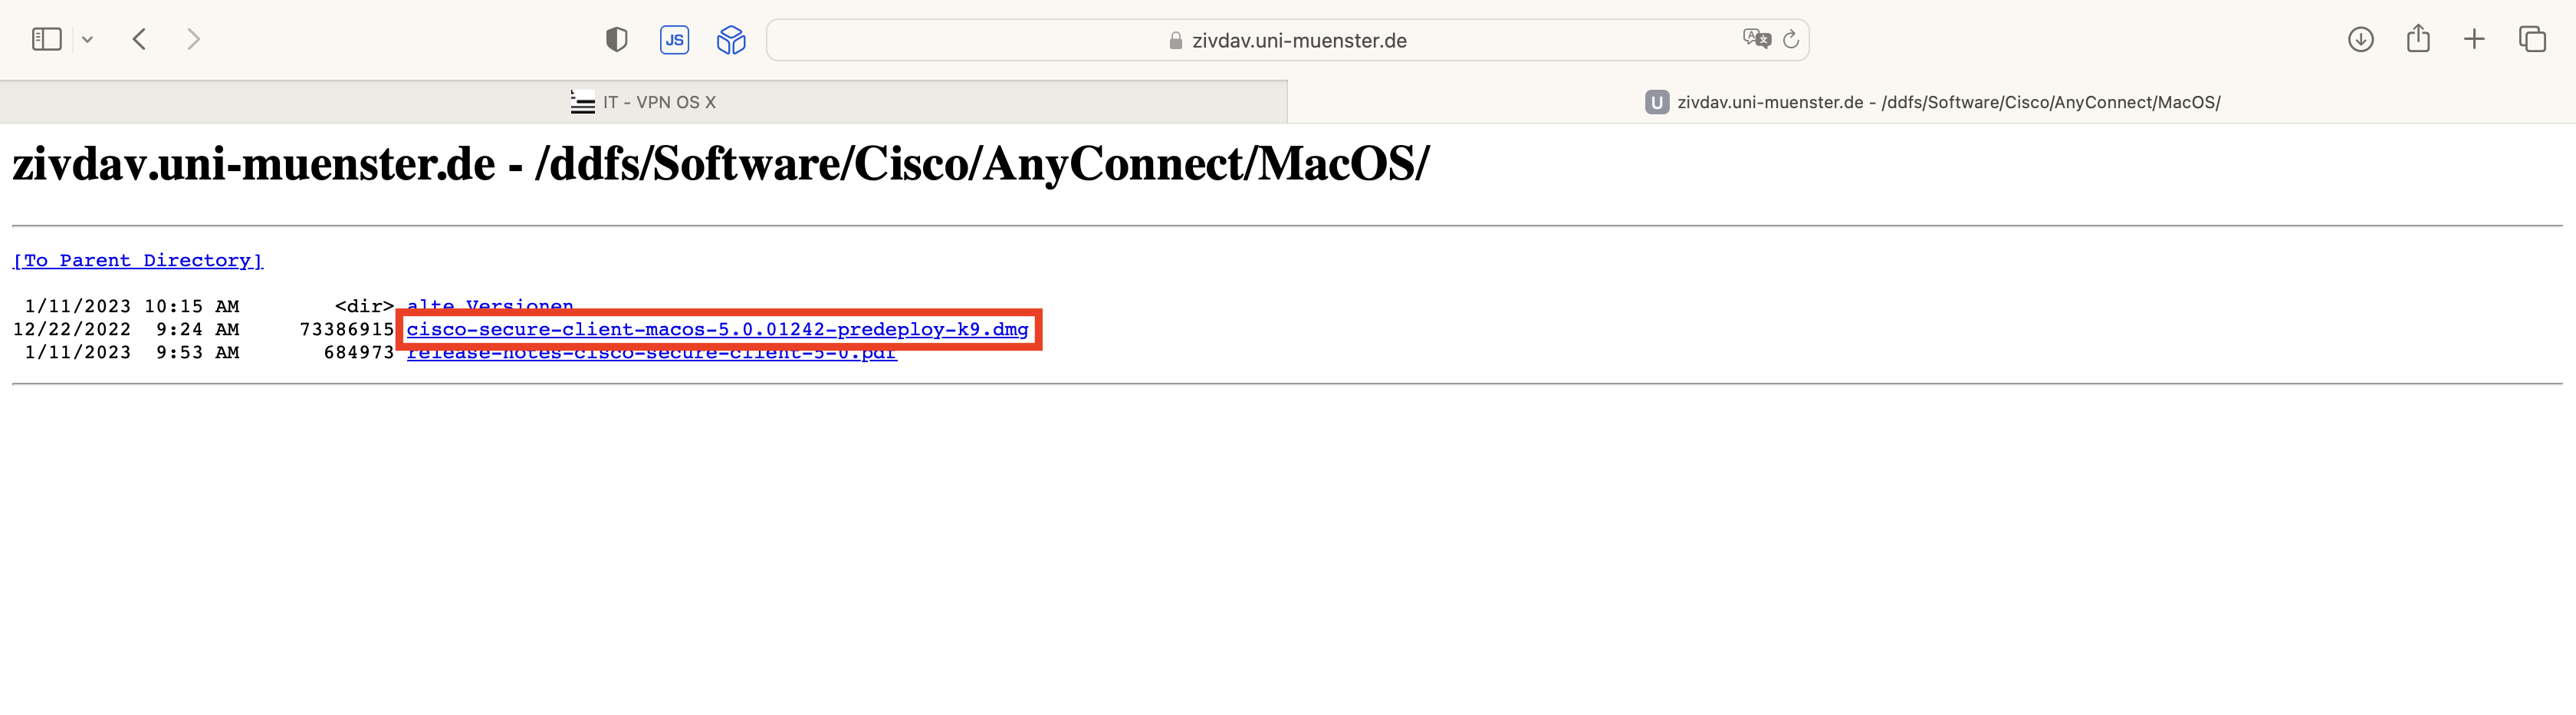
1. Software Download
Download the Cisco Secure Client. You may need to sign in with your university ID and password again.
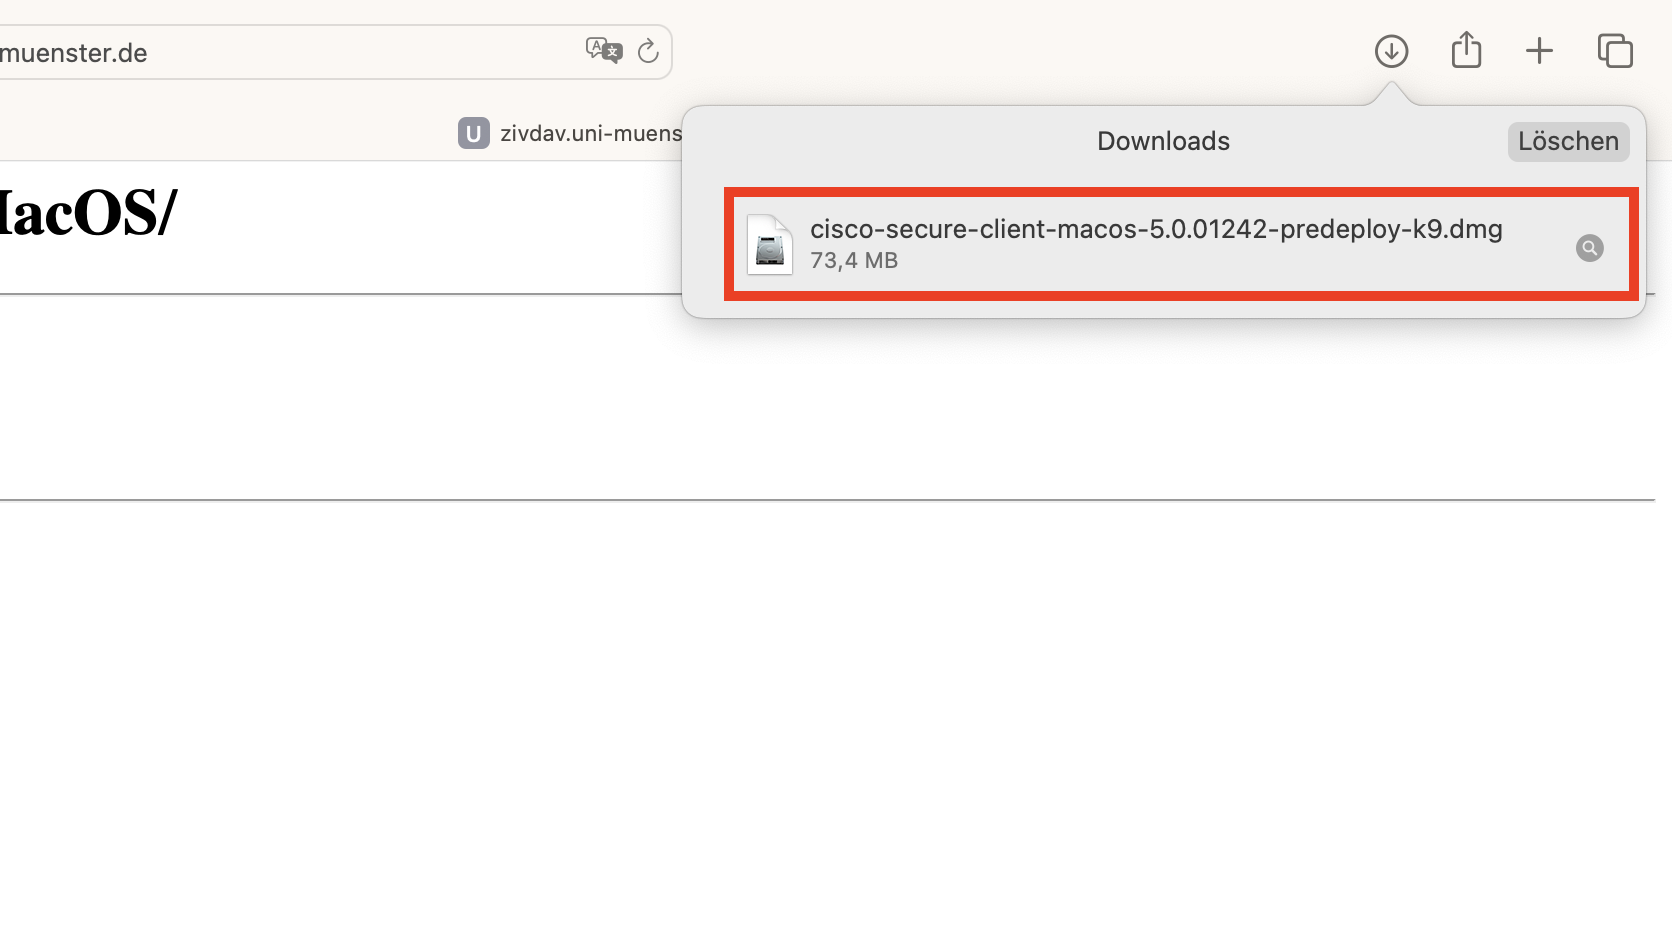
© Uni MS IT 2. Opening the File
Double-click on the downloaded dmg file to open it. If you use a browser other than Safari, you will find the file in the respective download area or in your local download folder.
© Uni MS IT ! Important: Close the Settings-App
Please close the Settings-App during the installation. Otherweise, the last steps after the installation are not shown to you and no connection can be established.
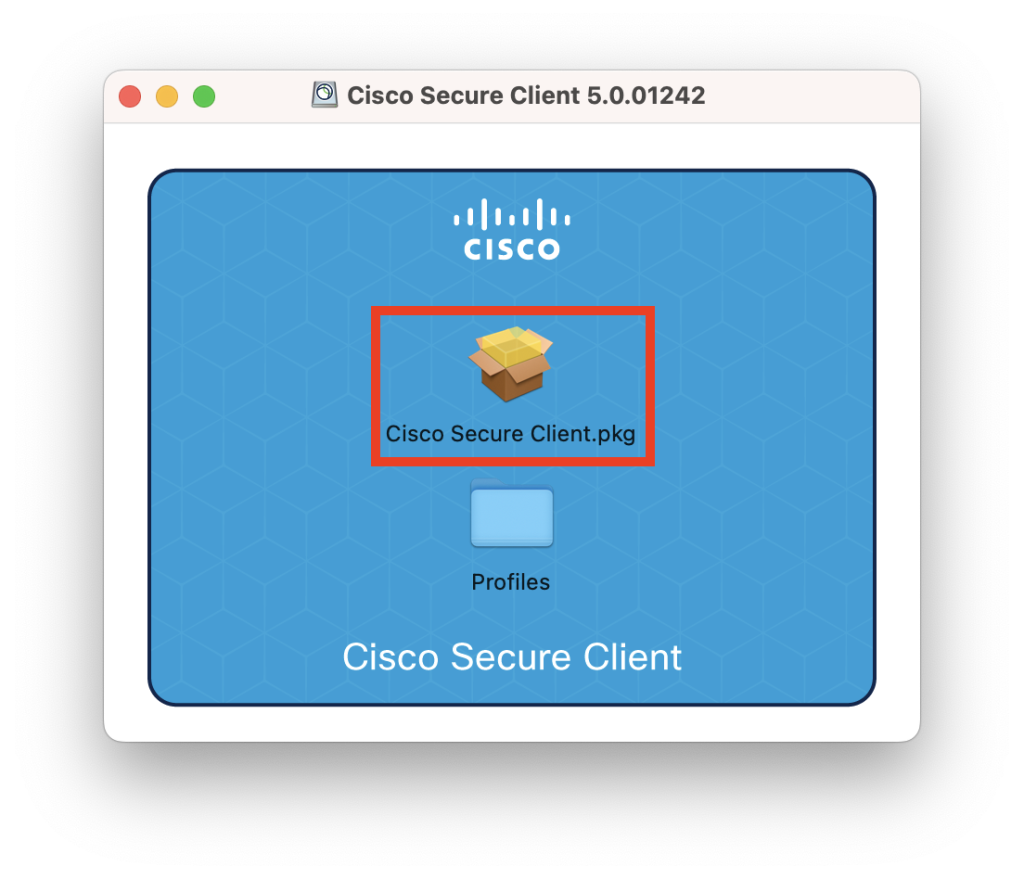
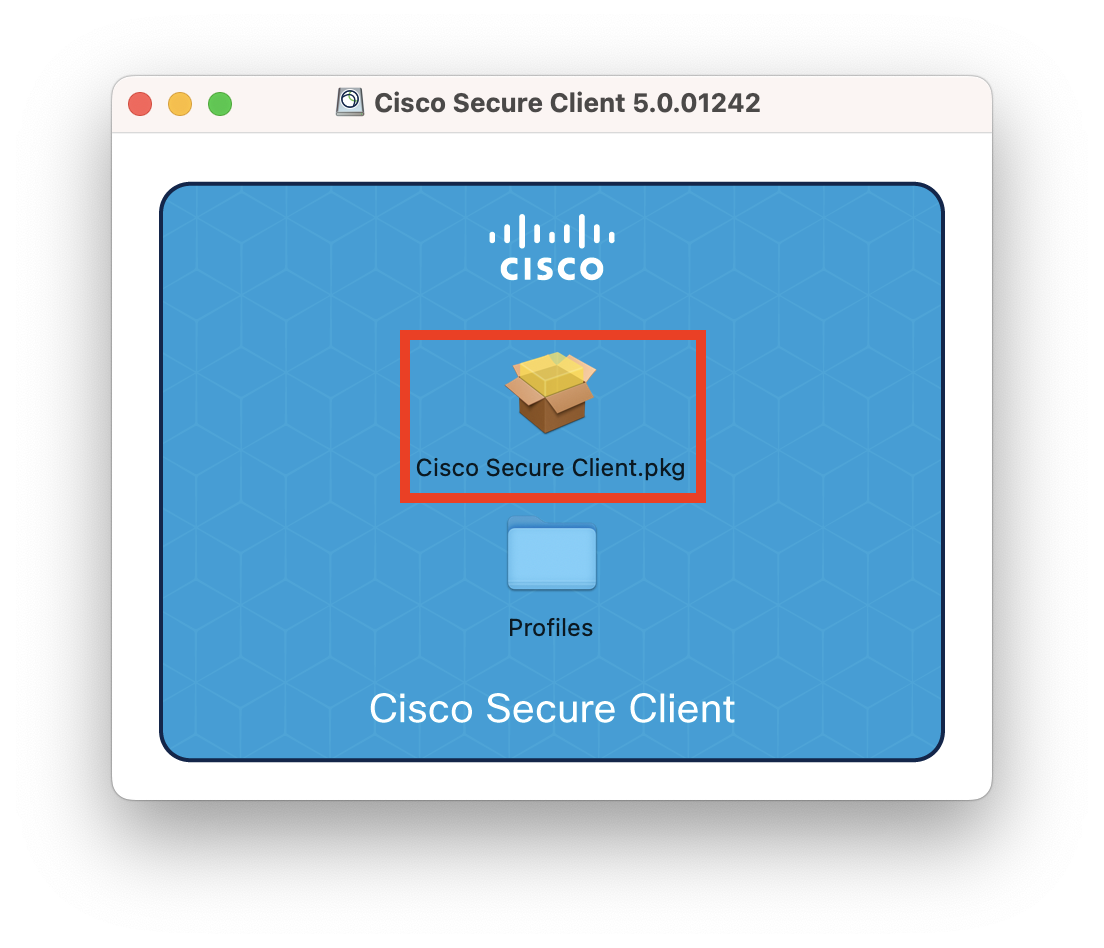
3. Starting the Installation
Start the Installation by double clicking the installation file Cisco Secure Client.pkg.
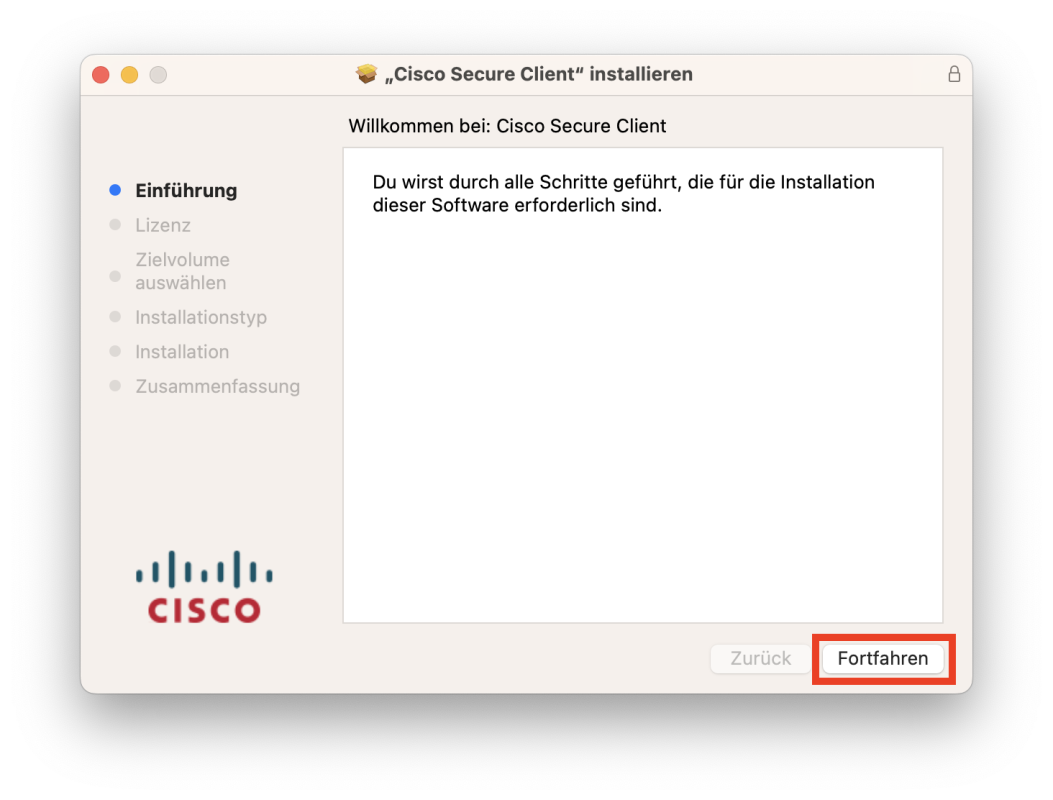
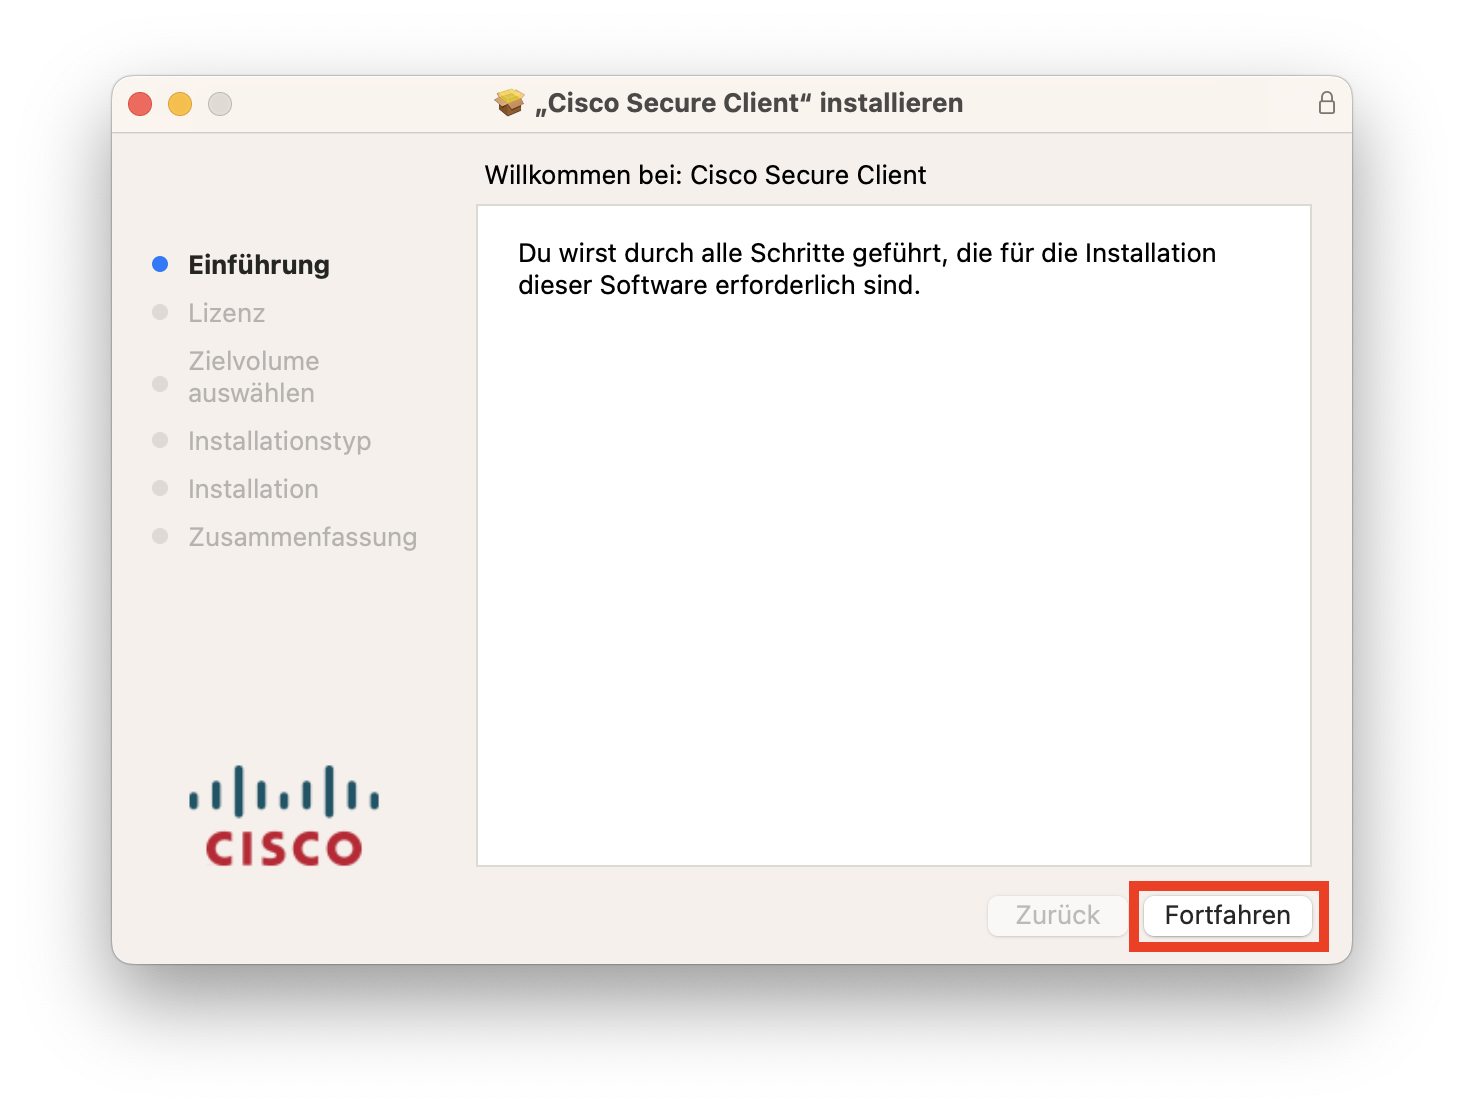
© Uni MS IT 4. Executing the Installer Package
Start the Secure Client Installer by clicking "Continue".
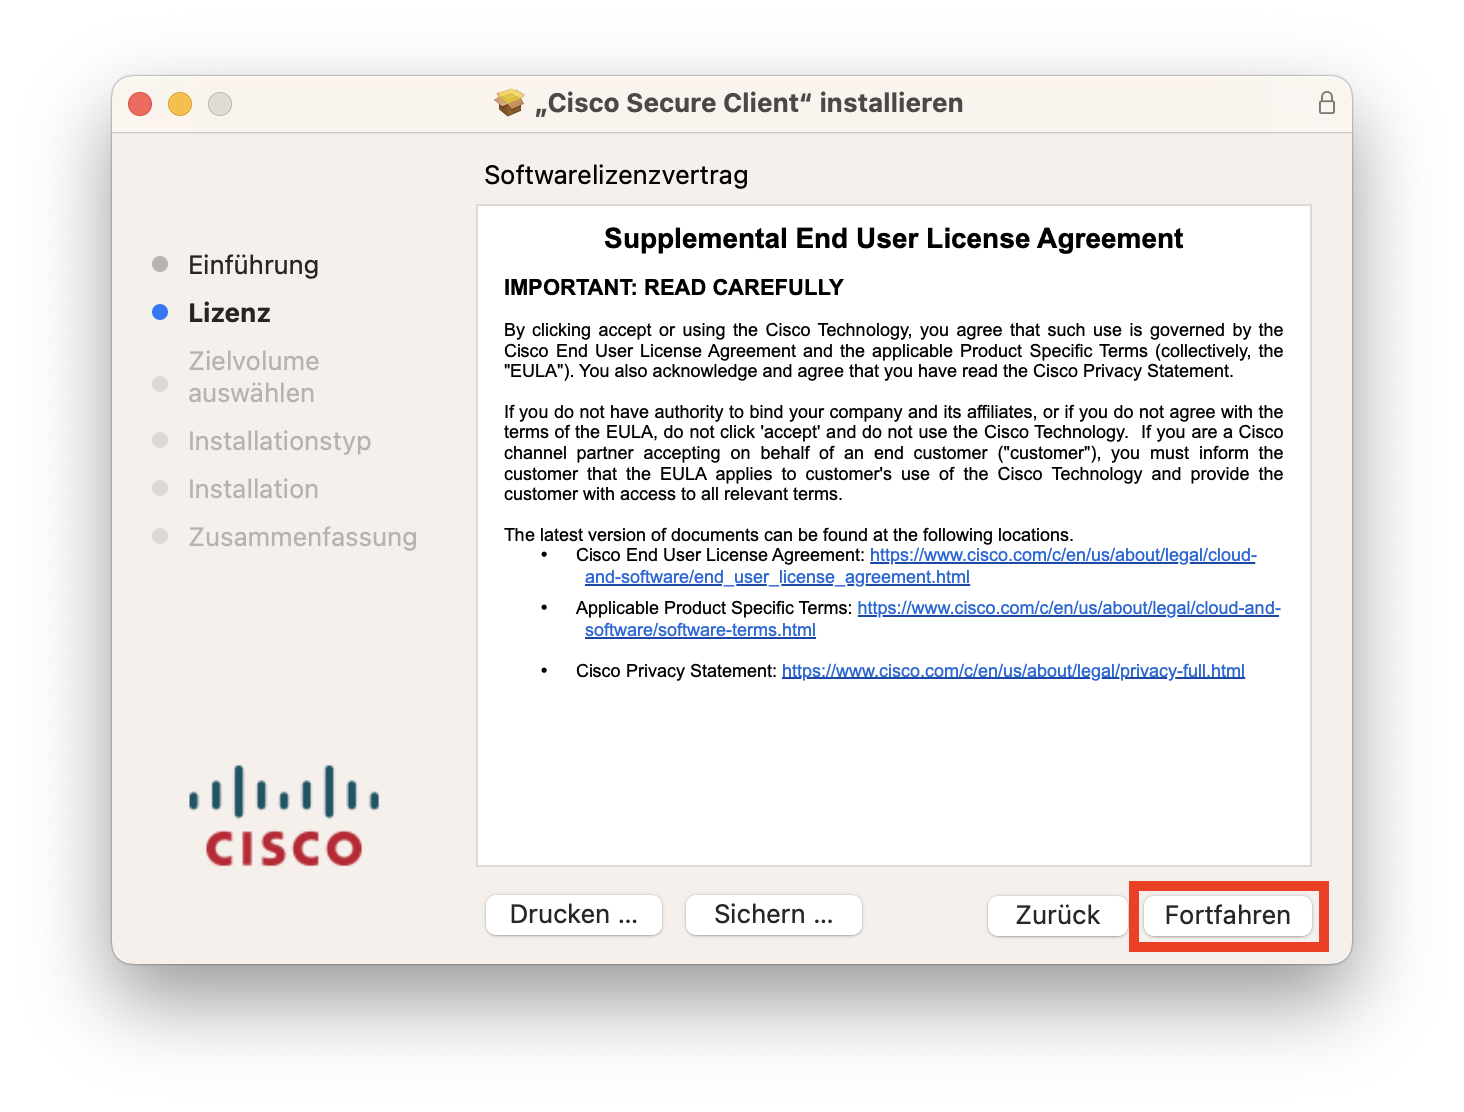
© Uni MS IT 5. Accepting the License Agreement
Continue the installation by clicking "Continue".
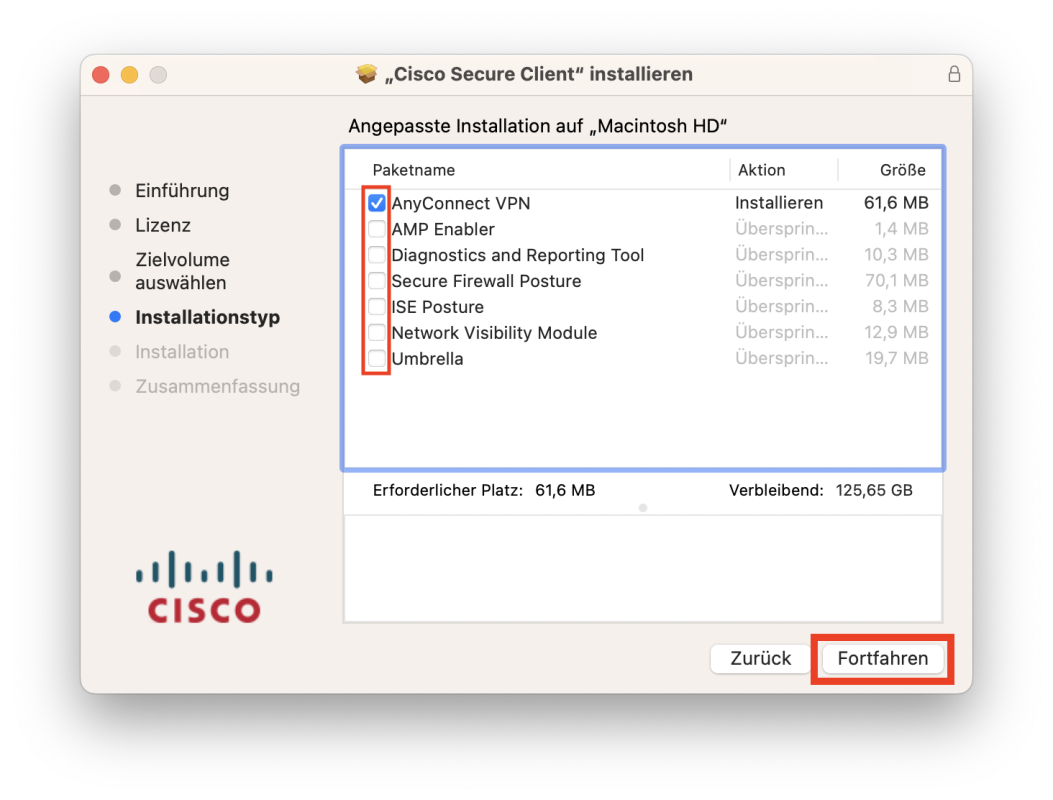
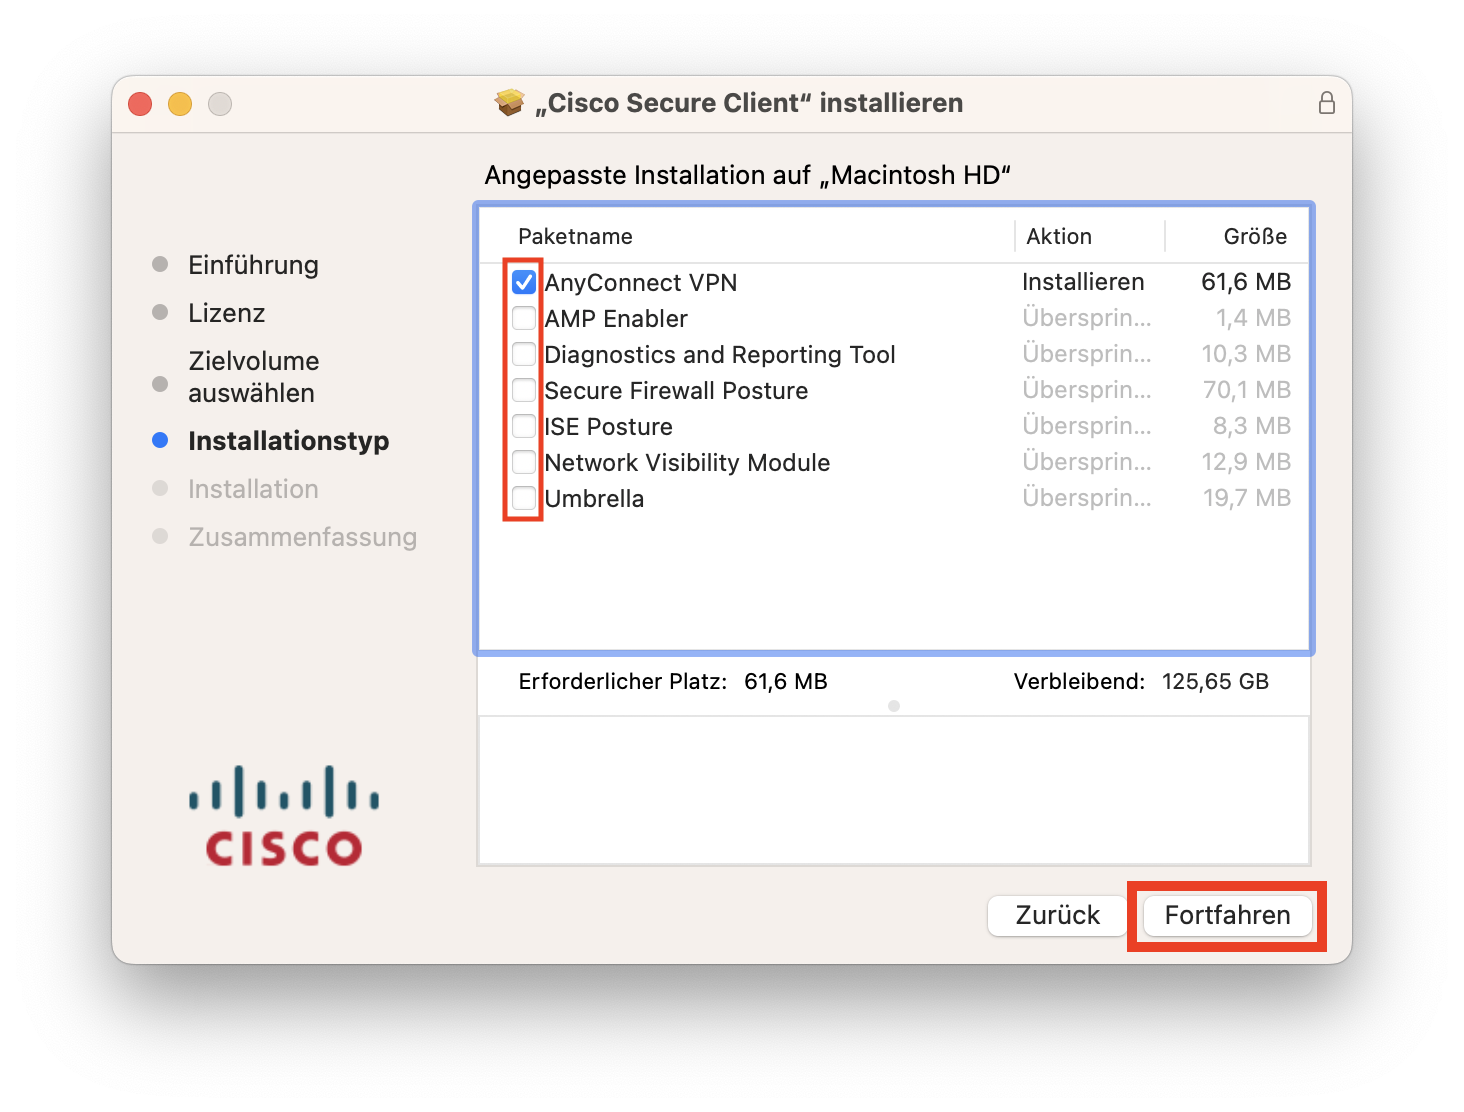
© Uni MS IT 6. Scope of Installation
Only install the package "AnyConnect VPN".
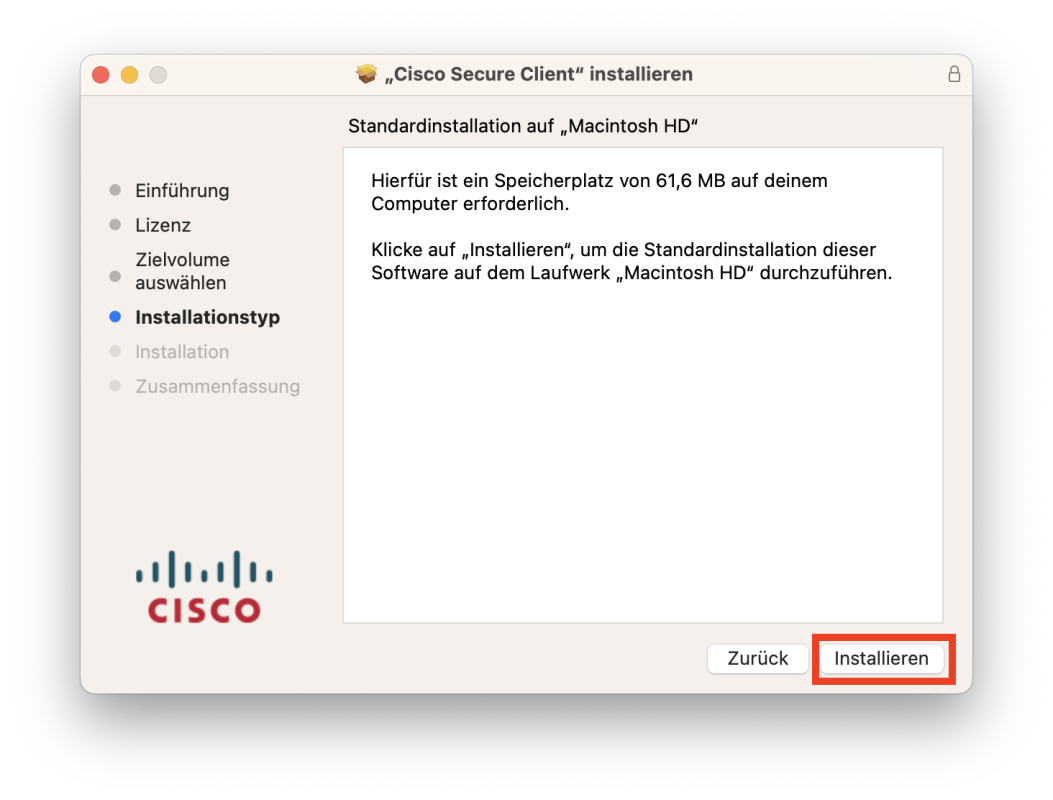
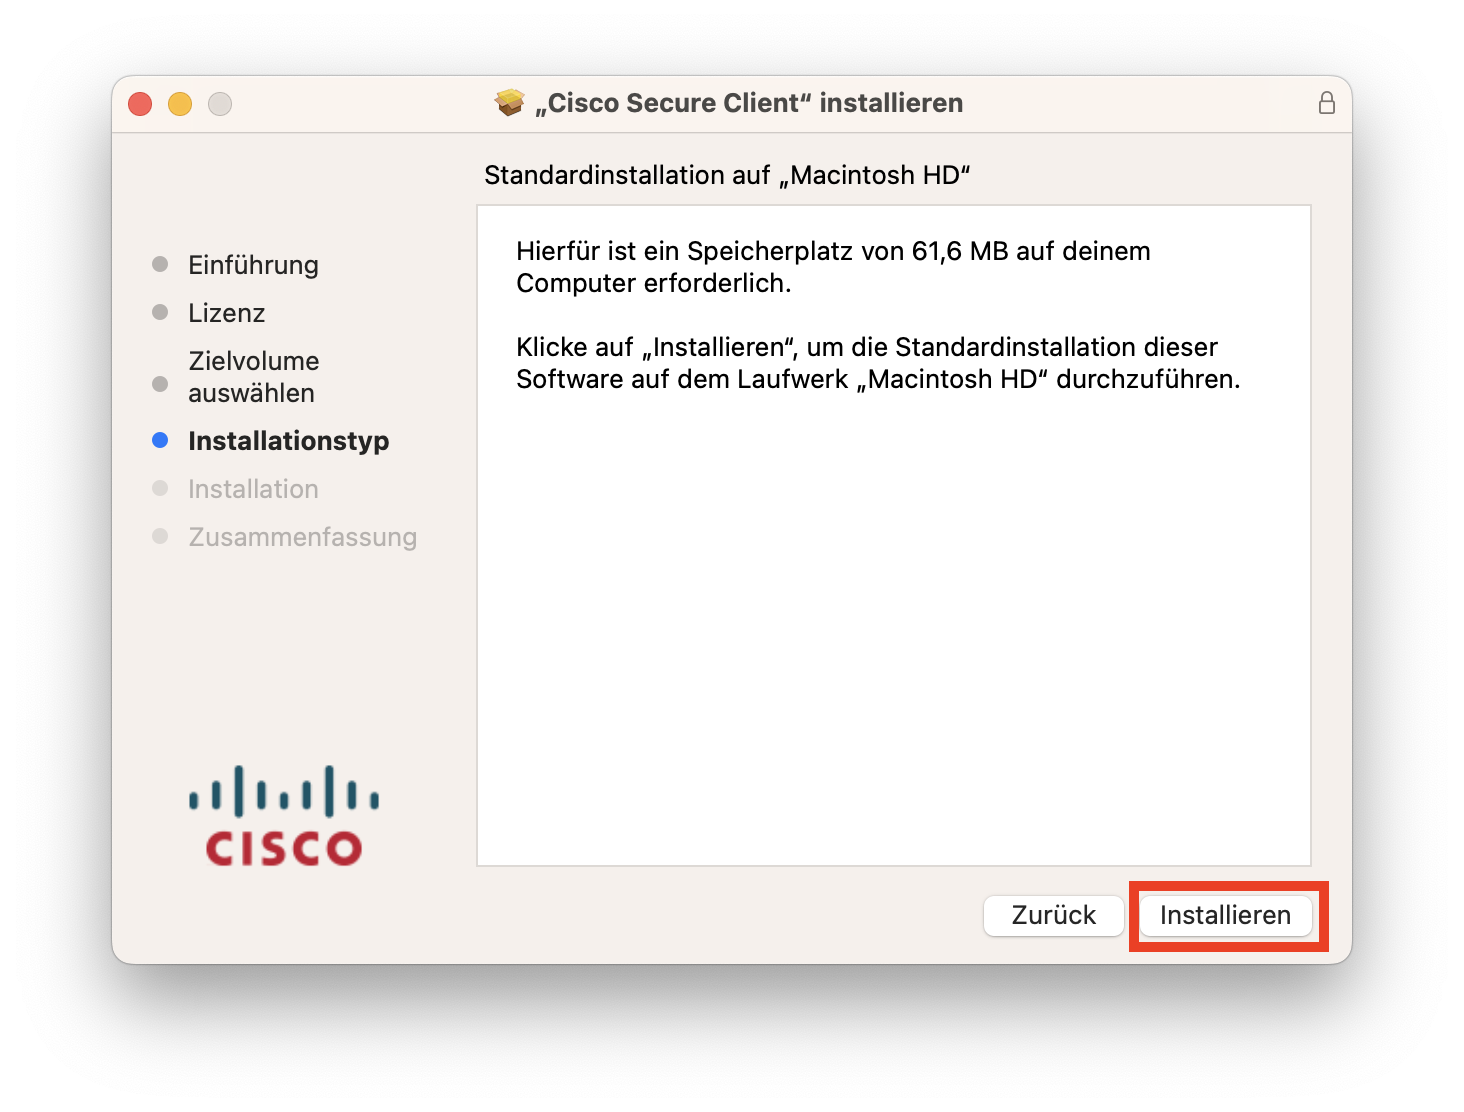
© Uni MS IT 7. Drive Selection
Click "Install" to perform a standard installation on your Mac
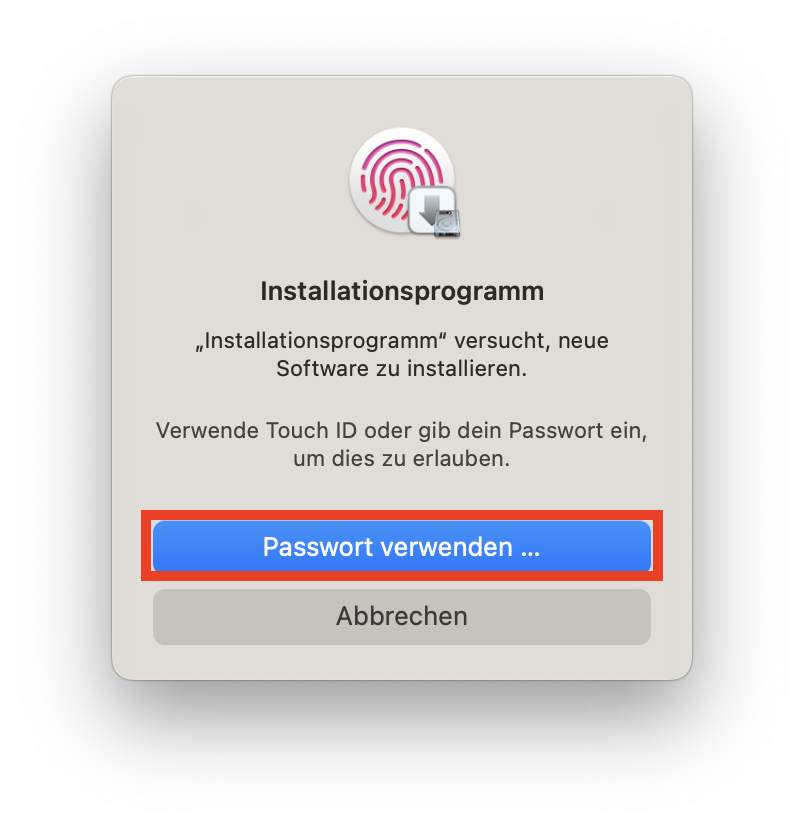
© Uni MS IT 8. Security Settings
Depending on your security settings, you may need to enter your Mac username and password or share this with a current Mac via Touch ID. Then click on "Install software".
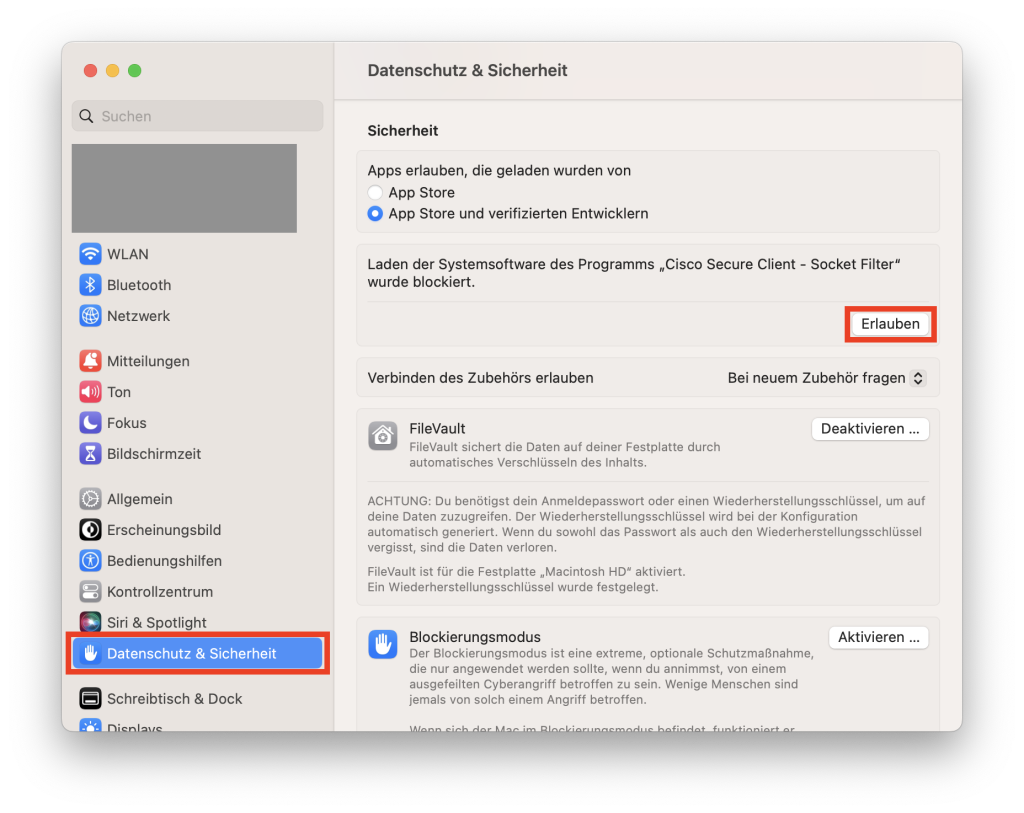
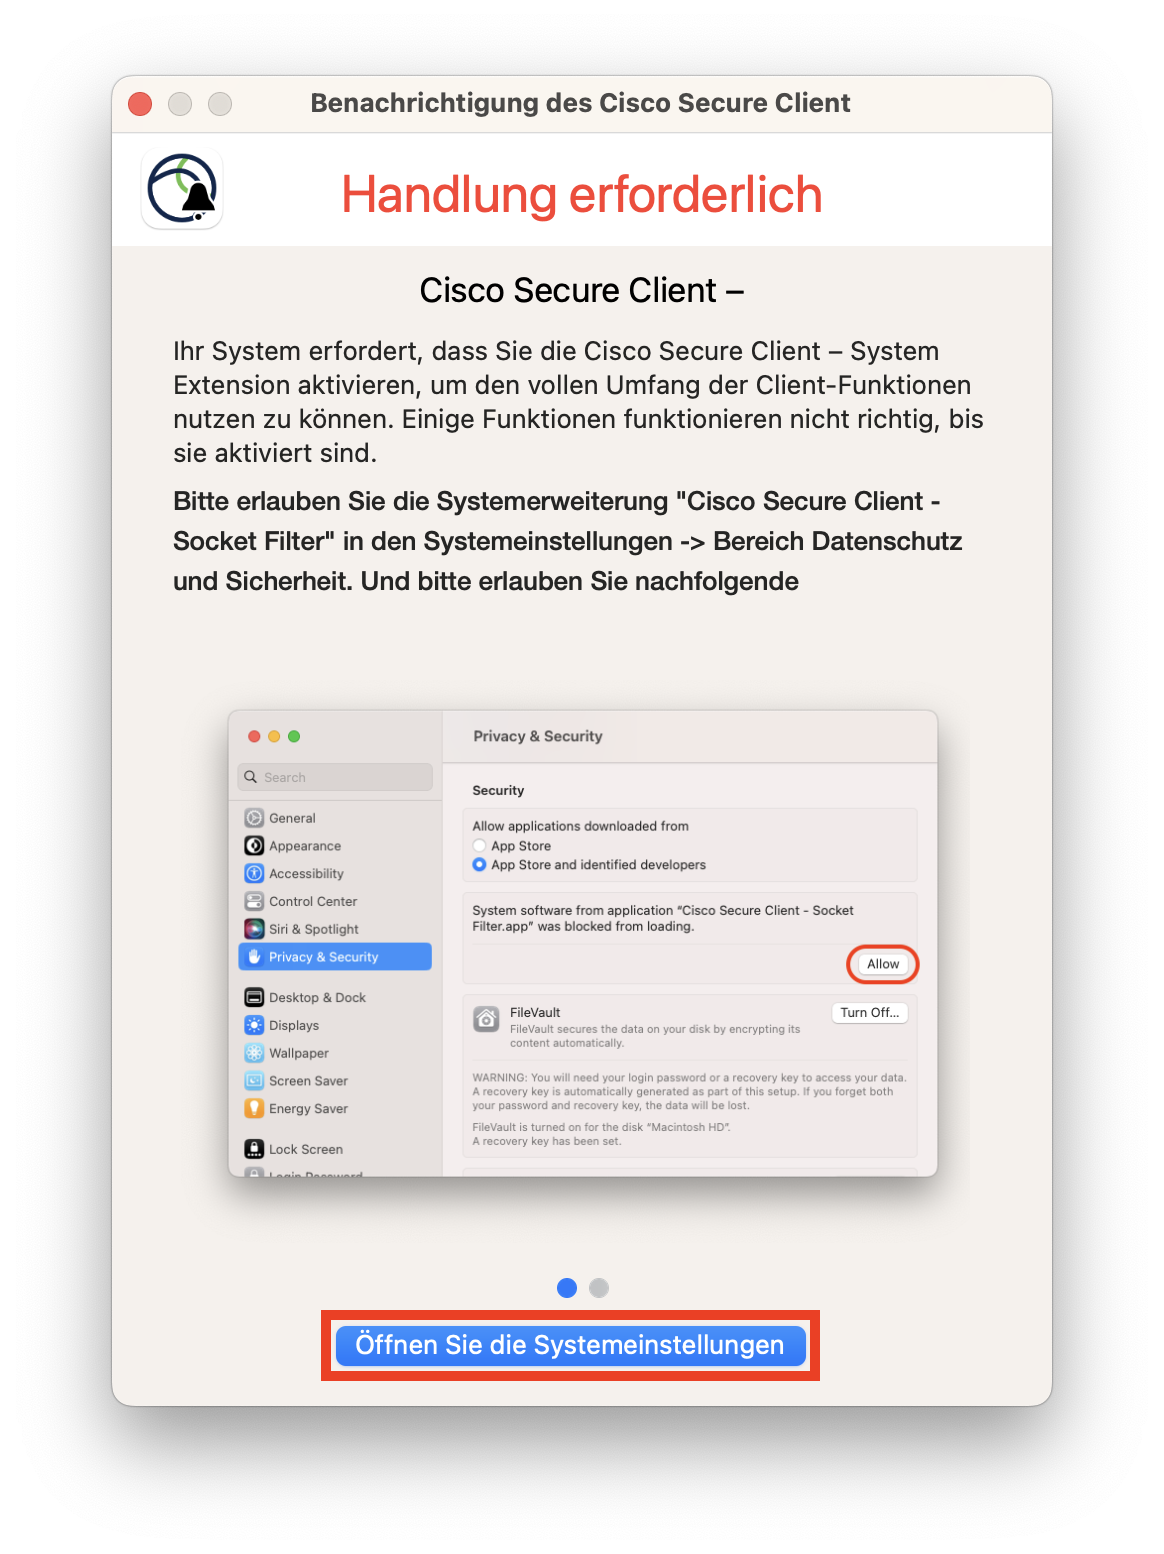
© Uni MS IT 9. Allow system extension
Click on "Open the settings".
© Uni MS IT 10. Allow editing of system settings
Click on "Allow". You may have to enter the system password again or confirm it with Touch ID.
macOS 12 and older: The System Preferences window looks different. Click on the lock there to release the system settings for editing and click on the "Allow" button.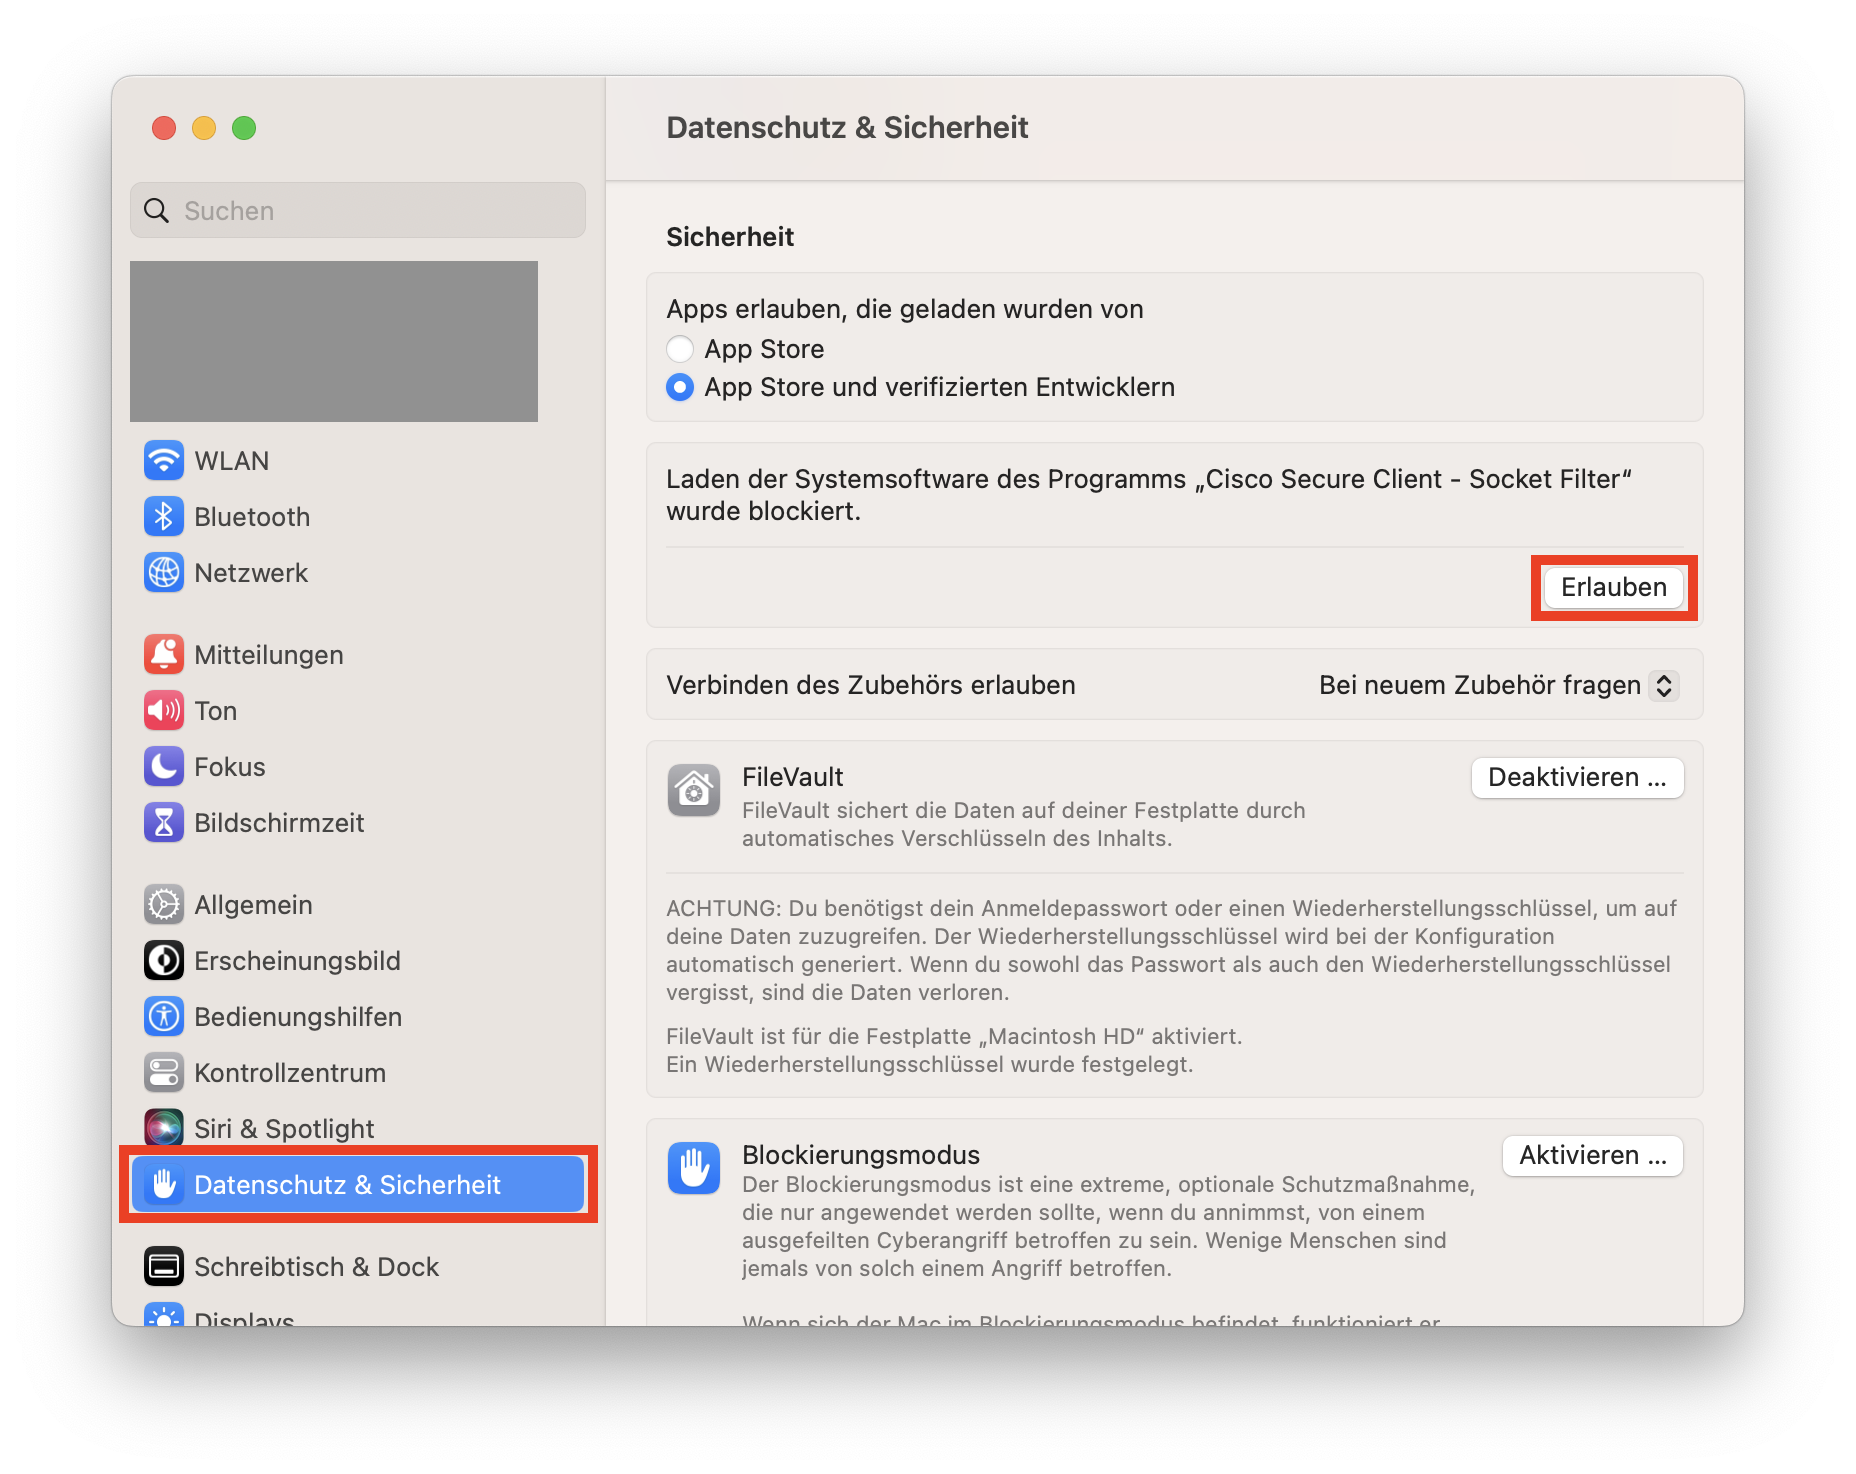
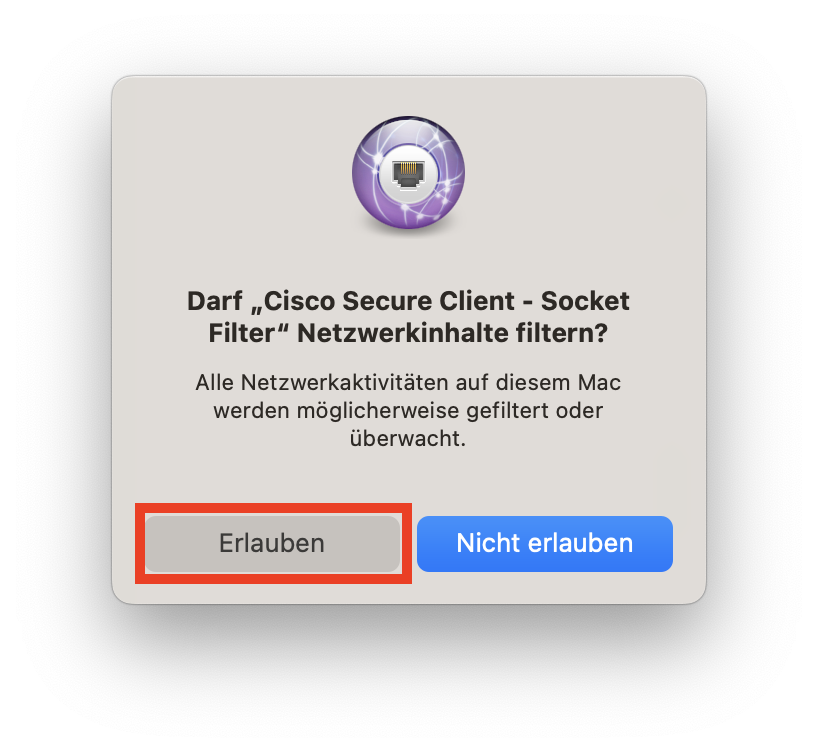
© Uni MS IT 11. Set up last preset for cisco
Click Allow to set up the final prerequisite for full Cisco functionality and click Reject on the Cisco Secure Client installer notification.
© Uni MS IT Starting & Ending the VPN Connection
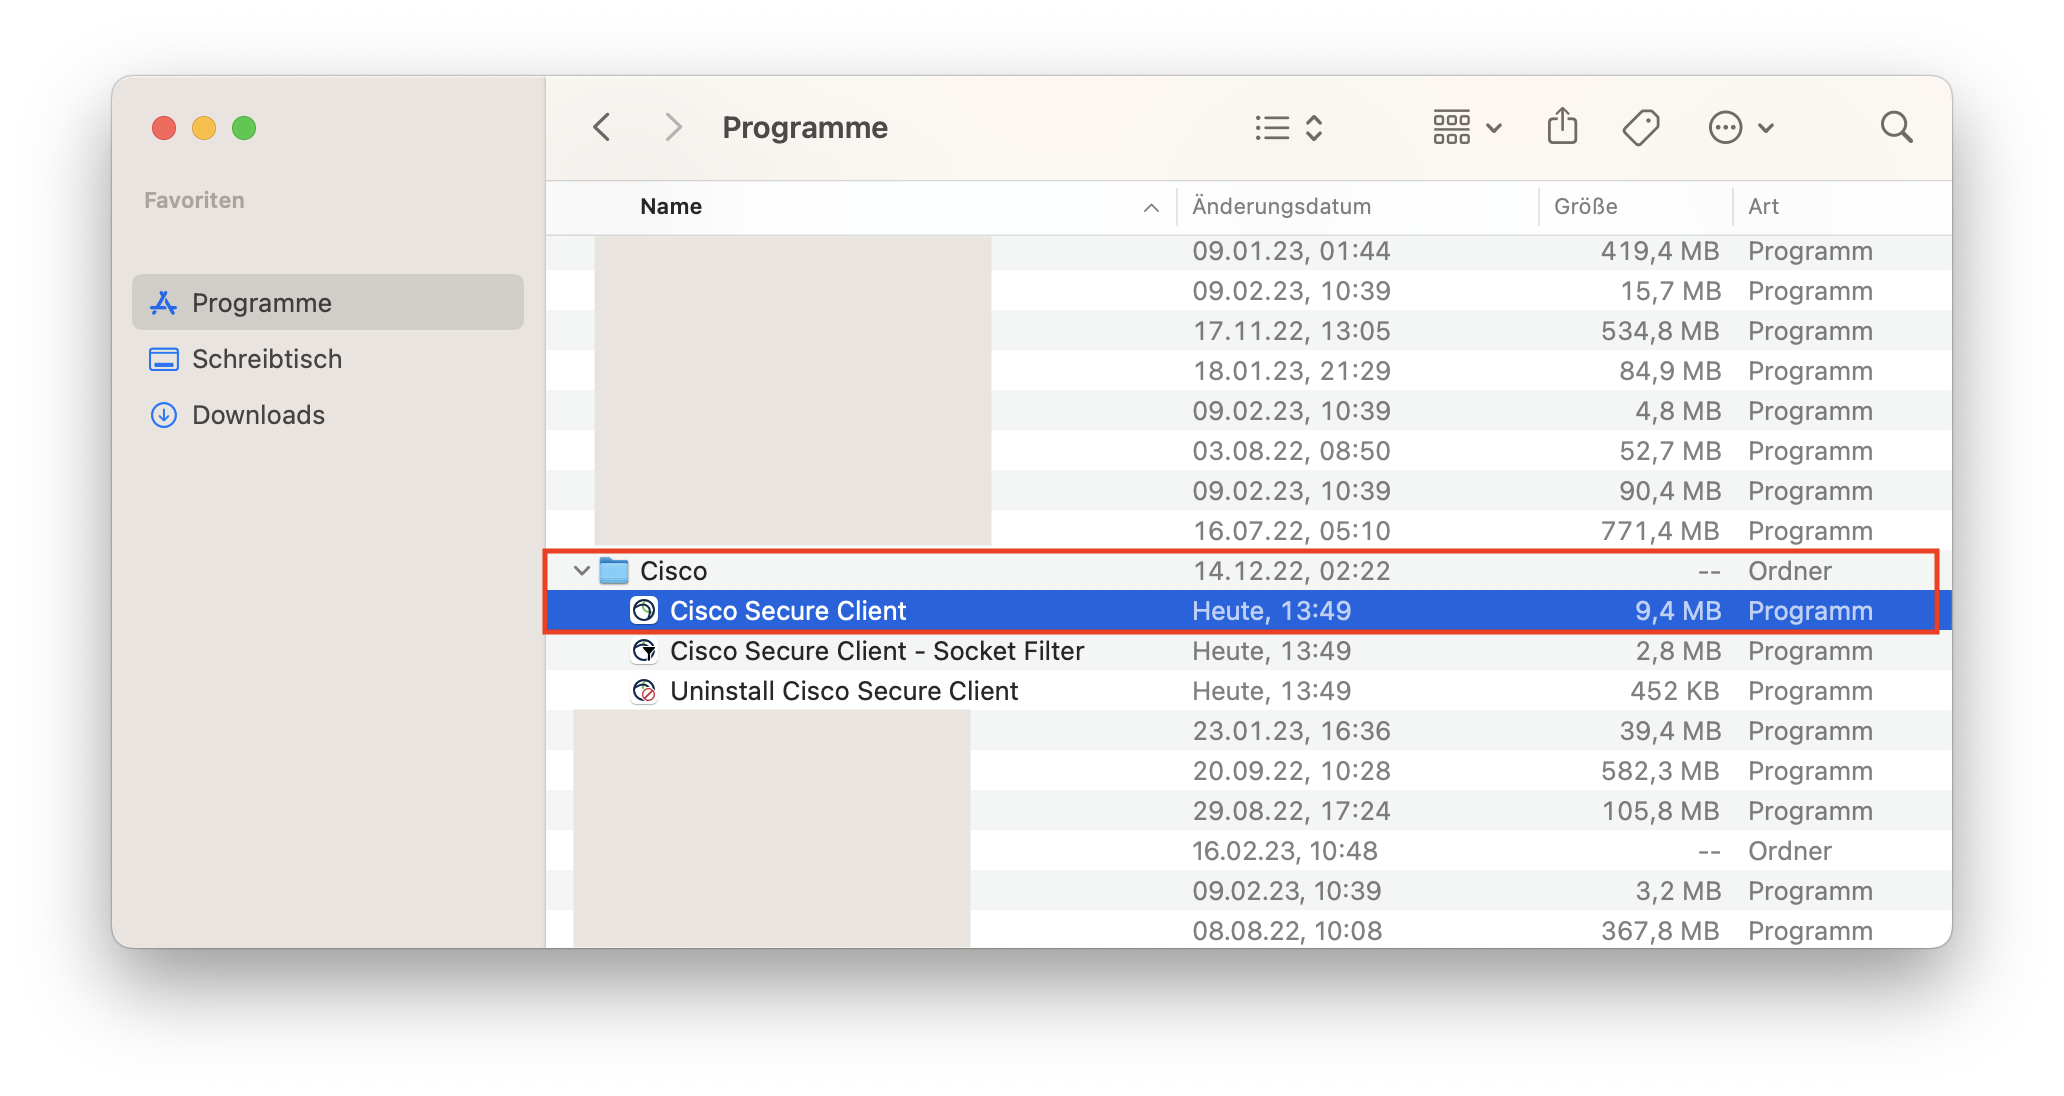
1. Starting the Cisco AnyConnect Client
Open the Cisco Secure Client.
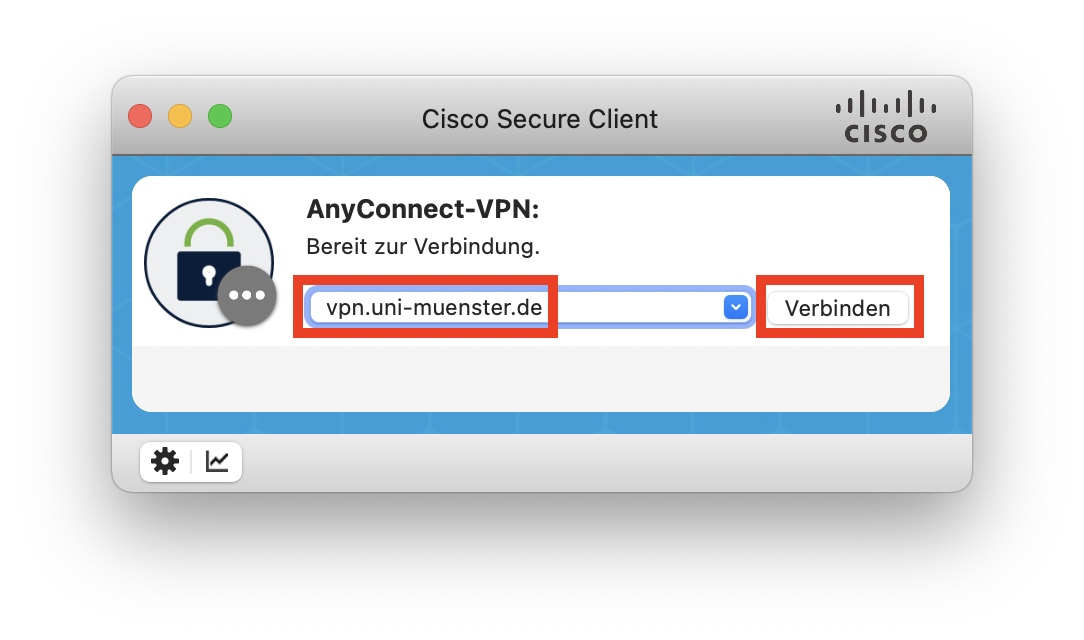
© Uni MS IT 2. Entering the VPN Server-Address
Insert the server address vpn.uni-muenster.de and start the connection by clicking "Connect".
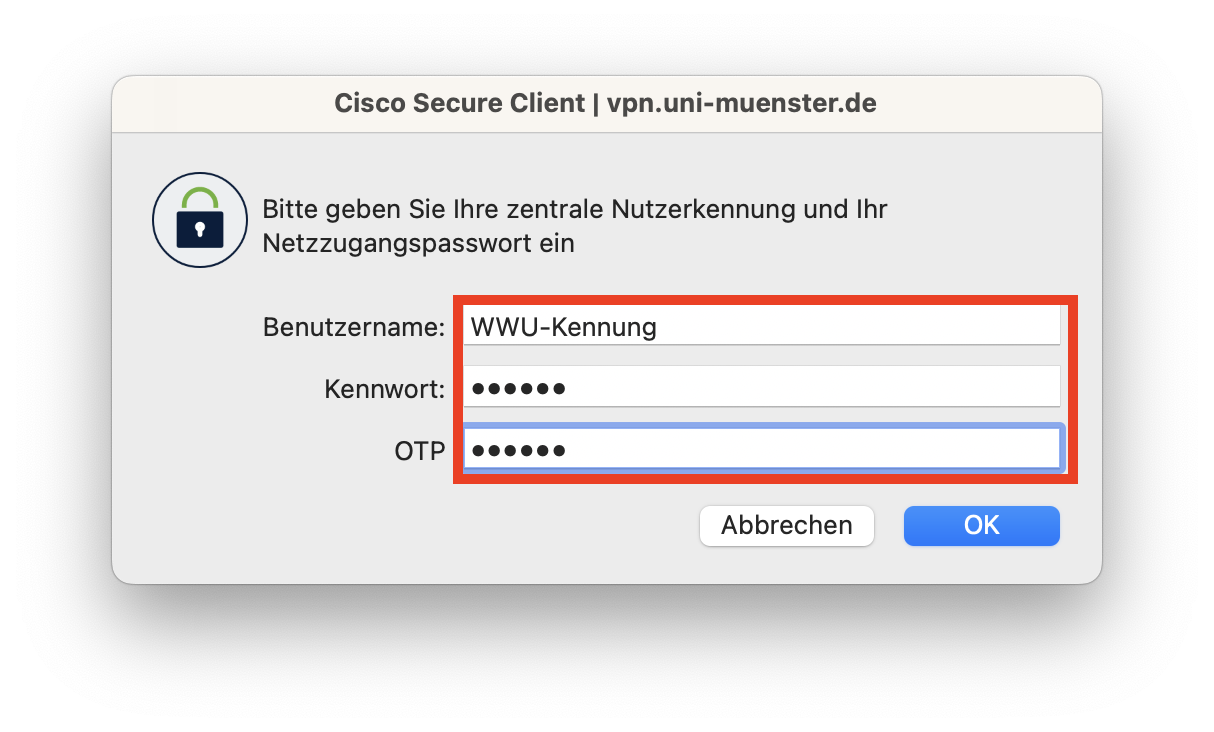
© Uni MS IT 3. Entering your User Data
Enter your university ID for user name, for password your password for network access and for OTP / second password your one time password and klick on "OK" afterwards. (Note: The network access password this is not your normal university password. You can set it in the IT Portal.)
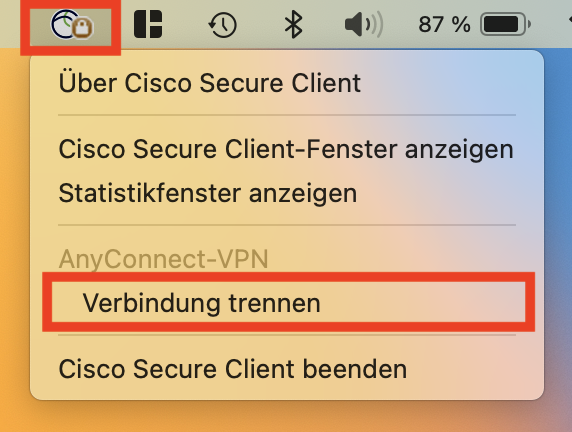
© Uni MS IT 4. Disconnecting the VPN-Connection
The ball with the closed lock in the status bar indicates that you are connected to the VPN network now. If the connection is no longer needed, click on the icon in the taskbar and click "Disconnect".
© Uni MS IT Special VPN-Profile for Exchange and OWA
To use Exchange on personal devices, you need the following dedicated VPN connection. This connection only manages Exchange traffic and does not have access to your other data traffic. On work devices, you can use the "Standard" connection listed above.
1. Enter Server
Enter the following server address in the field:
https://vpn.uni-muenster.de/exchange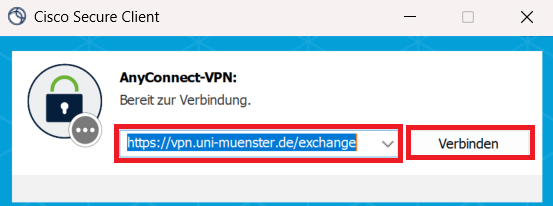
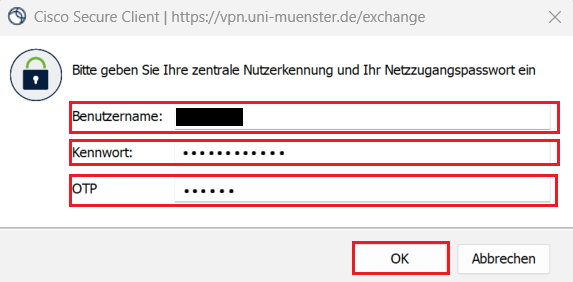
© CIT 2. Login
Log in using your university ID, your net-access password and your one-time-password.
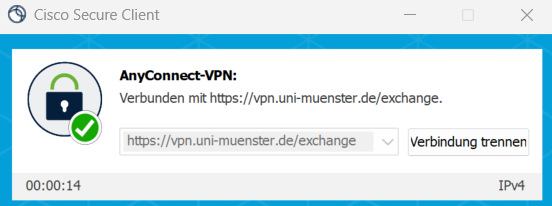
© CIT You are connected and can use Exchange. The Connection is saved as "Exchange".
© CIT Problems during downloading
The file ends with .man or .download
If the Cisco Secure Client installation file ends with ".man" or ".download" after downloading, a download error has occurred. Follow these steps to resolve the issue:
1. Open Finder and locate the installation file in the Downloads folder
2. Select the file and change the ending to ".dmg"
3. Proceed with the installation as usual.
If this or other download errors occur frequently, try the following...
... reboot your computer
--- clear the browser cache (especially for the specific website where you're downloading from)
... Use a different browserProblems during installation/uninstallation
Important!
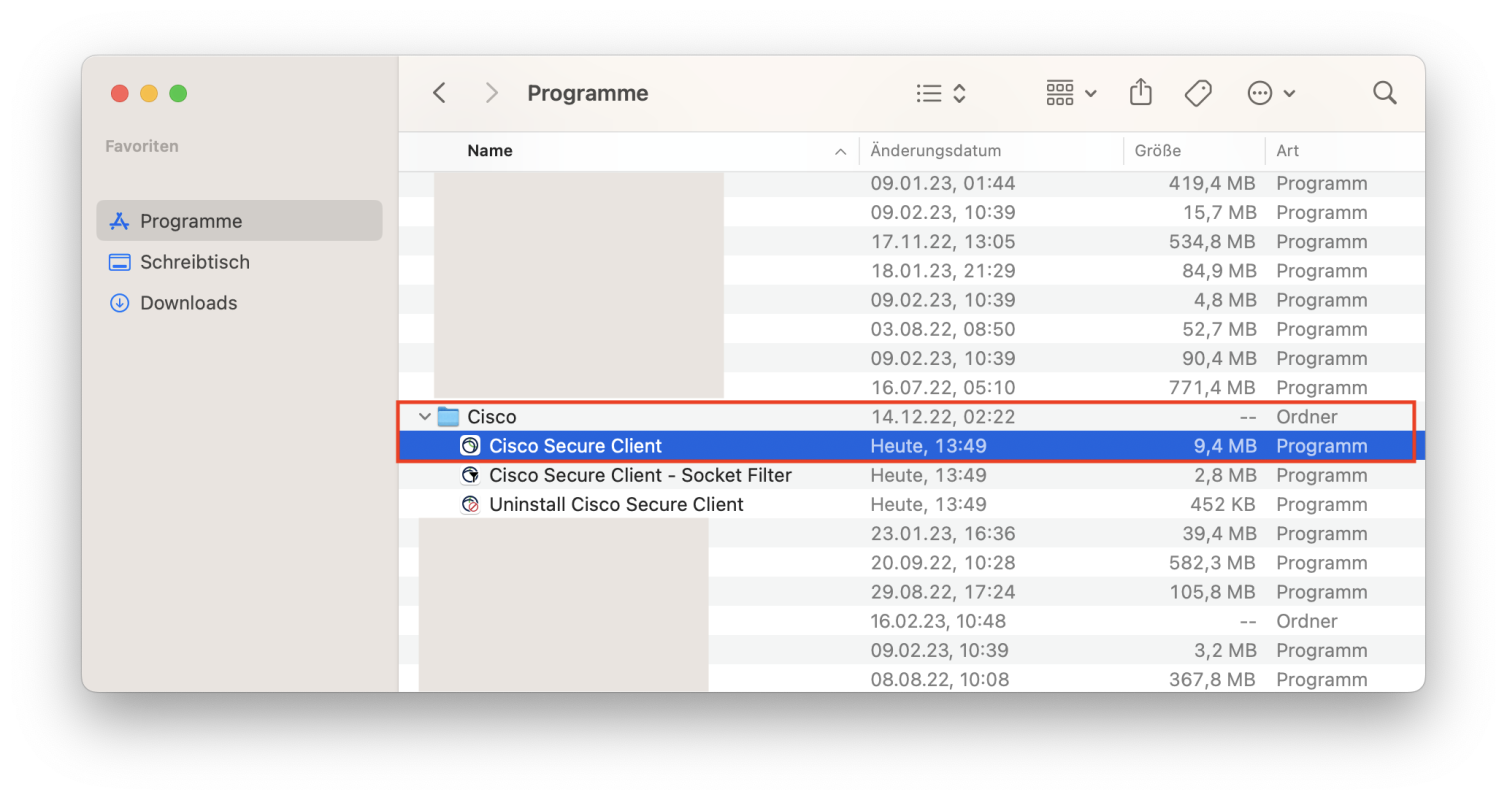
Some people accidentally move Cisco to the trash - the normal way to uninstall something on the Mac. This doesn't work for some apps outside the Appstore (usually when you have an install dialog, like Cisco, SPSS, Matlab).
If you can't uninstall the Cisco package completely or the “Anyconnect VPN” package can't be unchecked after repeated installation, please follow the instructions below:1. Uninstalling all Cisco software
1. open terminal.
2. Paste und press enter: sudo /opt/cisco/anyconnect/bin/anyconnect_uninstall.sh
3. enter Mac password (input not visible).
4. Paste und press enter: sudo rm -R /opt/cisco/anyconnect
5. Paste und press enter: sudo rm -R /Applications/Cisco
6. Paste und press enter: sudo pkgutil --forget com.cisco.pkg.anyconnect.vpn
8. Restart
The installation should work again.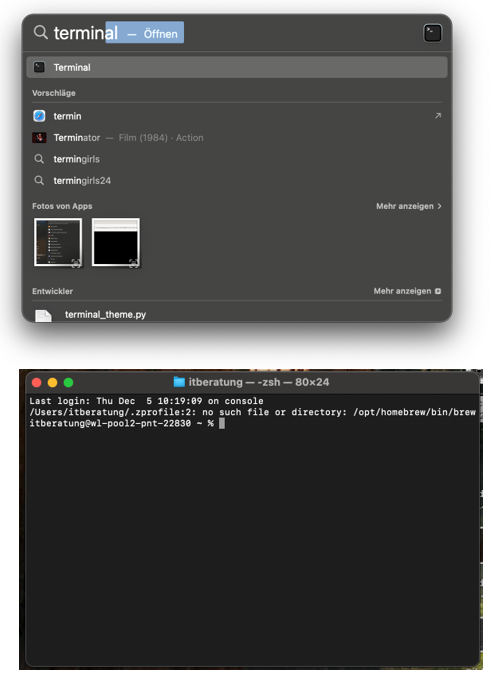
© CIT