

Integrating the University E-Mail Account in macOS
Detailed Instructions
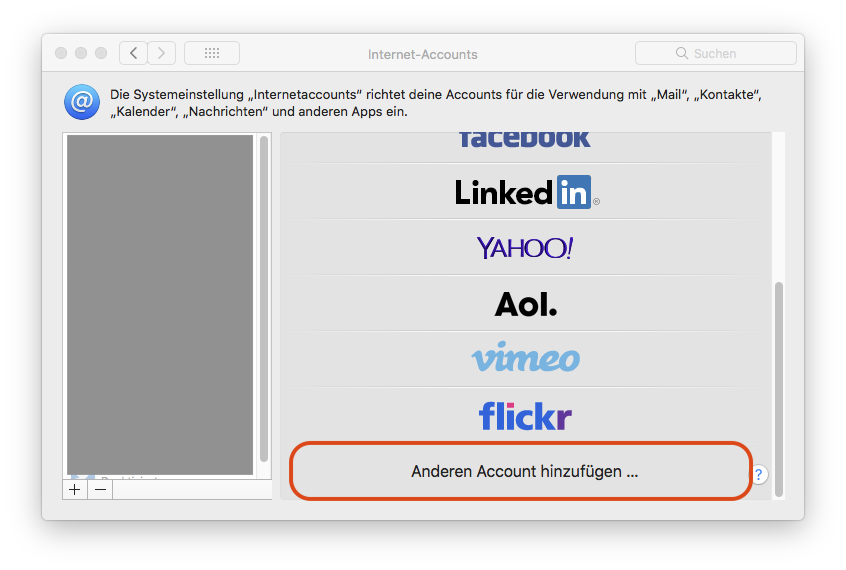
1. Open Internet Accounts Menu
Open your system settings and click on the "Internet Accounts" icon. Click on the plus icon (bottom left) and select "Add Another Account".
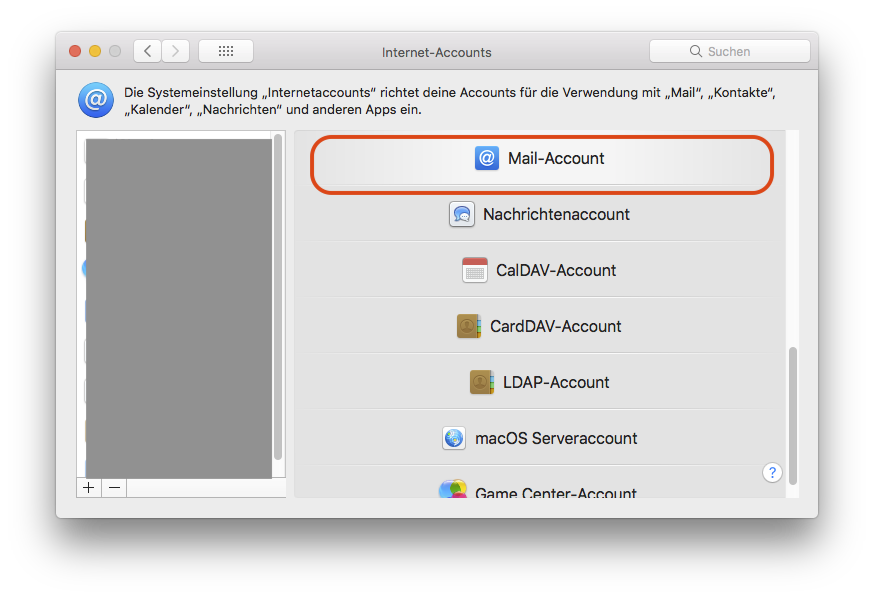
© ZIV 2. Select Mail Account
Select "Mail Account".
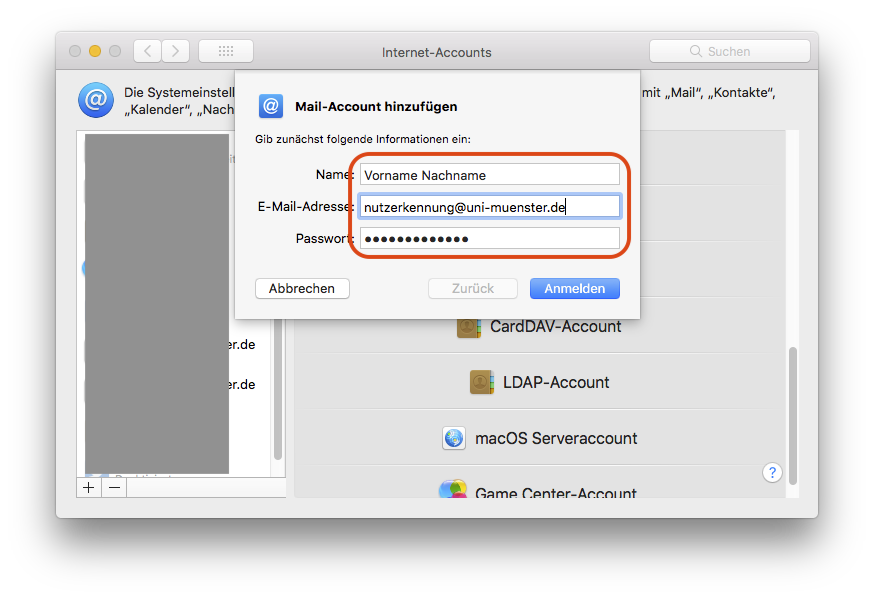
© ZIV 3. Enter User Credentials
Please enter the following information to add the new e-mail account:
- Full name: First name Last name (sender name of outgoing e-mails)
- Email Address: Your university e-mail address (YourUniversity-ID@uni-muenster.de)
- Password: Your university password
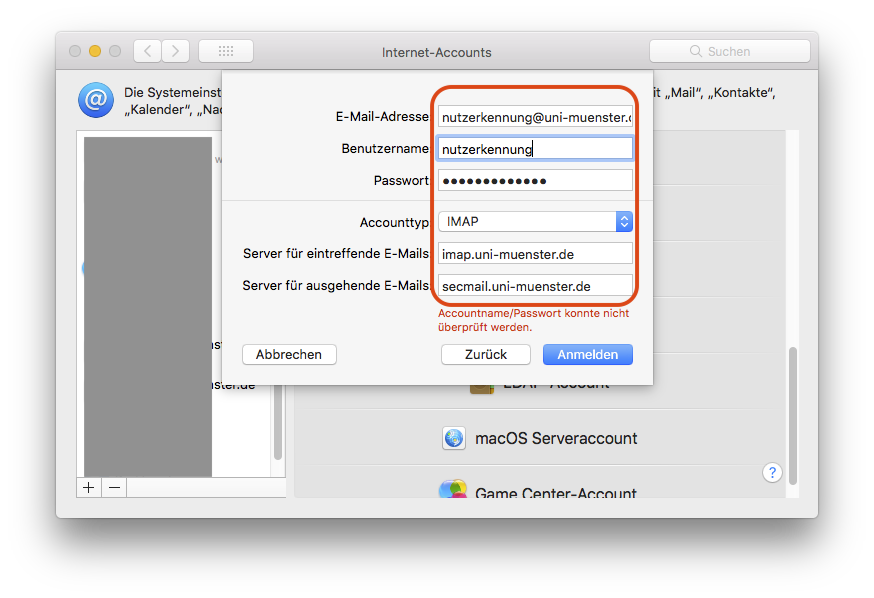
© ZIV 4. Enter Server Information
- User Name: Your university ID
- Password: Your university password
- Account Type: IMAP
- Incomming Server: imap.uni-muenster.de
- Outgoing Server: secmail.uni-muenster.de
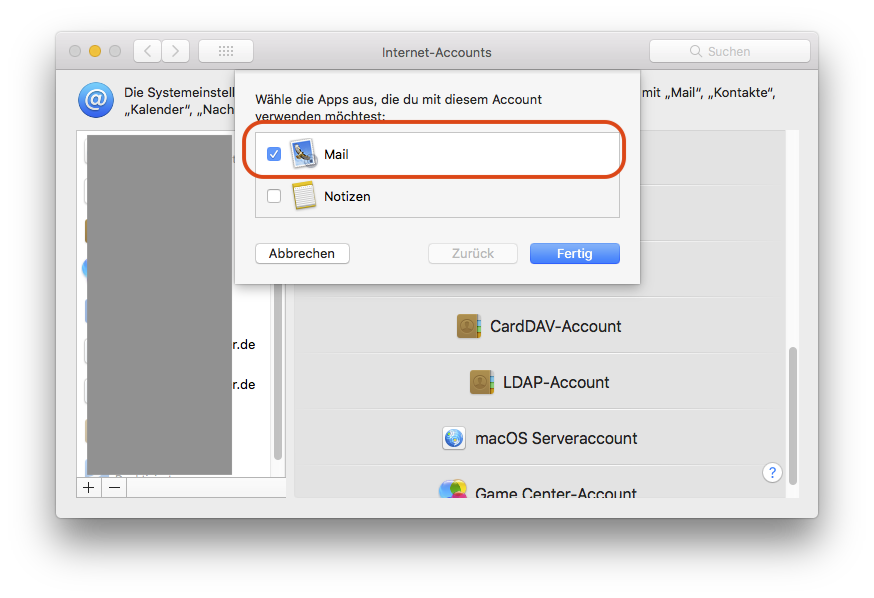
© ZIV 5. Select Mail
Select "Mail".
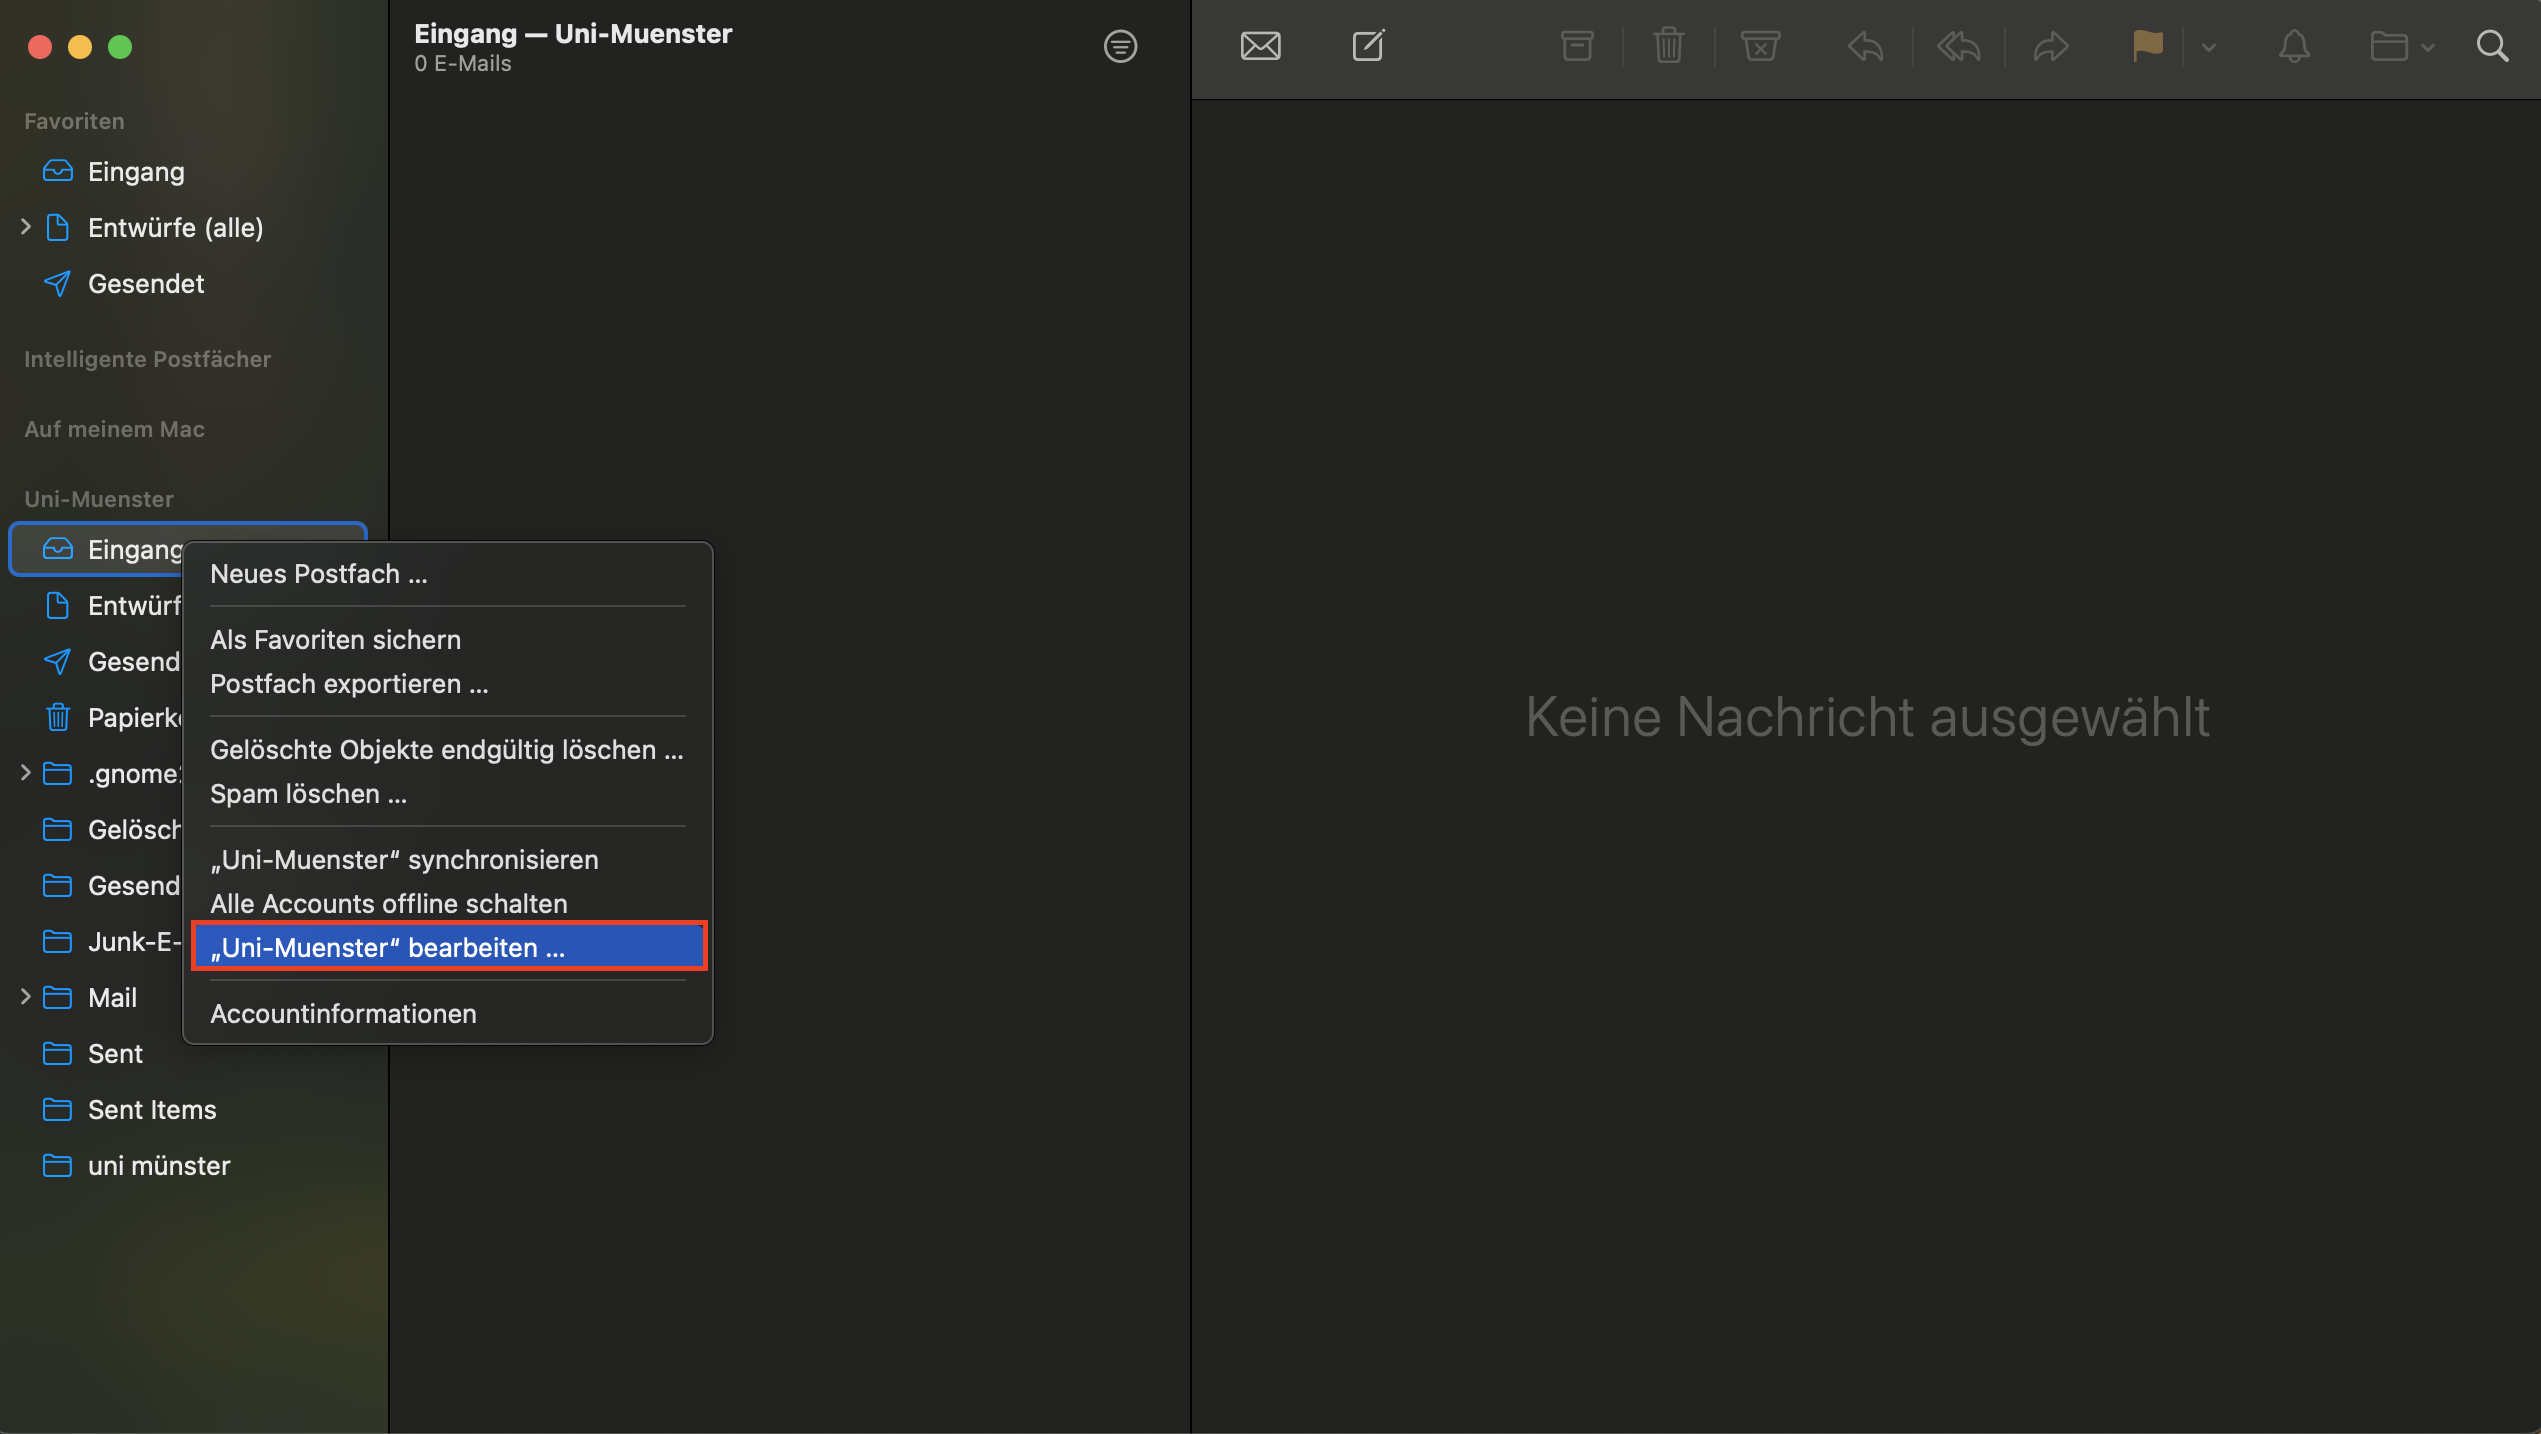
© ZIV 6. Further Options
Open the mail program on your Mac. The mail account you just added should now appear there. Right-click on the inbox and select 'Edit "Uni-Muenster"...'.
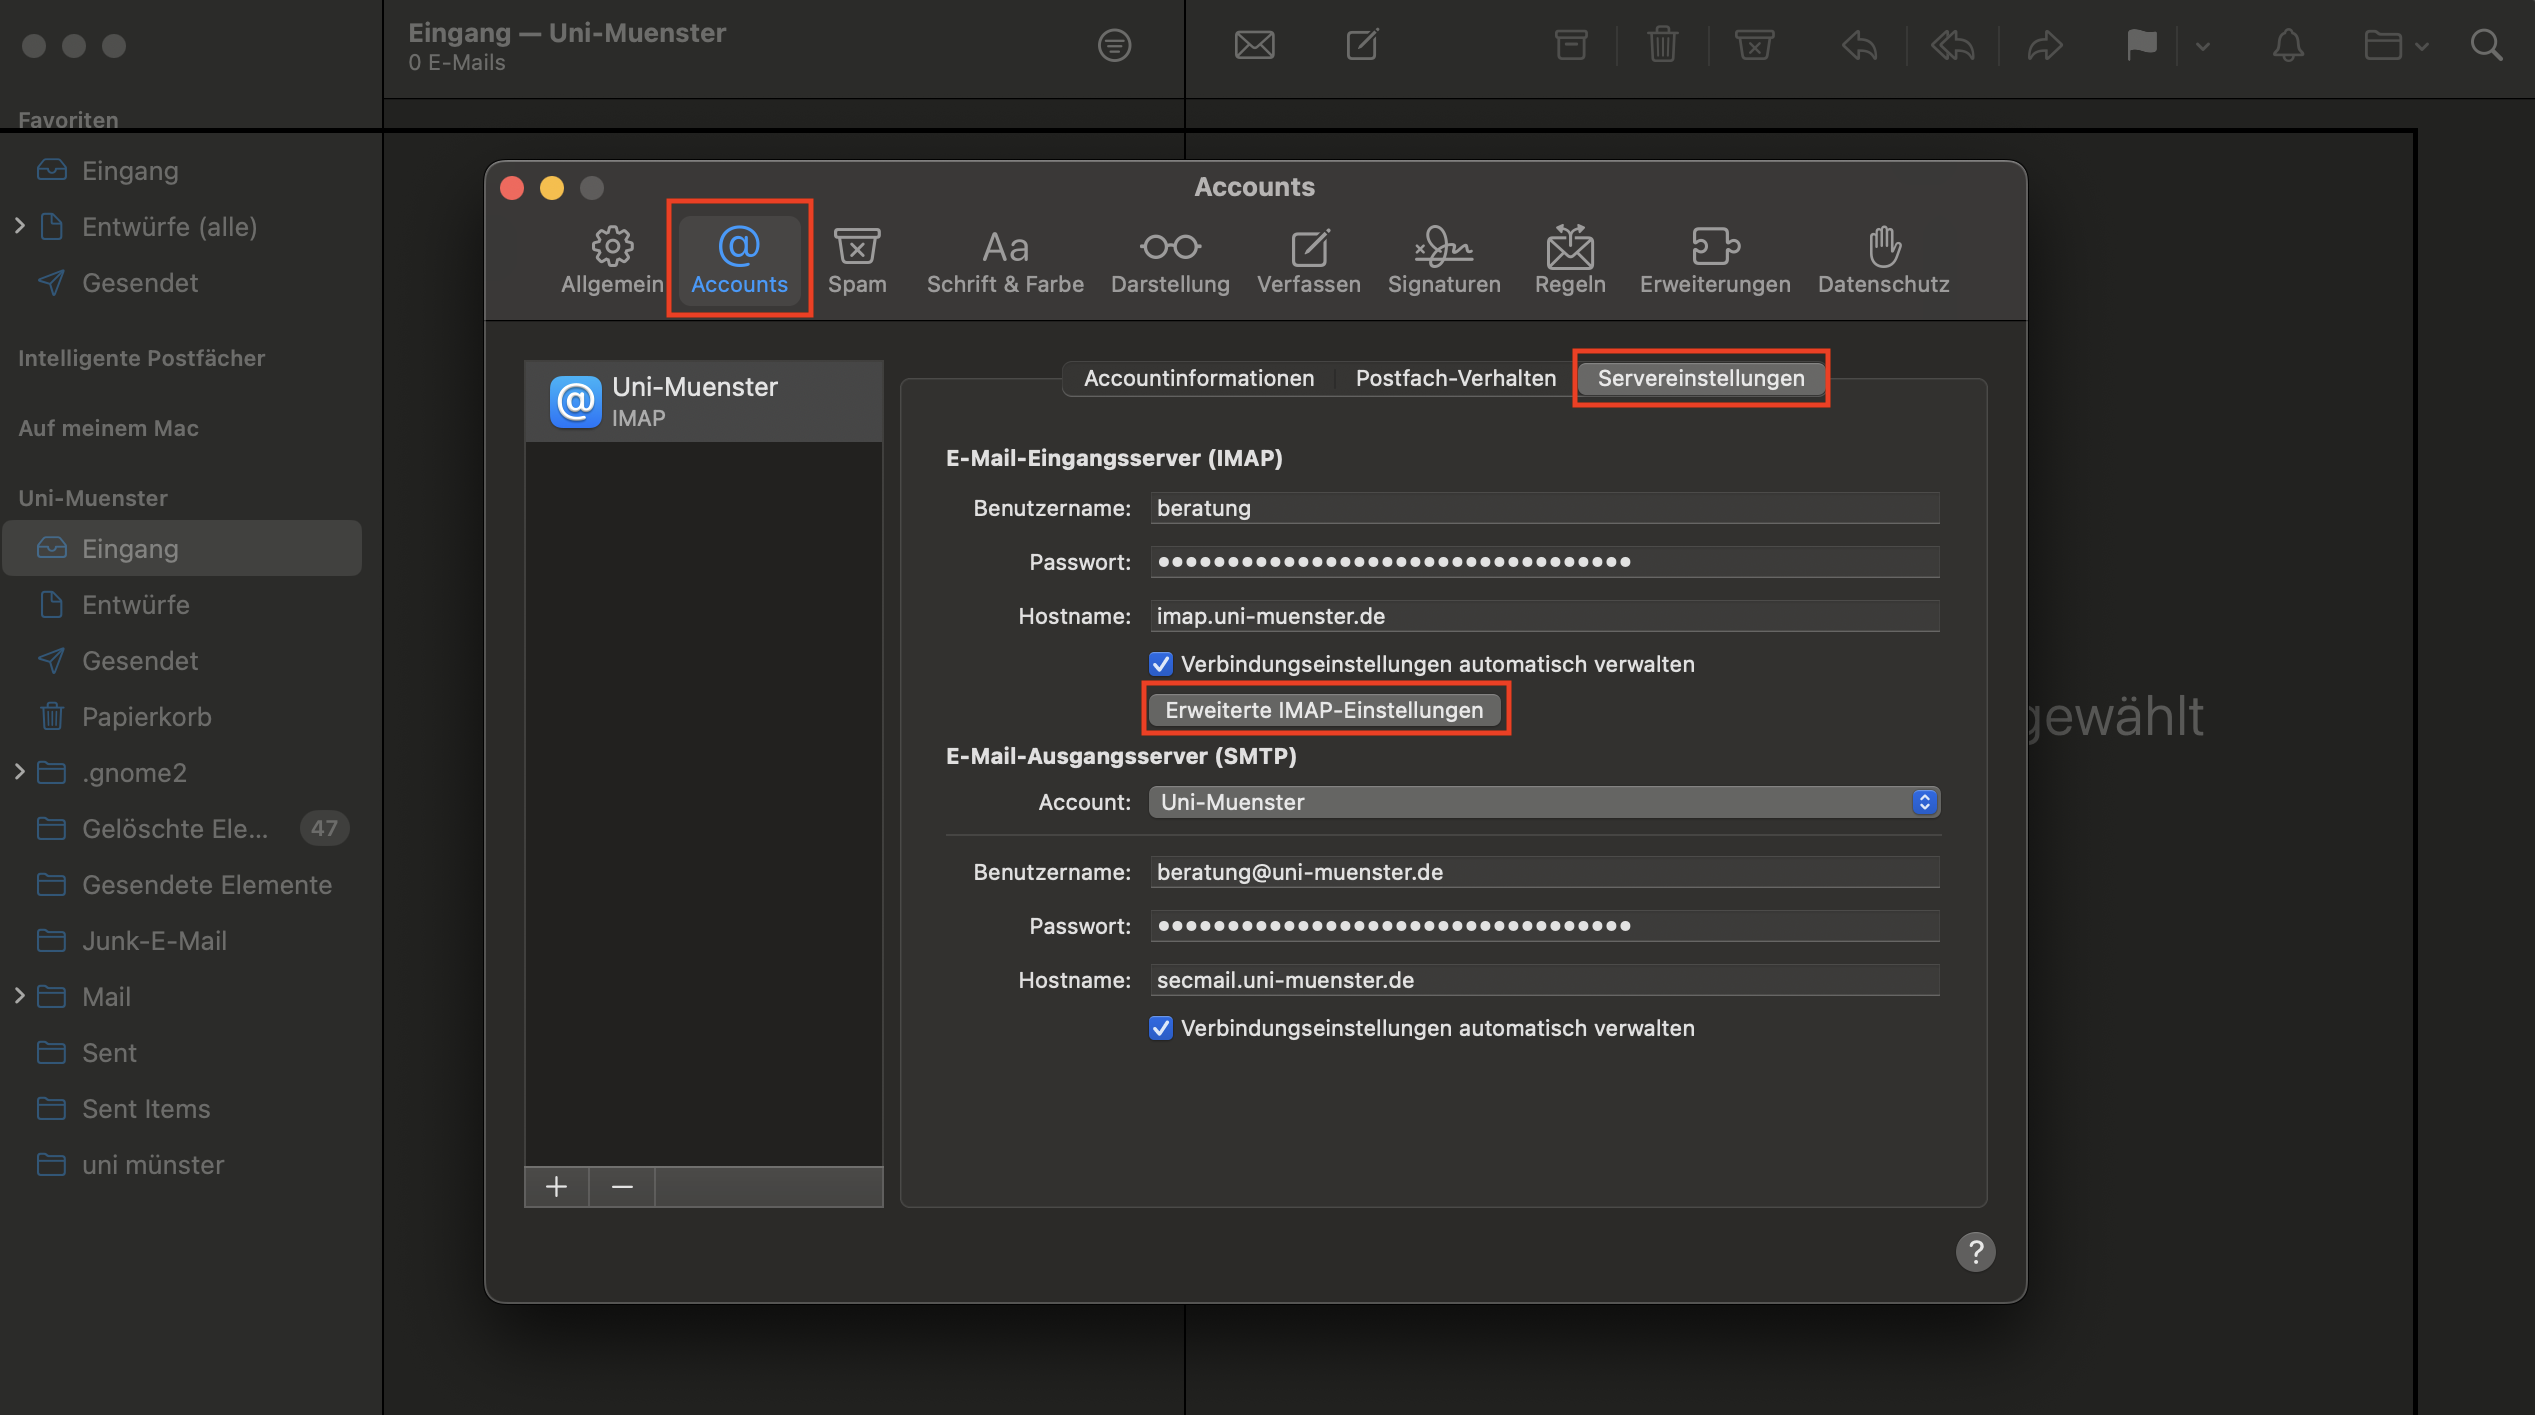
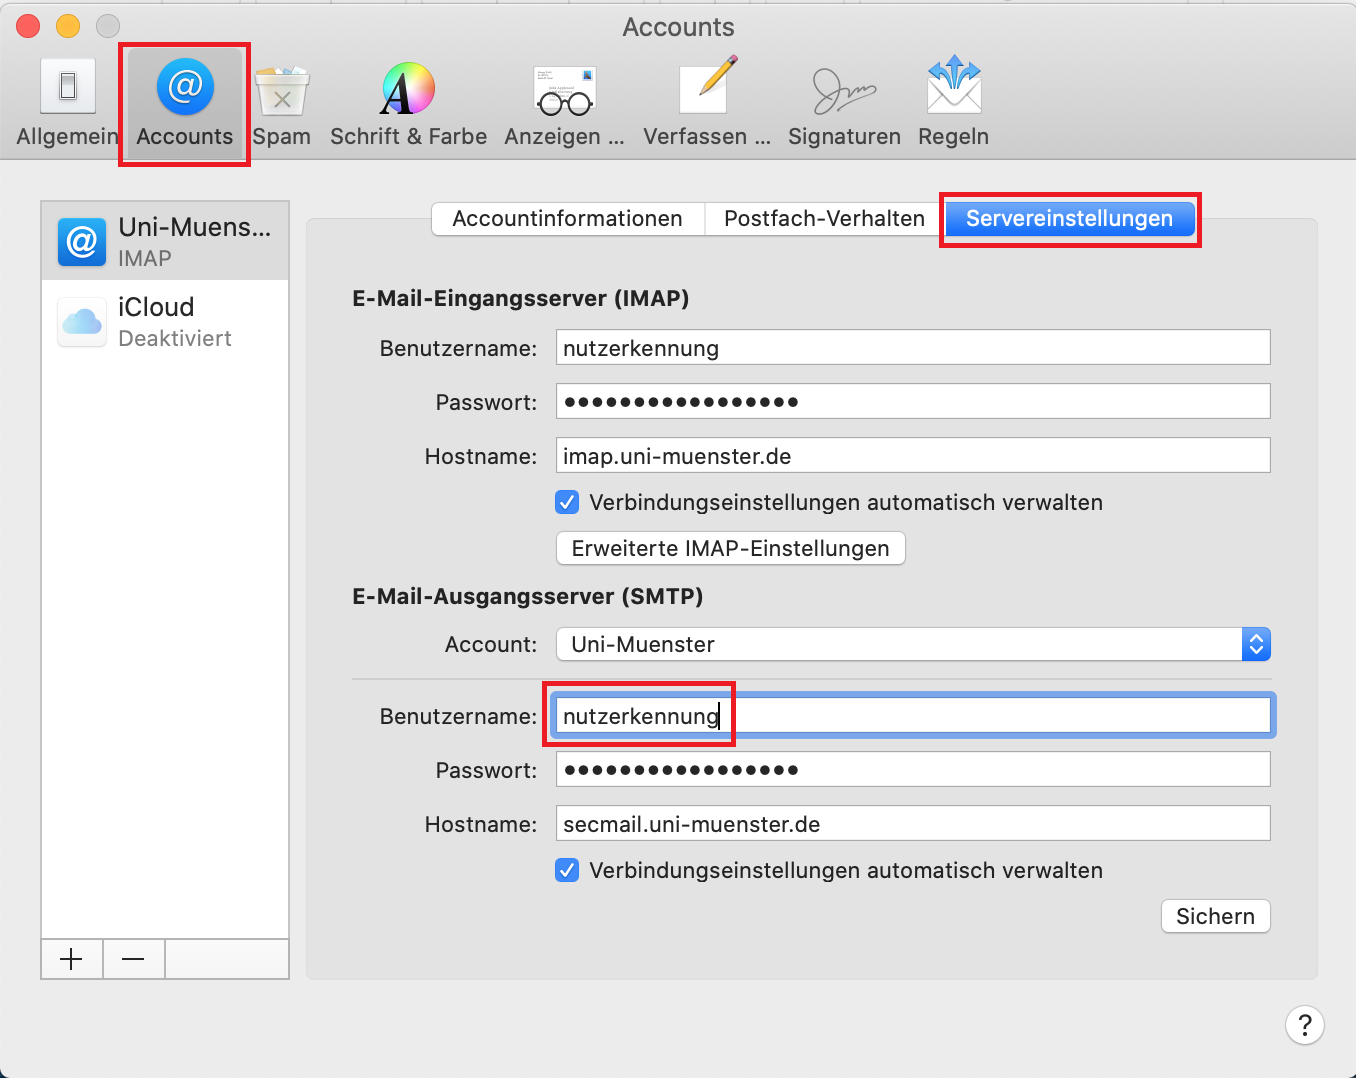
© CIT 7. Navigate to Advanced IMAP Settings
Click on 'Accounts' at the top, select the University of Münster mail account, navigate to server settings, and click on 'Advanced IMAP Settings' (see screenshot).
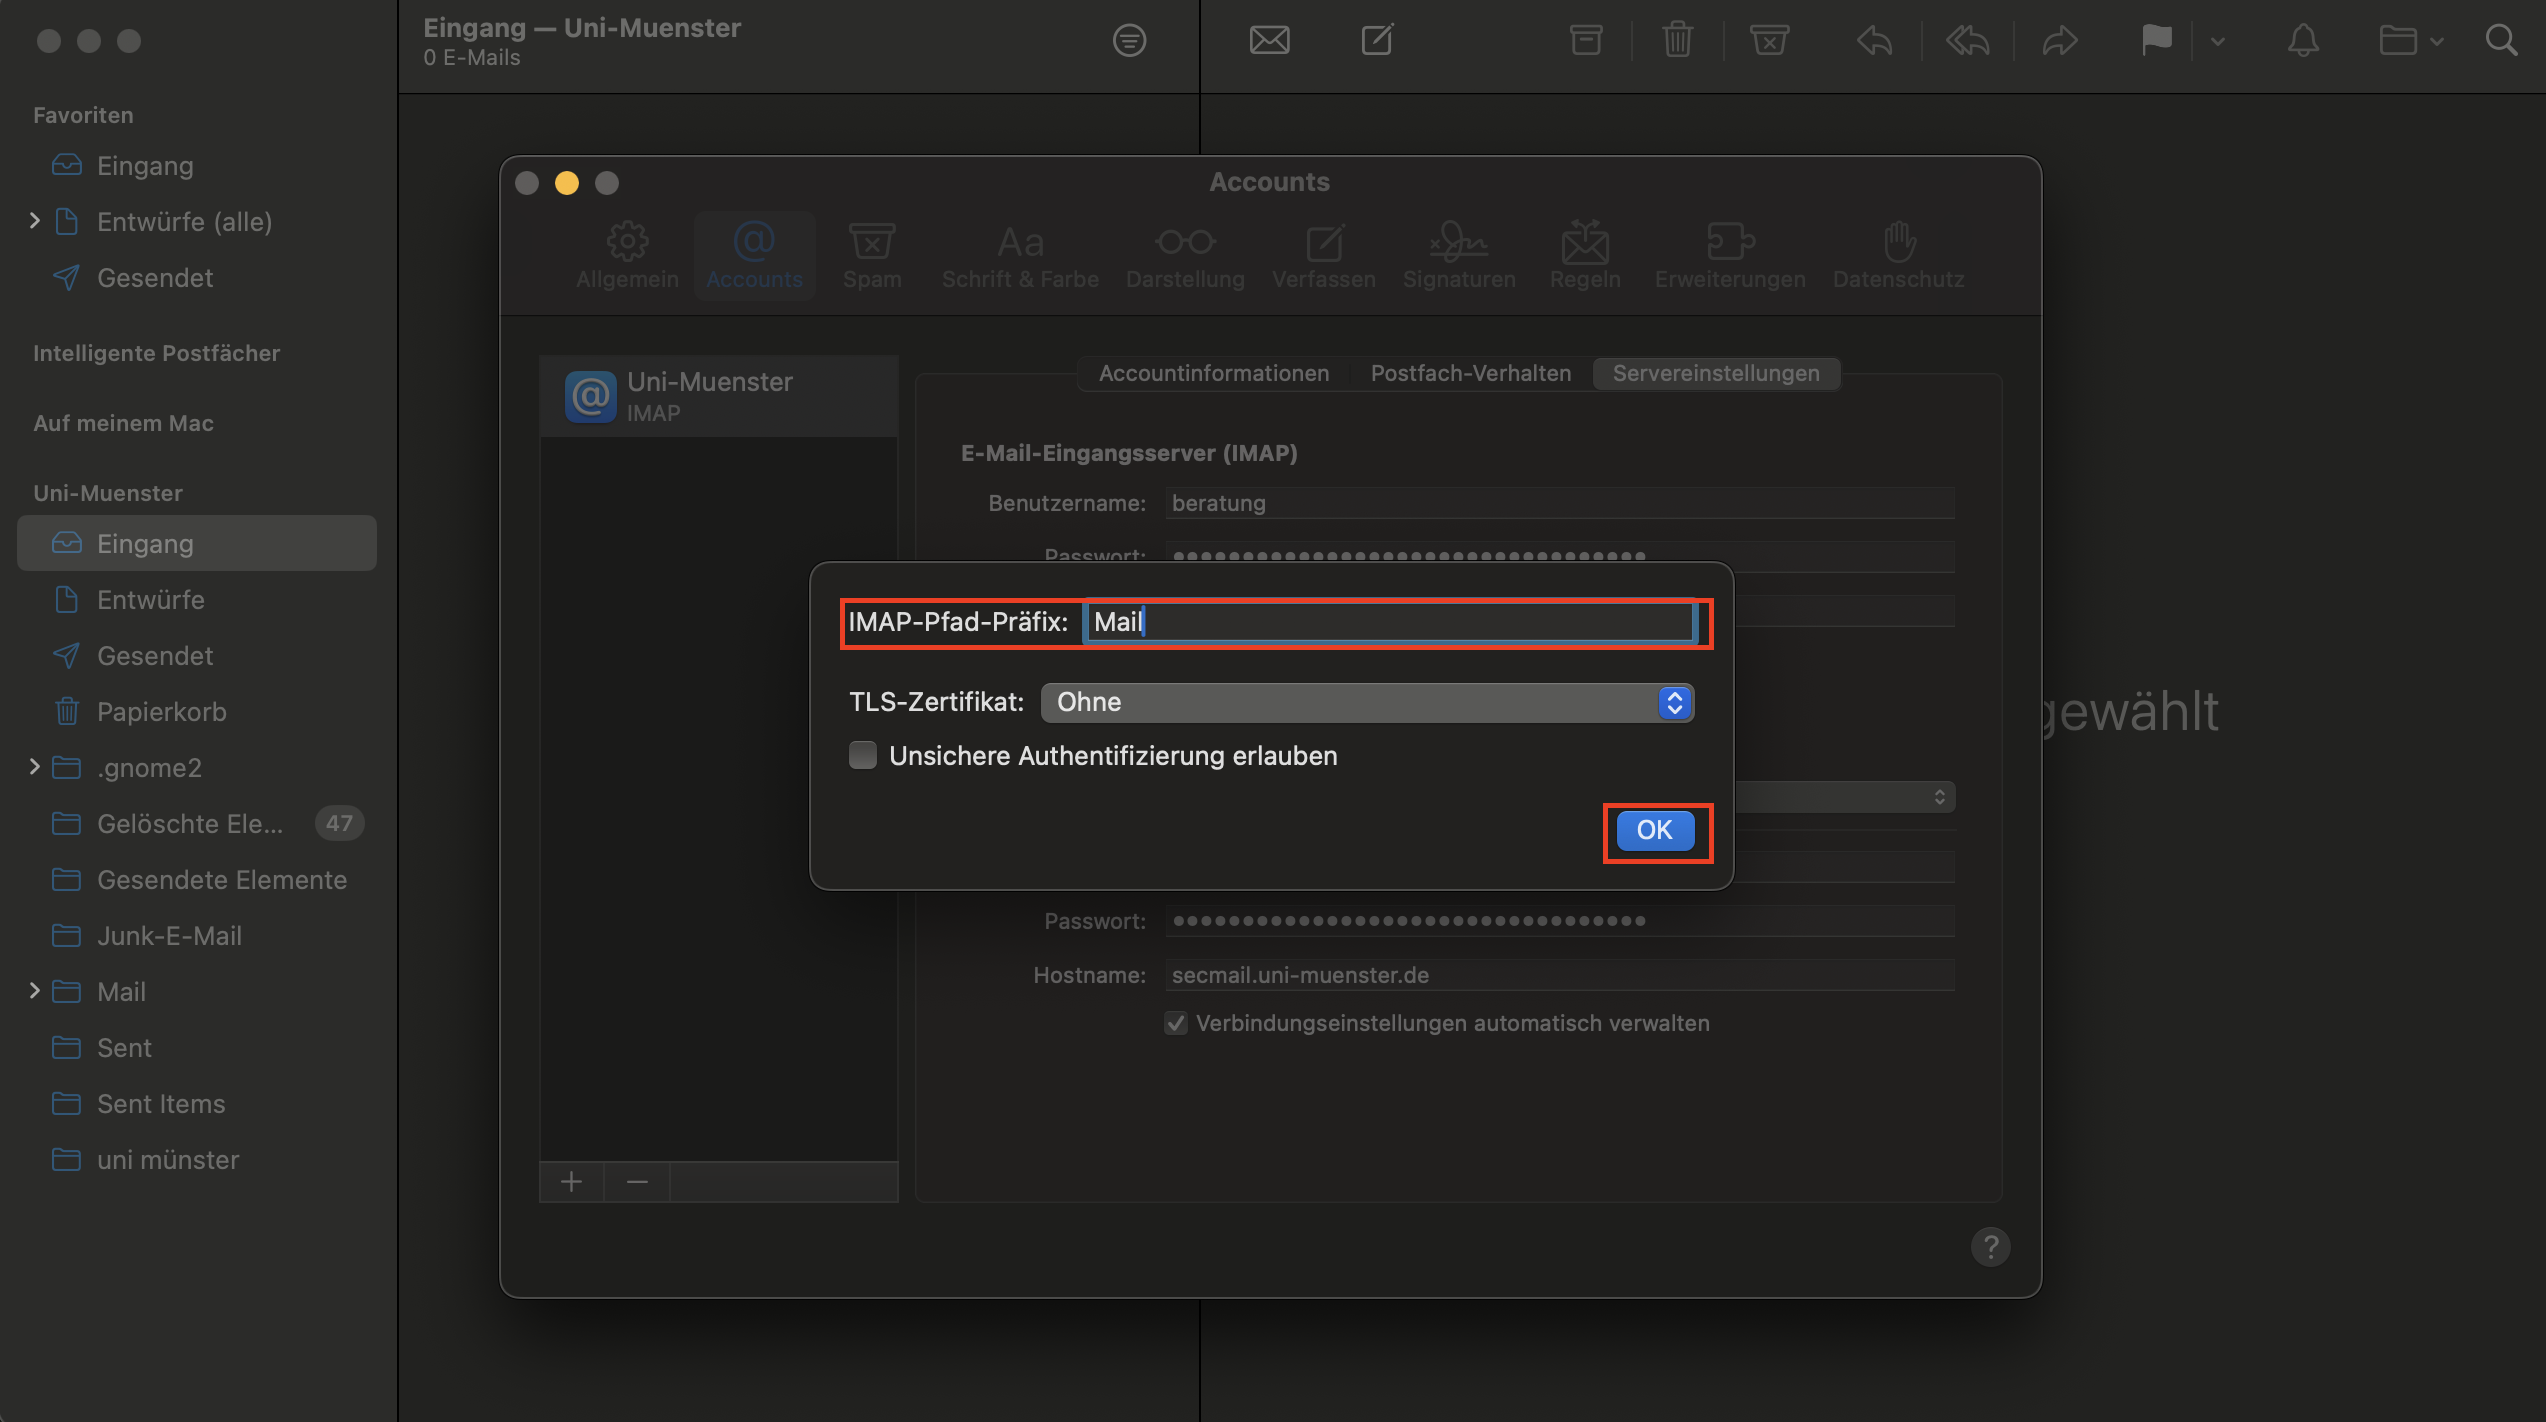
© CIT 8. IMAP Path Prefix
Please add "Mail" as Path Prefix and confirm your entry.
© CIT 9. Adjust outgoing server settings
For the outgoing mail server, only enter your university ID as the user name (the complete e-mail address is incorrectly entered there when the account is created).
© ziv


