OTP - linux
Note: If you already have an OTP service in use, you can continue to use it, in which case please just follow the "Setting up the service" points in our instructions.
ATTENTION: You need the GNOME Authenticator regularly to generate an OTP, do not delete the programme just like that. For security, it is best to also register an OTP service with your mobile device: Instructions for Android and iOS
Contact: IT-Support
GNOME Authenticator
1. Installation of Authenticator
Please install Authenticator via your software center. This may vary depending on the operating system and interface.
Authenticator can also be installed especially via Flatpak and Snap, the two cross-operating system installation options.
Through Flatpak, you can use the following terminal command: flatpak install flathub com.belmoussaoui.Authenticator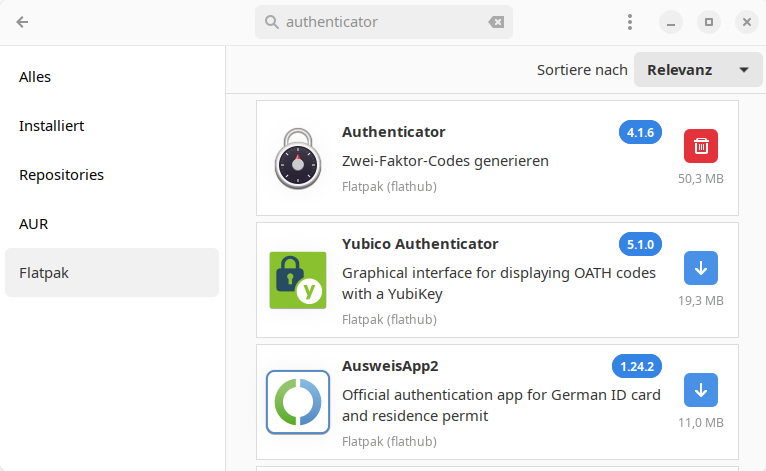
© Uni MS IT 2. Adding a new connection
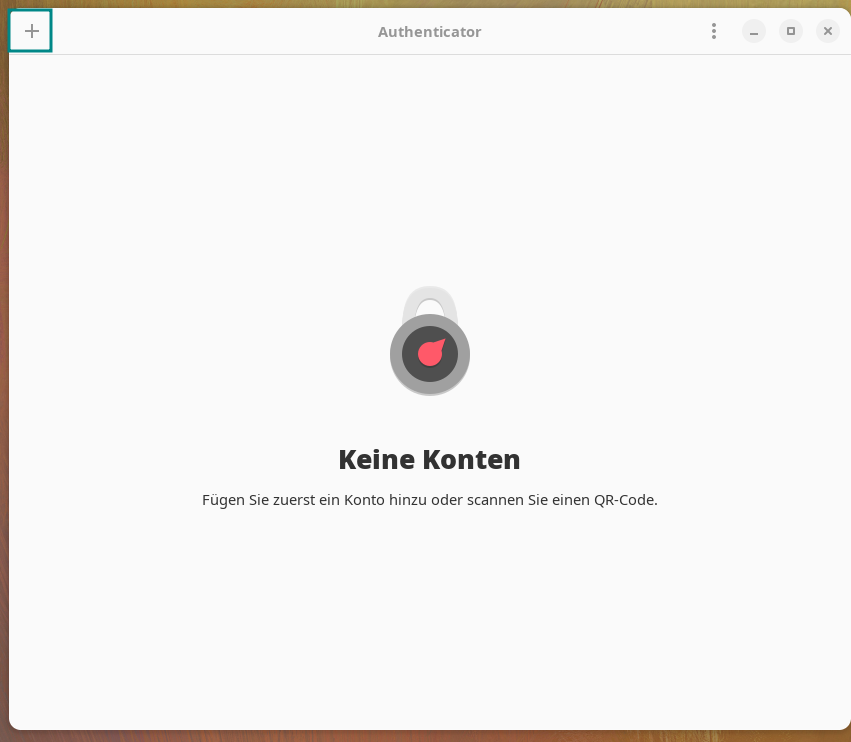
Open the Software "Authenticator" and click on the "+" in order to add a new connection.
© Uni MS IT 3. Regristration
Please switch now to the browser of your choice.
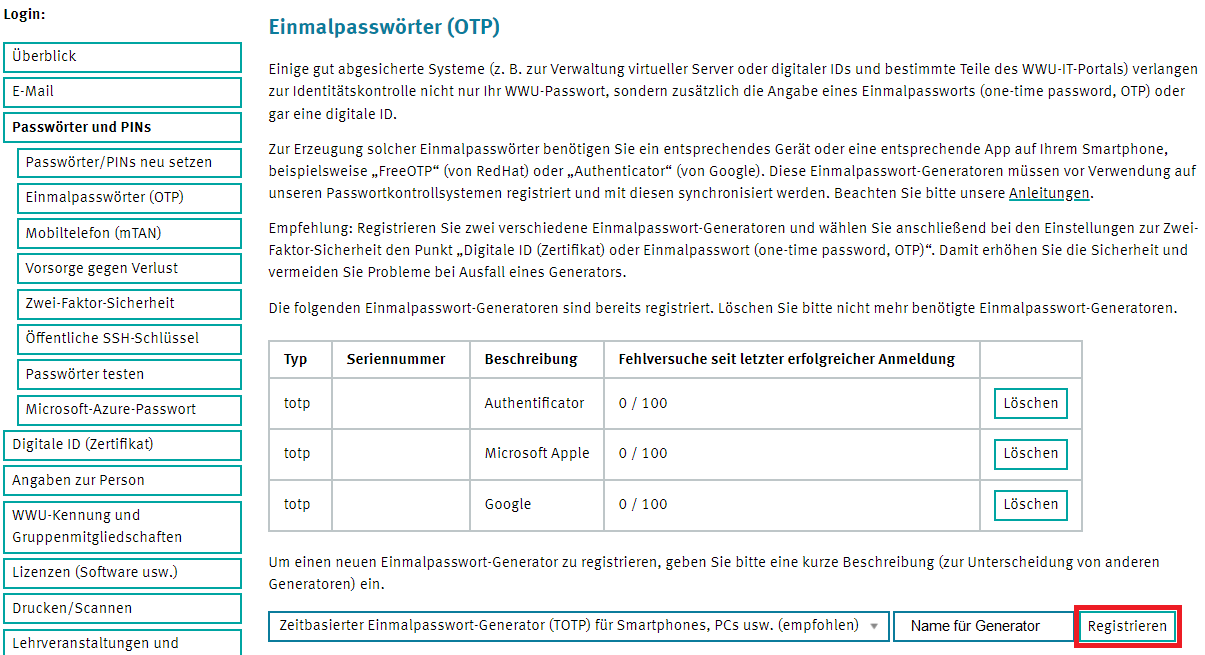
Setting up a one-time password generator is possible in the IT portal under the menu item "Passwords and PINs". Please select the item "Manage" on the page under "Two-factor security" under "One-time password generators" or alternatively the sub-item "One-time passwords (OTP)" in the menu bar on the left.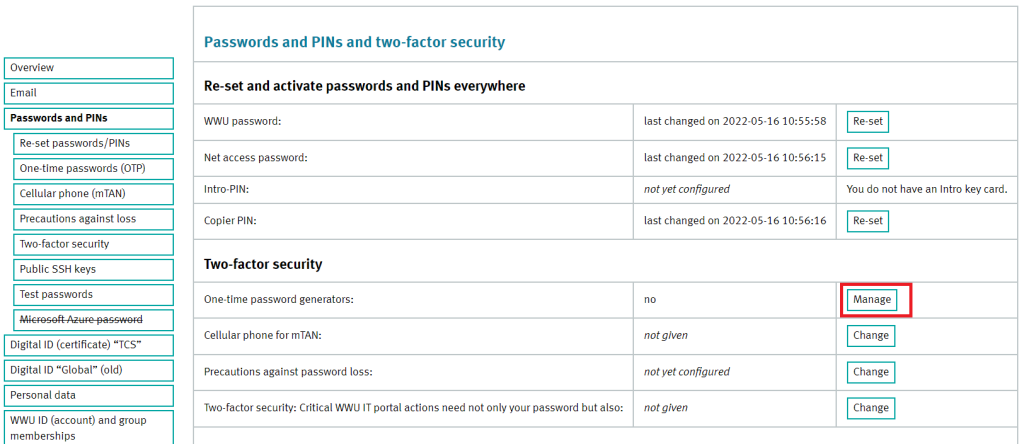
© CIT 4. Registration of a password generator
Select your OTP method (We recommend TOTP) and choose a description for your password generator. Then click "Register". .
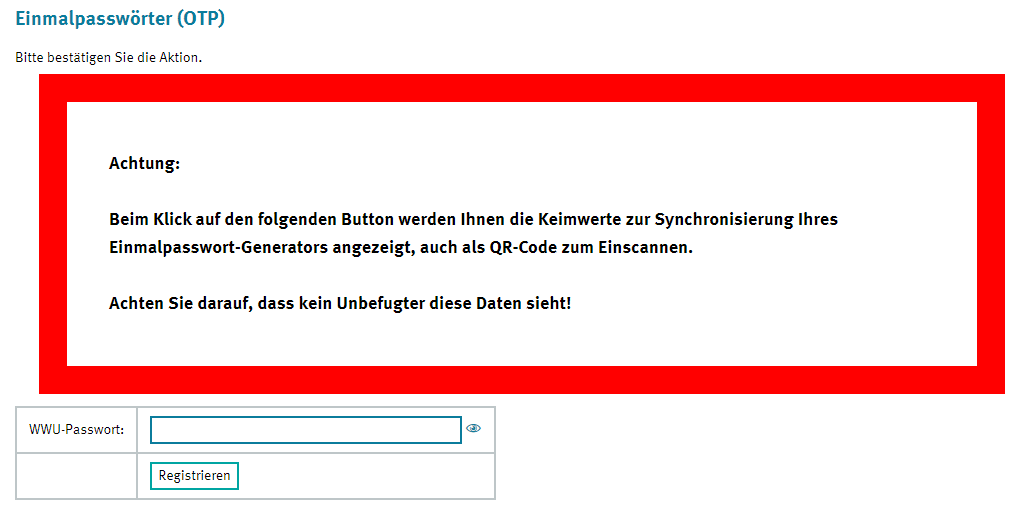
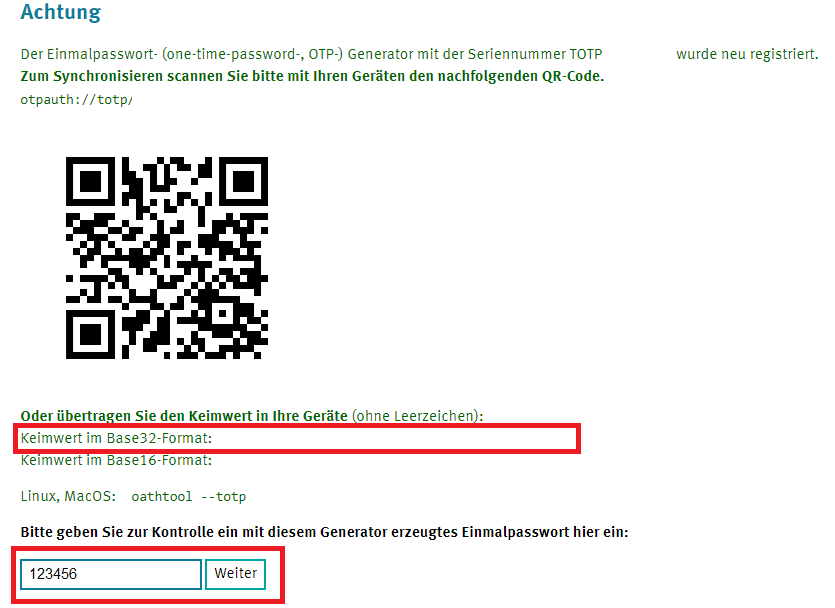
© CIT 5. Confirmation of Change
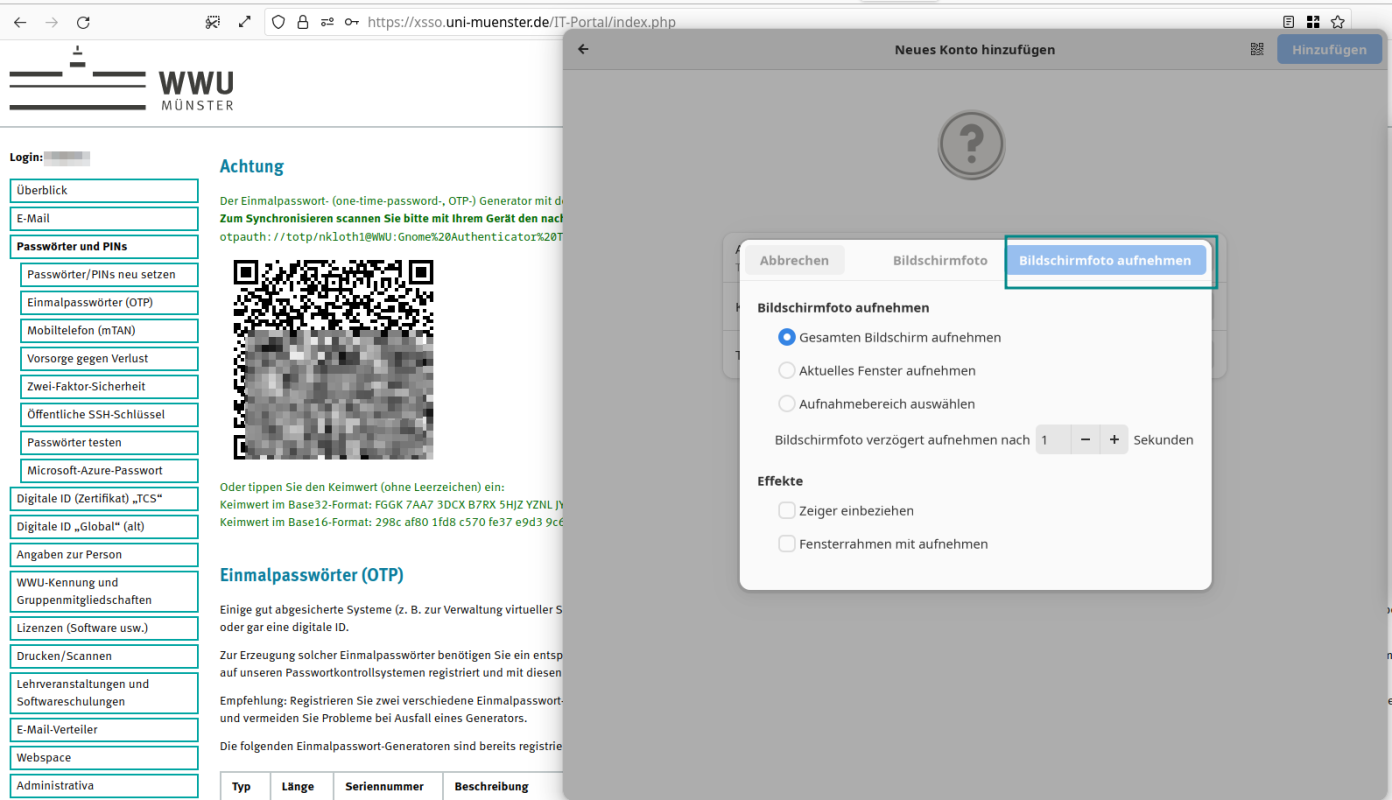
After opening this window (see screenshot), you will need to enter your university password in the field. If you have already activated the two-factor authentication, a second password may be expected. This will open a QR code and a germ value to confirm the generator. Please do not close the new page, as you will need it again in a later step.
© CIT 6. Scan the QR-Code
Now, please switch back to Authenticator. On the top right corner, you can find a QR-Code symbol. Please klick on it and choose screenshot. Ensure that the QR code generated by the IT Portal is fully visible on the screen, so the software can scan the code correctly (s. Screenshot).
Finally click on the blue button to create a screenshot and share it with the application.
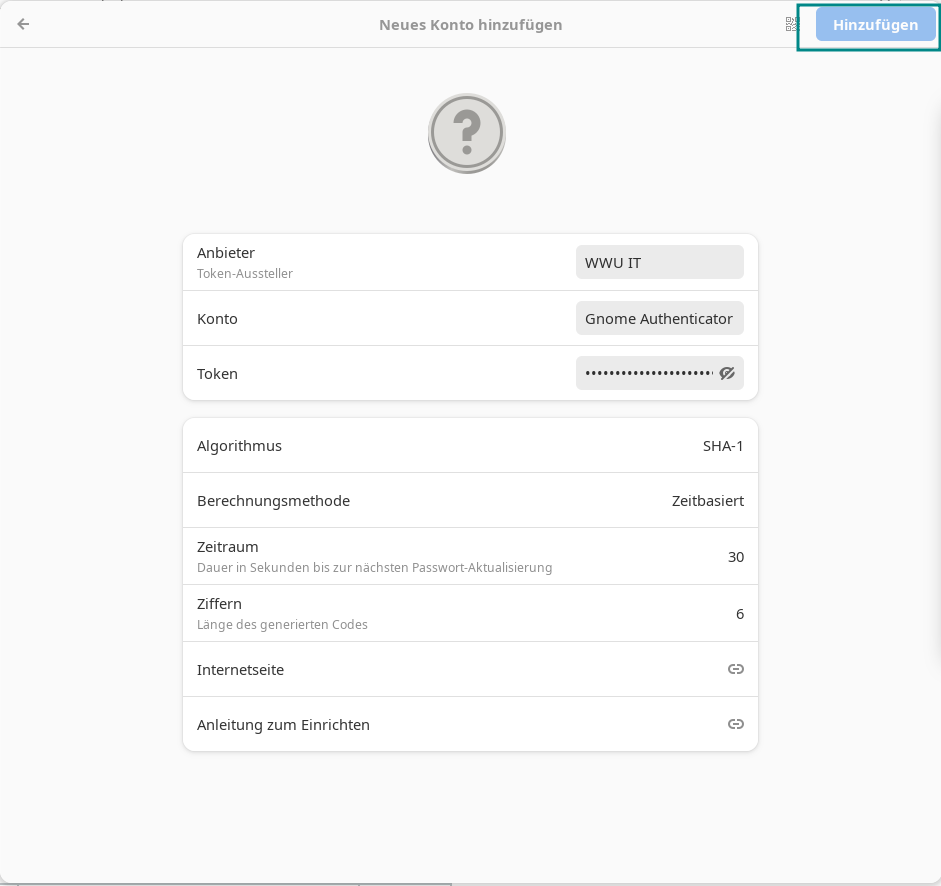
© Uni MS IT 7. Add service
The information was now automatically extracted. Click on "Add" to finally add the connection.
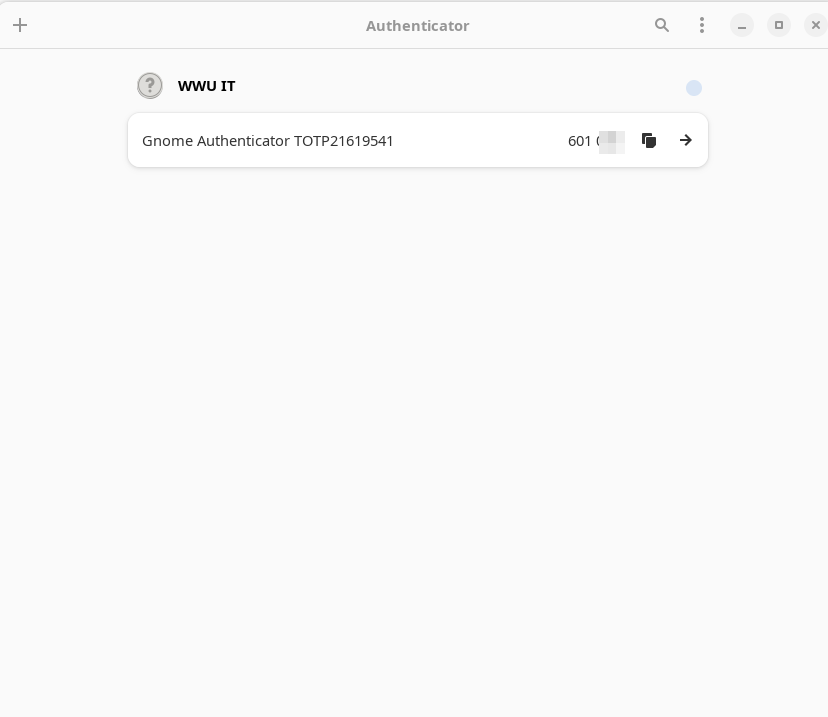
© Uni MS IT Now you can find in the overview the 6-digit-code. You have to enter this code if requested as shown in the next step.
© Uni MS IT 8. Checking the one-time password
After scanning the QR code with the app of your choice, your OTP generator is set up for use. When performing an action that requires confirmation via OTP, you input the multi-digit string of numbers displayed in your app. To check and confirm the OTP generator, a one-time password is expected, which must be entered in the field. Otherwise the generator will not be accepted.
© CIT