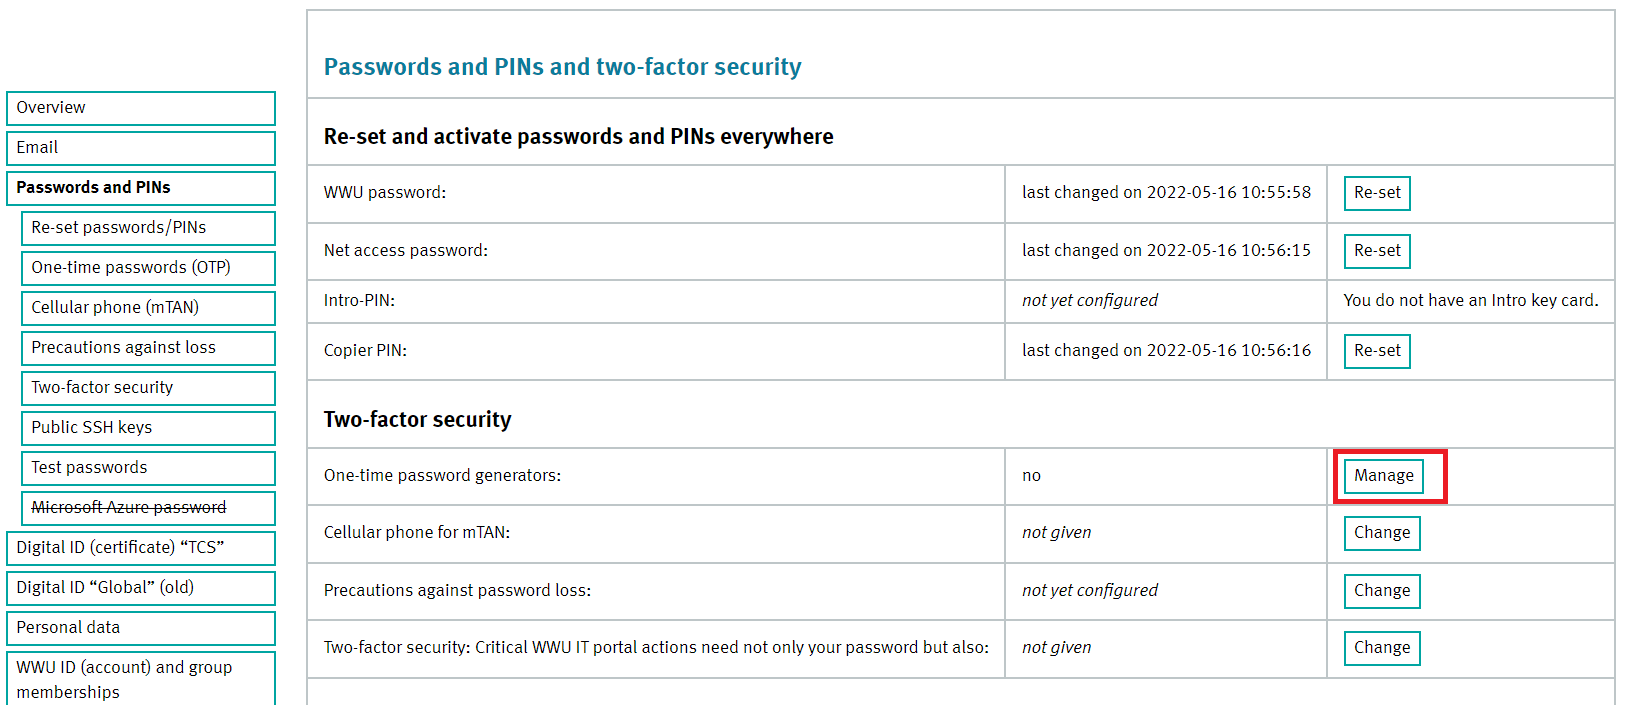
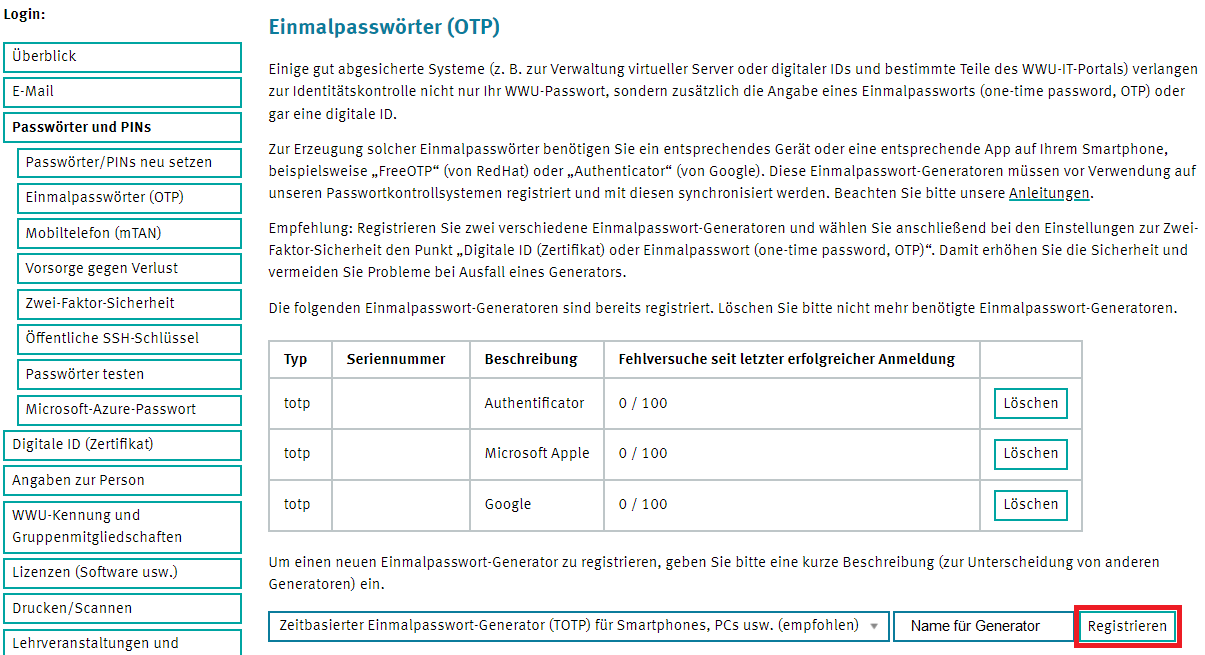
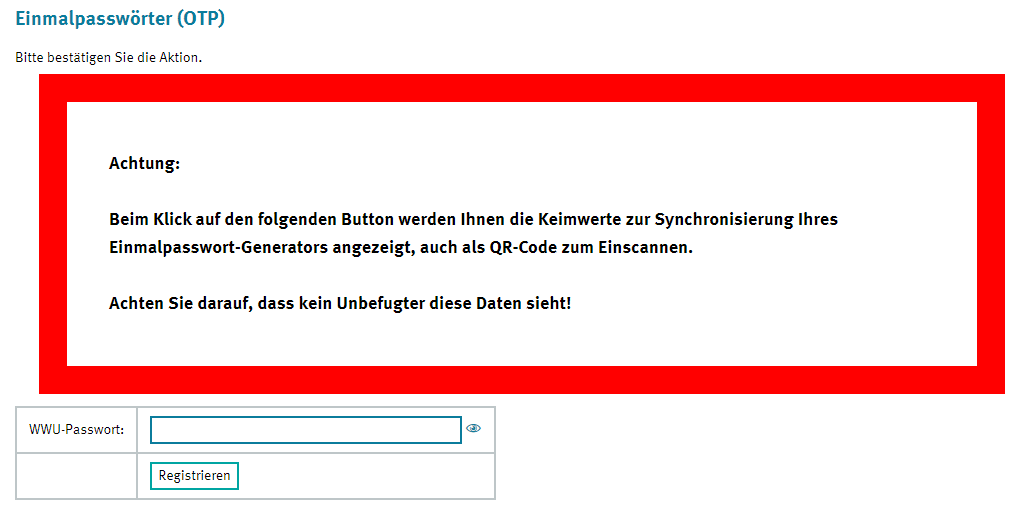
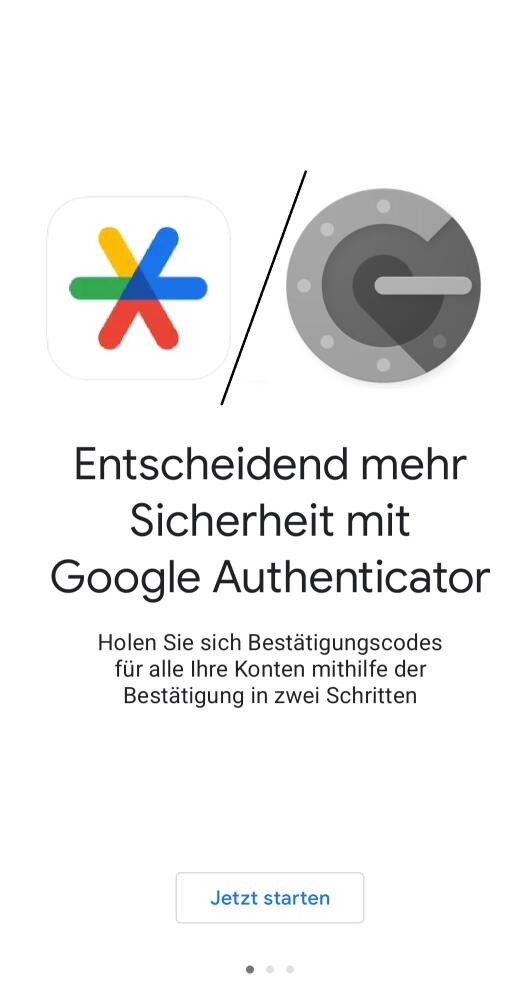
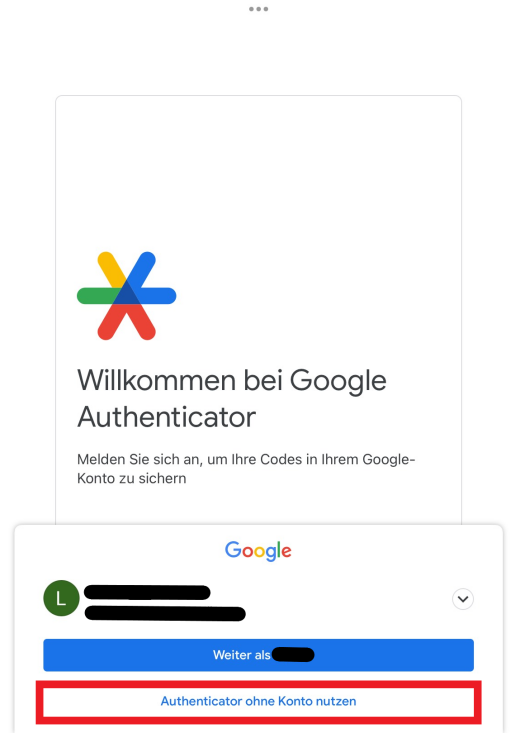
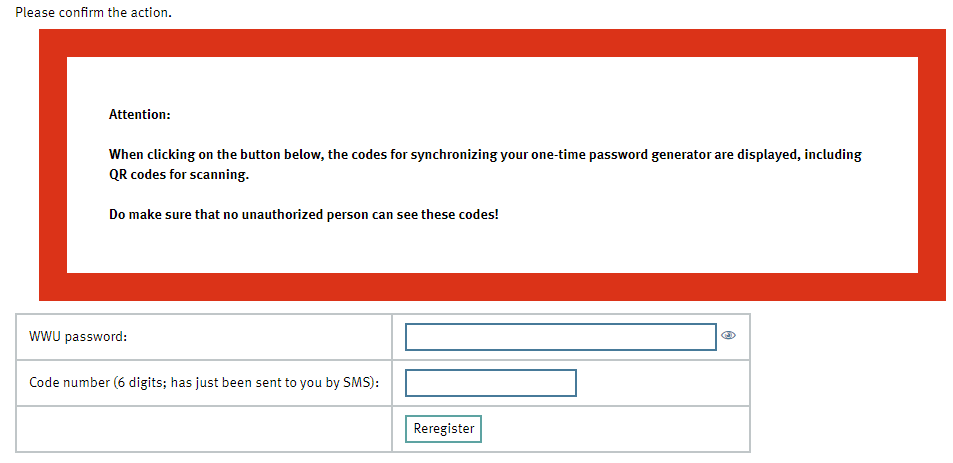
OTP - android and iOS

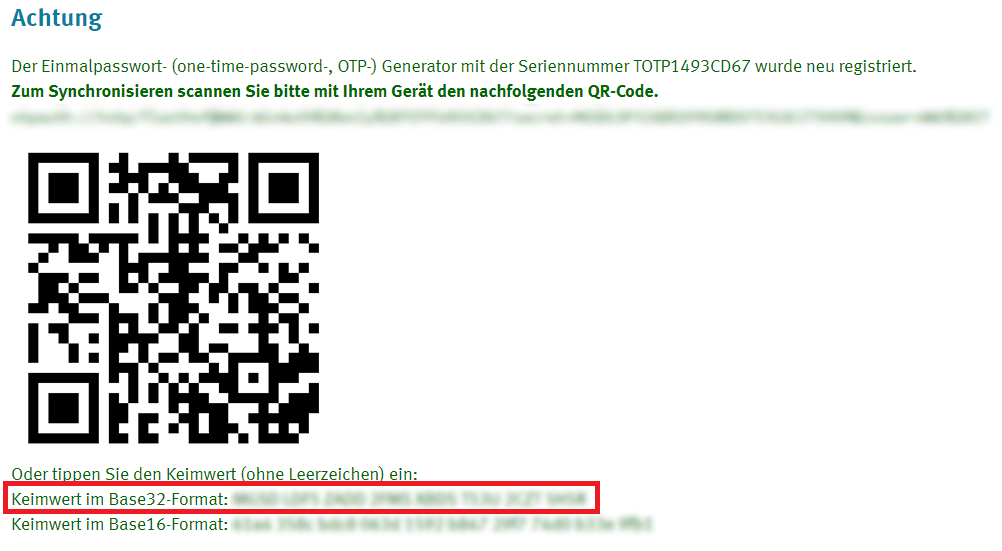
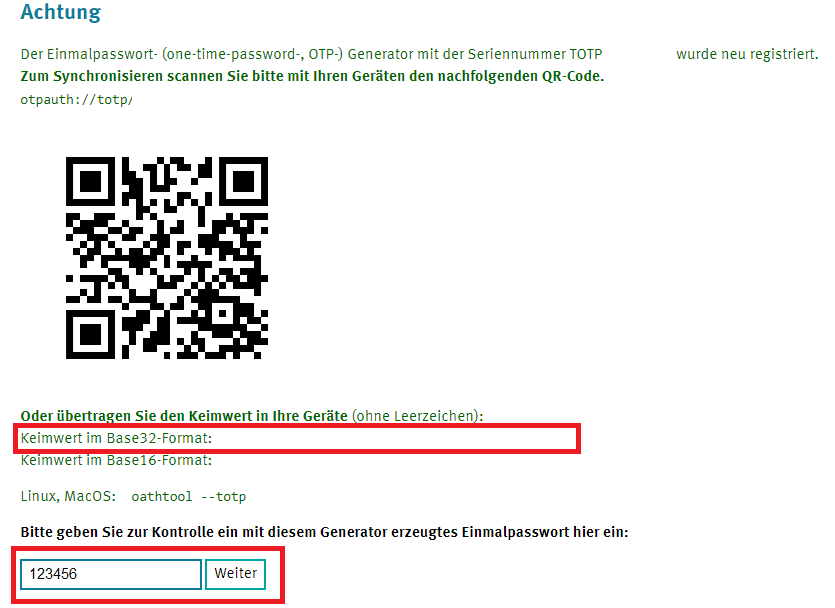
Note: If you already have an OTP service in use, you can continue to use it, then please just follow the points "Setting up the service" in our instructions.
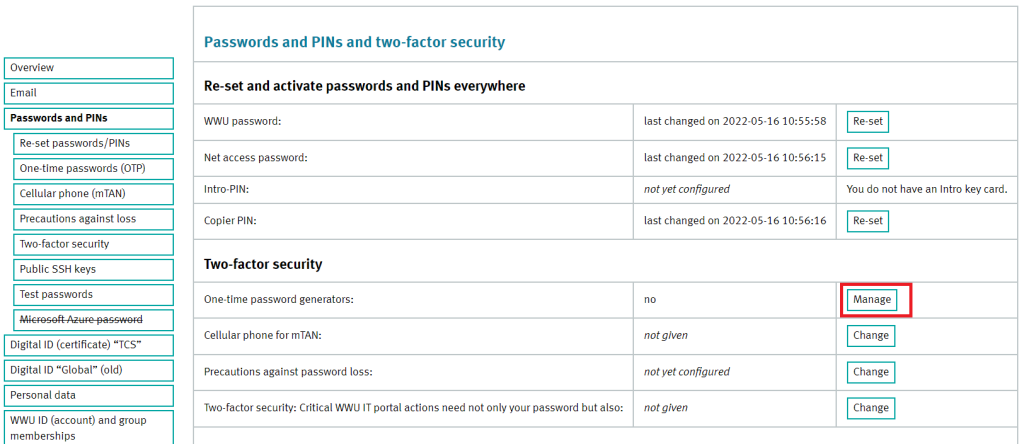
ATTENTION: You need the Google Authenticator regularly to generate an OTP, do not delete the programme just like that.

Contact: IT-Support

  • Google Authenticator

    1.In your terminal device: Download the app

    Download the Authenticator by selecting the link to the appropriate app store. 

    Google Play Store 
    Apple
     

    1.In your terminal device: Download the app
    © Google / Uni MS IT

    2. In the IT-Portal: Establishment of the service

    Setting up a one-time password is possible in the IT portal under the menu item "Passwords and PINs". Please select the item "Manage" under "Two-factor security" under "One-time password generators" or alternatively the sub-item "One-time passwords (OTP)" in the menu bar on the left.

    2. In the IT-Portal: Establishment of the service
    © Uni MS IT

    3. In the IT-Portal: Registration of a password generator

    Select your OTP method (We recommend TOTP) and nnter any name for the generator you have chosen. Then click on "Register" to activate your generator.

    3. In the IT-Portal: Registration of a password generator
    © Uni MS IT

    4. In the IT-Portal: Change confirmation

    After opening this window (see screenshot), you will need to enter your university password in the field. If you have already activated the two-factor authentication, a second password may be expected. Thereupon a QR code and a germ value will open to confirm the generator. Please do not close this new page, because you will still need it in a later step!

    4. In the IT-Portal: Change confirmation
    © Uni MS IT

    5. With the app: Launch Google Authenticator

    When you launch Google Authenticator for the first time, tap "Launch now". If this option does not appear, skip to the next step.

    5. With the app: Launch Google Authenticator
    © Google / Uni MS IT

    6. With the app: Google Authenticator Login

    Now you will be offered the option to continue with an existing Google account. Please specify here to use the Authenticator without an account.

    6. With the app: Google Authenticator Login
    © Uni MS IT

    7. With the app: Scan QR code

    Tap on "Add QR code", scan the QR code from the IT portal with the downloaded authenticator app and confirm the subsequent window. This process is explained in more detail in the next step....

    7. With the app: Scan QR code
    © Uni MS IT

    8. With the app: Activation of the generator

    To synchronize the OTP-generator, the QR code must be scanned via your downloaded app or you enter the setup key manually. When entering manually, enter the seed value below the QR code as the security key. You can name the account "University", for example. The key type "Time-based" must be retained.

    8. With the app: Activation of the generator
    © Uni MS IT

    9. In the IT-Portal: Control of the one-time password

    After you have scanned the QR code in your app or added the seed value to your authenticator, you can use the OTP procedure. For actions that require confirmation, now enter the code displayed in your app in the "One-time password (OTP)" field. To check and confirm the OTP generator, a one-time password is expected, which must be entered in the field. Otherwise the generator will not be accepted.

    You need the Google Authenticator regularly to generate an OTP, do not delete the programme just like that.

    9. In the IT-Portal: Control of the one-time password
    © Uni MS IT