
If you are an IT administrator in your department and wish to set up Windows Remote Desktop access to NWZ workstations (Windows PCs), please do not use the VPN gateways of the university for access from the Internet, but the Remote Desktop Gateway provided for this purpose.
In order to use the Remote Desktop Gateway and the Windows Remote Desktop Services on NWZ workstations (Windows PCs), some requirements have to be met on Windows and on the network.
There are three levels to be observed, the configuration of which is described below.
It is the responsibility of the IT administrator to secure such access point against unauthorized access.
Activate Windows Remote Desktop Services and Configure Windows Firewall
Enabling Remote Desktop Services must be done through Group Policy. You can extend an existing Group Policy object, create a new one, or use the provided template "NWZ - Remote Desktop Services über Remote Desktop Gateway". The latter also automatically configures the firewall and ensures that the computer does not become inaccessible due to the power saving mode.

© IVV Naturwissenschaften 
© IVV Naturwissenschaften 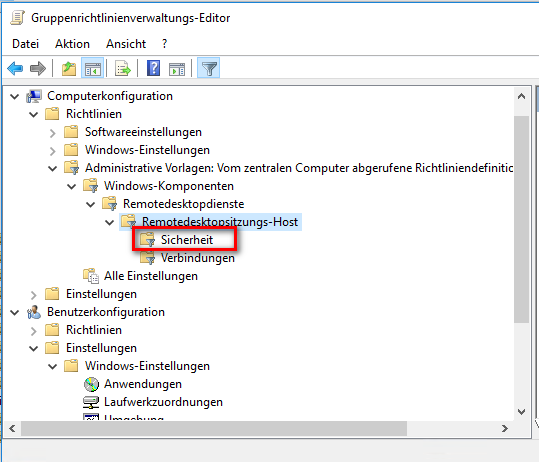
© IVV Naturwissenschaften 
© IVV Naturwissenschaften 
© IVV Naturwissenschaften 
© IVV Naturwissenschaften 
© IVV Naturwissenschaften 
© IVV Naturwissenschaften 
© IVV Naturwissenschaften 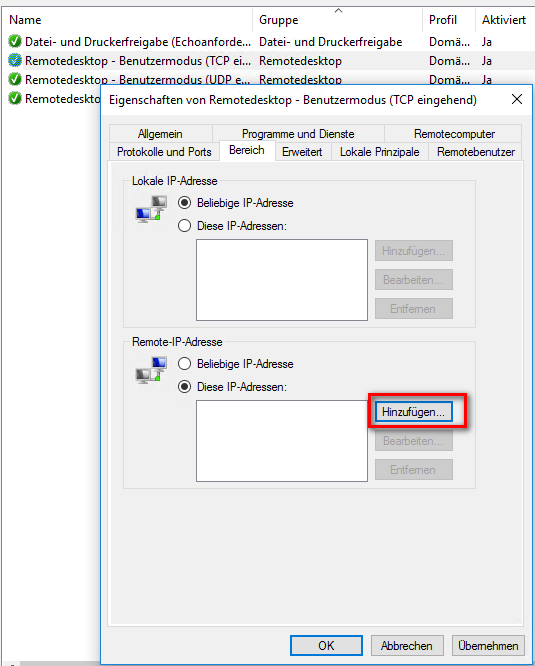
© IVV Naturwissenschaften 
© IVV Naturwissenschaften Configure Access Rules (ACLs) in NIC_online Net zone browser
To enable access to Remote Desktop Services via the Remote Desktop Gateway for your network zone, please contact the NOC and specify the network zone according to the network zone browser or the IP subnets, you deem to be accessible. The sub-module "RDP-CORONA" will then be added to your ruleset.
A general access rule is not possible. This would render the remote consoles of the central and decentralized Windows servers used only for administration accessible from the Internet.Configure User Access to Windows Remote Desktop Service
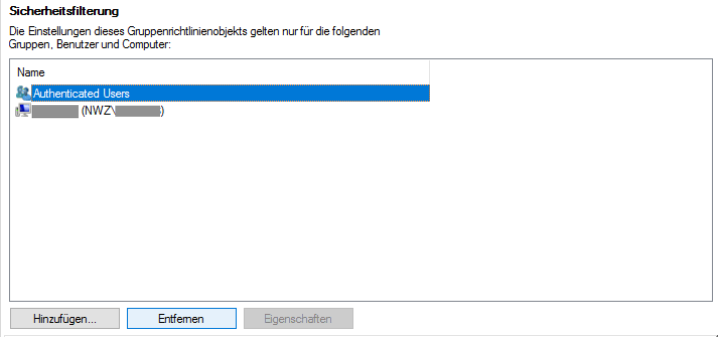
There is the option to configure the RDP user groups for all computers in an OU or explicitly for individual clients. We will discuss both configurations in this manual.
The configuration must be done via group policy.
You should create a new Group Policy object for this purpose.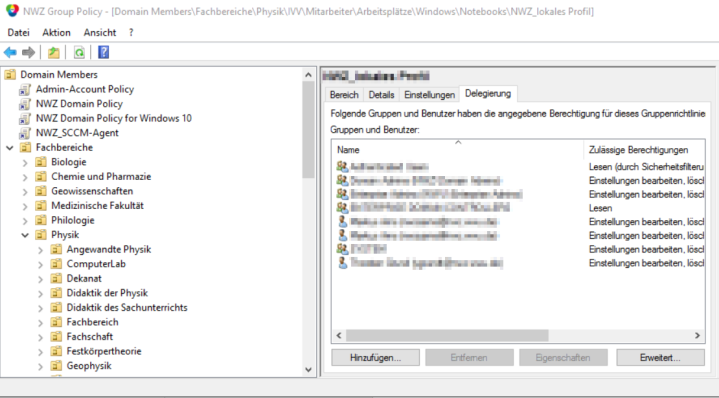
© IVV Naturwissenschaften 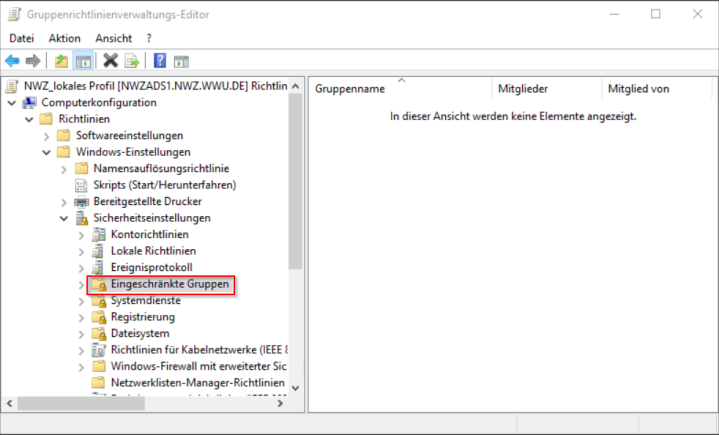
© IVV Naturwissenschaften 
© IVV Naturwissenschaften 
© IVV Naturwissenschaften 
© IVV Naturwissenschaften 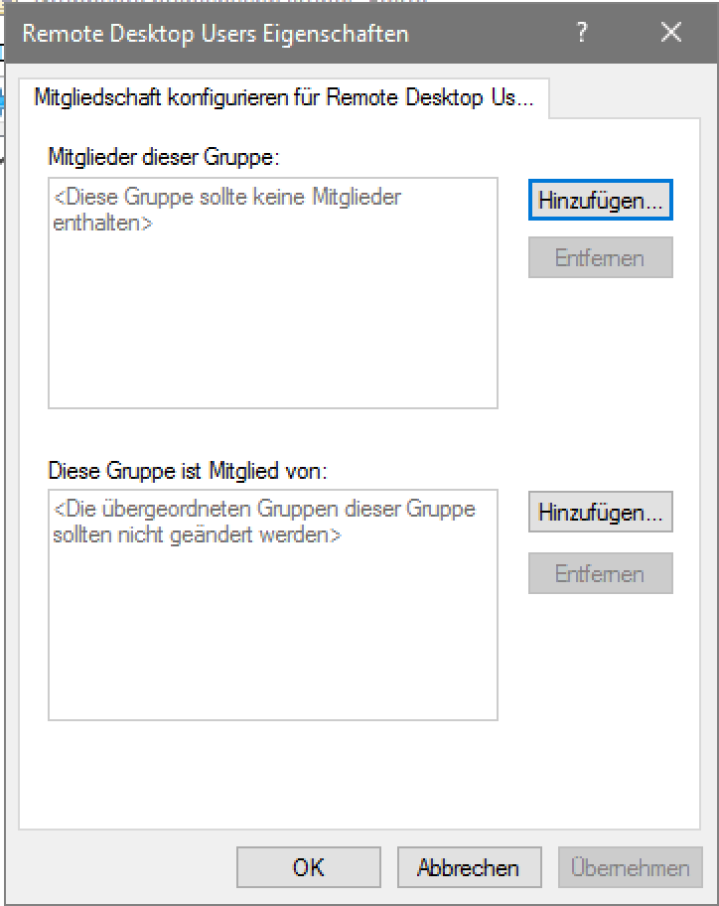
© IVV Naturwissenschaften © IVV Naturwissenschaften 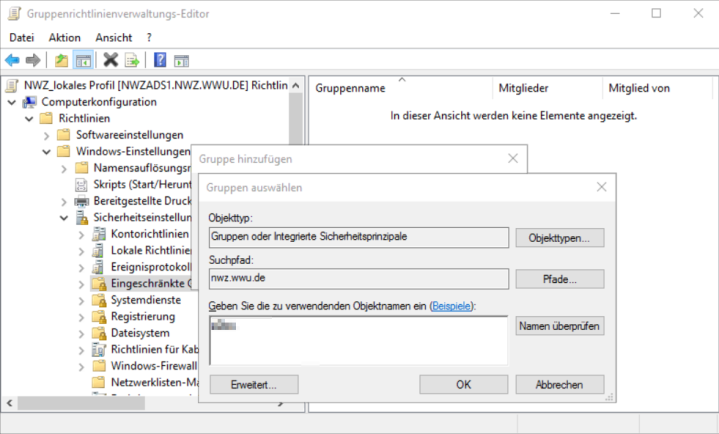
© IVV Naturwissenschaften 
© IVV Naturwissenschaften 
© IVV Naturwissenschaften 
© IVV Natruwissenschaften [Optional] Configuration of individual clients
© IVV Naturwissenschaften [Optional] Configuration of individual clients
Configure power saving settings
Tests have shown in several other IVVs that the energy saving settings can cause the computer to become inaccessible for the remote desktop. End users are advised of the problem of manually shutting down the computer in the instructions linked below.
To modify the power saving settings configured in Windows, you can use the following Group Policy object:"NWZ Energiesparplan Höchstleistung".
This should ensure that the computers do not go into power-saving mode and remain accessible. Please note the correct link order of the Group Policy objects if you want to change your own power saving settings with this policy. Power-saving policies distributed through Microsoft Endpoint Configuration Manager are overridden by Group Policy settings.
For configuration of power saving options in the BIOS/EFI of the PC, please consult the documentation of the respective manufacturer to disable it.End User Guide for Using the Windows Remote Desktop Service
After successful configuration of Windows Remote Desktop Services, please provide your users with the following instructions for using the service. Please remember to inform the users about the full computer name and the user accounts and passwords to be used.
The following link is not otherwise published , as its use requires prior configuration by the IT administrator, as well as additional individual information and, if necessary, instructions. You may pass it on.https://www.uni-muenster.de/NWZ/en/Hilfe/Nutzer/Anleitungen/Windows/RDSRDG/windowsrdsueberrdg.html