
A first example
On the basis of this example all important steps for starting a job on the Condor pool should be clarified. If you have any further questions, please refer to the short manual, the official manual and the FAQ.
The Job
As an example we use a very simple greeting program here, written in Fortran. Of course, in reality you should only send programs to the Morfeus-Grid that need a lot of computing time (and also do something useful...).
gruss.f90:
program gruss
   Implicit None
   Character(Len=80) :: name
   Write (*,*) "Bitte geben Sie Ihren Namen ein:"
   Read (*,*) name
   Write (*,*) "Hallo, ", trim(name)
end
The program was compiled under Windows quite normally with the 32-bit compiler and is now under I:\Documents\gruss\gruss.exe . From there we could now run it locally as usual. Instead we want to use the Morfeus-Grid.
Step 1 - Select a Suitable Computer to Send the Message
To send the job, you can use any computer that is part of the Morfeus grid, including your own workstation. However, it is important that the computer runs until the jobs are completed. If you switch off the computer, the jobs sent from there will also be aborted, even if they run on a completely different computer. If necessary, you should look for a more suitable computer.
Step 2 - Writing an Input File
If the job usually expects input from the keyboard, like our program above, write it to a text file instead and place it in the same directory as the program file. So we put a file I:\Documents\gruss\eingabe.txt with the content:
Fritzchen
If the program reads its input from a file anyway or does not need any input at all, this step is of course omitted. It is not necessary to create an empty file.
From here there are two possibilities: Using a graphical user interface or controlling Morfeus from the command line.
Possibility 1 (Using Morfeus via a graphical user interface):
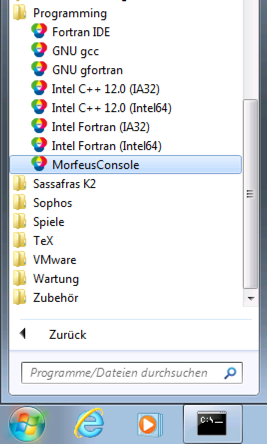
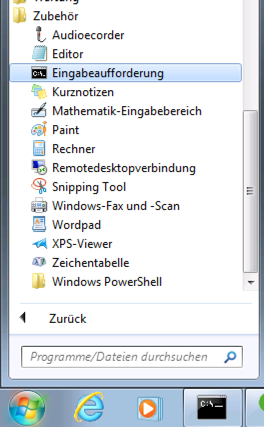
Step 3 - Start MorfeusConsole
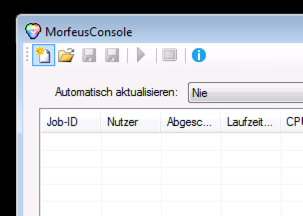
The jobs in the Morfeus Grid can be managed with the program "MorfeusConsole". We start the program from the start menu (Submenu "Programming"):
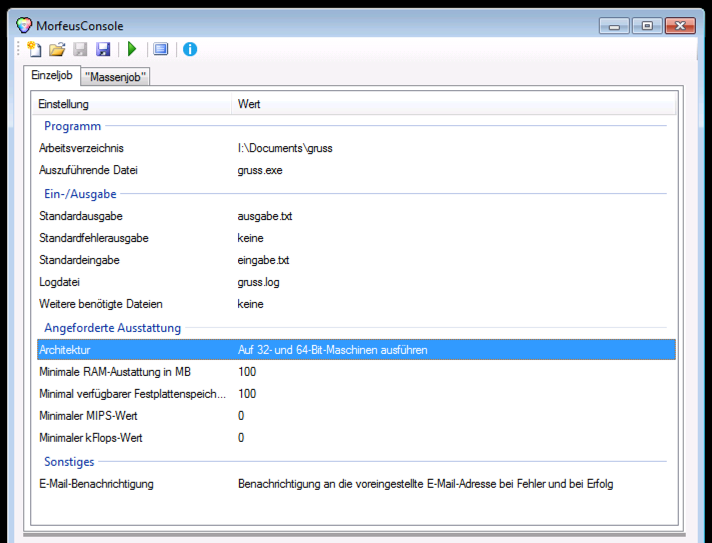
Step 4 - Create Job Description
We create a new job description and select the directory where our program is located as the working directory (I:\Documents\gruss):
Step 5 - Make Settings
We need to make settings now. The name of the file to execute is already correct, but the input file we created in step 2 still needs to be specified. Double-click on the line "Standard input" and enter the file name "input.txt" or select it with the button "Select".
The output of the program should not be saved under "gruss.out", but under "ausgabe.txt", so we also change this entry by double-clicking it.
Since we have created a 32-bit program that runs on both 32-bit and 64-bit machines, we can finally change the architecture settings accordingly.
Our simple program has no further memory requirements.
Step 6 - Send the Job
Now the job only has to be transferred to the grid by clicking on the "Start Job" button:
If you are submitting a job from this PC for the first time or have recently changed your password, MorfeusConsole will ask you for your password, as it is needed to transfer the jobs to the grid.
Schritt 7 - Check the Status of the Jobs
By clicking on "Update now" we can now check the status of the job. Depending on how busy the grid is, the job will first be in the state "I (waiting)". As soon as a suitable machine has been found for the job, the status changes to "R (running)". As soon as the job is completed, it disappears from the list. If you did not deactivate this in step 5, you will also receive an e-mail at this point.

Schritt 8 - View Output File
If we now go back to our working directory, we will find the output file "output.txt" there with the content:
Bitte geben Sie Ihren Namen ein:
Hallo, Fritzchen
That was it!
Possibility 2 (Controlling Morfeus from the Command Line):
Step 1 and 2: see above.
Step 3 -Open the Console
First we start a command prompt:
Step 4 - Create Job Description
We change to the directory where our program is located (I:\Documents\gruss) and create a file gruss.sub there:
cd I:\Documents\gruss
notepad gruss.sub
Step 5 - Making Settings
In this file we write the following:
universe = vanilla
executable = gruss.exe
input = eingabe.txt
output = ausgabe.txt
log = gruss.log
notification = Complete
request_disk = 102400
request_memory = 100
requirements = ( ((ARCH=="X86_64")||(ARCH=="INTEL")) )

queue 1
The first line must be included in every job description. Other "universes" are not supported in Morfeus Grid. The second line indicates the name of our program. The third line specifies that our input file is called "input.txt". The output of the program should be stored in a file "output.txt".A log file named "gruss.log" is also to be created, in which you can later find information about when and where the job was calculated. The line below activates the sending of e-mails informing you when the job was finished or had to be aborted due to an error. The two request lines require at least 100MB disk space (specified in KB) and RAM (specified in MB) for our job. Since we have created a 32-bit program that can run on both 32-bit and 64-bit machines, we specify this in the next line. We only want to calculate one job, so we end the description file with "queue 1".
Step 6 - Send the Job
Now all you have to do is transfer the job to the grid. This works with the command
condor_submit gruss.sub
If you are submitting a job from this PC for the first time or have recently changed your password, there will be an error message because Condor does not yet know your password. Then run the command
condor_store_cred add
enter your password, and then submit the job again.
Step 7 - Check the Status of the Job
Now call up the command
condor_q
to see whether the job is already running.
| ID | OWNER | SUBMITTED | RUN_TIME | ST | PRI | SIZE | CMD |
| 4.0 | account | 4/30 6:10 | 00:00:00 | I | 0 | 10.0 | gruss.exe |
Depending on how busy the grid is, the job will first be in the state (column ST) "I" (waiting). As soon as a suitable machine has been found for the job, the status changes to "R" (running). As soon as the job is completed, it disappears from the list. If you did not deactivate this in step 5, you will also receive an e-mail at this point.
Step 8 - View Output File
If we now go back to our working directory, we will find there the output file "output.txt" with the content:
Bitte geben Sie Ihren Namen ein:
Hallo, Fritzchen
That was it!
By the way, there is also a button in the graphical user interface "MorfeusConsole" with which you can generate a .sub file for the command line:
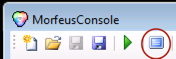
In this way, you can always see how the respective settings would be made "manually".