1. Set up digital ID
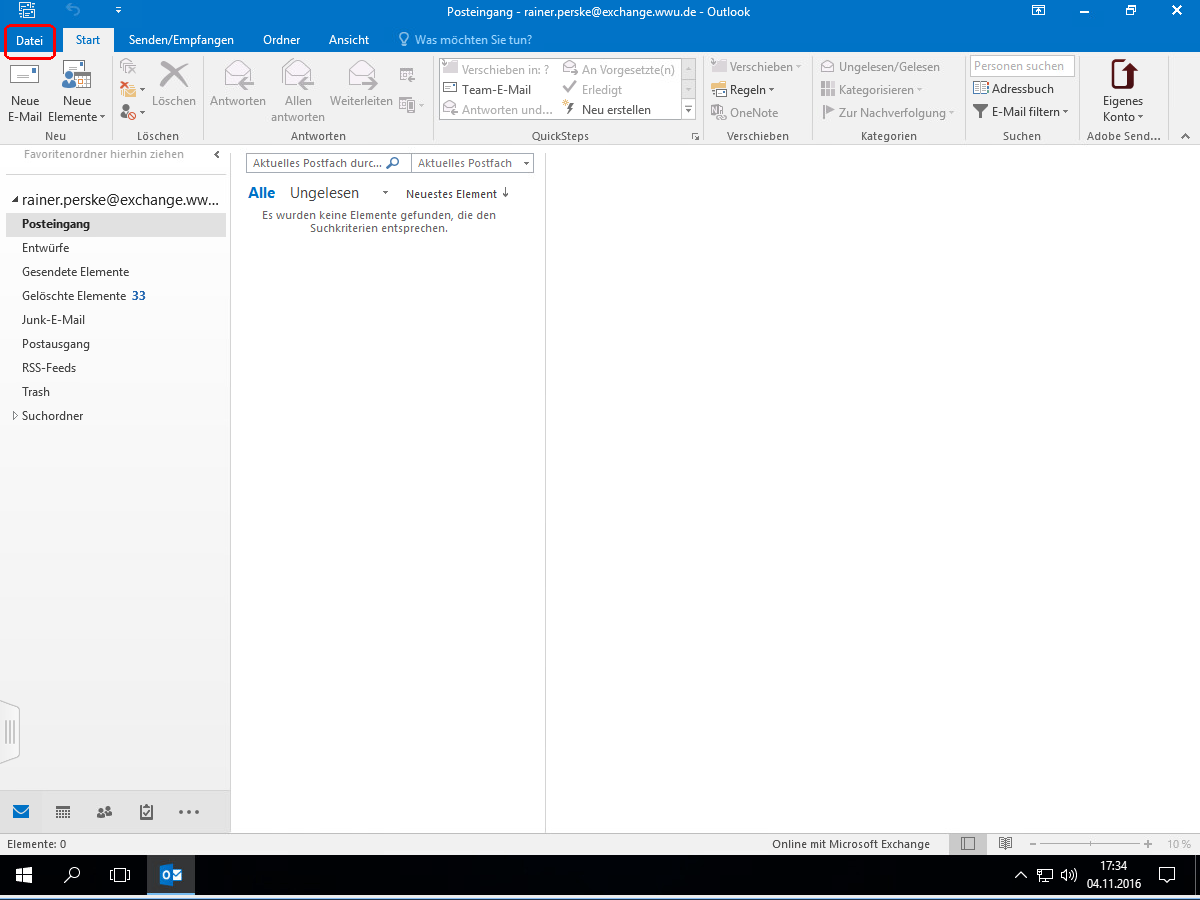
After starting Outlook, open the menu „Datei“
(“File”):
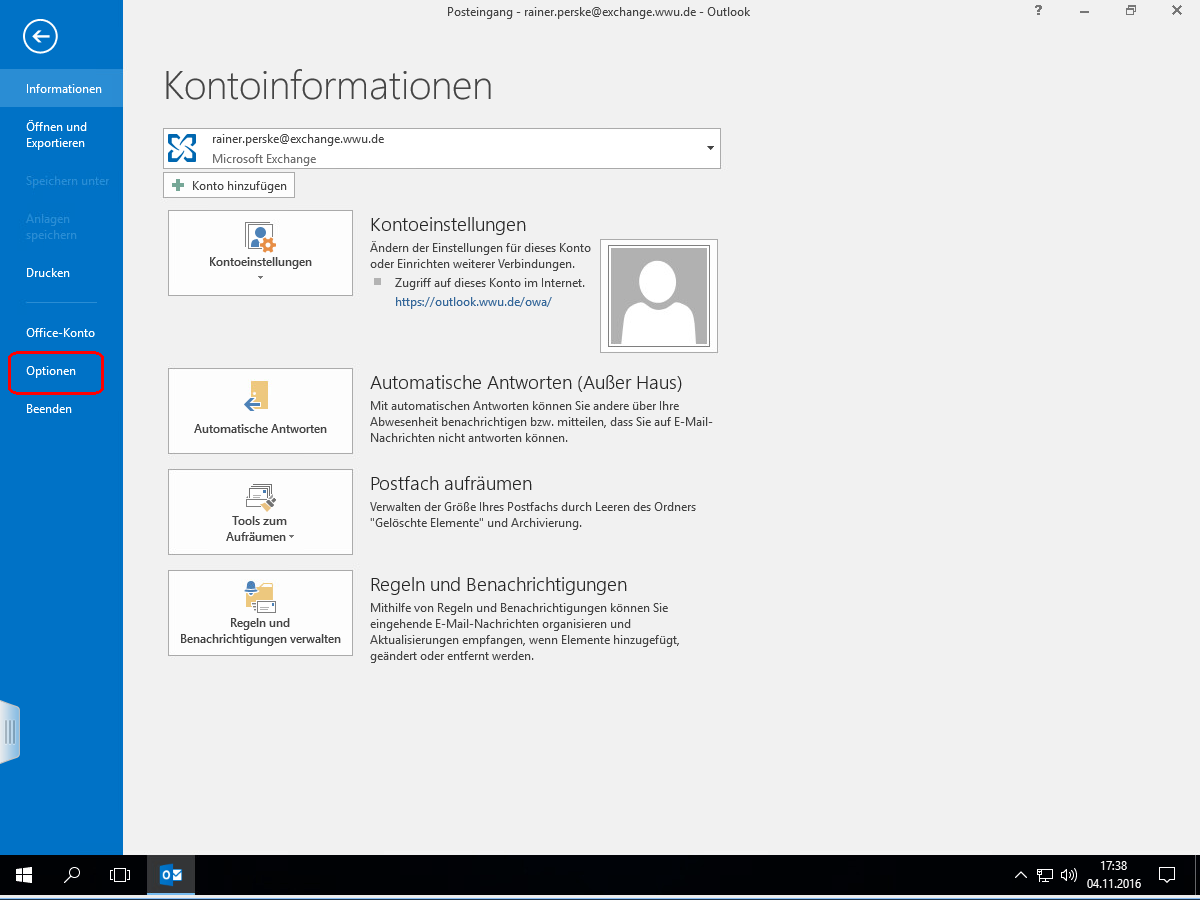
There you open the „Optionen“ resp.
(“Options”):
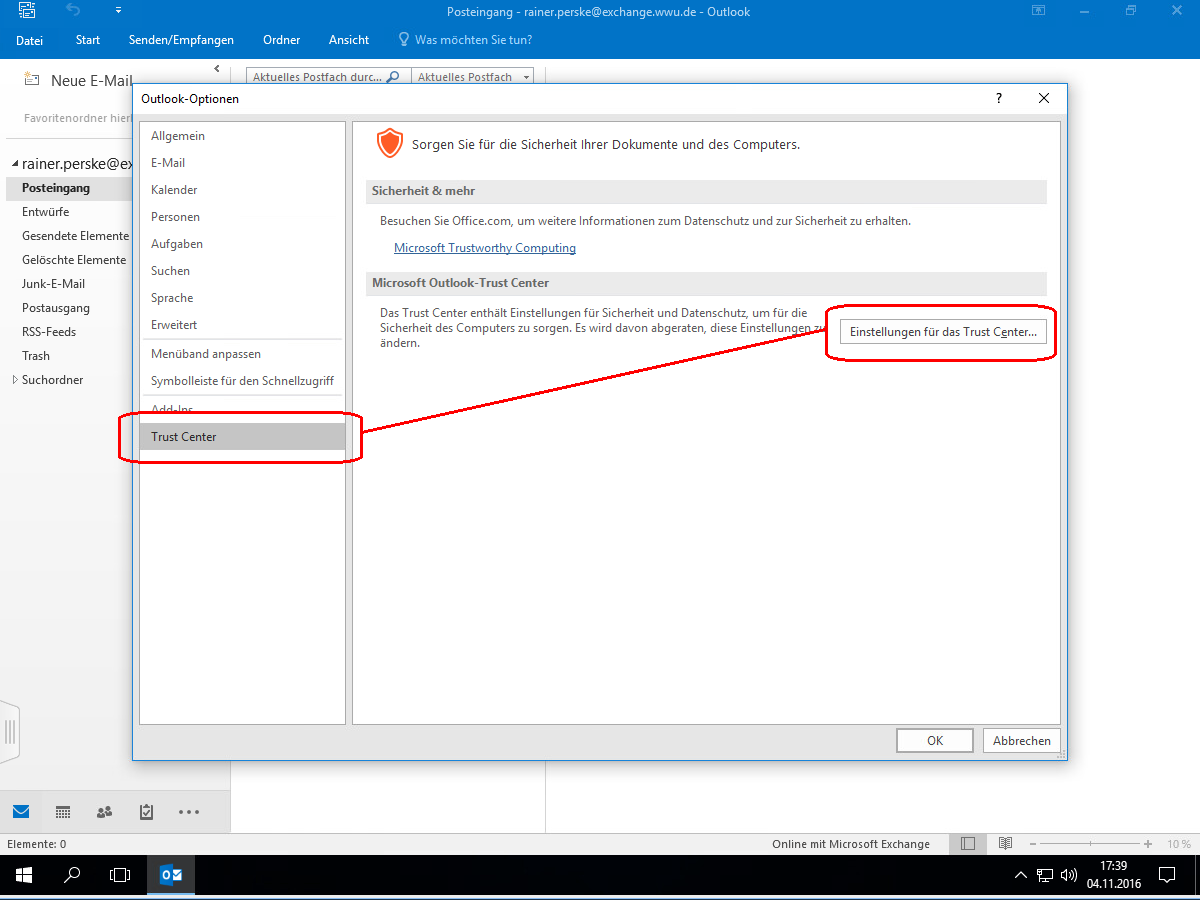
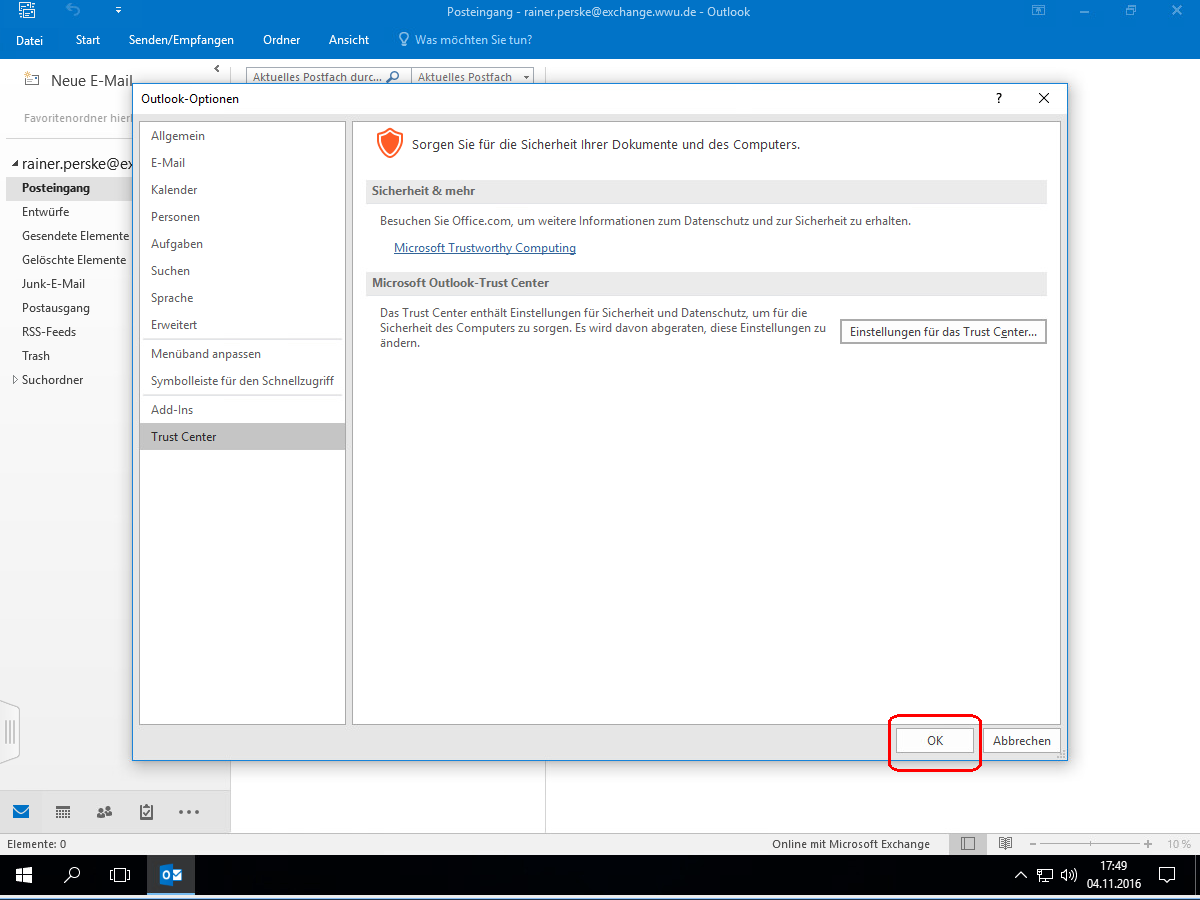
In the “Outlook Options” you select the “Trust
Center” page and open the „Einstellungen für das Trust
Center“ (“Trust Center Settings”):
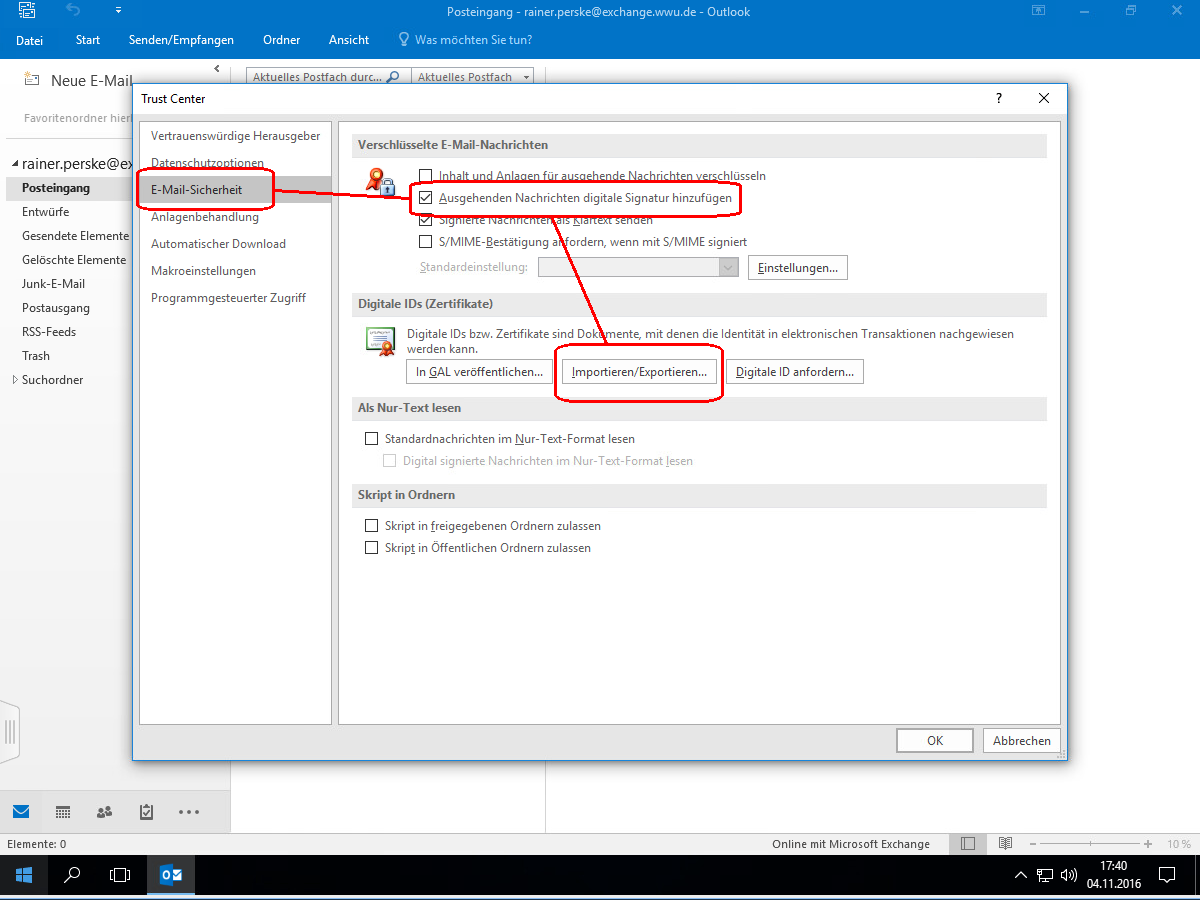
In the “Trust Center“ you select the page
„E-Mail-Sicherheit“ (“Email security”),
activate the setting „Ausgehenden Nachrichten digitale Signatur
hinzufögen“ (“Add digital signature to outgoing
messages”), and open the dialog
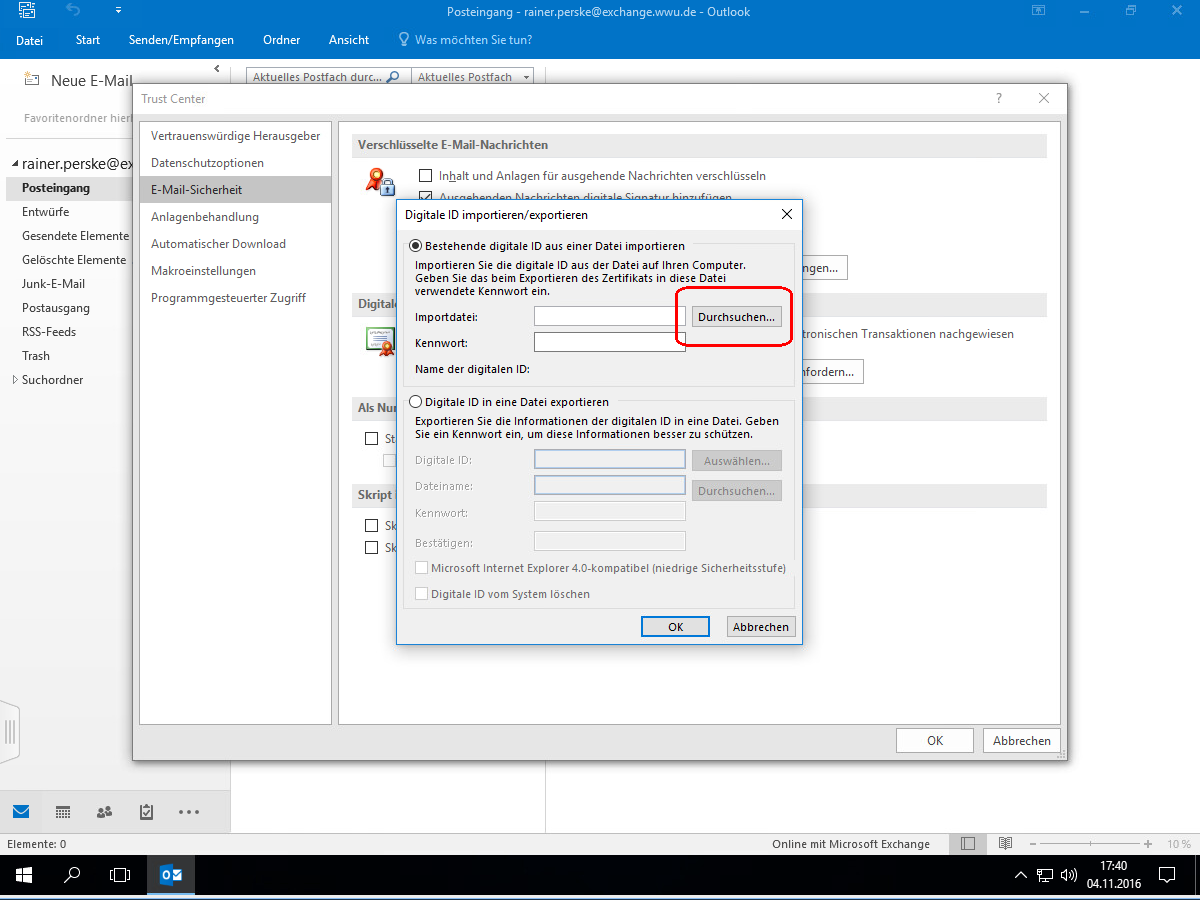
„Importieren/Exportieren“
(“Import/Export”):
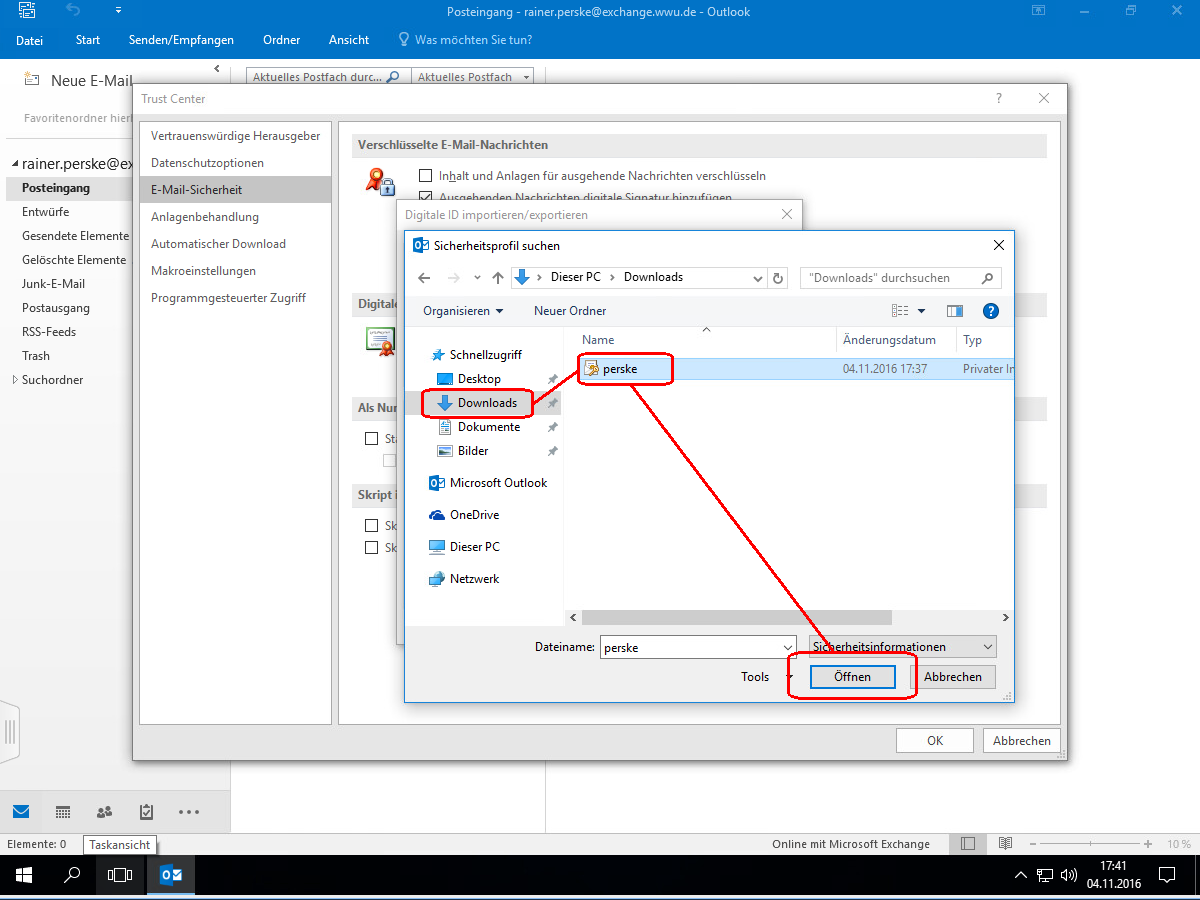
There you select the PKCS#12 file containing your digital ID (i.e. your private
key, your public key and all relevant certificates) (not the PEM file
from the email):
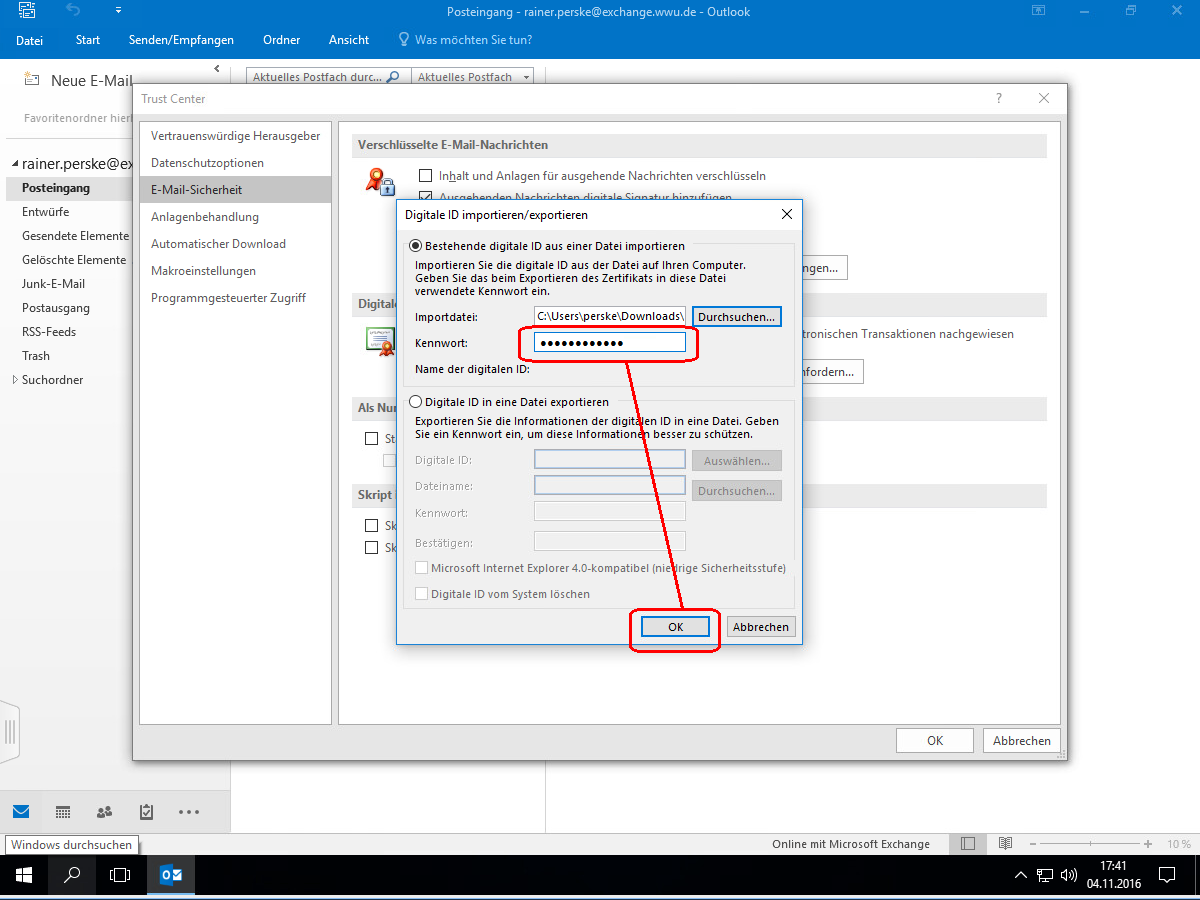
Furtheron, you enter the passphrase (password) protecting the PKCS#12 file and
start the import process with “OK”:
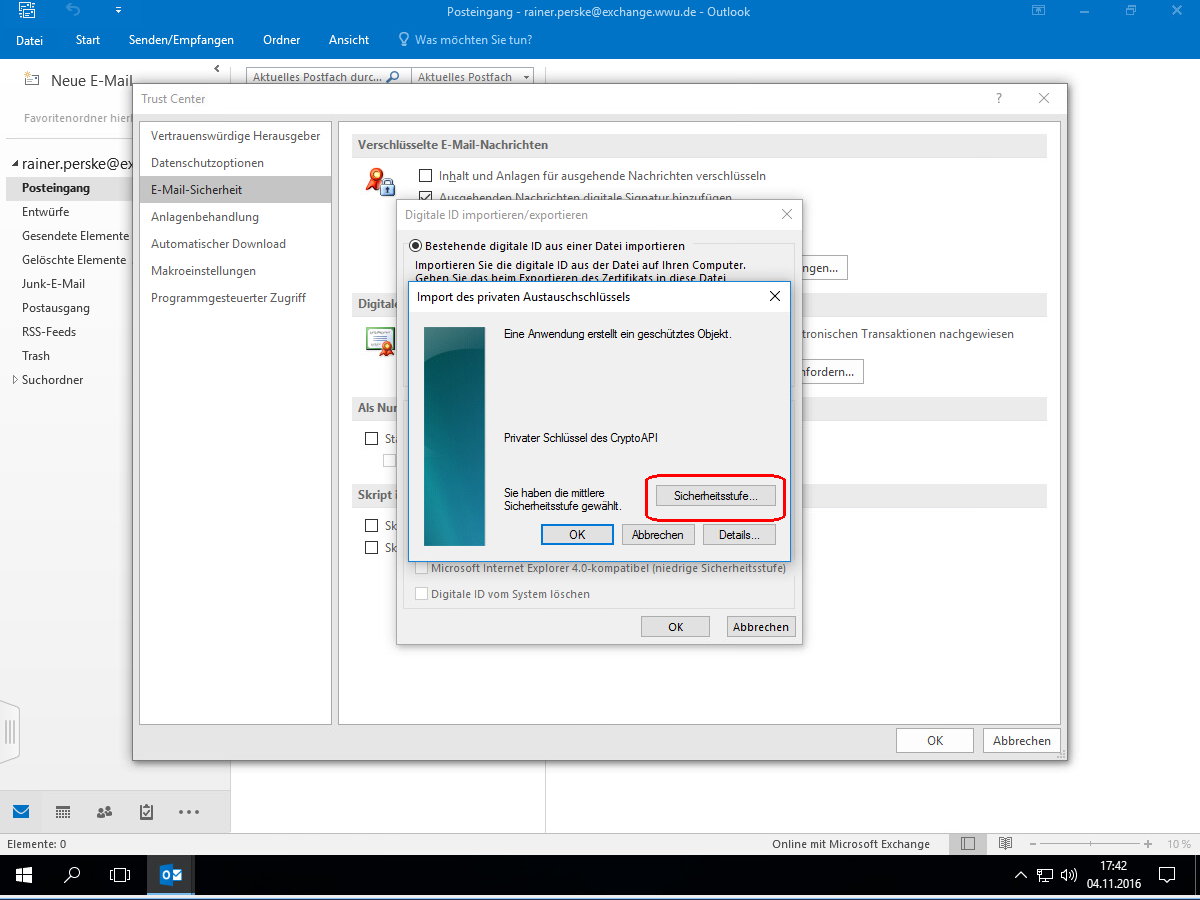
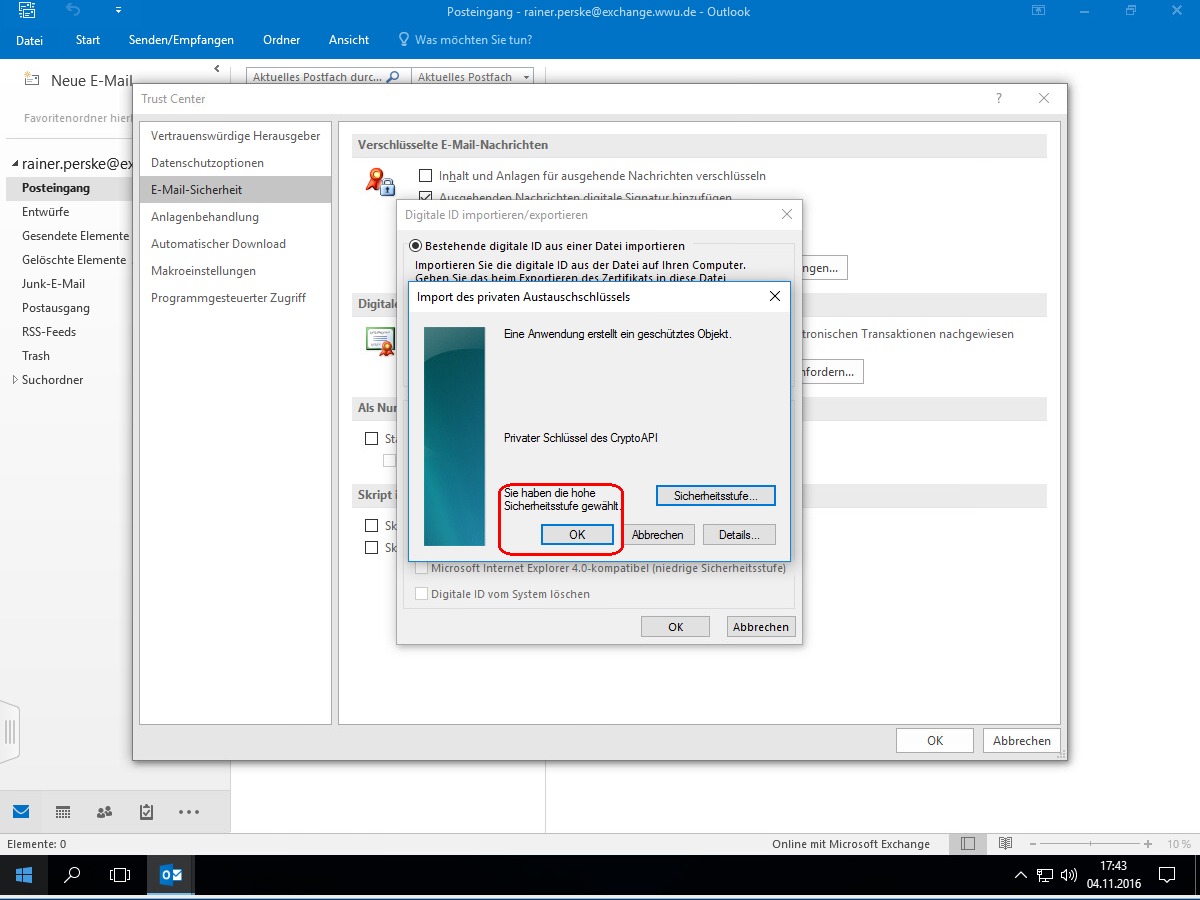
A dialog box appears. Here you click on
„Sicherheitsstufe“ (“Security level”):
Select the security level „Hoch“ (“High”;
this causes Outlook to ask for your passphrase each time when accessing
your private key, i.e. each time you are signing or decrypting) and
click on „Weiter“ (“Next”)
(If your PC is secured by IT experts, if your PC is used only by
you, if you always lock your PC when you leave it, and if the PC is
located in a locked room to which only a few trustworthy people have
access, then you are also welcome to select the „Mittel“
(“Medium”) security level and skip the next image in these
instructions. This will save you from having to enter the password
every time you sign and decrypt emails).

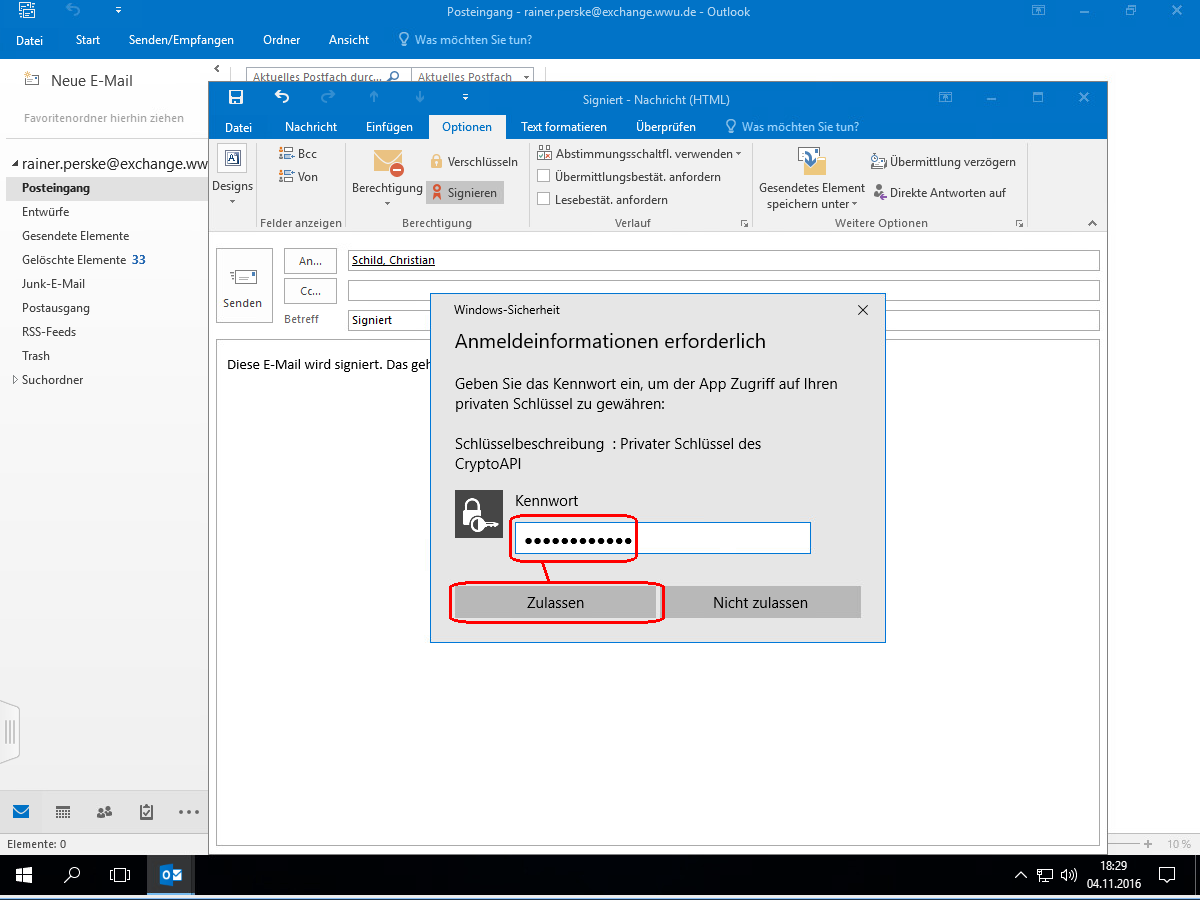
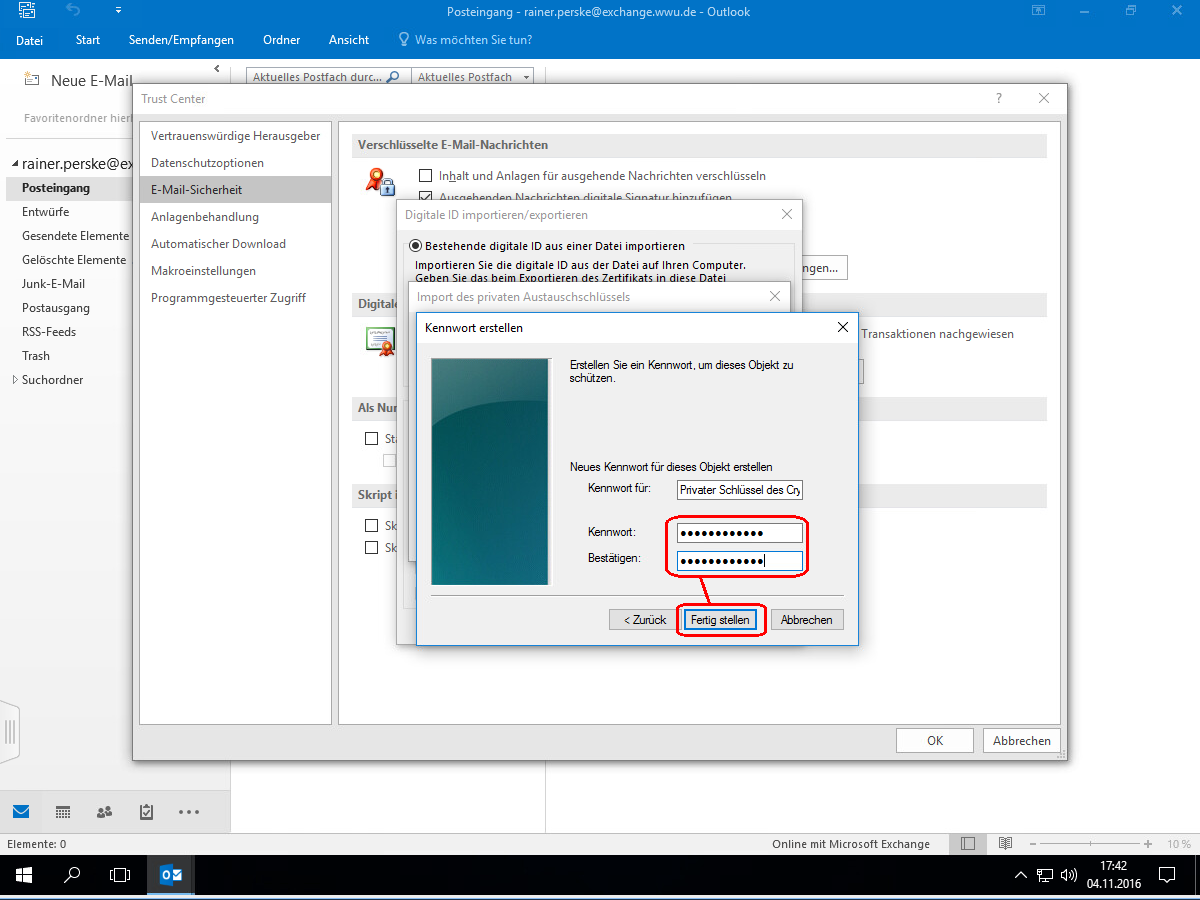
Now you are asked to choose a password. This password will be asked
for before using your private key for signing or decrypting:
You get back to the previous dialog box. There you check that you
have really selected the high security level and complete the import
process with “OK”:
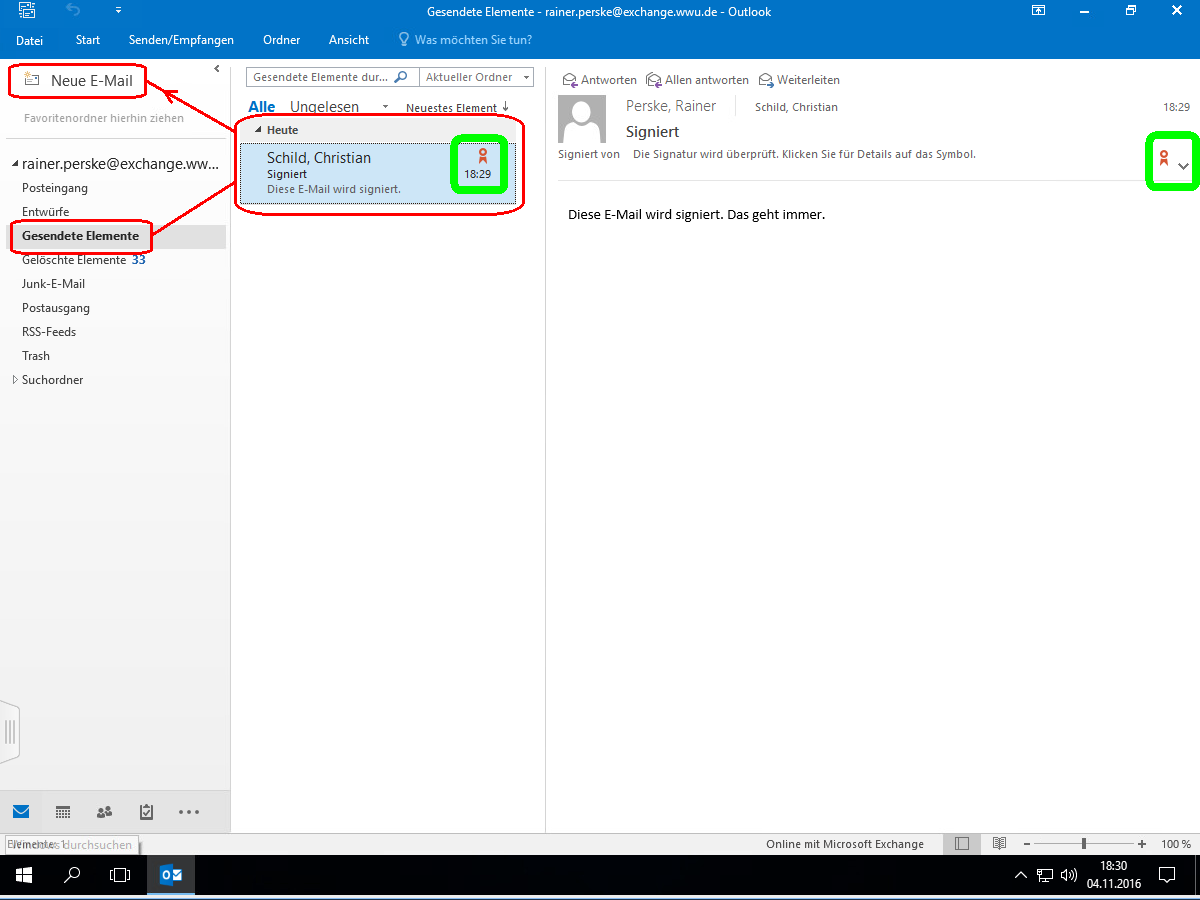
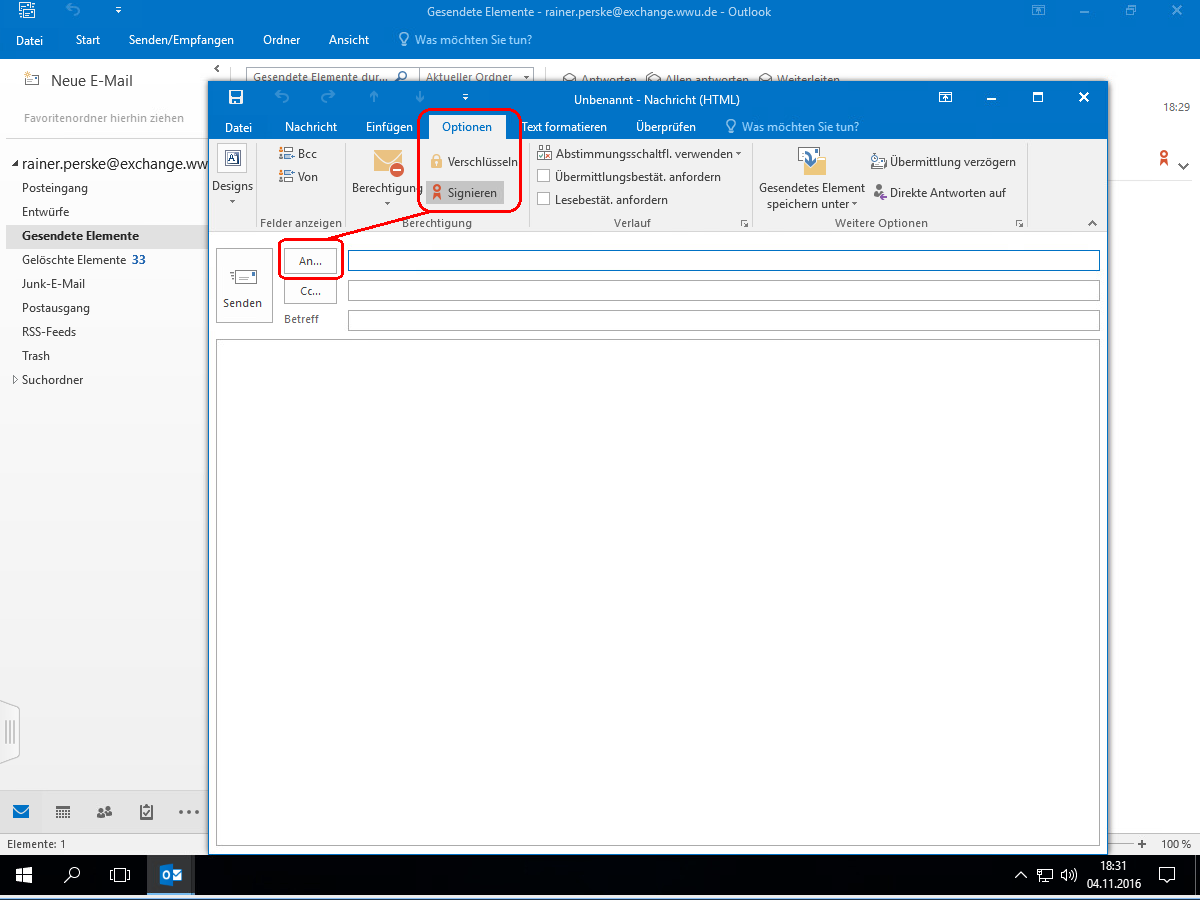
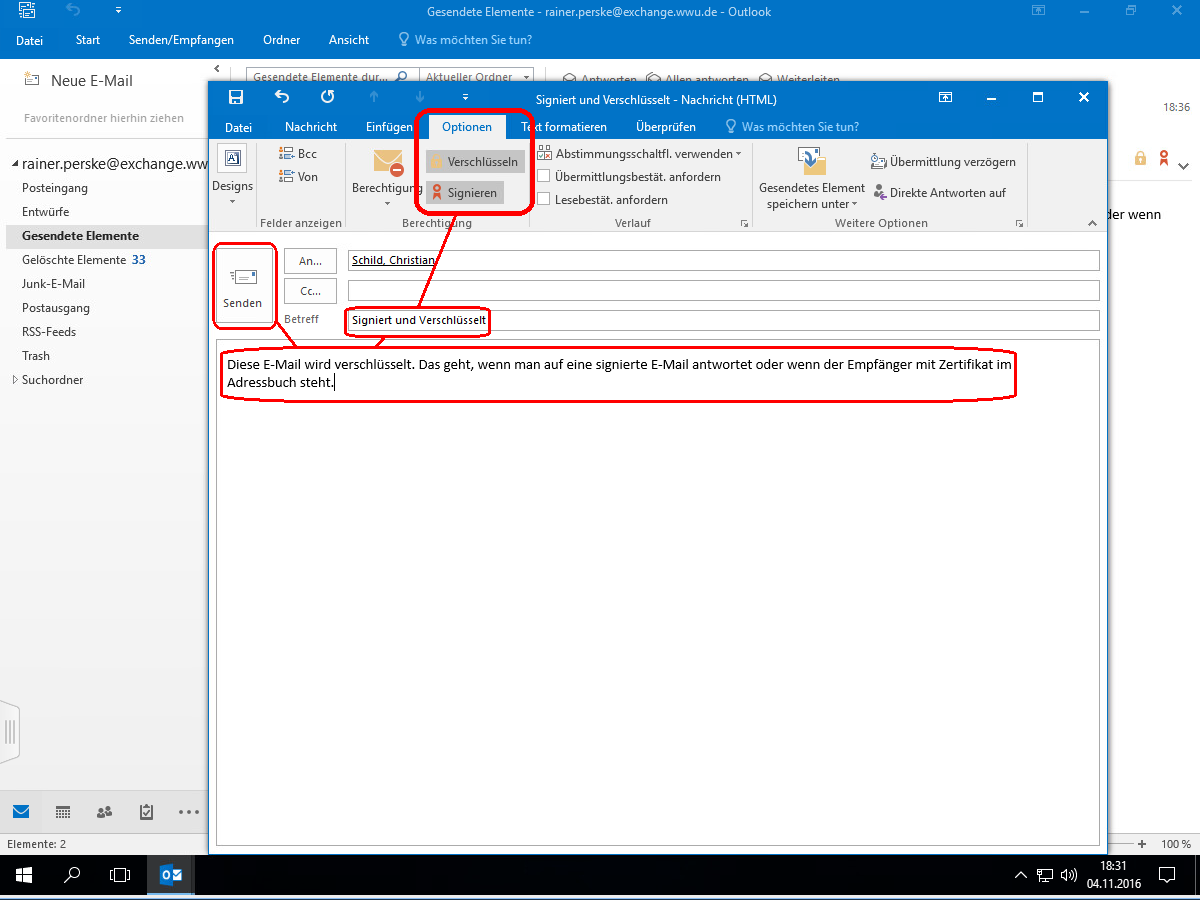
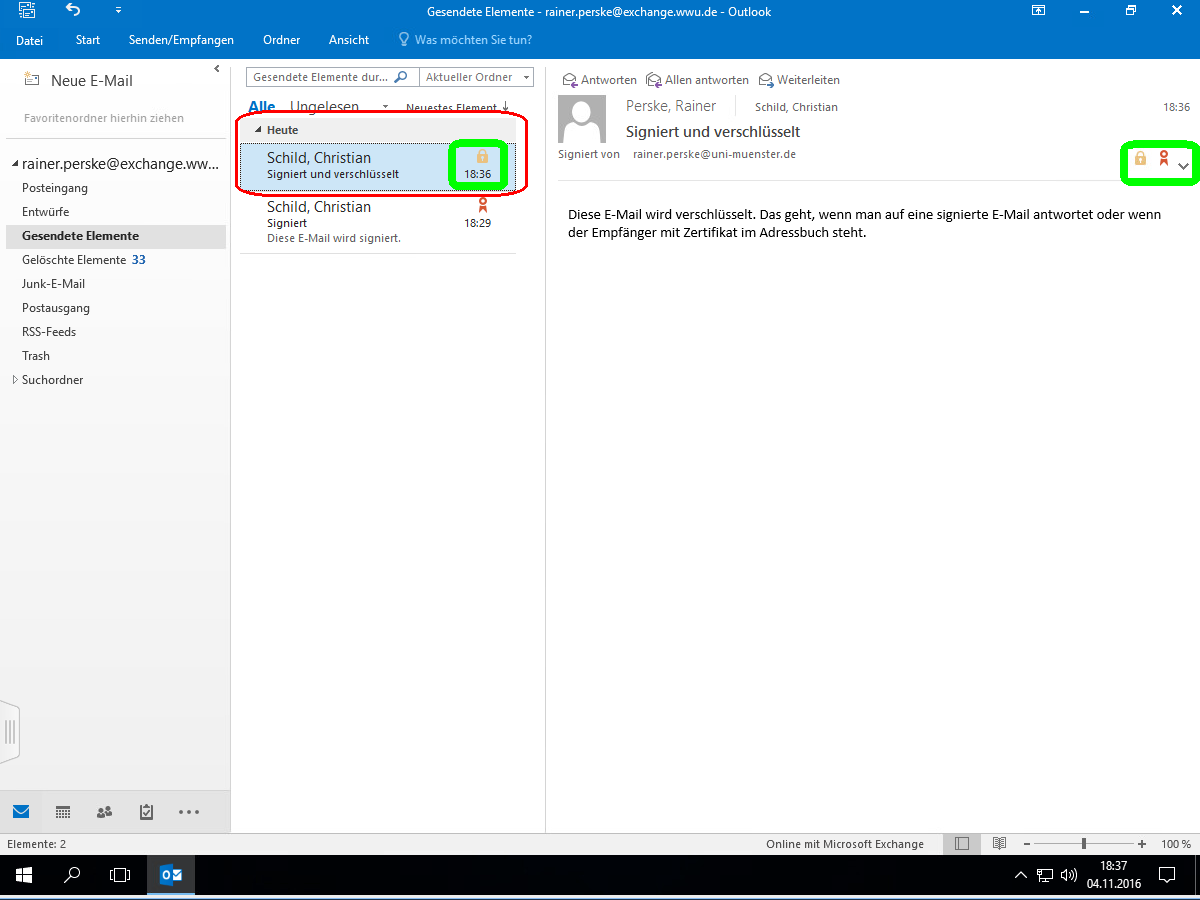
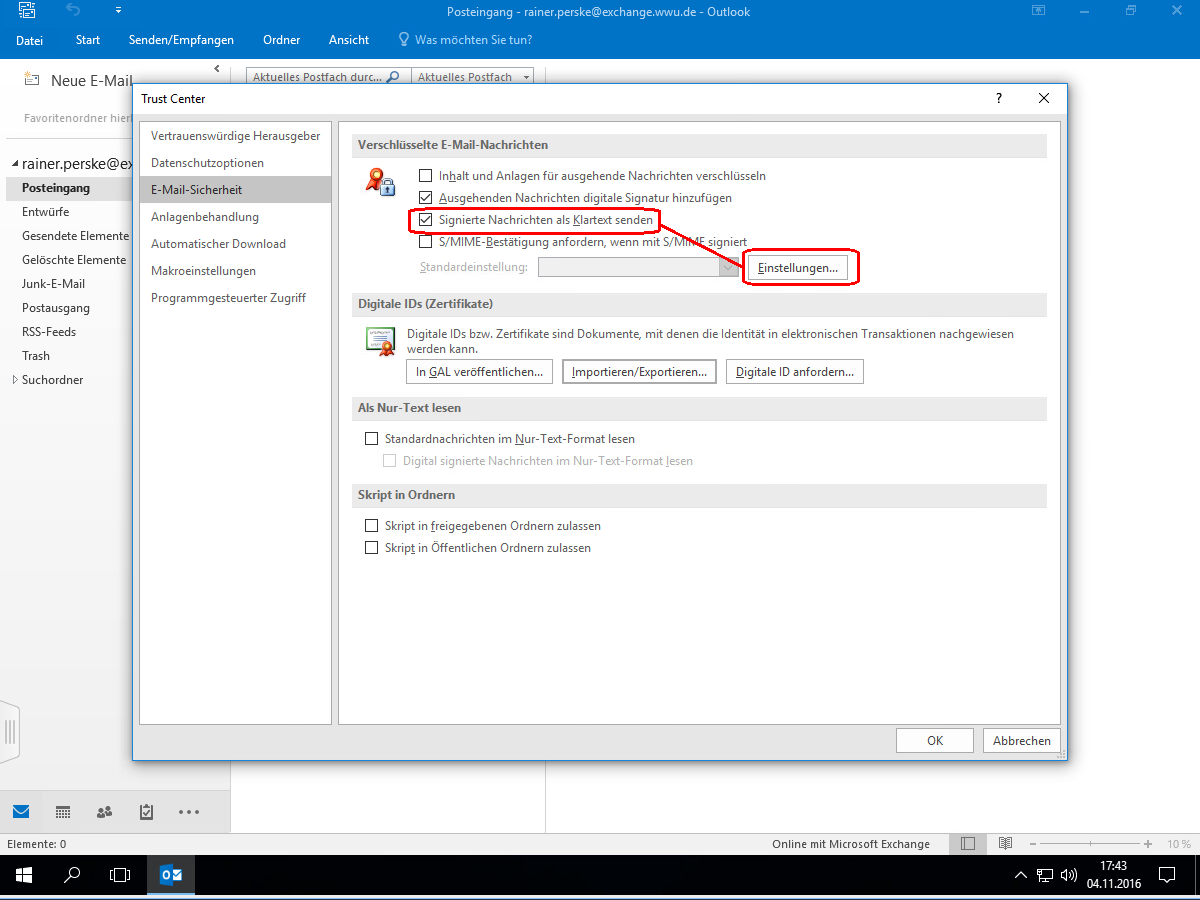
Back on the “Email security” page of the “Trust
Center”, check that signed messages continue to be send as clear
text, and open the „Einstellungen“
(“Settings”):
Her you check that the correct certificate is selected both as
„Signaturzertifikat“ (“Certificate for
signing”) and as „Verschlüsselungszertifikat“
(“Certificate for encrypting”).
Addendum (September 2023): If you are not importing a
digital ID for the first time: With new Outlook or Windows versions,
please be sure to click „Weitere Optionen“ (“More
options”)" in the „Wählen Sie ein Zertifikat
aus“ (“Select a certificate”) dialog box, because
only then will you be offered all valid imported digital IDs for
selection.
Select the „Hashalgorithmus“ (“hash
algorithm”) “SHA256” and the
„Verschlüsselungsalgorithmus“ (“Encryption
algorithm”) “AES (256-bit)”, and confirm the settings
with “OK”:
(If there is no „Name der Sicherheitseinstellung“
(“security setting name”) entered at the top, simply select
a name yourself.)
These settings are both very secure and compatible with most other
software:

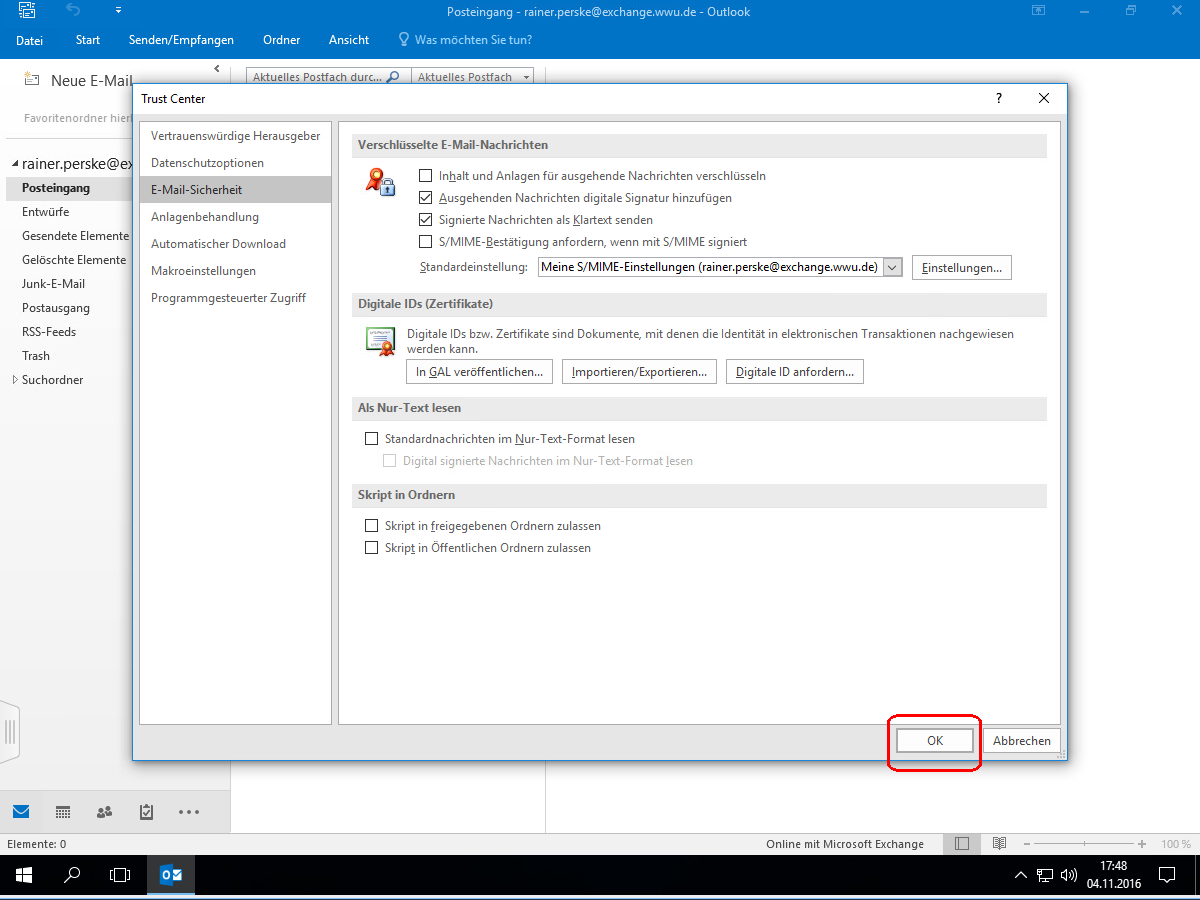
Close the “Trust Center” with “OK”:
Close the „Outlook-Optionen“ (“Outlook
options”) with “OK”, too:
This completes your settings.

")