Import and use digital IDs with Mozilla Thunderbird
Please click on the images to enlarge.
Please replace my user name “perske” and my email addresses with your own data.
These instructions contain four parts:

")
Please click on the images to enlarge.
Please replace my user name “perske” and my email addresses with your own data.
These instructions contain four parts:
The primary password of Thunderbird protects private keys, passwords and other confidential data saved in the Thunderbird profile.
This setting only needs to be made once.
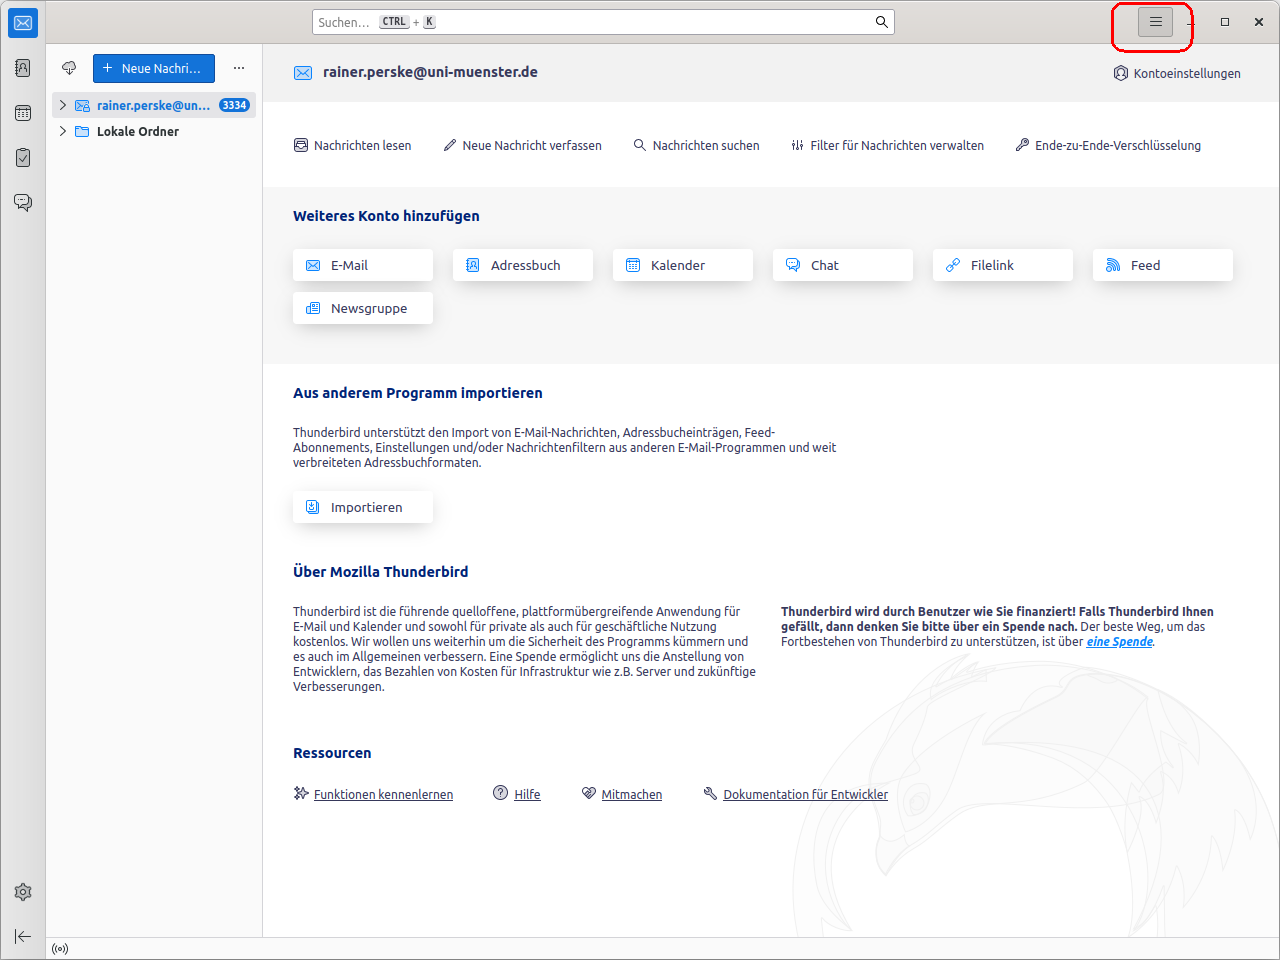
Open the settings page of Thunderbird:
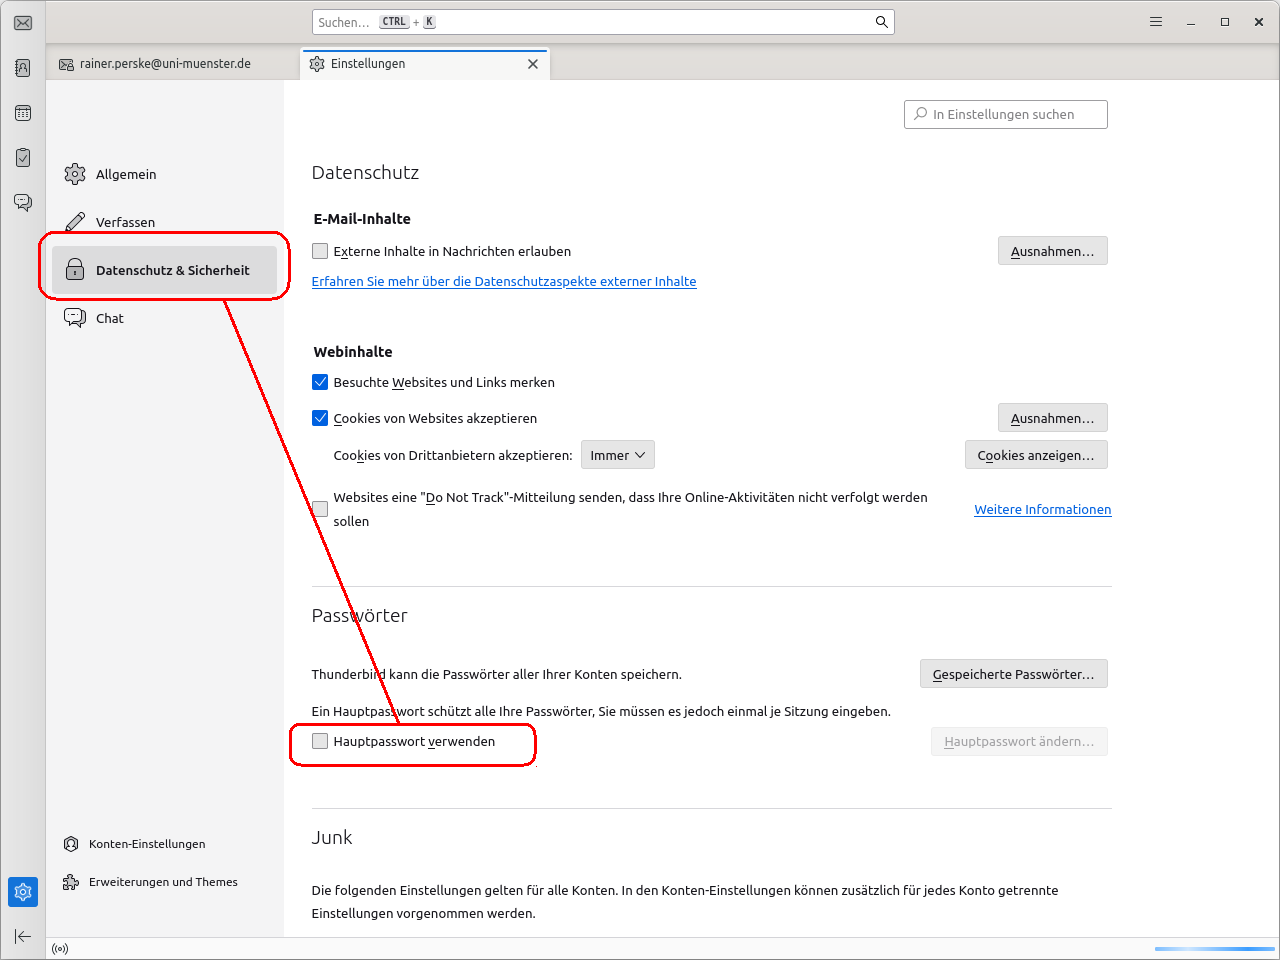
In the area „Datenschutz und Sicherheit“ (“privacy and security”) in the section „Passwörter“ (“passwords”) click on „Hauptpasswort verwenden“ (“use primary password”):
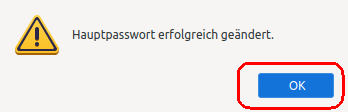
Enter a new primary password and confirm with “OK”:
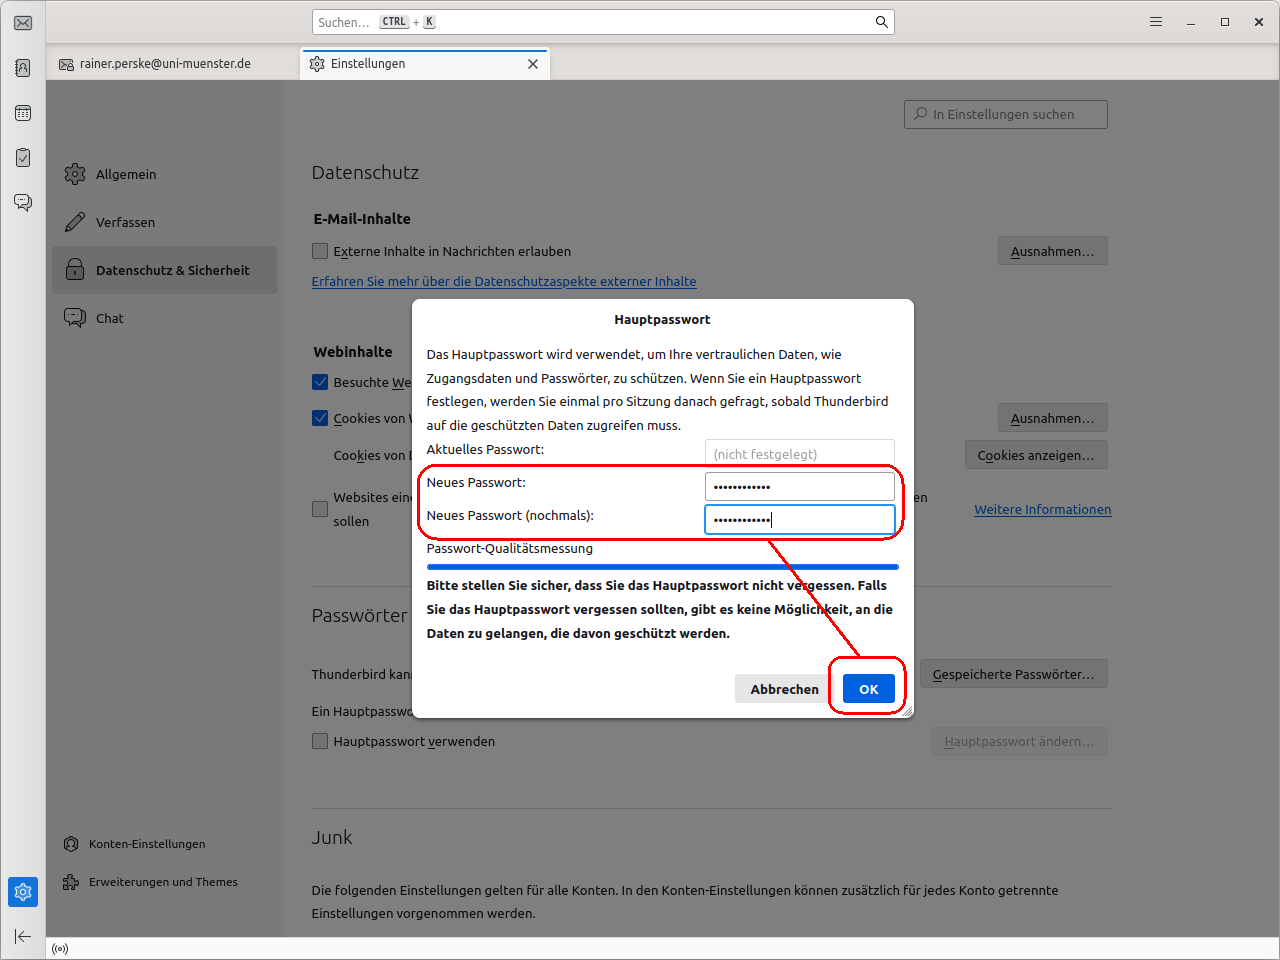
Accept the completion message with “OK”:
You can close the settings now.
In all subsequent steps, you may also be asked for the primary password set above.
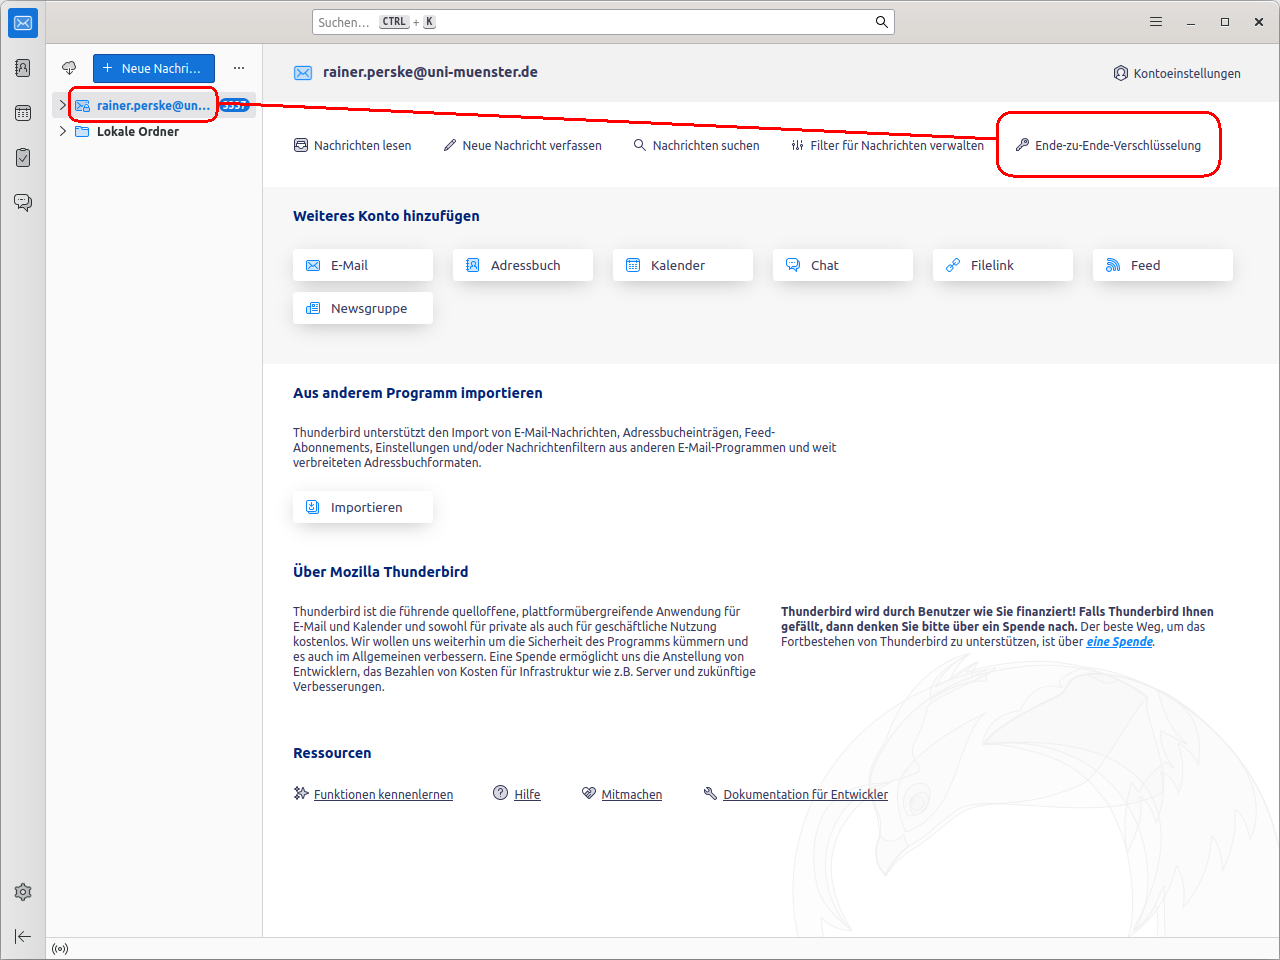
Select the email account for which you want to use the digital ID and open in the account settings the area „Ende-zu-Ende-Verschlüsselung“ (“end-to-end encryption”):
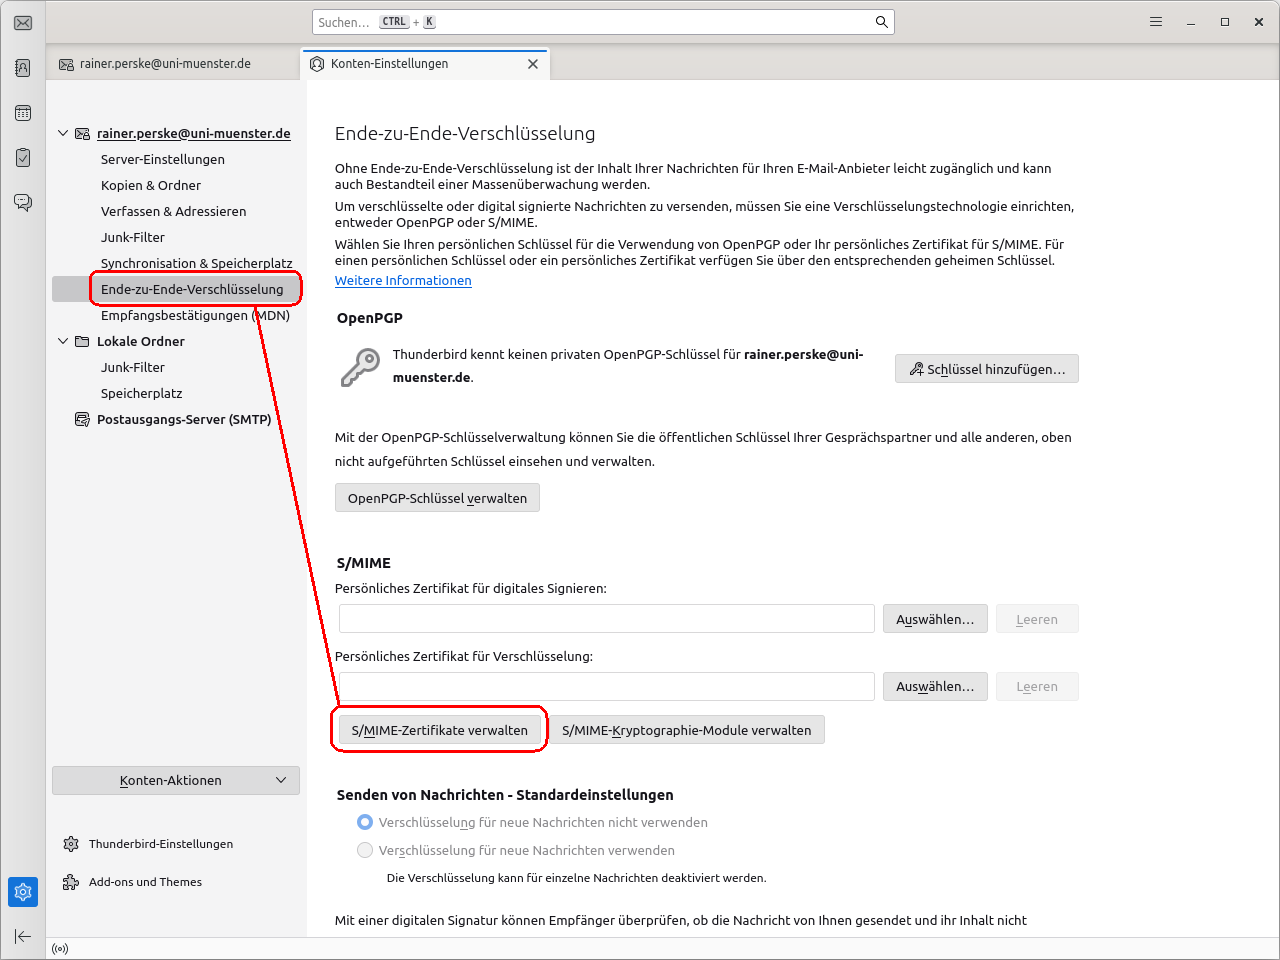
There in the section „S/MIME“ click on „S/MIME-Zertifikate verwalten“ (“manage S/MIME certificates”):
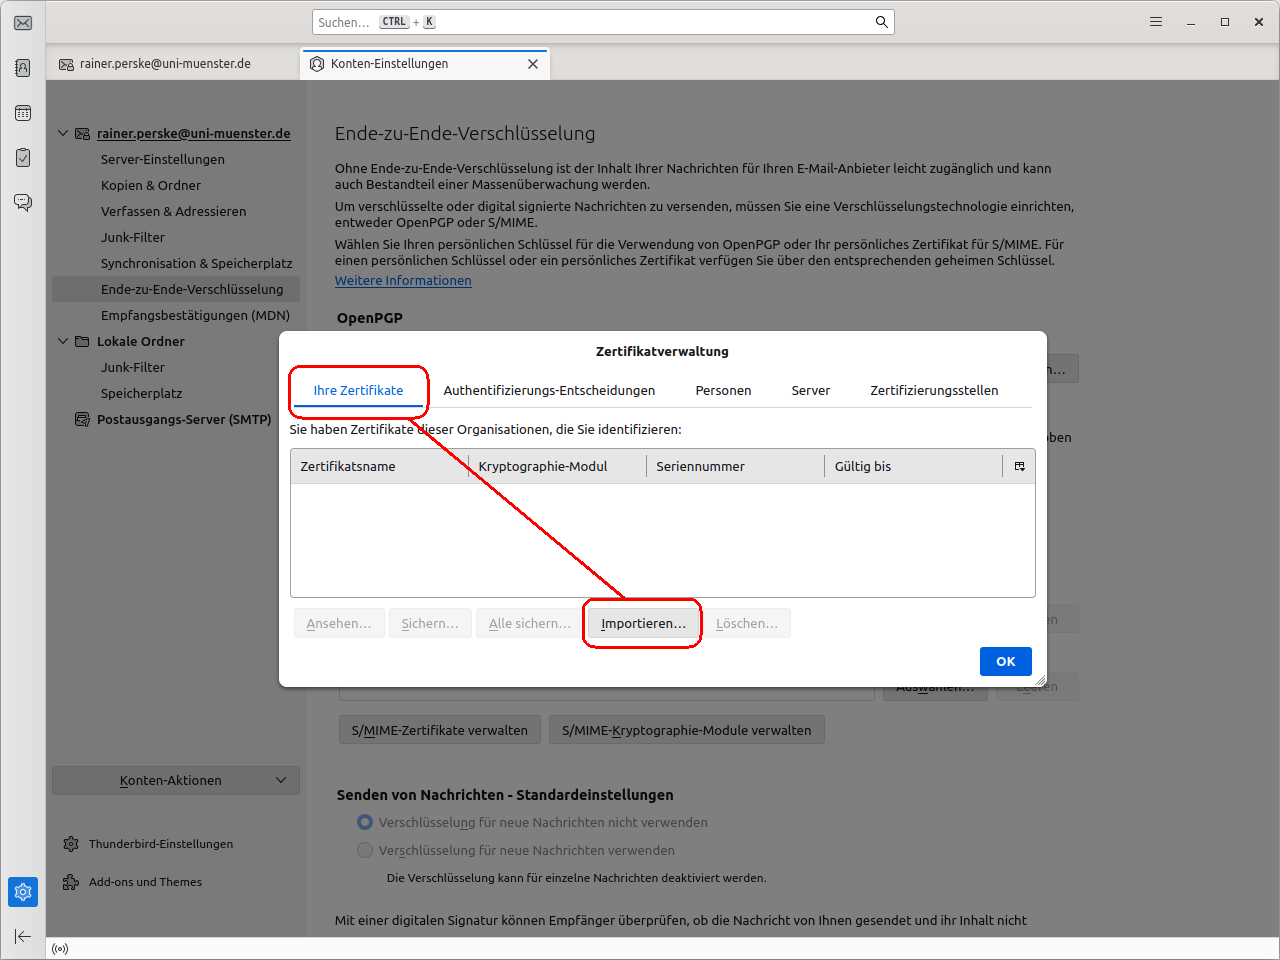
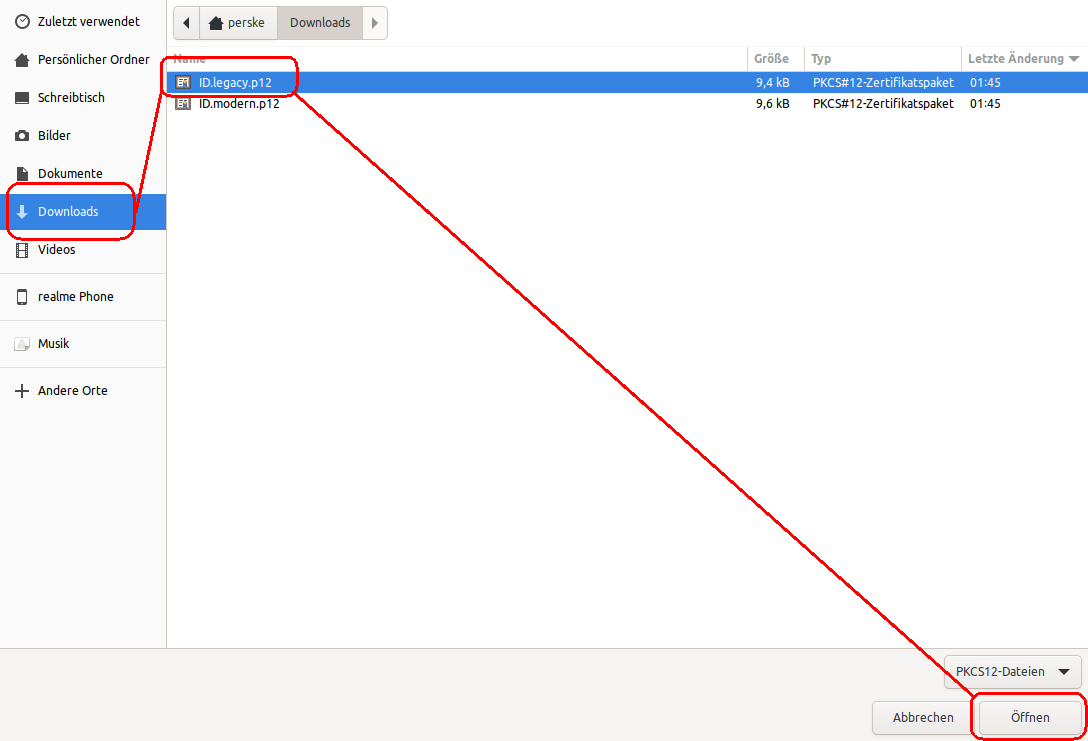
In the „Zertifikatverwaltung“ (“Certificate administration”) select the tab „Ihre Zertifikate“ (“Your certificates”) and click on „Importieren“ („Import”):
There you select the PKCS#12 file containing your digital ID (i.e. your private key, your public key and all relevant certificates) in legacy format (not the PEM file from the email):
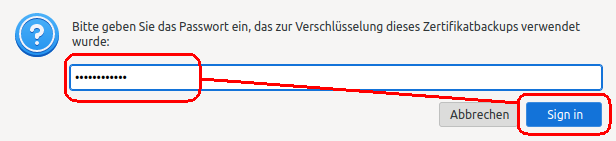
To allow the private key to be extracted from the PKCS#12 file the password protecting this file must be entered:
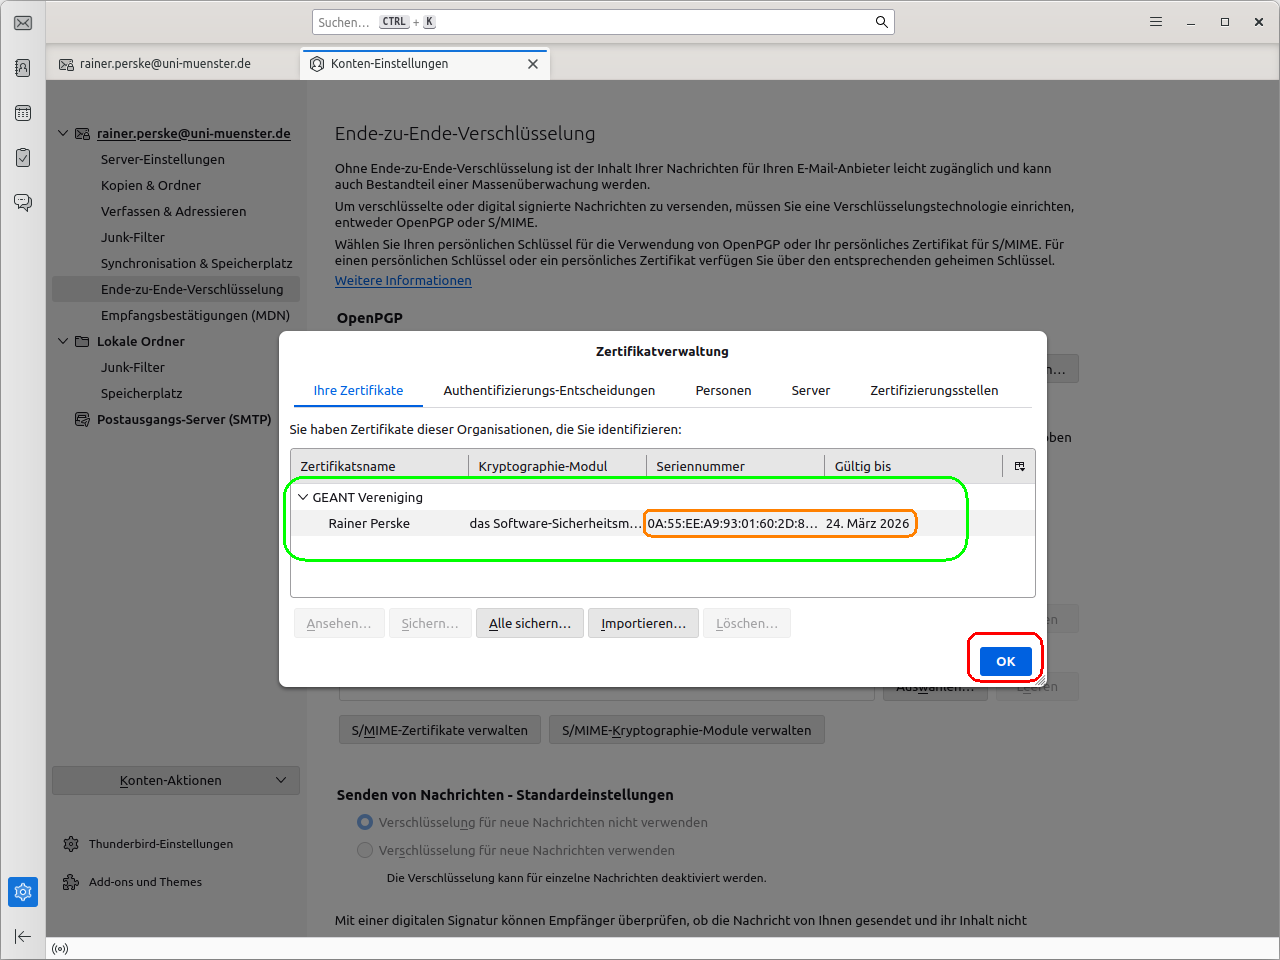
Now your digital ID should be displayed in the certificate management.
If you have already imported several digital IDs now, please remember the first digits of the serial number and the expiration date so that you can select the correct digital ID below.
Accept the successful import with “OK”:
This way you can import as many digital IDs as you want.
In all subsequent steps, you may also be asked for the primary password set above.
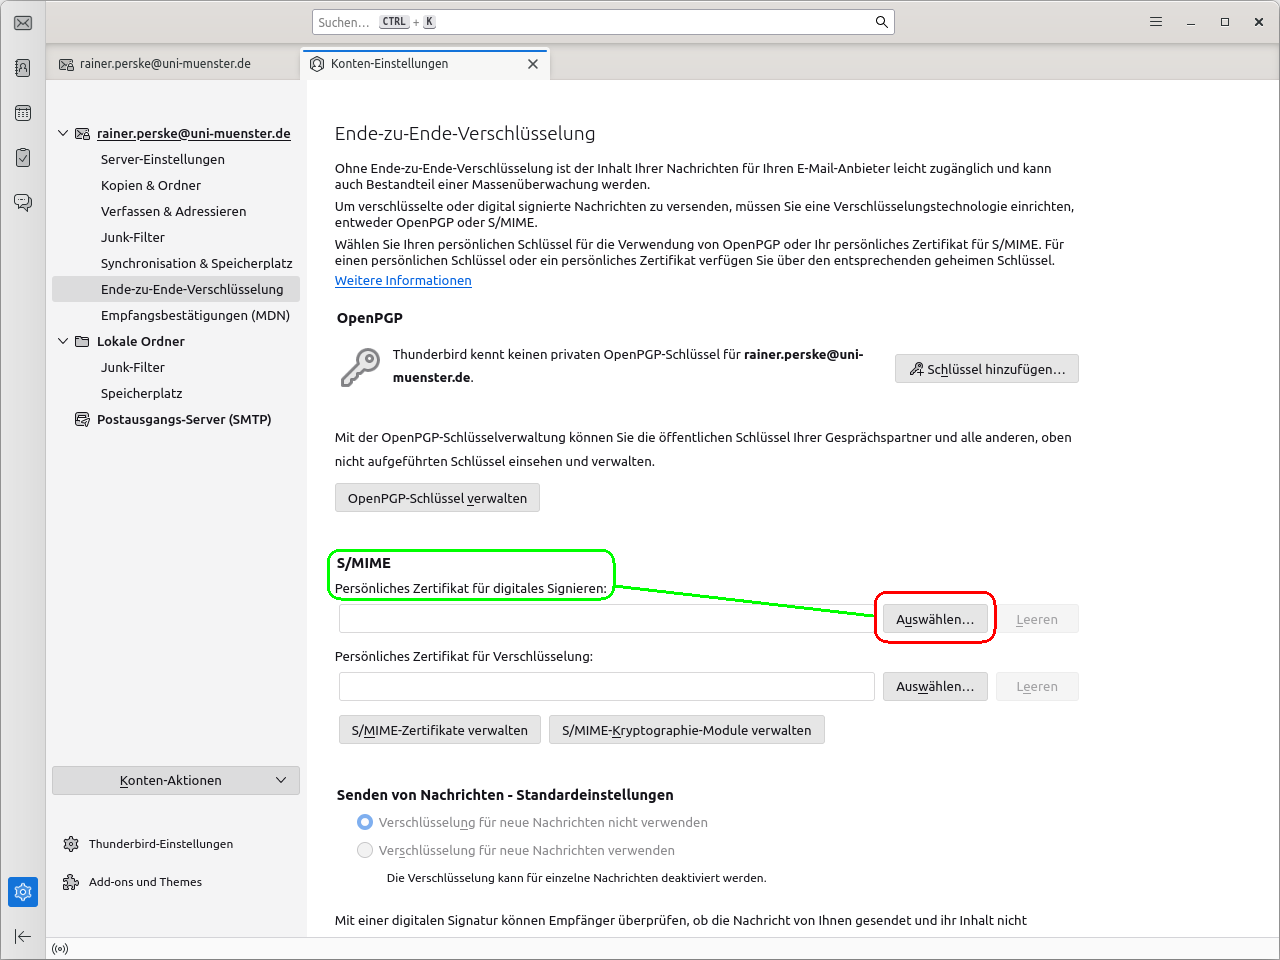
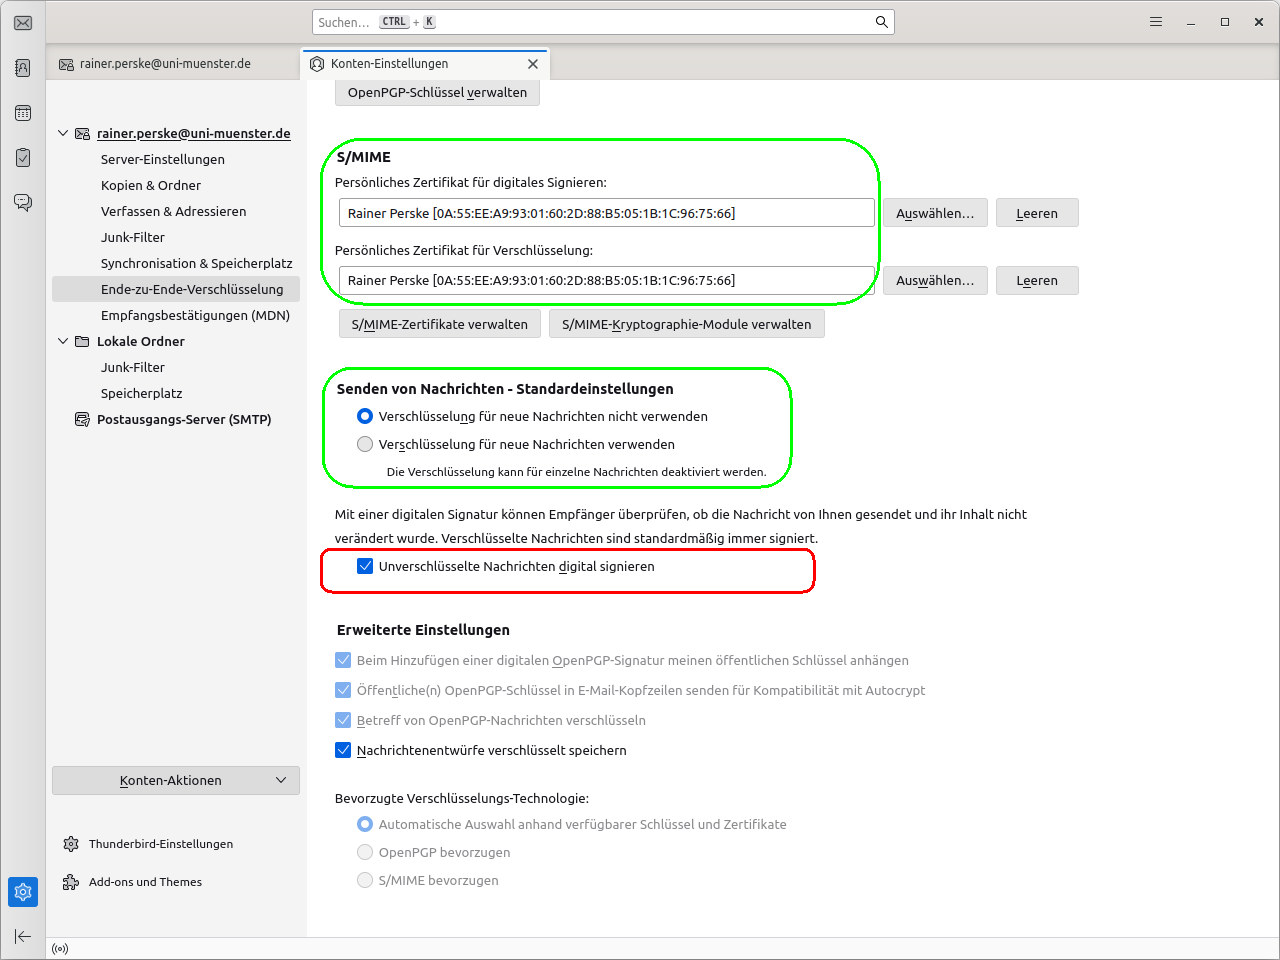
Select again the email account for which you want to use the digital ID and open in the account settings the area „Ende-zu-Ende-Verschlüsselung“ (“end-to-end encryption”):
There in the section „S/MIME“ click behind „Persönliches Zertifikat für digitales Signieren“ (“personal certificate for digital signing”) on „Auswählen“ (“select”):
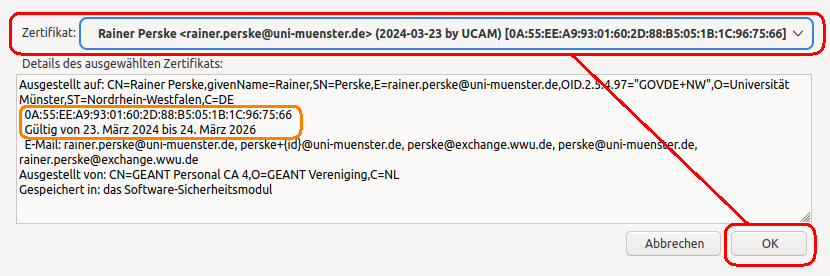
At the top of the small window select your current digital ID. In the larger area below, the properties of the digital ID you have just selected are displayed so that you can check that you have selected the correct digital ID using the serial number and expiration date. Then click on „OK“:
Confirm with „Ja“ (“Yes”) that the digital ID is to be used both for signing and for encrypting messages to you:

Your current digital ID should then be selected for both digital signing and encryption.
As a rule, you will not encrypt all outgoing emails, as this would only be possible if all recipients also have digital IDs.
However, please make sure that all outgoing messages are digitally signed by default:
This completes your settings.
In all subsequent steps, you may also be asked for the primary password set above.
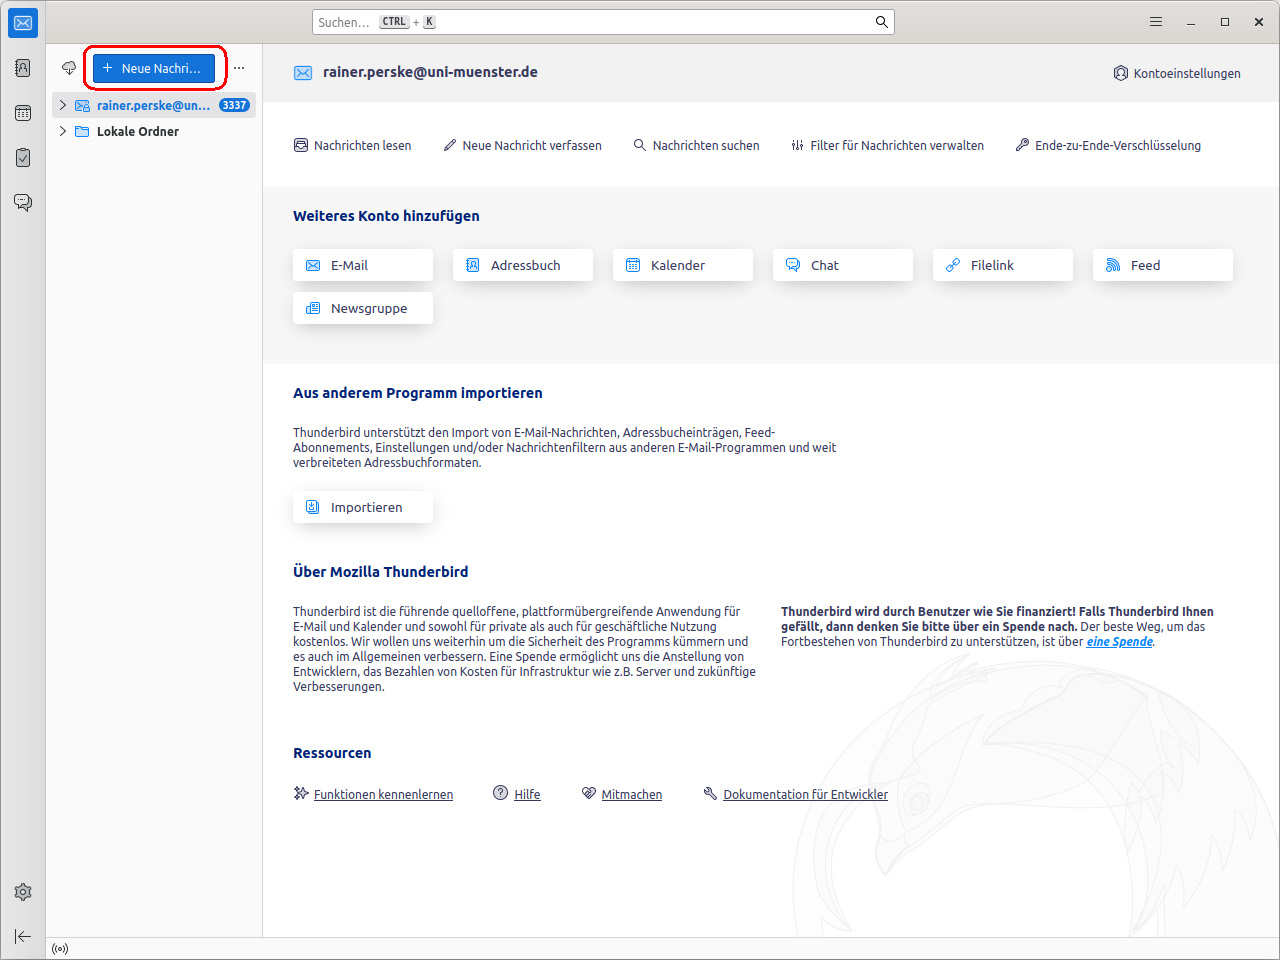
Now you can try that sending signed or even signed and encrypted emails really works. Hence now compose a new messages:
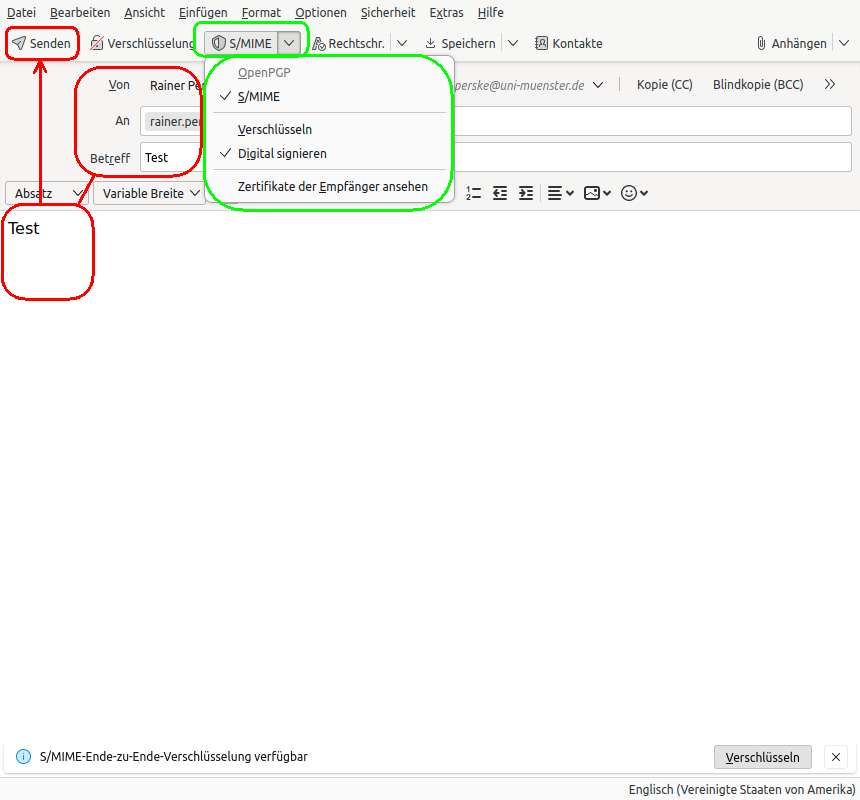
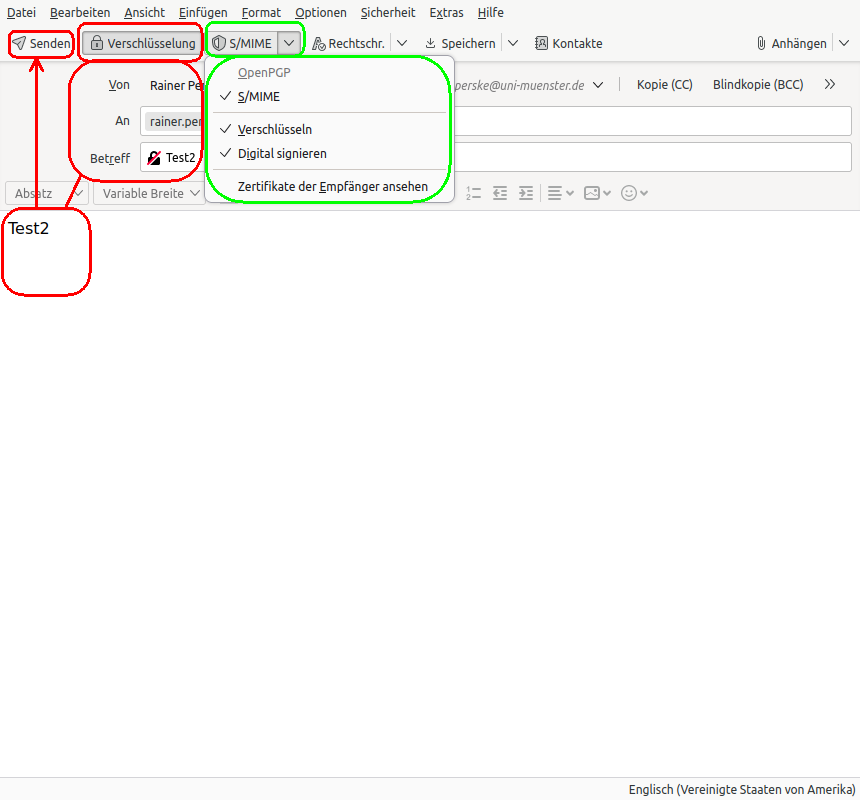
For testing, write an email to yourself. In the toolbar at the top, behind “S/MIME” you can open the menu where you can indicate whether the new email is to be signed and/or encrypted:
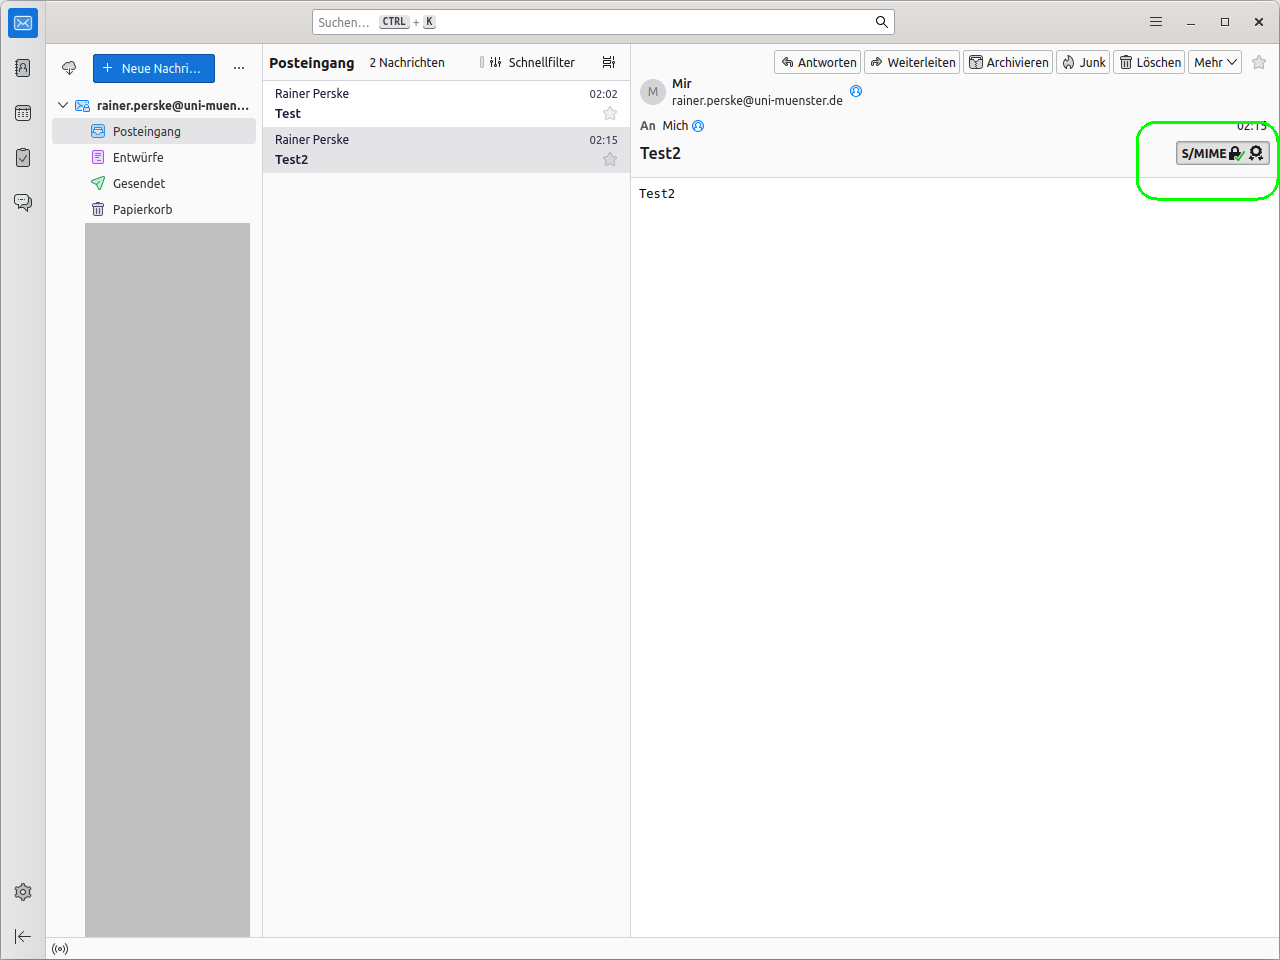
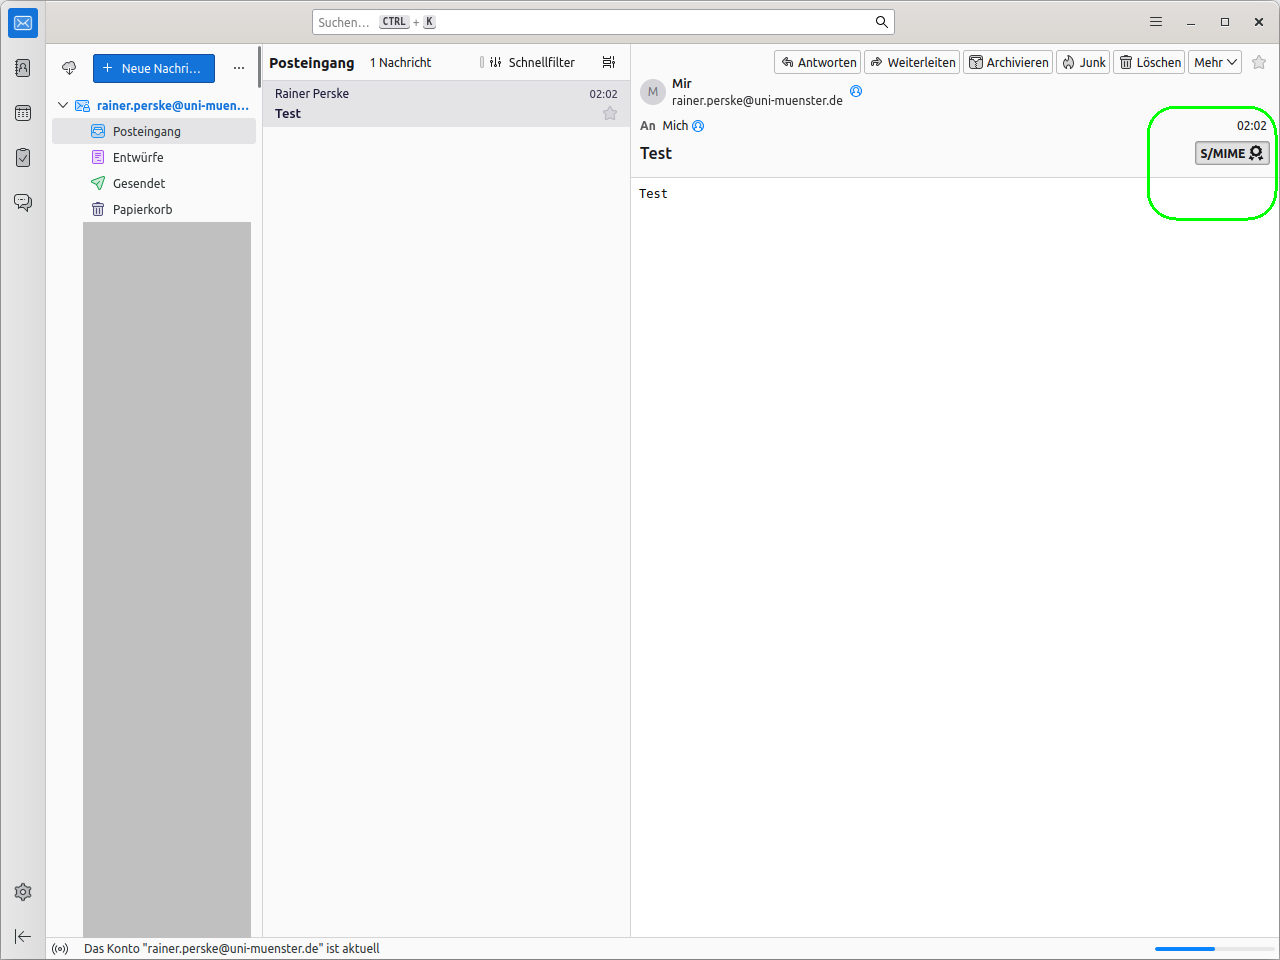
If you then look at the digitally signed e-mail, you will see a seal-shaped symbol that you can click on for more information (do try it!):
Again compose a new message. This time, in the toolbar at the top, also click on „Verschlüsselung“ (“encryption”):
If you then look at the encrypted e-mail, you will see both a seal-shaped symbol for the signature and a slot symbol for the encryption that you can click on for more information (do try it!):