NOMAD Laboratory

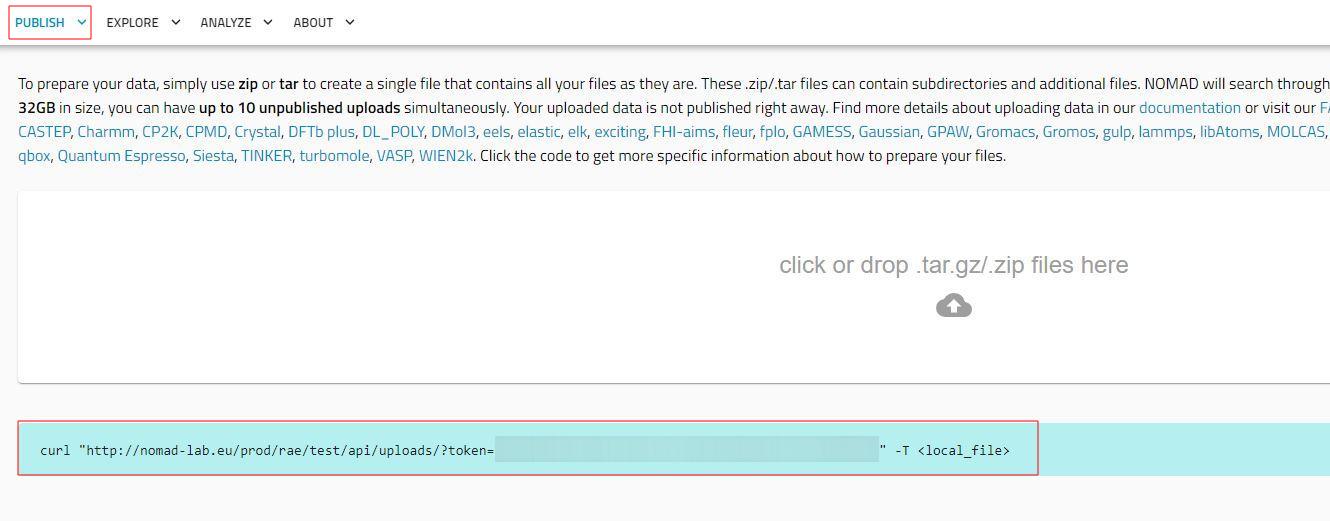
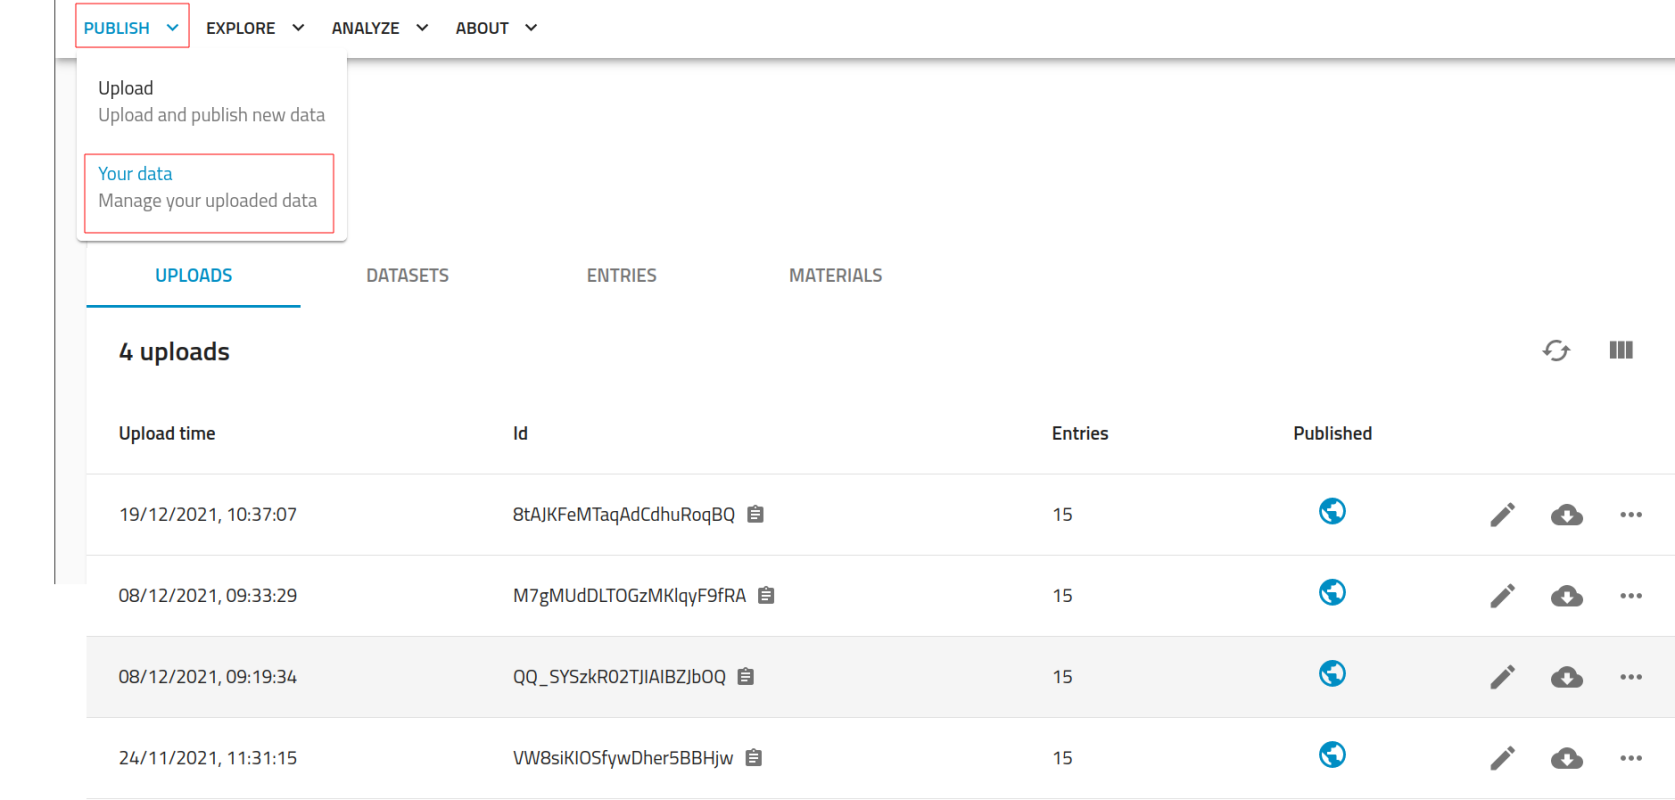
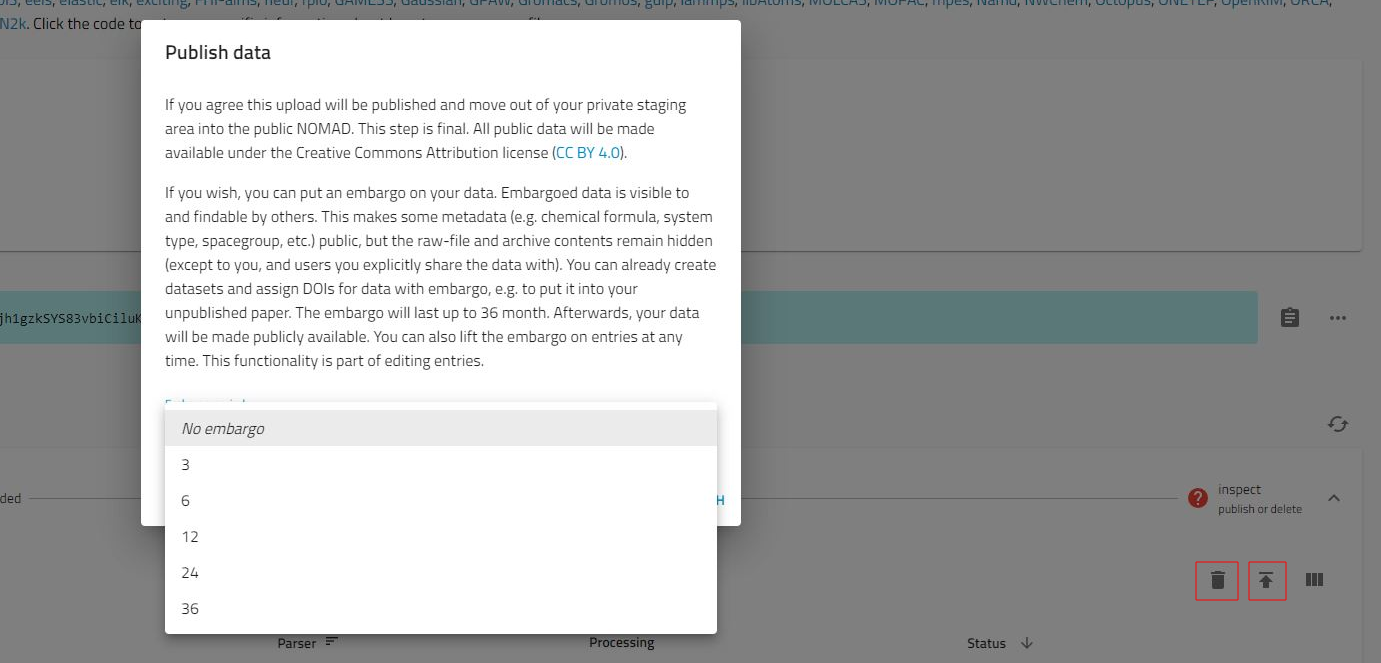
NOMAD Laboratory is an interactive instrument, which allows sharing and publishing of scientific data (enables generation of DOI). It supports input and output files of most electronic-structure codes and provides comfortable search engine for search in uploaded files. Calculations shared via NOMAD Laboratory can be downloaded in raw and in unified archive formats. Manipulations with data stored in NOMAD can be done via GUI or programmatically via NOMAD API or OPTIMADE API.

Upload and publication of the data

Please note: NOMAD is not a cloud service in the strict sense.  Publishing your file is irreversible (the data can then no longer be deleted) and is comparable to a scientific publication.

In order to be able to upload and to publish your calculations, create a NOMAD account.


1. Preparing files.

This is the best way to prepare your upload:

1. Directories may contain further directories.

2. The names of the directories can largely be anything.

3. All files belonging to the same code run must be grouped together in one folder, if possible.

4. “One directory per calc” - rule must be adhered to.

Please make sure to compress you data to “tar.gz„ or  “zip„ format before uploading. One upload is limited to 32 GB.


2. Upload of the data.

To upload data, log in to your NOMAD account.

Under the section “PUBLISH”  will open an upload-field  where the file can be added by “drag-and-drop”.

Alternatively, the file can be uploaded via terminal, using a curl command with a personal token.

Your file will be parsed and interpreted by the system to find as much metadata in the file as possible. The metadata is used to optimate the search in the user's uploads.

PLEASE NOTE: You can delete your upload only in case you have not published it yet. The published uploads cannot be deleted anymore.


2. Upload of the data.
© NWZ

3. Reviewing the uploaded data.

Under “PUBLISH” you will find option “Your uploads”, in this section you can view and manage the file you uploaded.

3. Reviewing the uploaded data.
© NWZ

4. Adding additional user-metadata.

Before publishing, you can manage the metadata for your datasets and add supplementary comments. To edit metadata, click the Pencil icon. A new window will open where you can add references, additional co-authors, and people you want to share the dataset with.

If the persons do not have a NOMAD account yet and therefore are not shown by the system, there is a possibility to send an invitation using  the option “Invite new user” in the lower-left corner. The corresponding person will then receive a link with the invitation by e-mail.

4. Adding additional user-metadata.
© NWZ

5. Publish/delete dataset.

If you are dissatisfied with your upload, you can delete it by clicking on the recycle bin icon.  The  already published datasets files can no longer be deleted.

As far as you decide to publish your file, you can do it using the “Publish” option. There are two possible options: with and without embargo.

 Choose Publish with embargo if you want to publish your file, yet it should start to be visible to wide audience only after a certain period of time. For your co-authors and people listed in metadata, your file will become visible after publication. The maximum period for which you can set an embargo is 36 months. Thereafter, the embargo will be removed automatically. The embargo can be lifted at any time when editing metadata.

Publication without embargo makes datasets visible to all NOMAD users. If your file  was published without embargo, you can no longer set an embargo for these files.  

5. Publish/delete dataset.
© NWZ
  • Video tutorial

    00:46 Creating a NOMAD-Account

    01:40 Set of example files

    02:15 First step: preparing files

    03:54 Guideline to prepare files

    04:57 Second step: uploading files

    05:34 Upload with a shell command and a secret token

    06:15 Third step: reviewing the uploaded data

    06:68 Working with incomplete entries

    07:18 Usage of „your data“- interface

    07:48 Fourth step: adding additional user-metadata

    08:55 Adding co-authors and inviting them.

    10:15 Fifth step: publishing data

    10:32 Embargo-concept

    11:33 Creating and adding of DOI