
Printing on the photocopiers
The copiers in the ground floor corridor of the IAP and in the learning centre can also be used as printers.
Windows Setup Guide
To be able to print directly from the Windows PC, the following steps must be performed by the user:
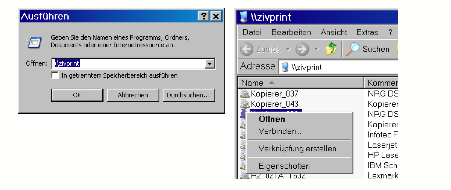
One-time: With Start -> Run -> Enter: \\zivprint you get a list of the printers managed by the WWU IT. The multifunction devices are called „Kopierer_#“, "#" stands for the consecutive number of the respective multifunction device. Please ask for the number of the desired multifunction device the person responsible for the device in the respective area. Select the desired printer with the mouse and "connect" using the right mouse button. The window with the printers can now be closed.
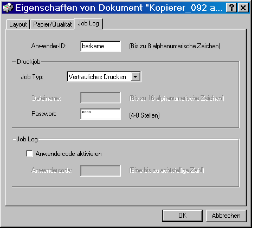
To print, e.g. under Word, proceed as follows: Open the print dialog with File -> Print, select the desired printer and click on "Properties". In the "Job Log" area, enter any ID, select "Confidential Printing" as the job type and enter any password. This password ensures that no one else can print the file.
Insert the canteen card into the copier (if necessary) and then press the key with the printer symbol (Left, 2nd key from below). Select "Print jobs" on the touch screen, then select your own job and "Print" and enter the password selected for printing. Then answer the following questions with "OK" and "Yes".
Setup instructions for SuSE Linux
To be able to print directly from the SuSE-Linux-PC, the following steps must be carried out by the user:
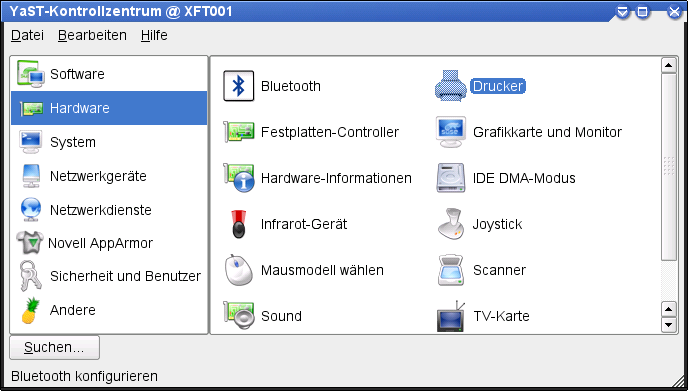
Open the YaST Control Centre, select the category "Printer" under "Hardware".
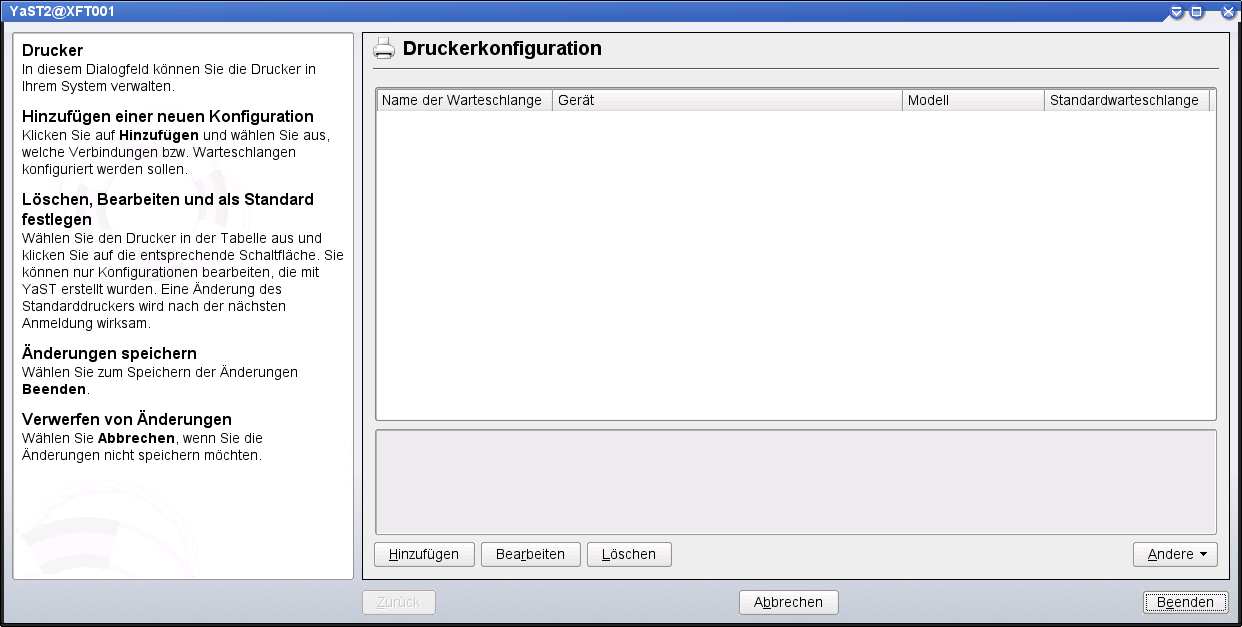
Click "Add" in the printer configuration.
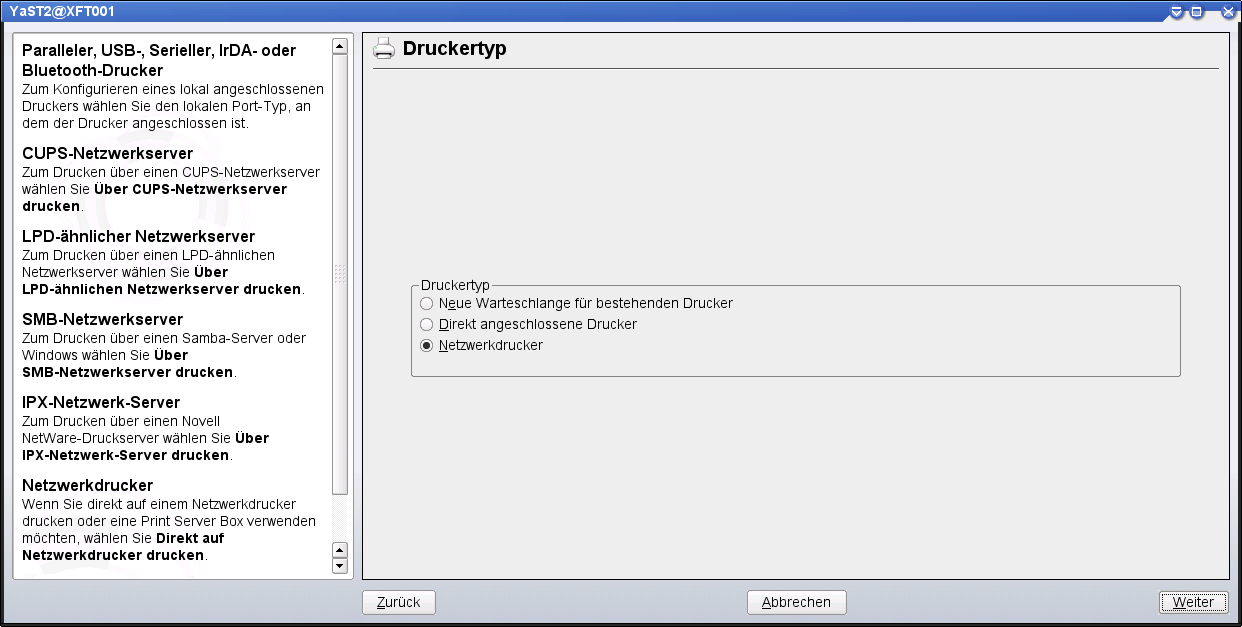
Select "Network Printer", "Next".
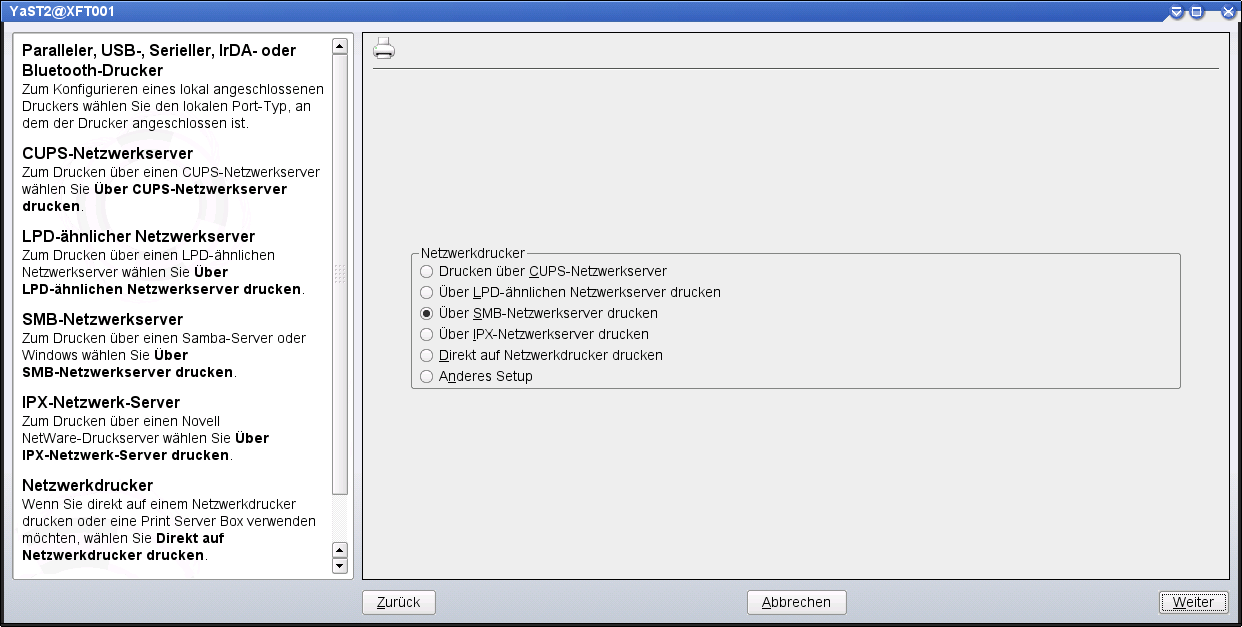
Select "Print via SMB Network Server", "Next".
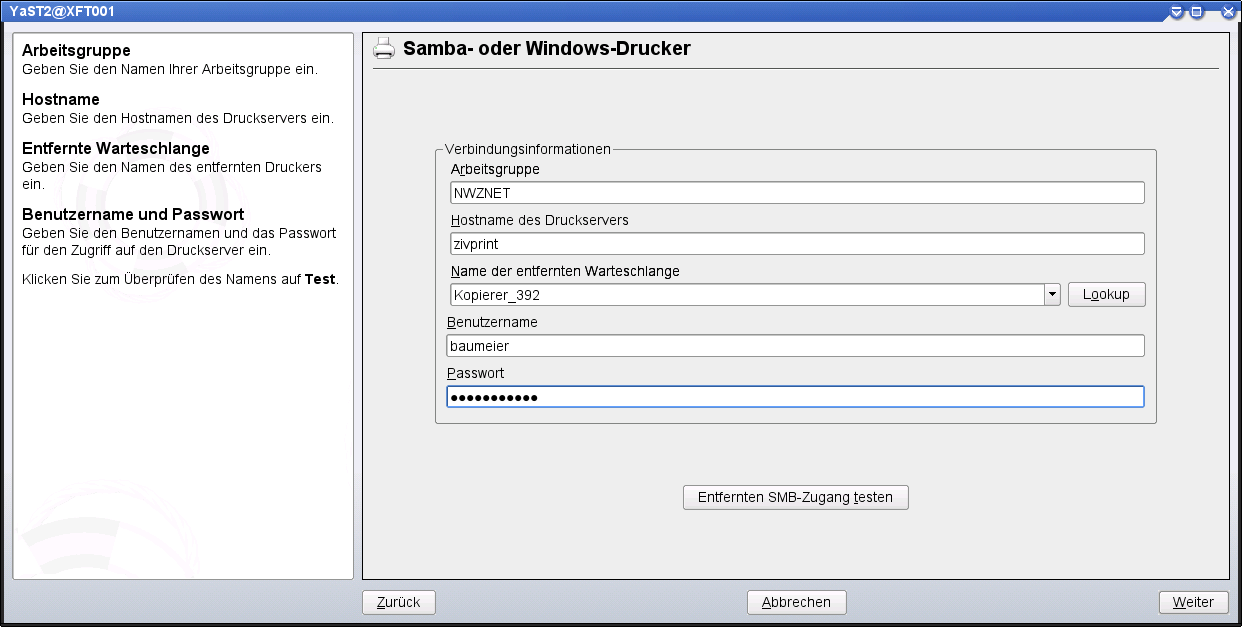 Enter connection information as shown above. The multifunction devices are called "Copier_#", "#" stands for the consecutive number of the respective multifunction device. For the number of the desired multifunction device, please contact the person responsible for the device in the respective area.
Test access. "Continue".
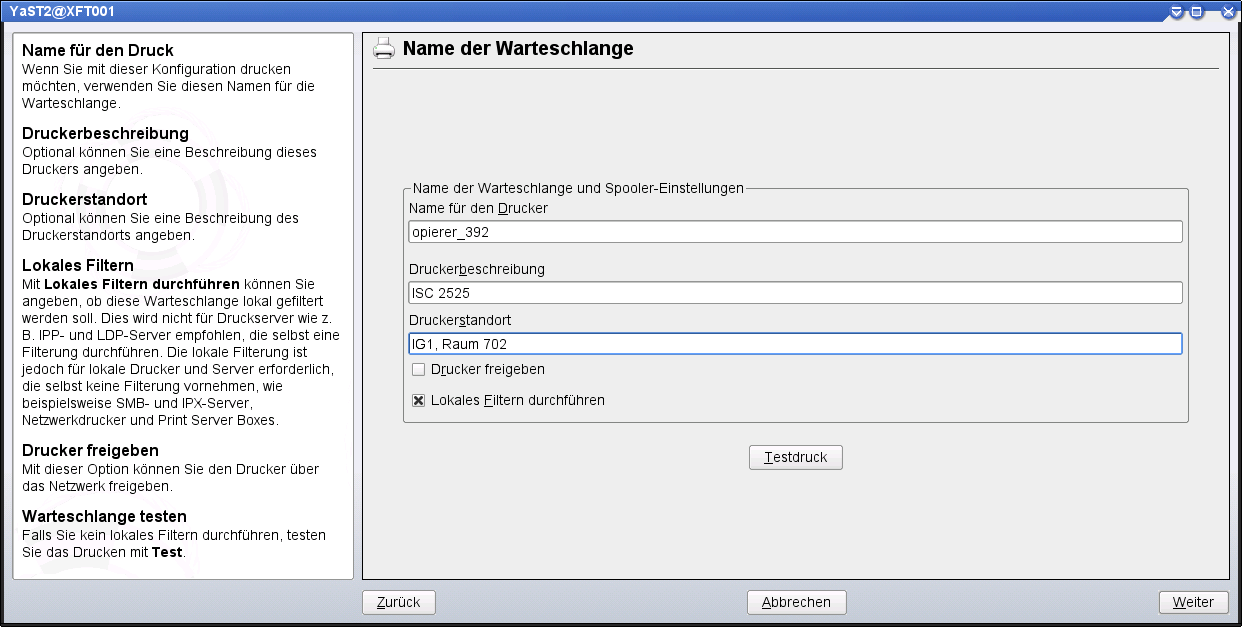
Name is automatically entered (why the K is missing remains a mystery...), enter printer description and location, deselect "Share printer". Next.

Select the printer model as shown. Click on "Select PPD file".
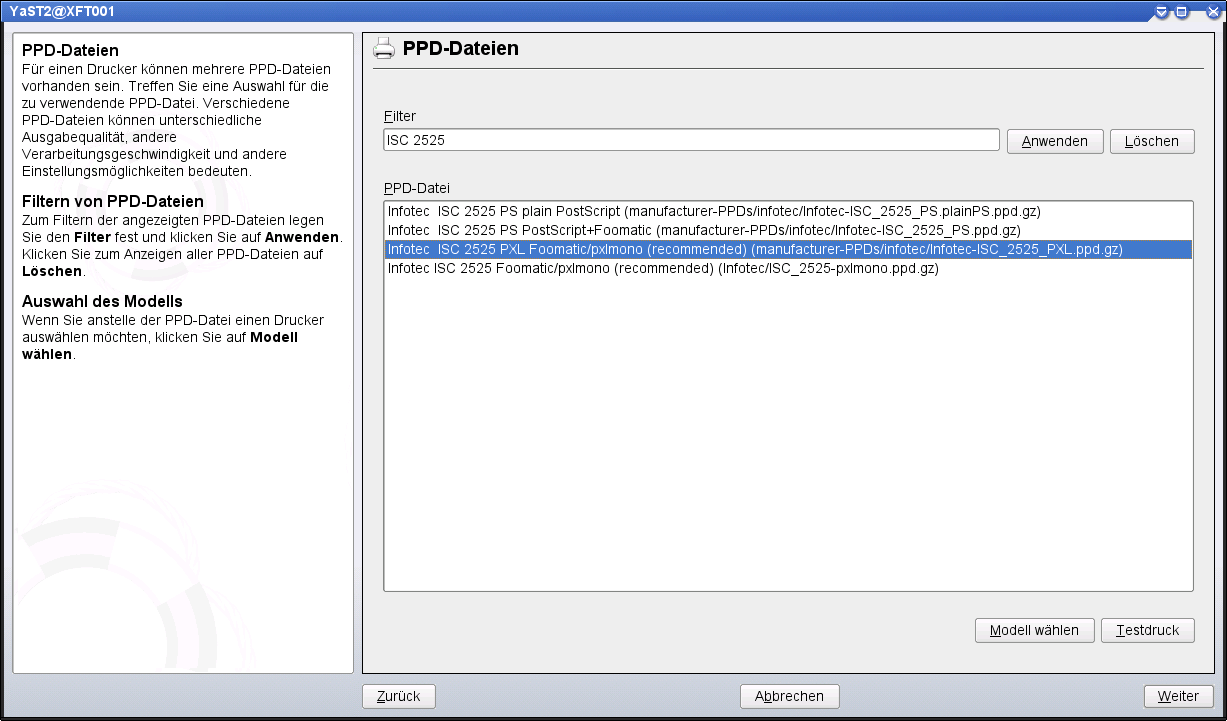
Enter the type of the respective device in the filter, e.g. "ISC 2525", click on "Apply". Select the appropriate driver from the list, e.g. "Infotec ISC 2525 PXL Foomatic/pxlmono (recommended) (...)". "Next".
In the summary window "Configuration" set the "Filter Settings" (e.g. Duplex Unit) depending on the printer model and finally finish the setup in the YaST with "OK" and "Finish".
To set up the "LockedPrint" mode required to use the copier, proceed as follows
and in addition to the three options for selecting the user code (1001, 1002, and 1003) and the PIN (4001, 4002, and 4003), which are not very difficult to guess, you have to open the corresponding PPD file from the directory /etc/cups/ppd/ in an editor.
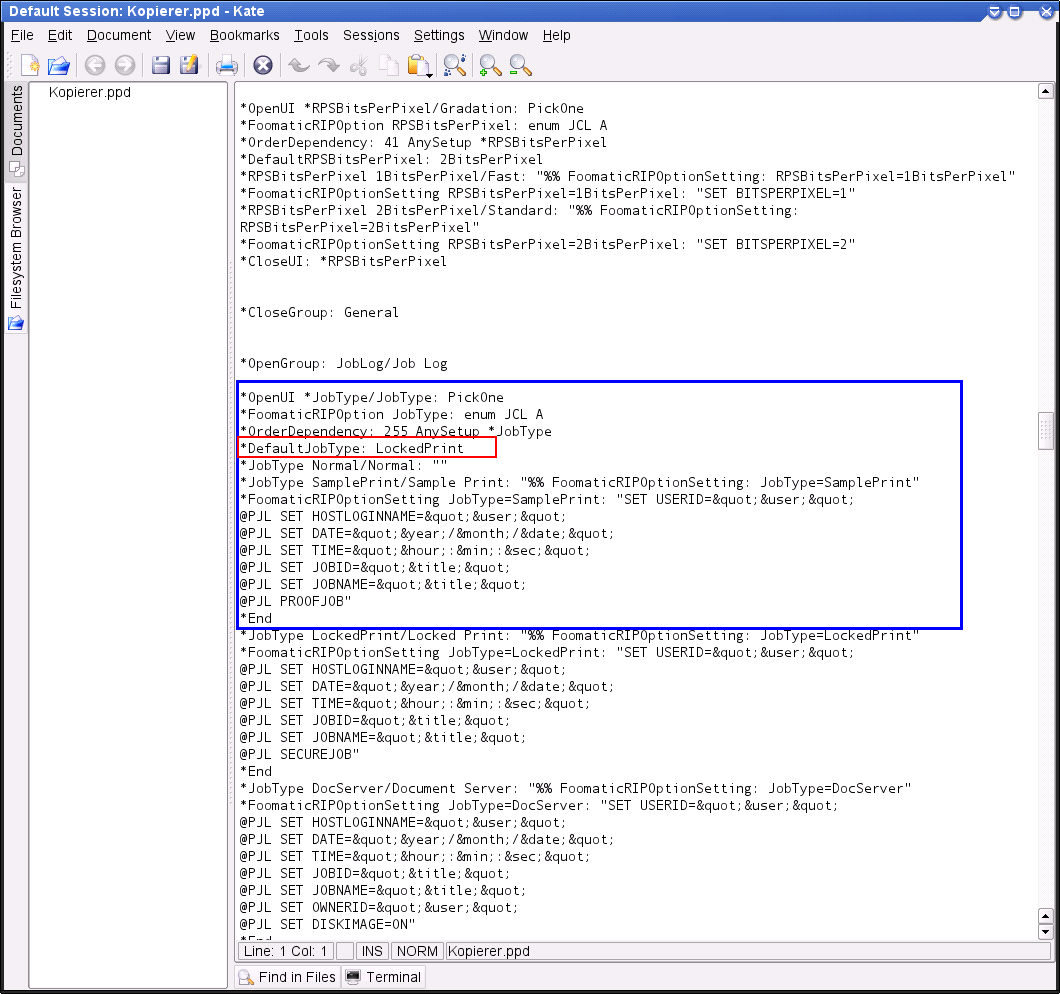
Set the default print mode to LockedPrint. Locate the blue framed section *OpenUI *JobType/... Enter
*DefaultJobType: LockedPrint
like in a red frame.
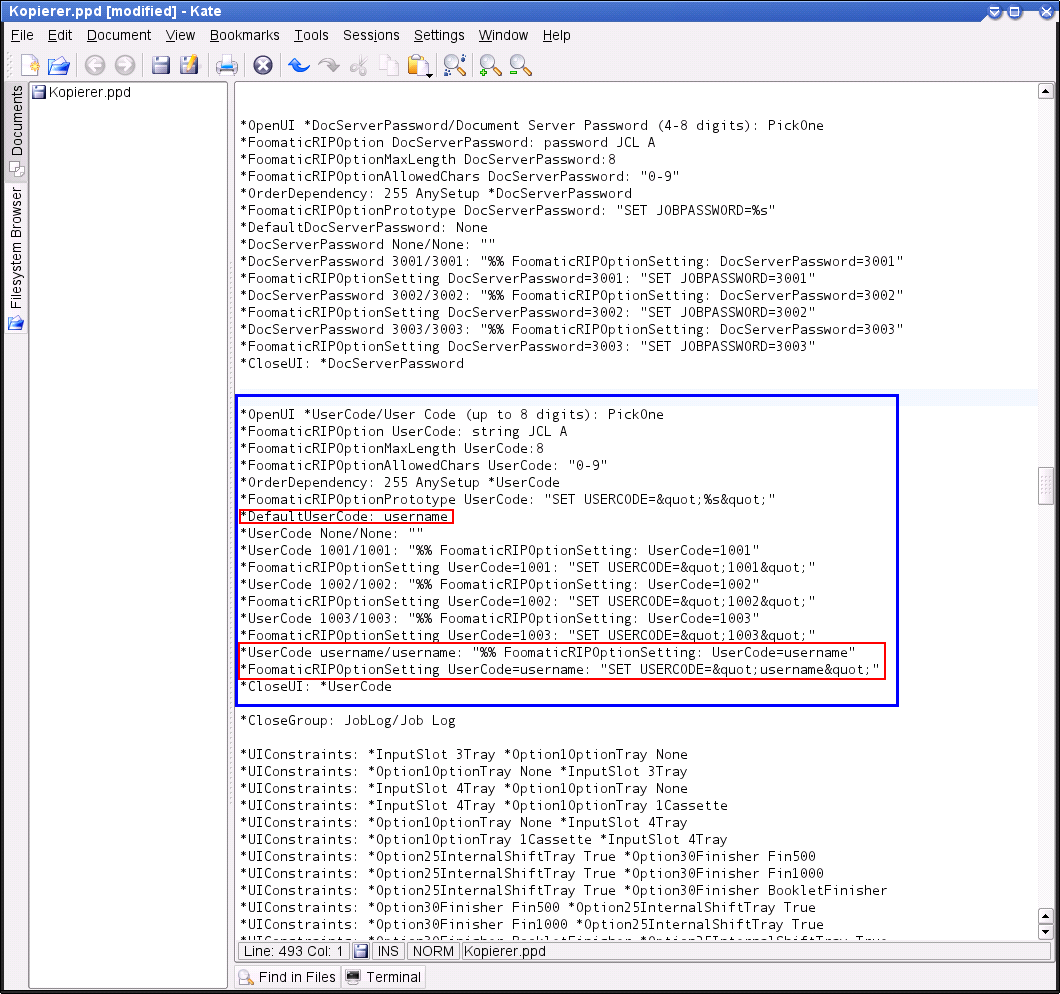
Setting the personal user code.
Find the blue framed section *OpenUI *UserCode/User Code
Set
*DefaultUserCode: username
(of course replace username with your own username).
Add the two additional framed lines.
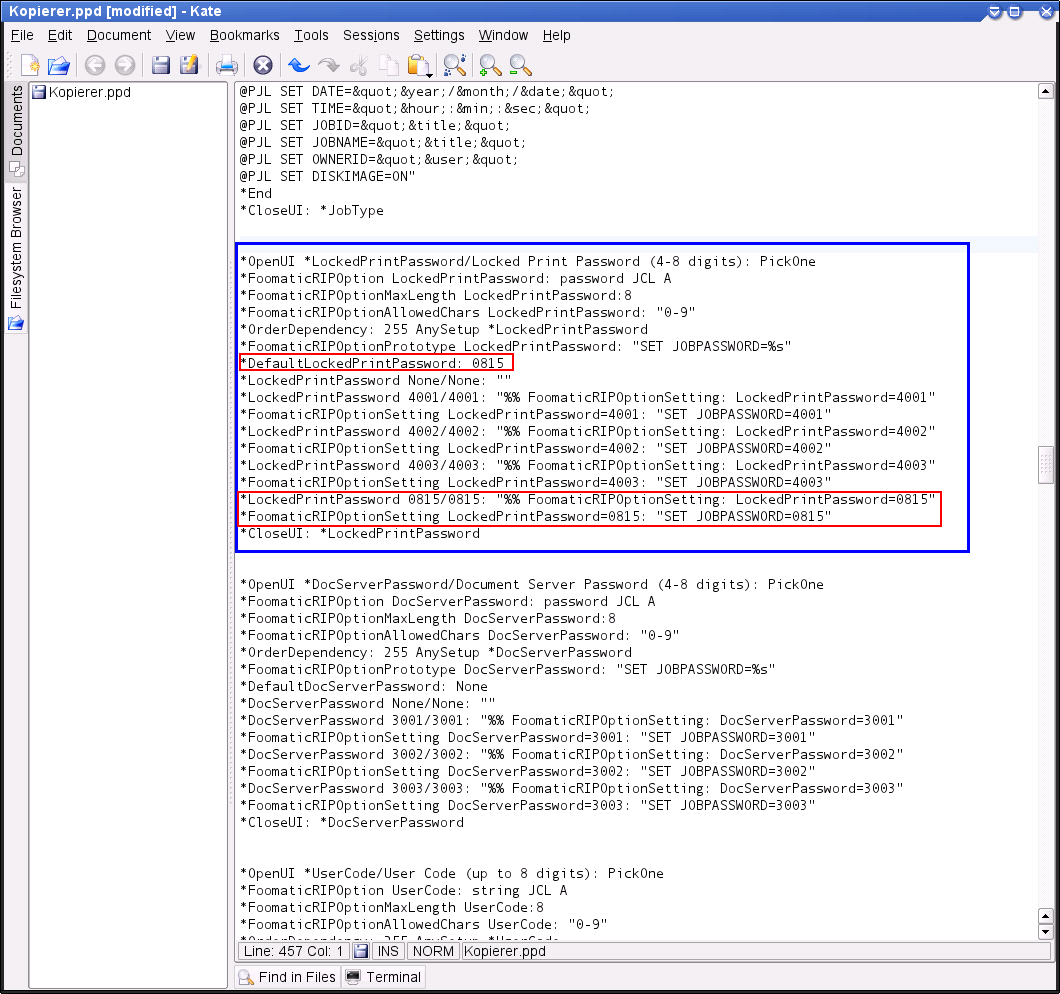
Setting the personal PIN.
Locate the blue framed section *OpenUI *LockedPrintPassword
Set
*DefaultLockedPrintPassword: 0815
(of course replace 0815 with your own 4-8-digit PIN).
Add the two additionally framed lines.
Save and close the file.
Insert the canteen card into the copier and then press the key with the printer symbol (Left, 2nd key from below). Select "Print jobs" on the touch screen, then select your own job and "Print" and enter the PIN. Then answer the following questions with "OK" and "Yes".
Mac OS X set up guide
To print directly from a Mac, the following steps must be performed by the user:

Open System Preferences and select "Print & Scan."

A new printer can be added by clicking on the "+". The lock in the lower left corner must be opened first. Authentication is done via a y account or the local administrator.

The next step is to adjust the toolbar. This can be done with a right click -> Customize toolbar.

The button "Advanced" must be dragged into the bar.


For Type, "Windows printer via Spooler" must be selected and entered under URL "smb://zivprint.uni-muenster.de/Name". Please ask the device manager in the respective area for the number of the desired multifunction device. Select the printer driver via "Use". If it is not listed, the driver must be installed.

Select "Lower Magazine" under Optional Magazine and confirm with OK.


To print, e.g. under Word, proceed as follows: Open the print dialog with File -> Print, select the desired printer and click on "Show details". Under Job log the job type must be changed to "confidential printing".

You must specify any user ID and password. This password ensures that no one else can print the file.


The configuration can be saved under Presets.
Insert the canteen card into the copier (if necessary) and then press the key with the printer symbol (Left, 2nd key from below). Select "Print jobs" on the touch screen, then select your own job and "Print" and enter the password selected for printing. Then answer the following questions with "OK" and "Yes".