
")
Please pay attention not only to the pictures in the following instructions, but also be sure to read the introductory explanations and the notes between the individual illustrations thoroughly!
Electronically sign PDF documents
To sign PDF documents electronically, you need a digital ID suitable for this purpose, which we call PDF ID. (The digital IDs used for emails are not suitable.)
In the IT portal, you can obtain such PDF IDs from our own PDF CA. These PDF IDs can be imported into Adobe Acrobat (Pro and Reader) and other PDF software.
The electronic signatures generated with the PDF IDs issued by our PDF-CA are recognized by the university administration and shall also be recognized by all other offices of the University of Münster.
(In order to sign PDF documents in such a way that they are also accepted outside the university, however, a “qualified signature card” is required for a fee, along with the corresponding hardware and software. The signatures created with these are even recognized by authorities and courts within the European Union. If you have a specific business need, please contact the IT Service Competence Center.)
To issue a digital ID, the identity of the applicant must be sufficiently well checked. This is already the case for most professors, civil servants, employees and regular students, and also for all persons who have previously received a personal certificate from the CA of the University of Münster. They can proceed directly according to the following instructions.
All other members of the university or the arts academy (lecturers, assistants, guest students, etc.) must visit a UCAM team member once and identify themselves and only then can they proceed according to the following instructions. The affected persons will be notified of this in the IT portal.
Guides
Please click on the images to enlarge.
Please replace my university ID “perske”, my email addresses, and my further datails with your own data.
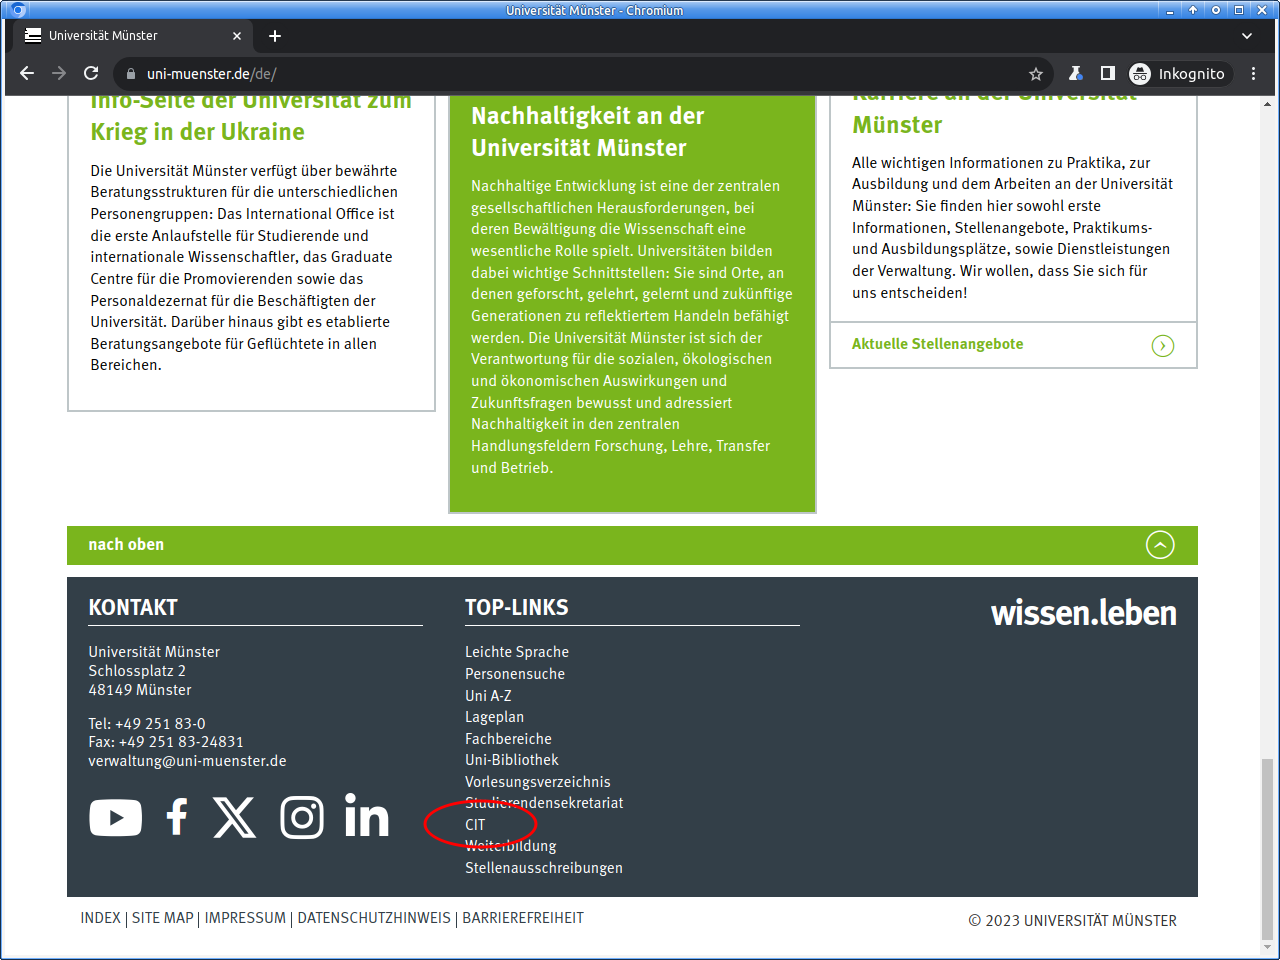
Guide: Request a digital ID for PDF documents in the IT portal
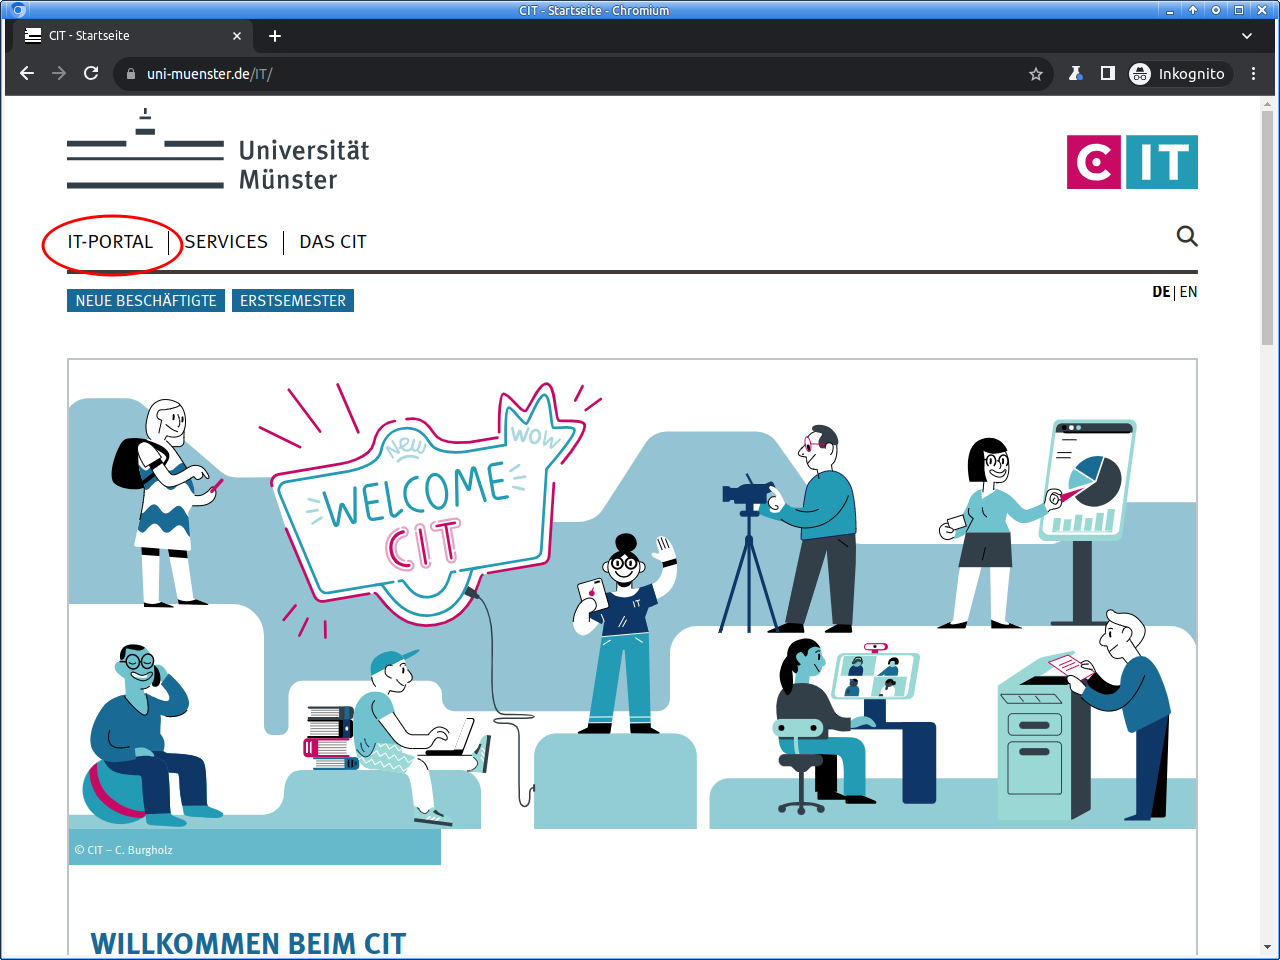
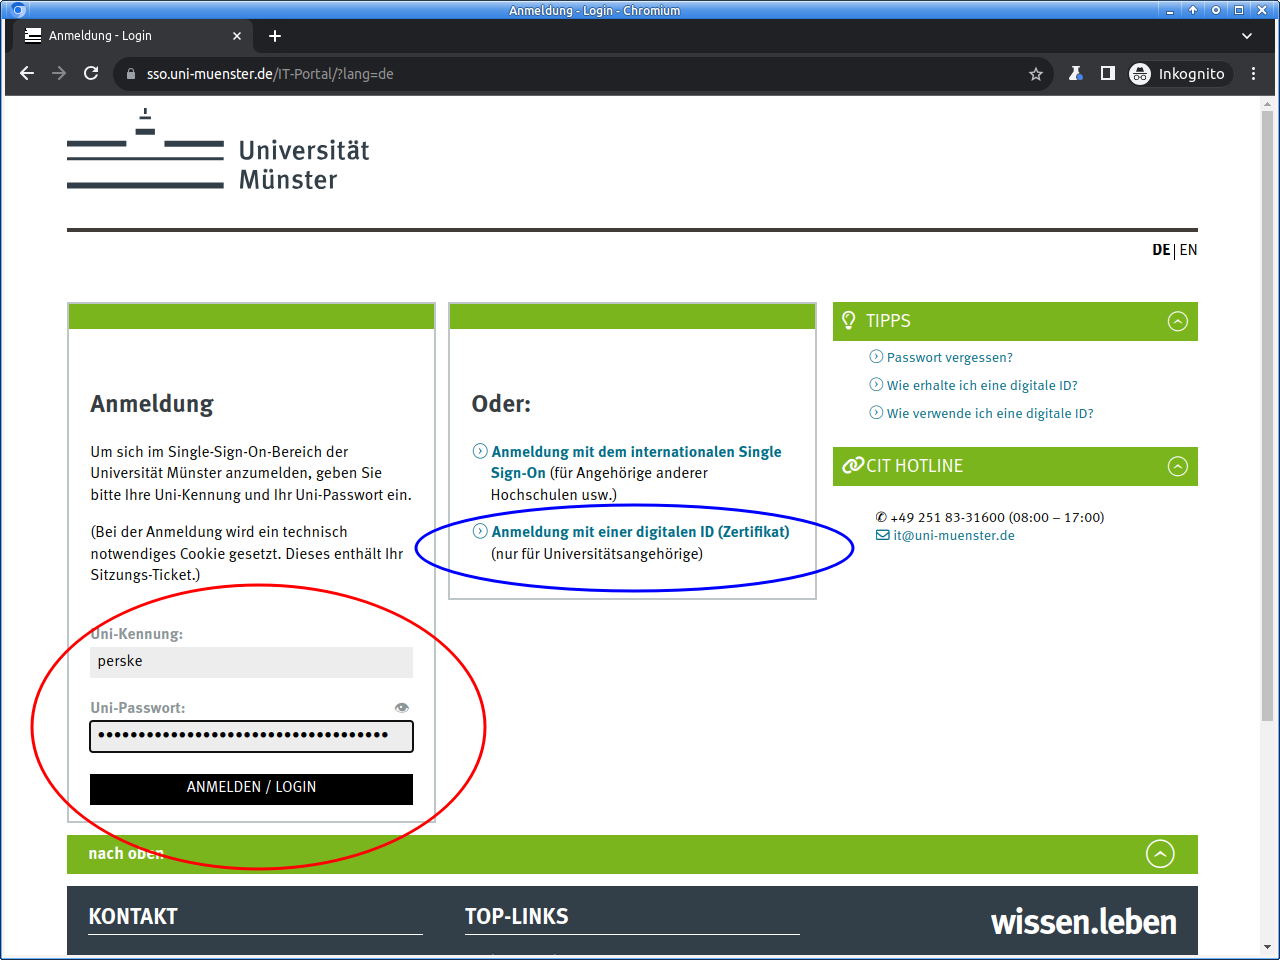
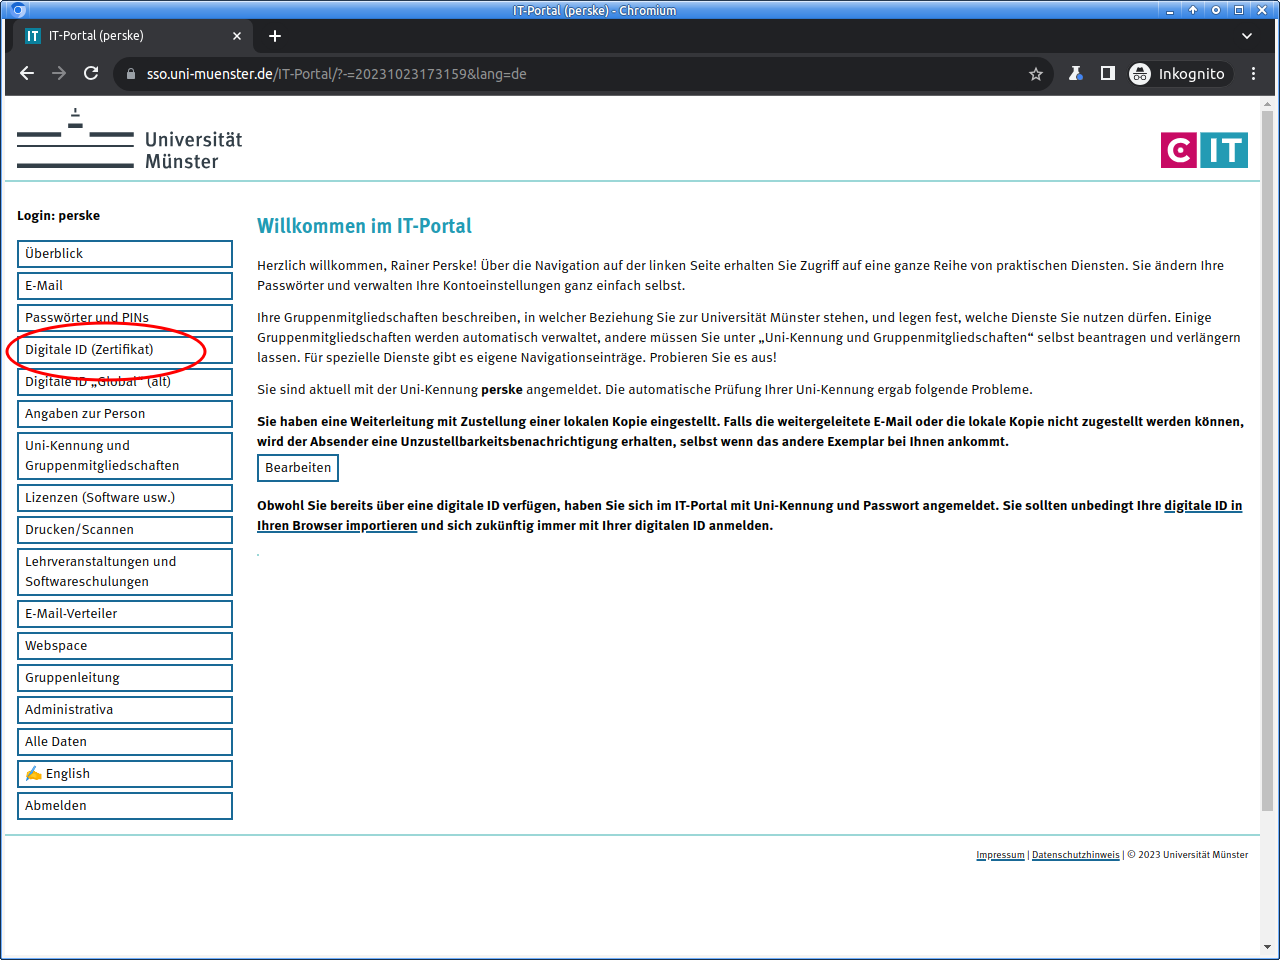
Please log in to the IT portal:
For logging in, usually university ID and university password are used. But if you already own a digital ID (for e-mail and WWW), you can use that:
After logging in to the IT portal important notes may appear. A note regarding missing two-factor security would be important but two-factor security is enabled automatically when requesting a digital ID.
Select the area „Digitale ID (Zertifikat)“ (“Digital ID (certificate)”):
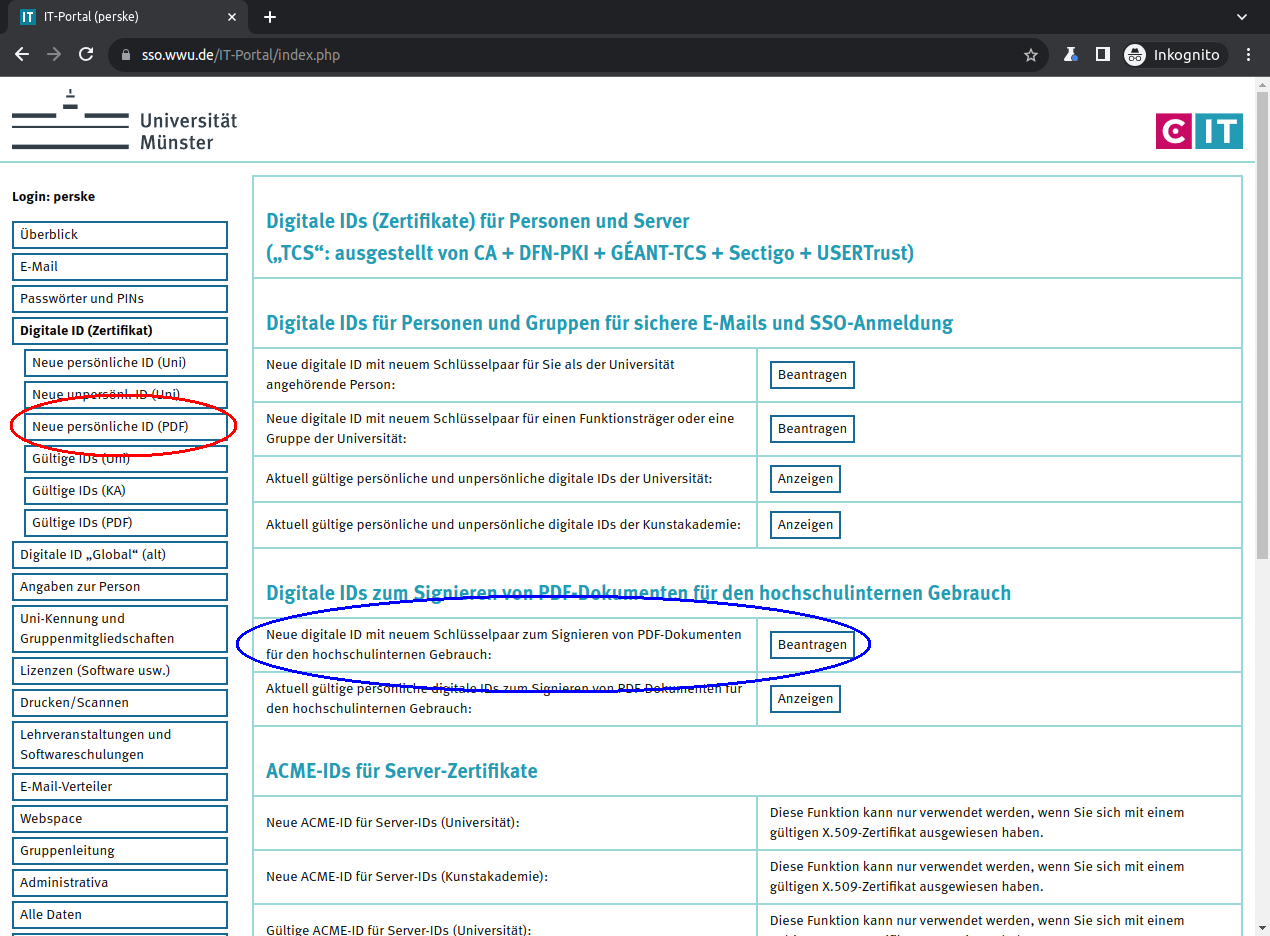
There click on „Neue persönliche ID (PDF)“ (“New personal ID (PDF)”) or in the correct line on „Beantragen“ (“Request”):
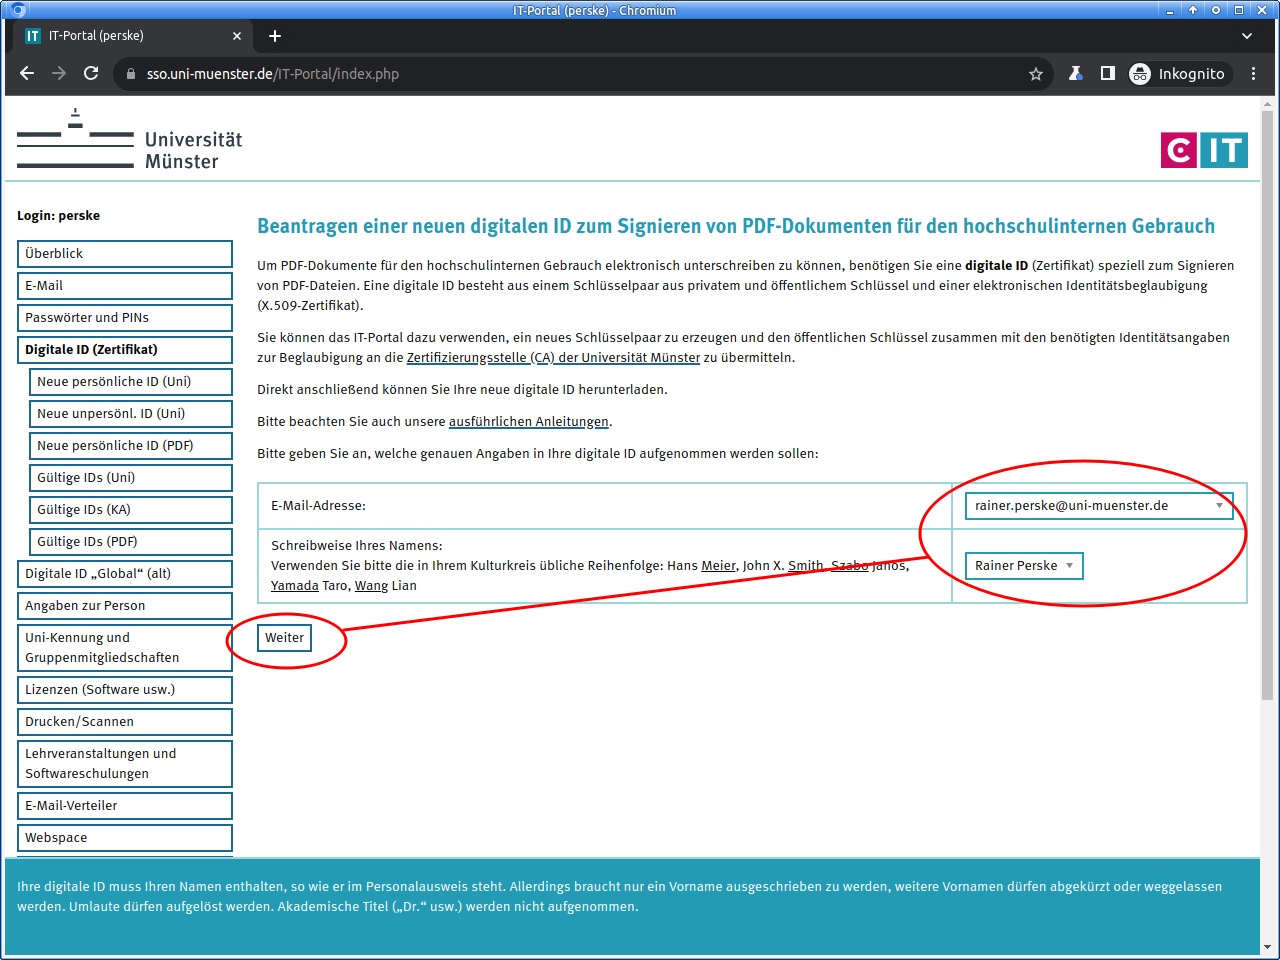
On the next page first regard the detailed notes. Then select what details are to be included into the digital ID.
For members of the arts academy corresponding input fields are displayed:
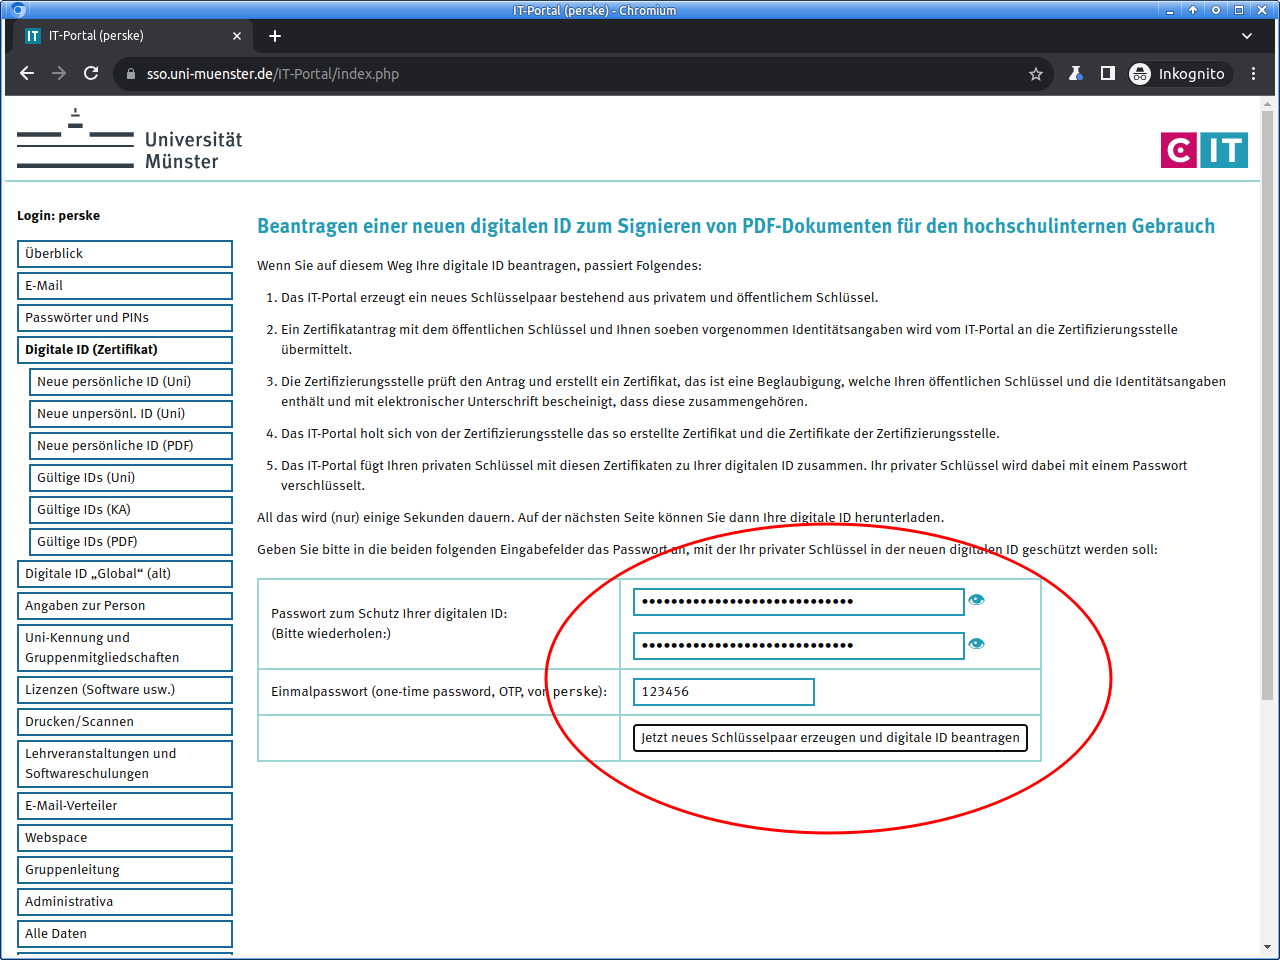
On the next page you will download the digital ID as an PKCS#12 file. This file will be encrypted with a password for security. Please choose a good password and enter it twice.
Please make a note of this password and keep it very carefully!
Nobody can help you if you lose it, not even us!With a click on the button you then request your new digital ID.
Usually after only a few seconds your digital ID is ready.
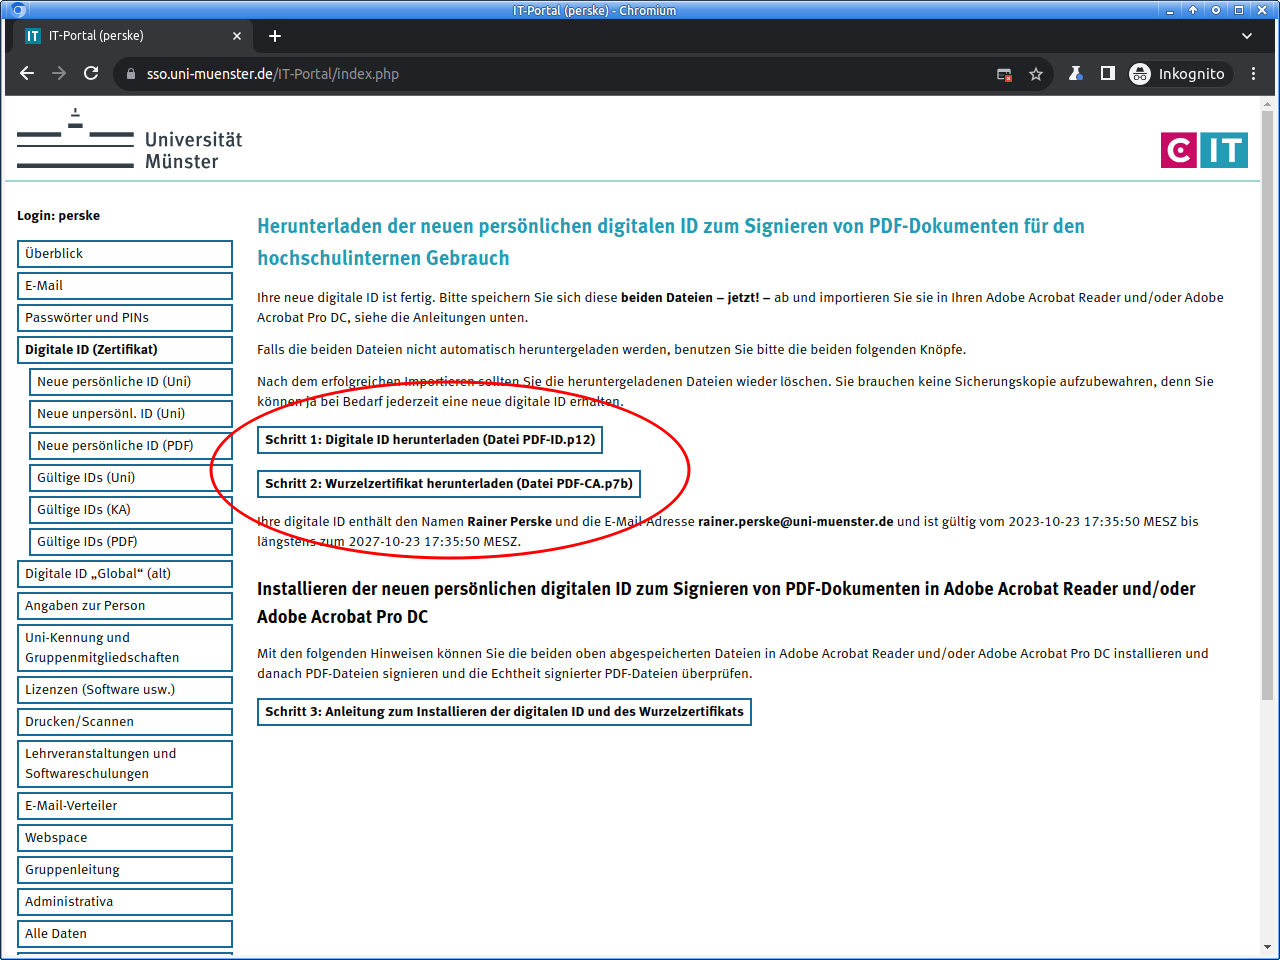
The download of the digital ID should start automatically, but can be also be started manually.
Please save your digital ID carefully!
Once you leave the page, there is no possibility to download the digital ID again!
Please also download the root certificate
(Only for private computers) Guide: Import (root) CA certificates
This guide does not apply to computers that are centrally maintained by the CIT or by an IVV.
These steps need to be performed only once. If you get a new digital ID, you do not need to repeat these steps.
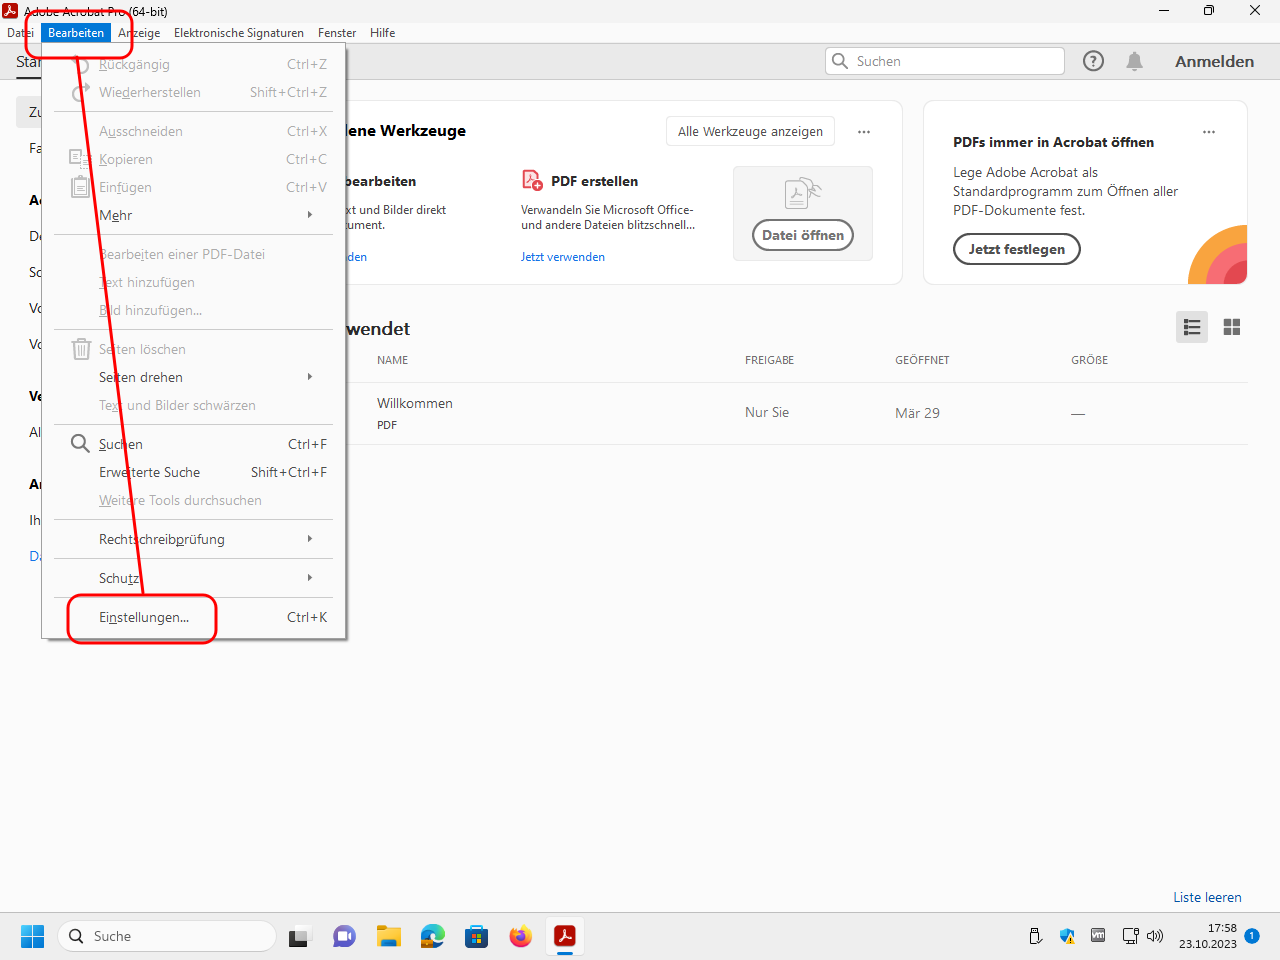
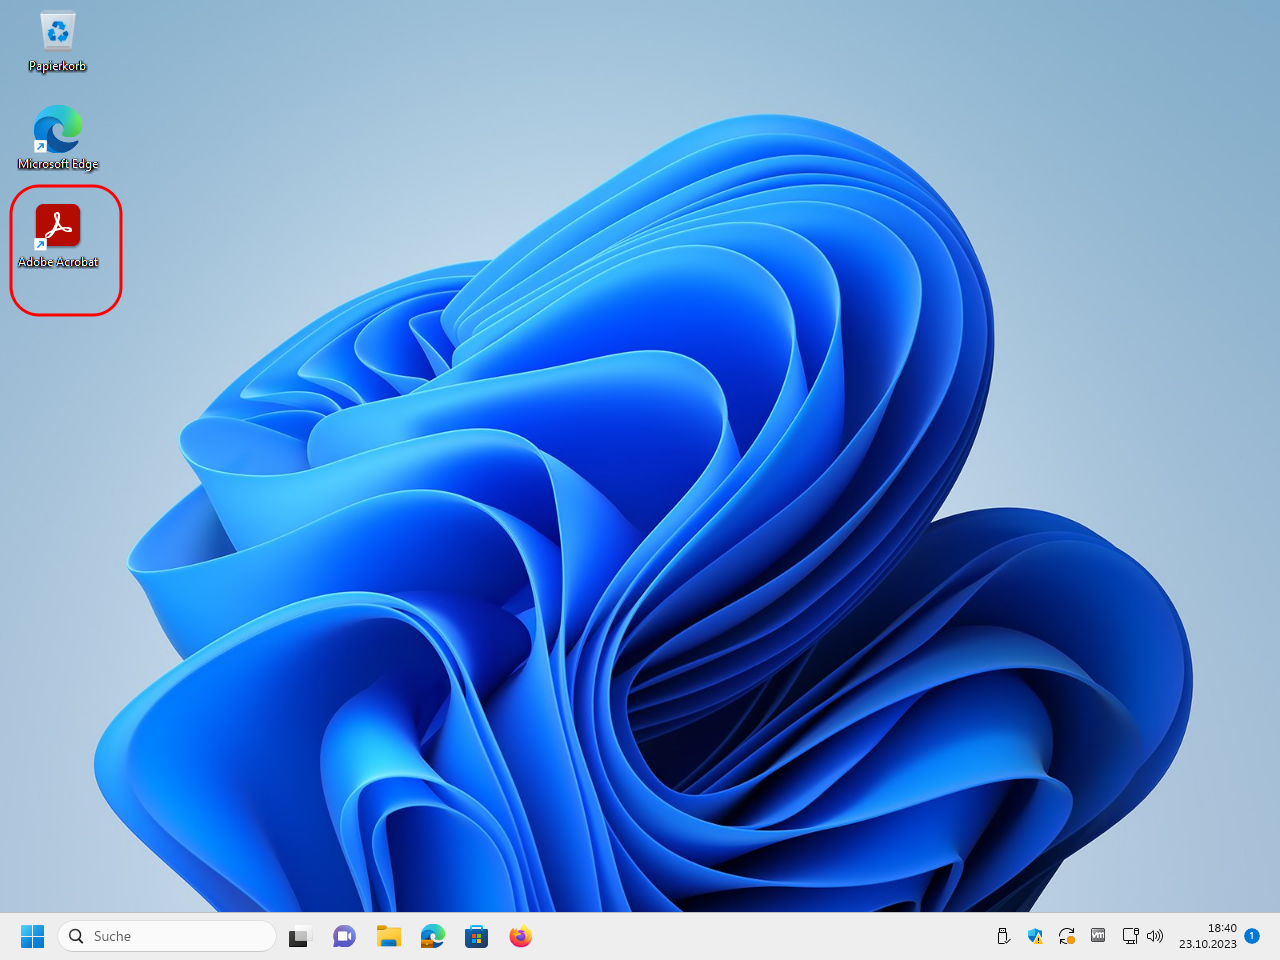
Open Adobe Acrobat Reader resp. Adobe Acrobat Pro:

Open the settings:
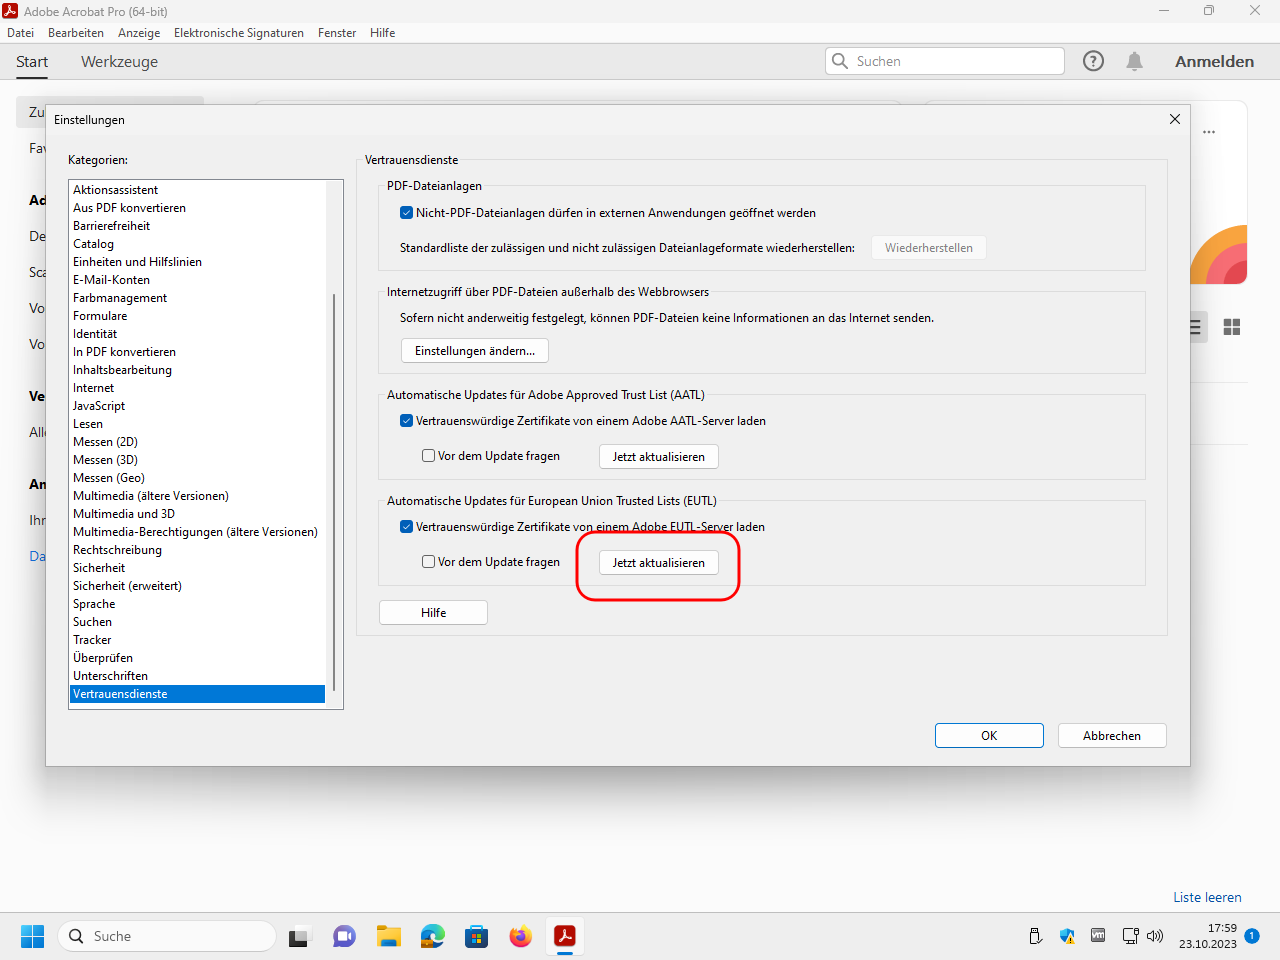
Open the trust services category and update the Adobe Approved Trust List (AATL):
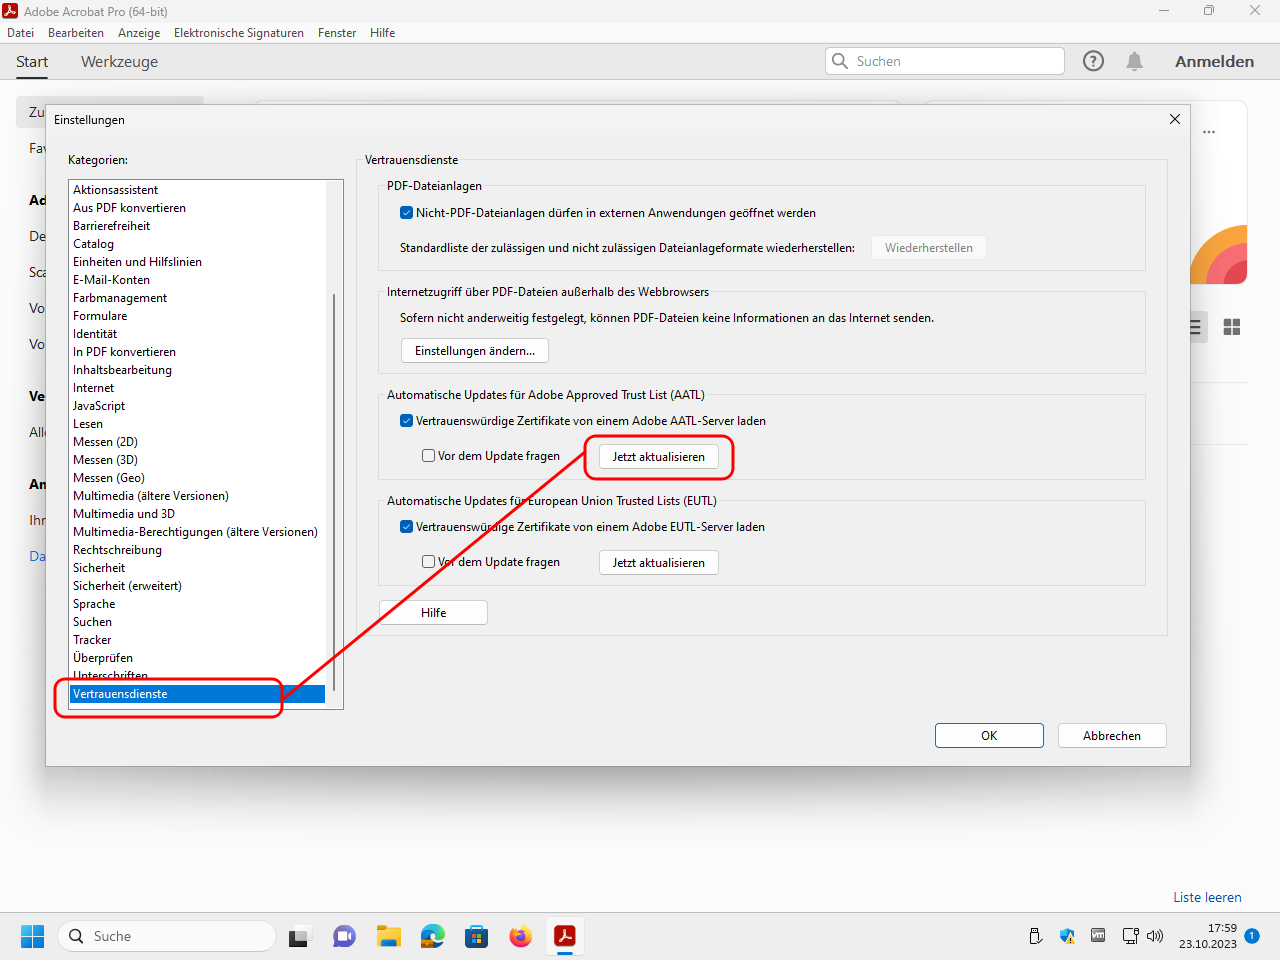
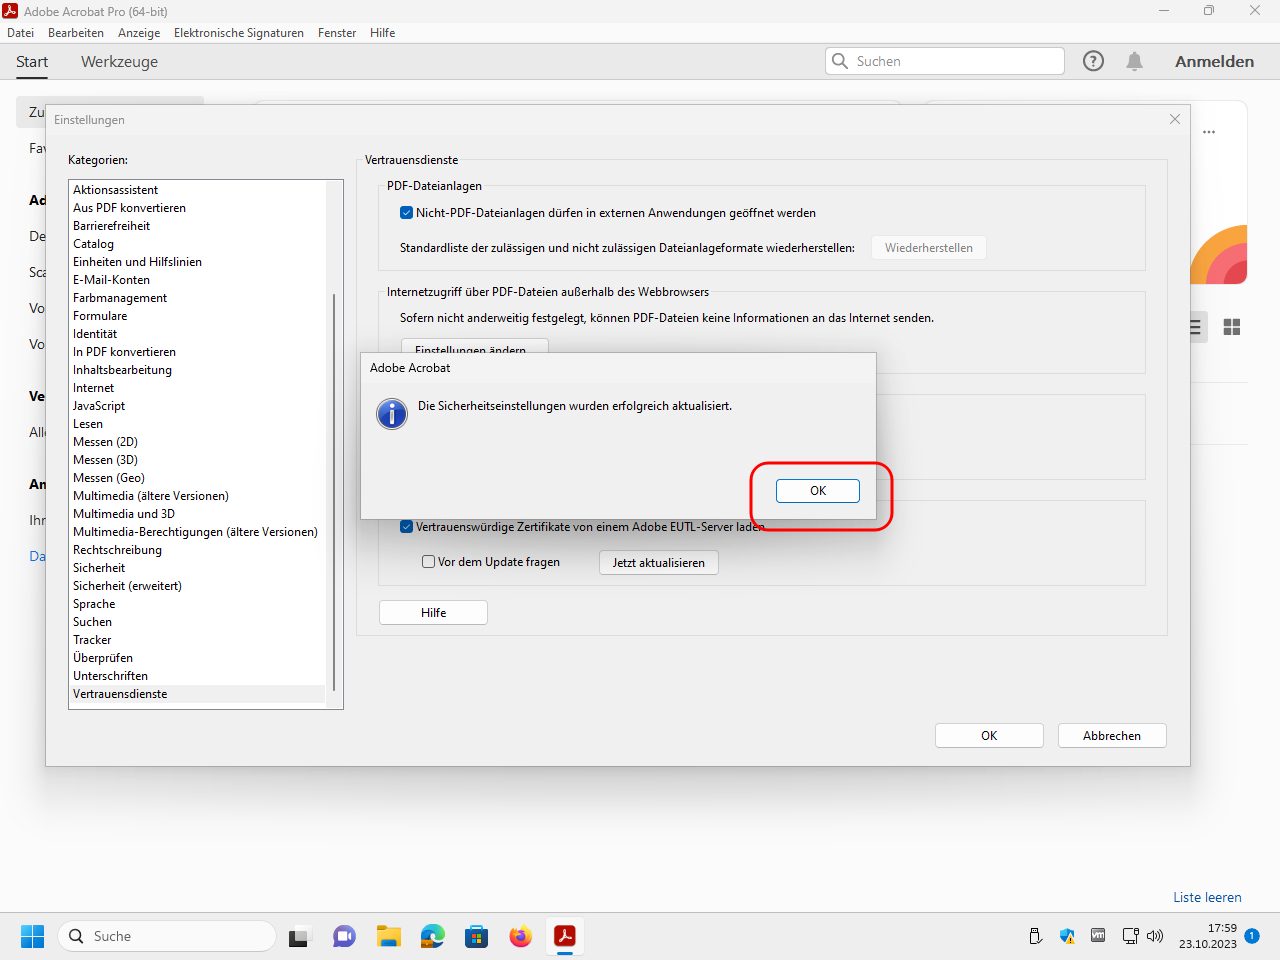
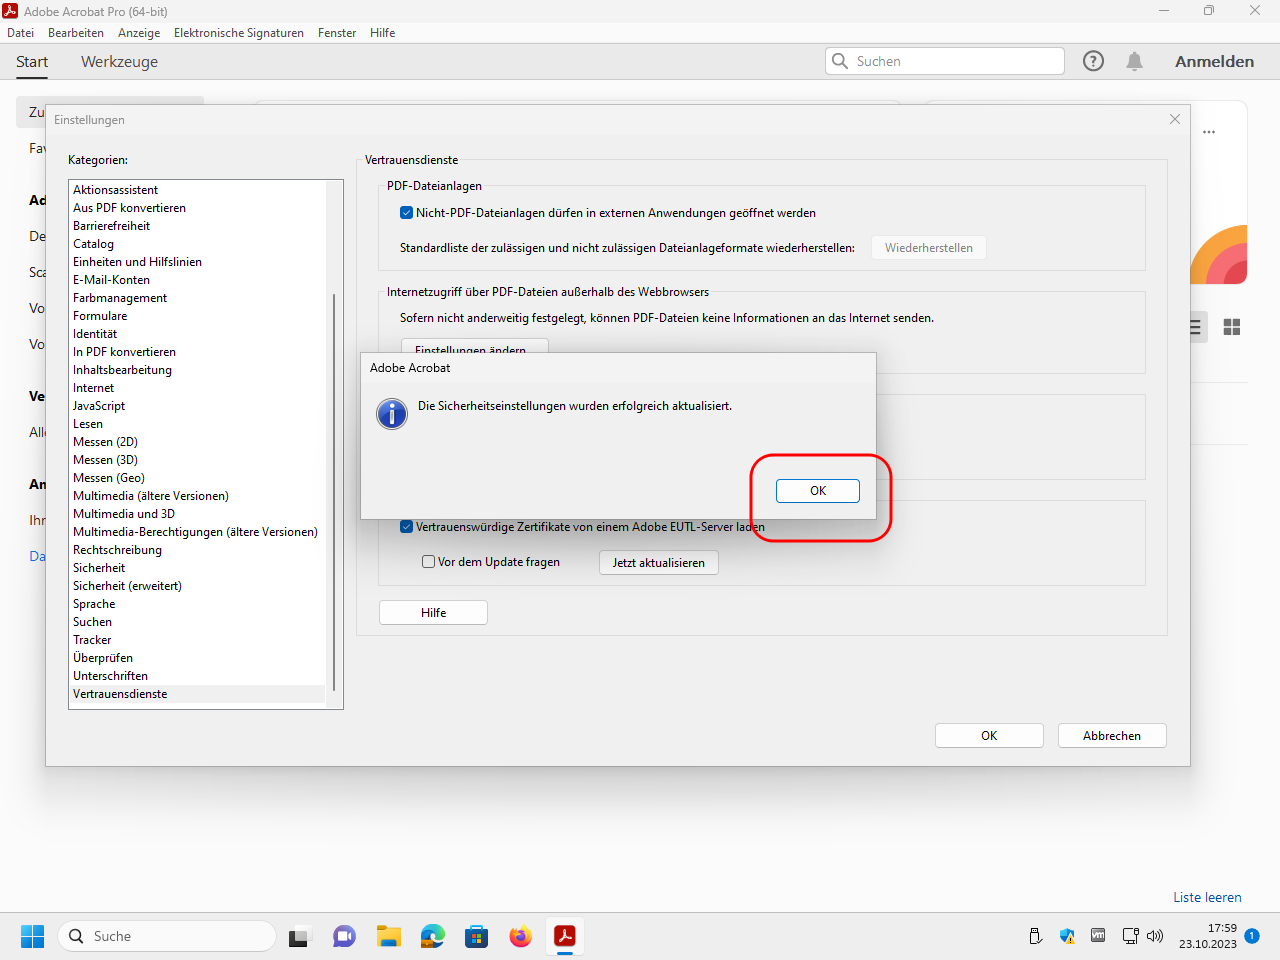
Update also the European Union Trusted Lists (EUTL):
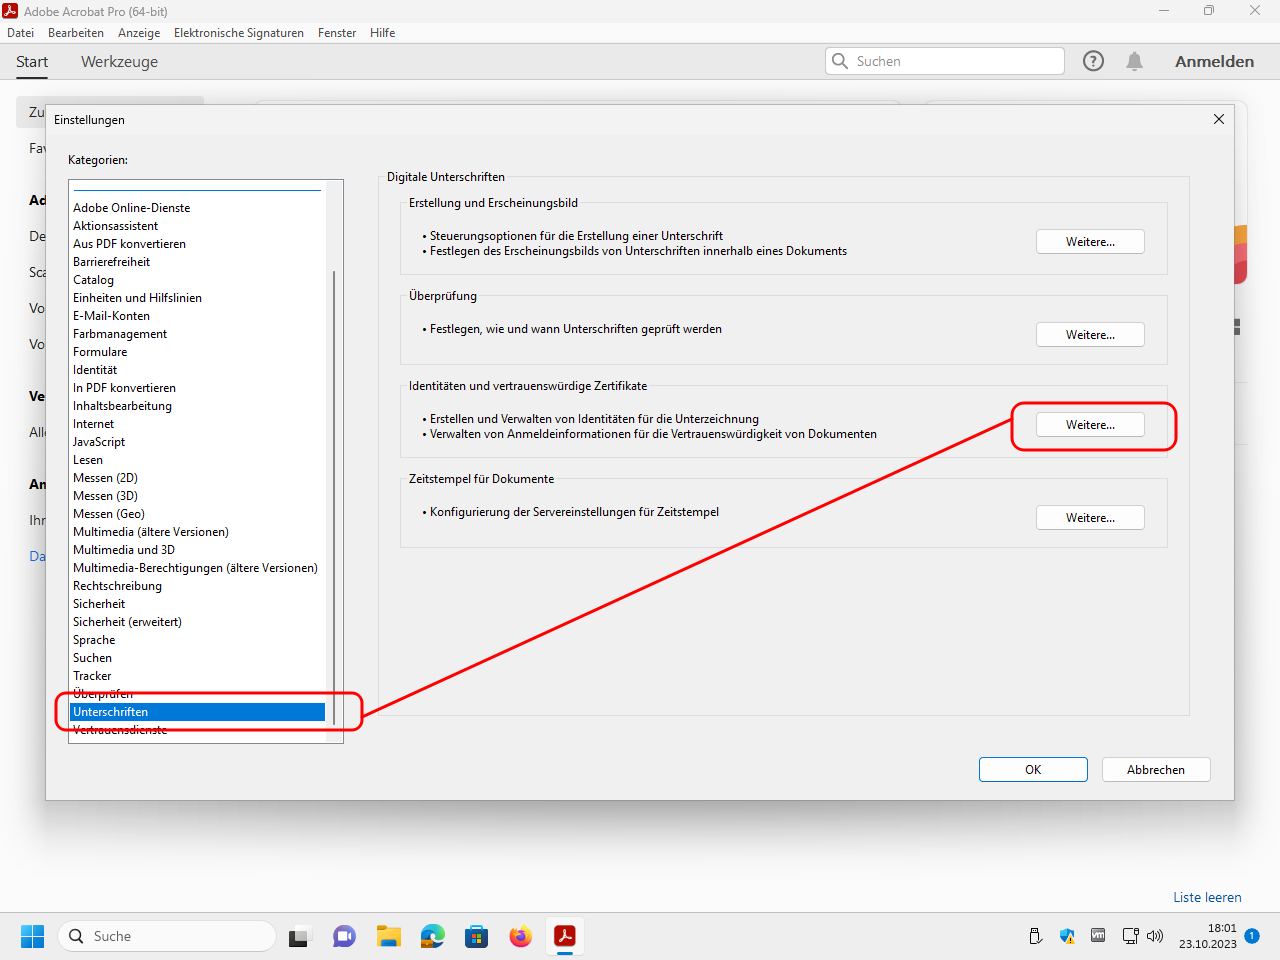
Open now the signatures category and edit the settings for identities and trustworthy certificates:
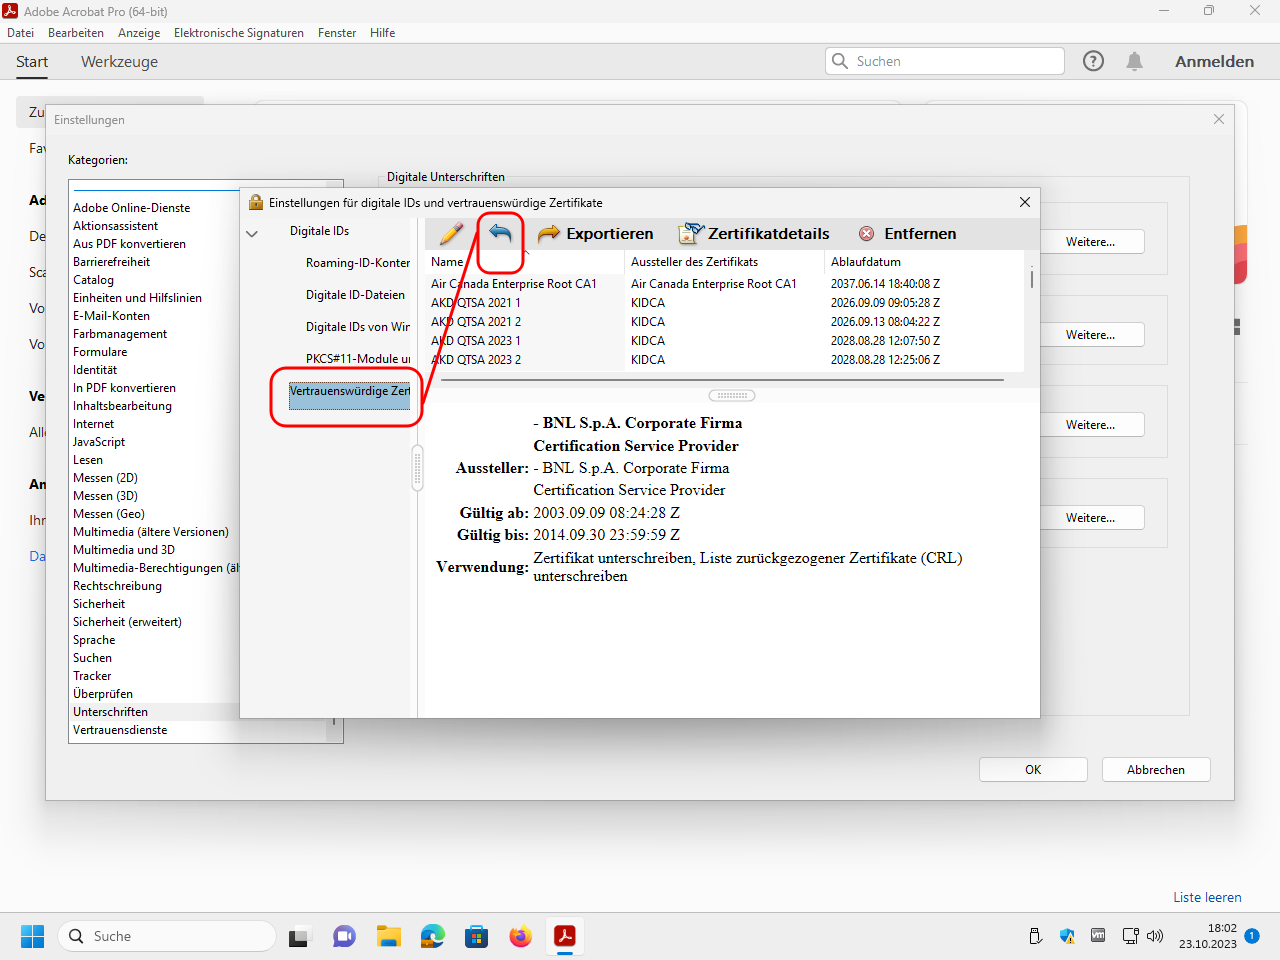
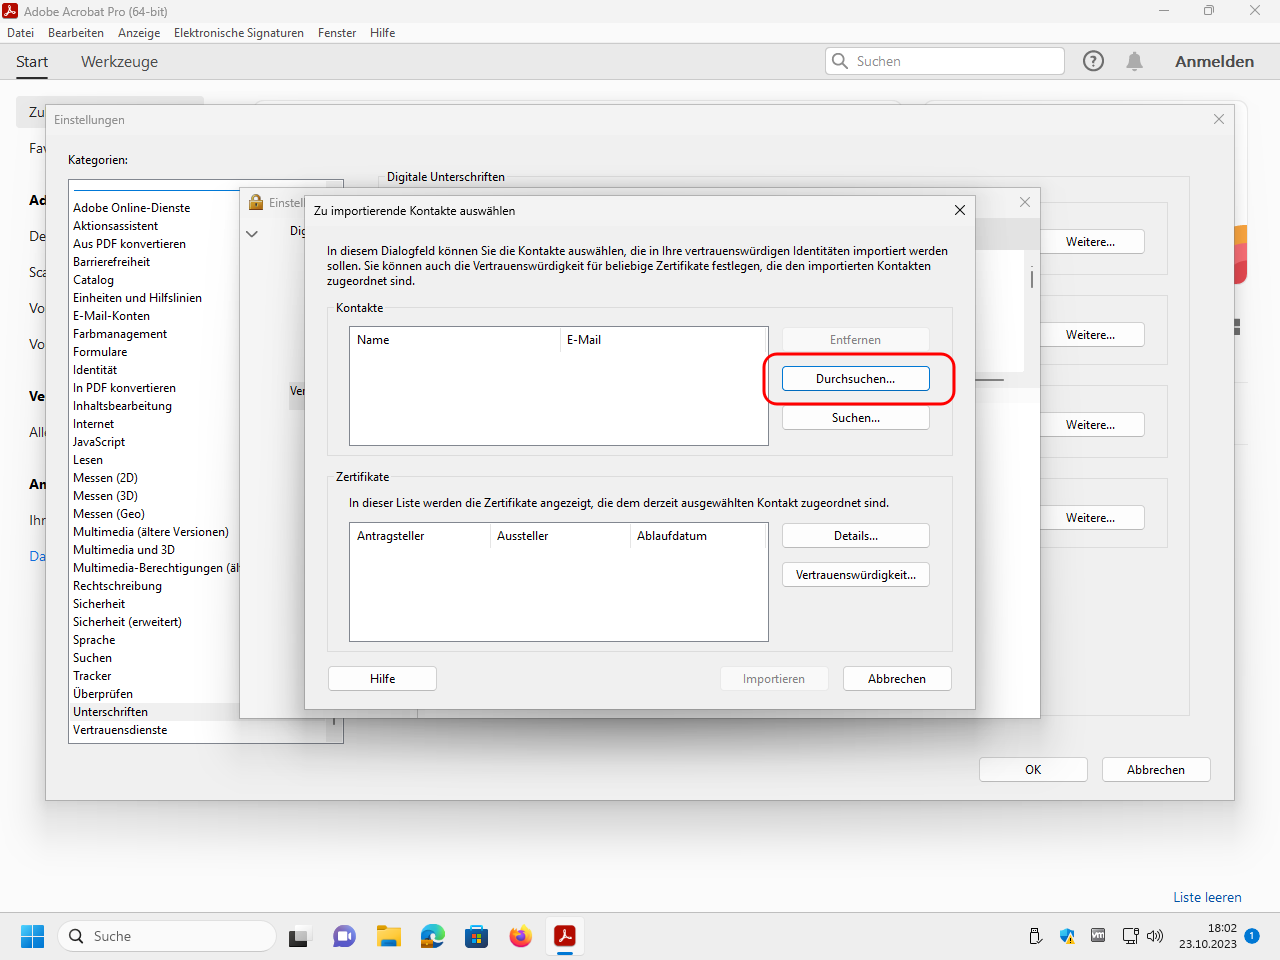
In the section trustworthy certificates please click on the blue import arrow:
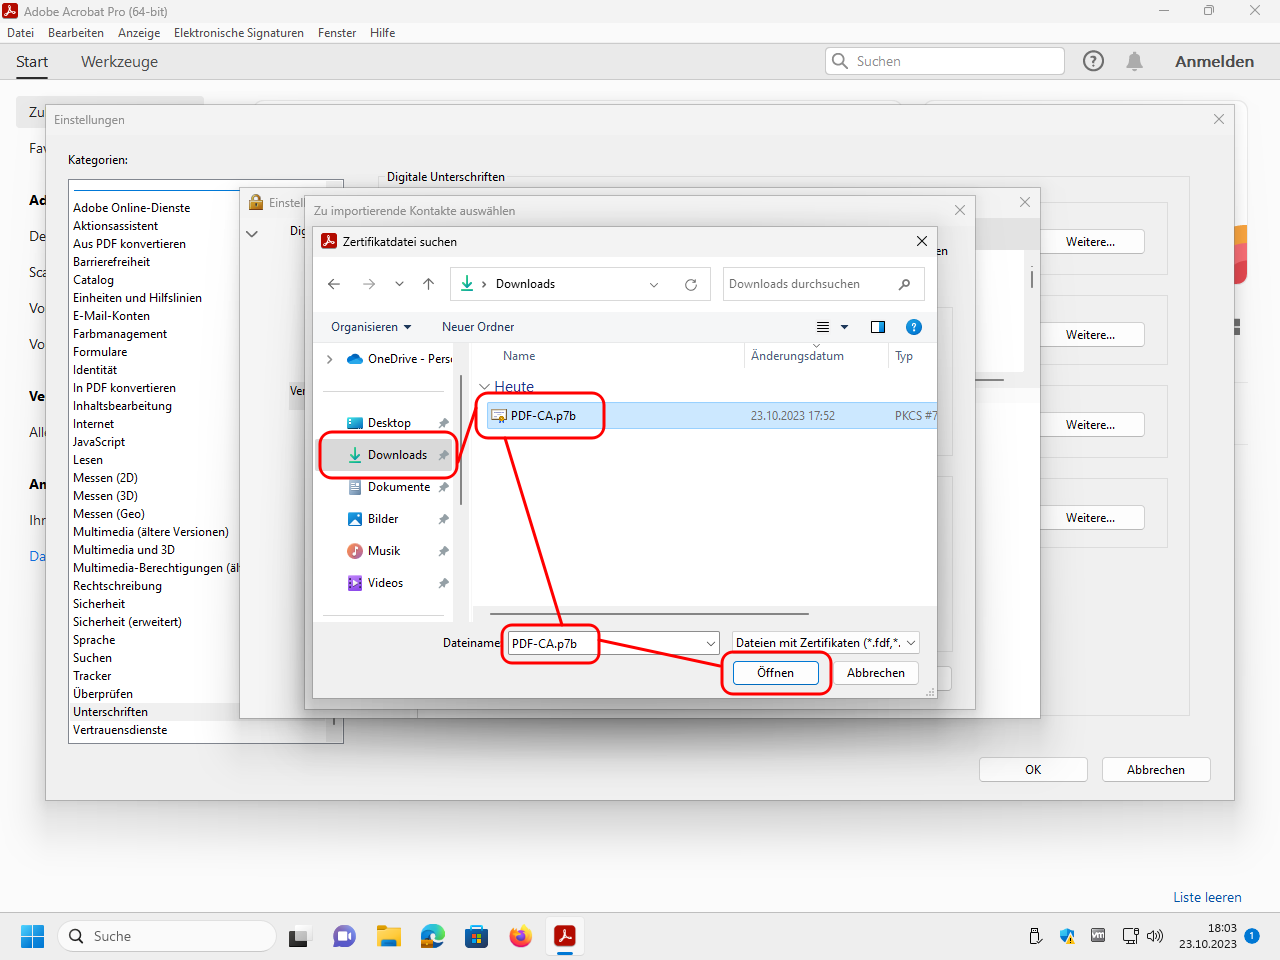
Select the file P7B file PDF-CA.p7b downloaded above (or here) that contains the root certificate of our PDF-CA:
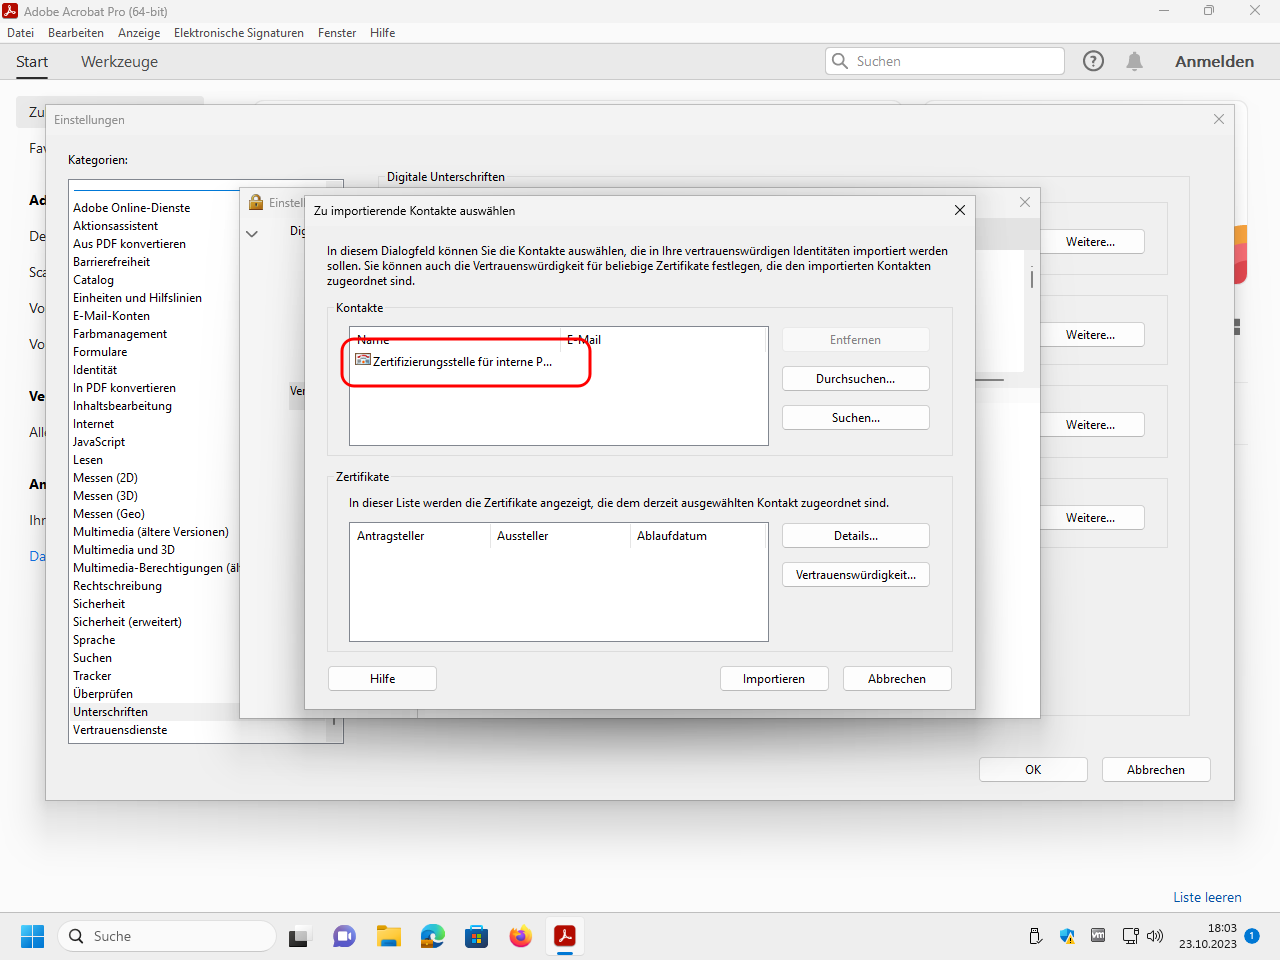
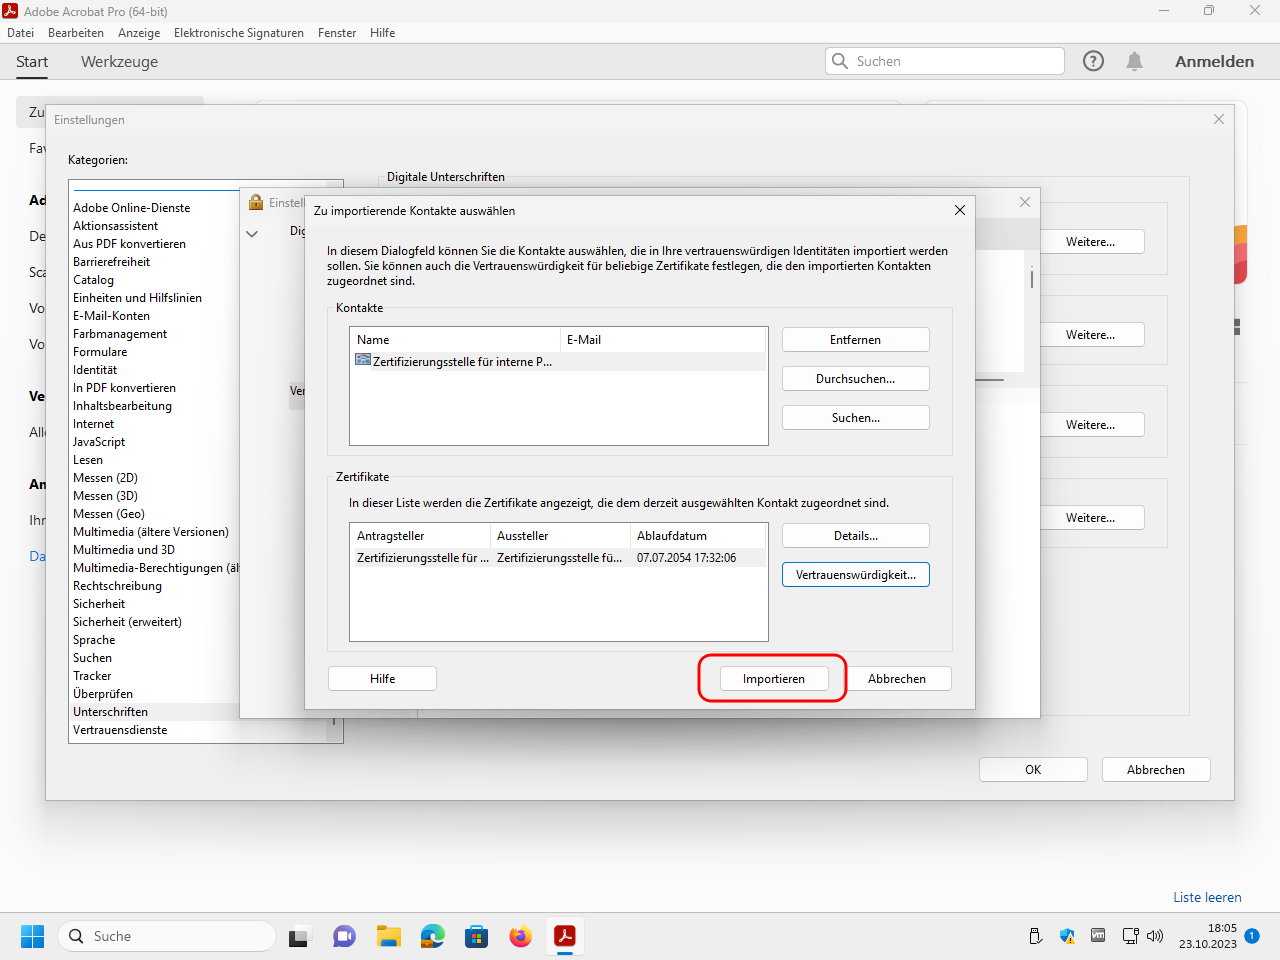
Click in the upper window on the just selected certificate to copy it into the lower window:
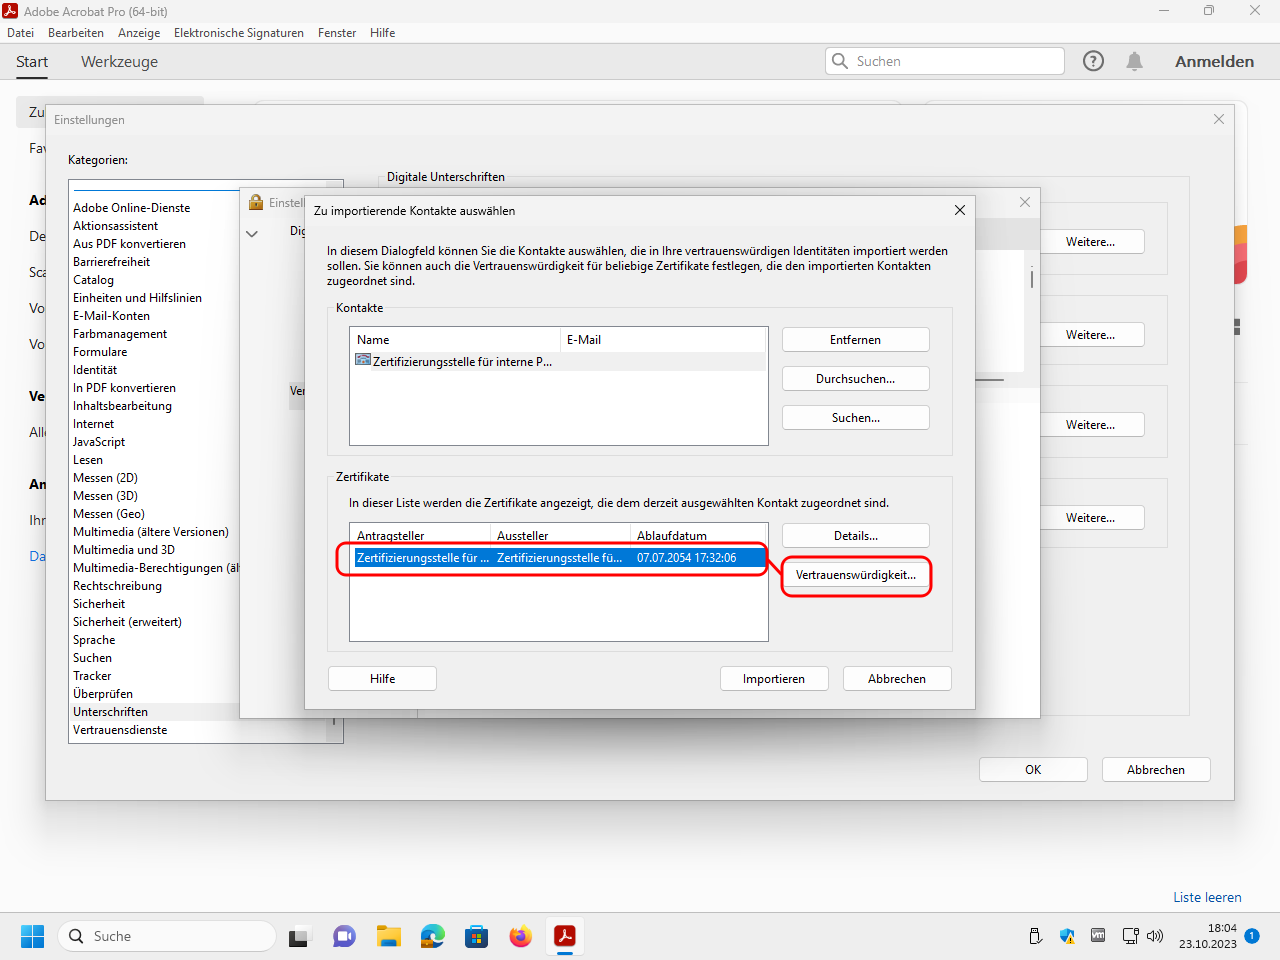
Click now in the lower window on the just selected certificate and edit the trustworthyness:
Mark the checkboxes to use the certificate as trustworthy root for certified documents, but do not mark the further checkboxes:
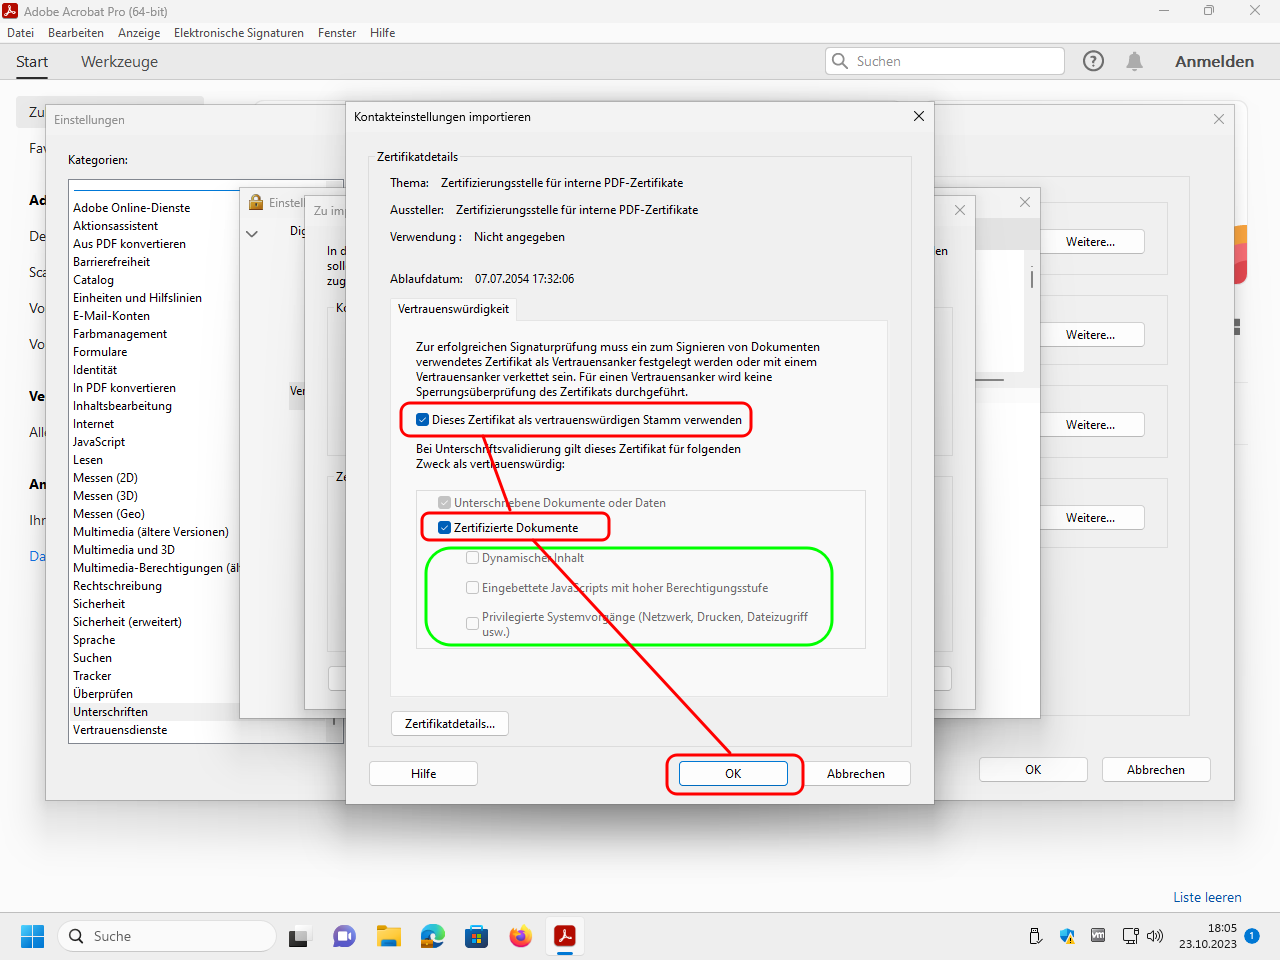
Import the certificate now:
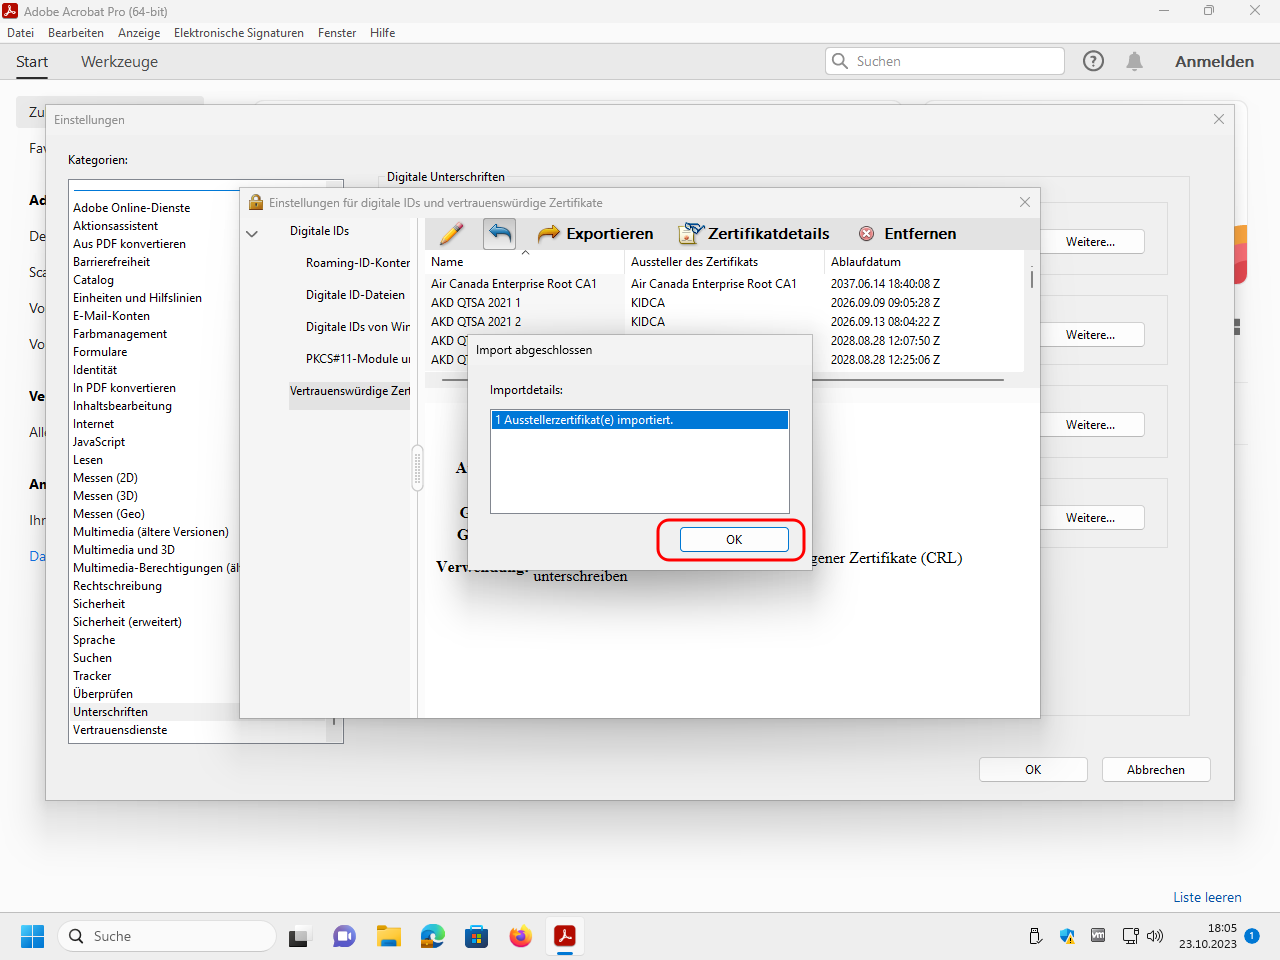
Close the dialog windows:
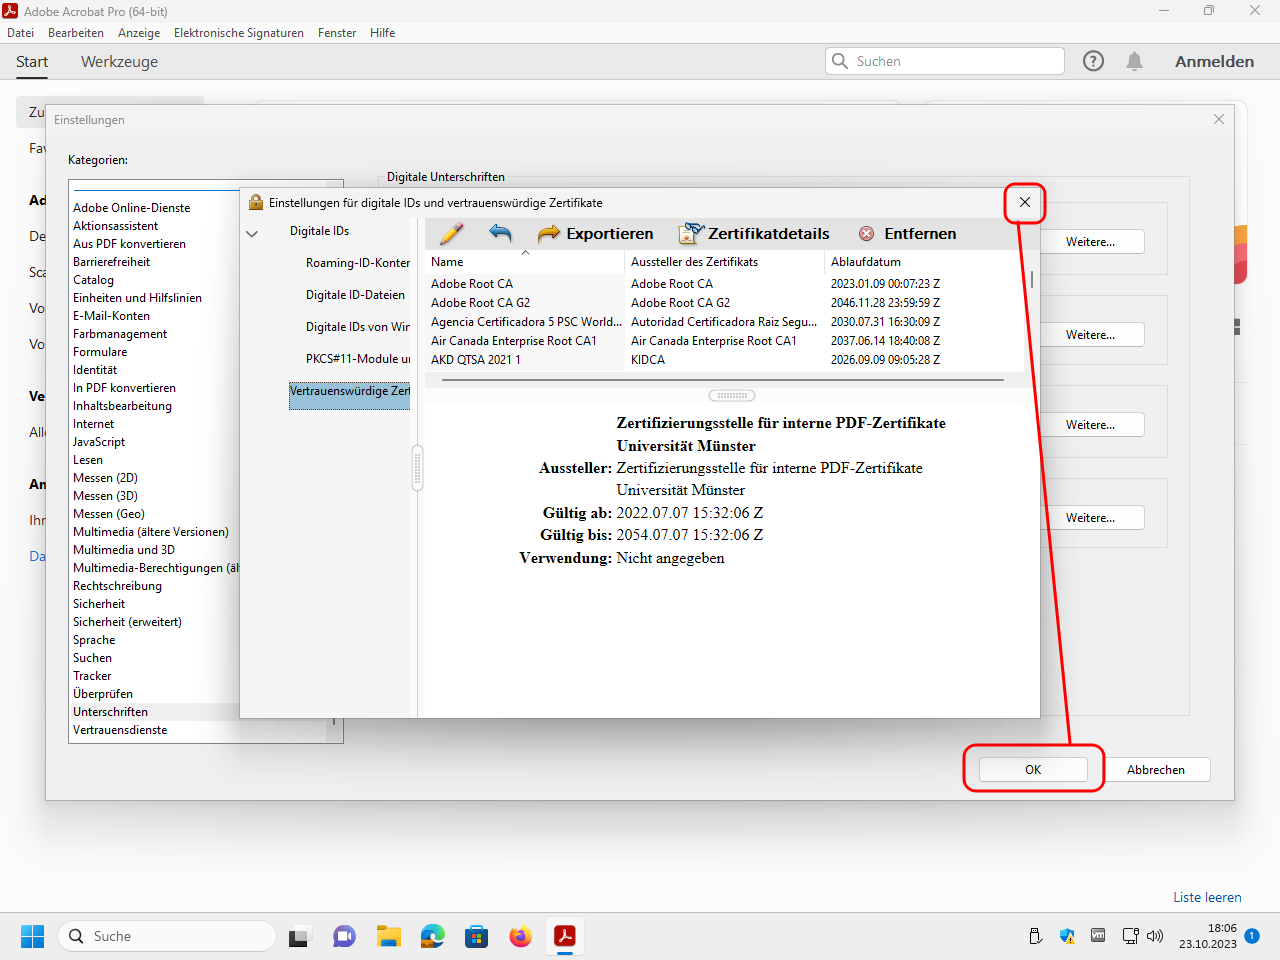
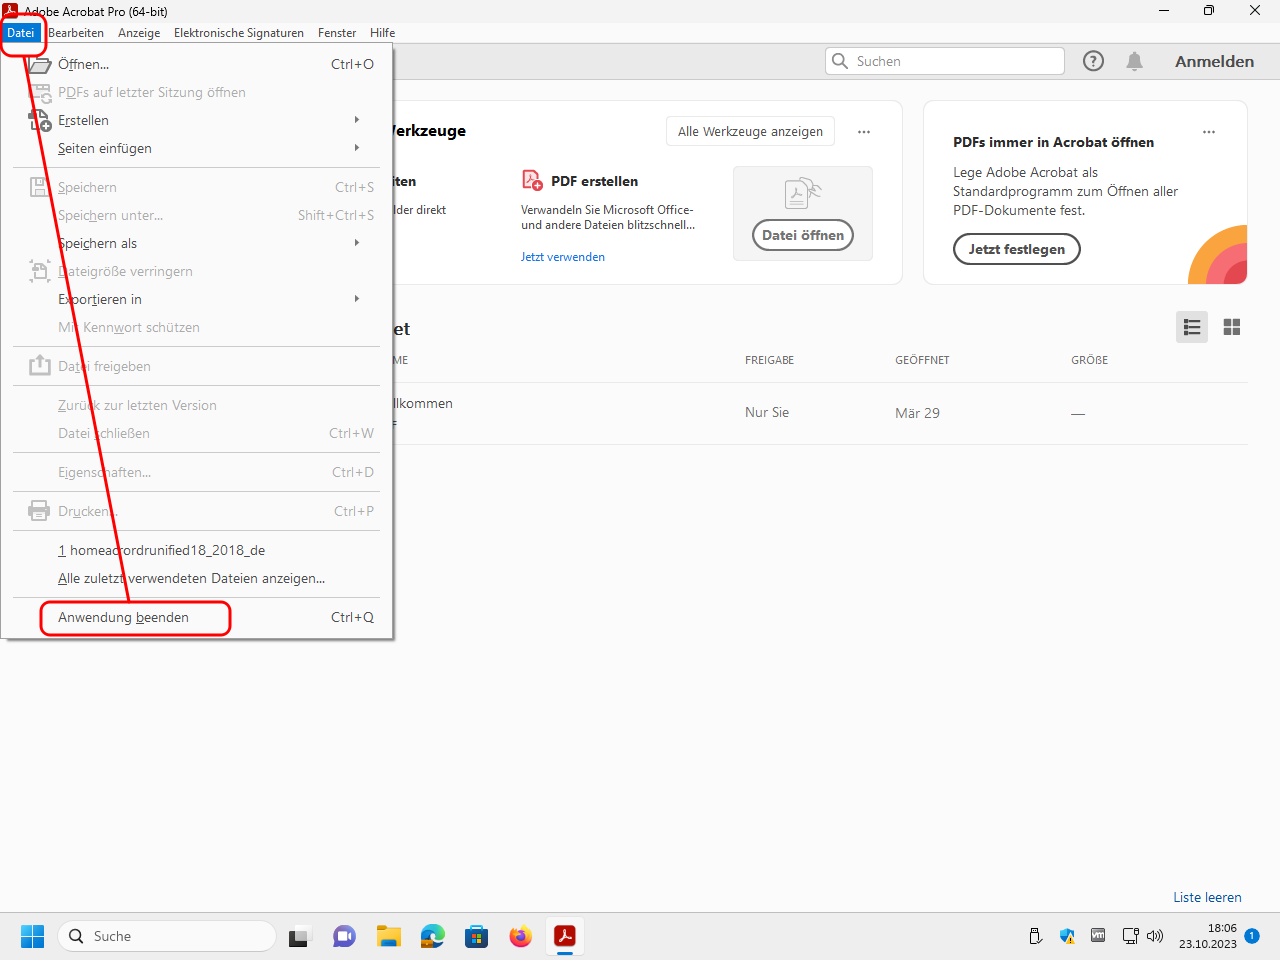
Close Adobe Acrobat:
This completes the setup of the root certificates.
Further CA certificates
It would be conceivable to import P7B files with other CA certificates (not only root certificates) as trusted certificates in the same way:
T-TeleSec GlobalRoot Class 2
(recommended, was used before the PDF-CA was established)DFN-Verein Community Root CA 2022
(recommended, is used by other universities instead of our PDF-CA)GEANT Personal CA 4 and GEANT Personal ECC CA 4 (not recommended!, were used for email certificates until January 2025)
HARICA Client RSA Root CA 2021 and HARICA Client ECC Root CA 2021 (not recommended!, are used for email certificates since January 2025)
You should only import the not recommended certificates – and really only then – if you want to explicitly check documents that have been incorrectly signed with digital IDs that are only intended for e-mail signatures and not for document signatures.
(Only for system administrators) Guide: Distribute (root) CA certificates
This guide applies only to system administrators who maintain multiple computers.
If you need to perform multiple installations of Adobe Acrobat, it is sufficient to import the (root) CA certificates as described above on a single computer with a freshly installed Adobe Acrobat. (The installation should not yet contain any personal data!).
Next, identify the addressbook.acrodata file where Adobe Acrobat has saved the settings you made:
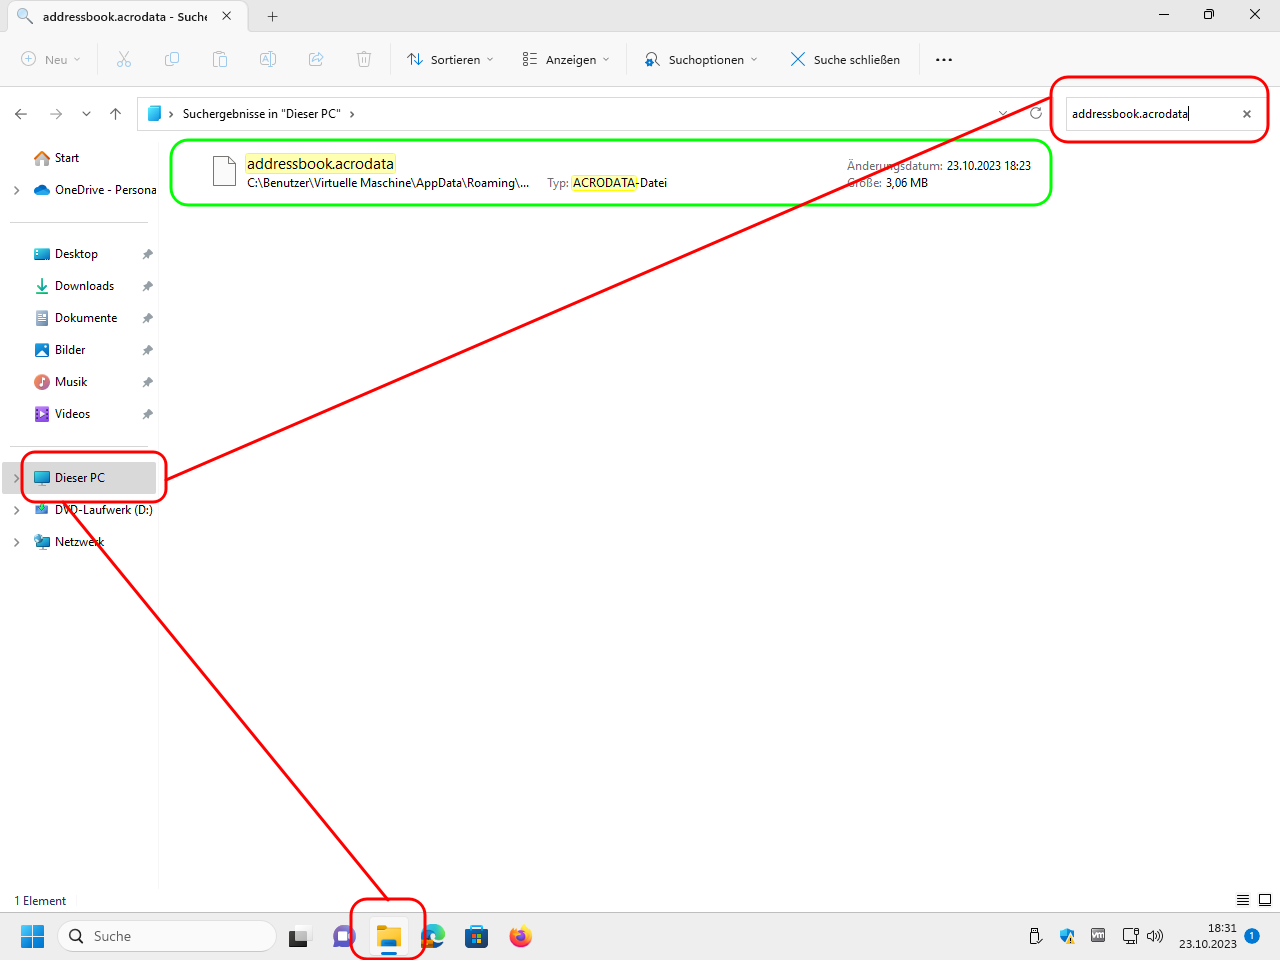
When installing Adobe Acrobat on other computers, also copy this file to the (possibly newly created) folder
C:\ProgramData\Adobe\Acrobat\DC\Security\.On MacOS systems the file is to be put here for each local account:
/Users/$USER/Library/Application
Support/Adobe/Acrobat/DC/Security/addressbook.acrodata
Guide: Import a digital ID
To be able to sig own PDF files you have to import your digital ID.
Open Adobe Acrobat Reader resp. Adobe Acrobat Pro:
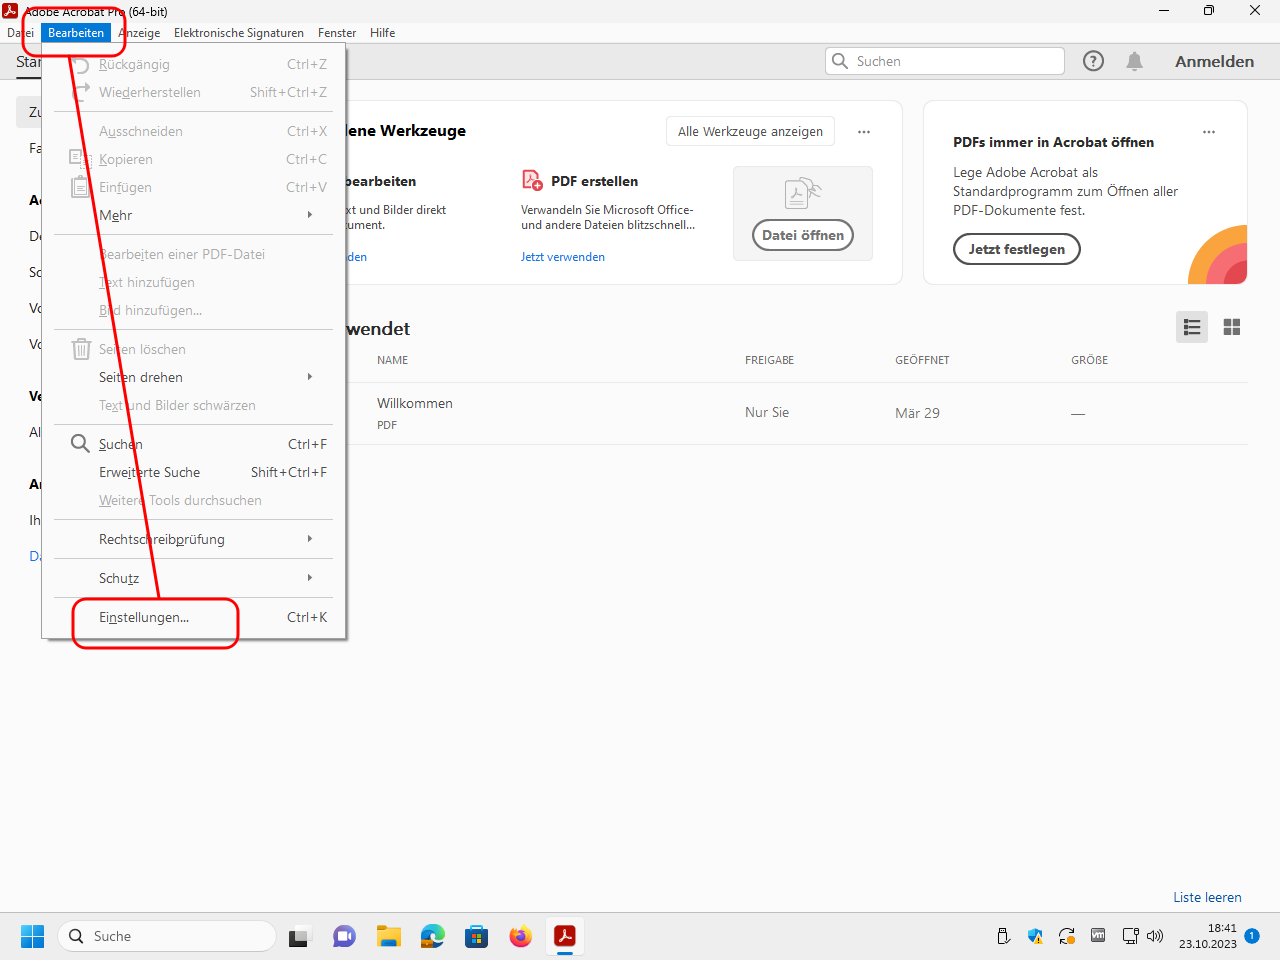
In the menu „Bearbeiten“ (“edit”) click on the entry „Einstellungen“ (“preferences”):
Select the category „Unterschriften“ (“signatures”) and click under „Identitäten und vertrauenswürdige Zertifikate“ (“identities and trustworthy certificates”) on „Weitere“ (“Further”):

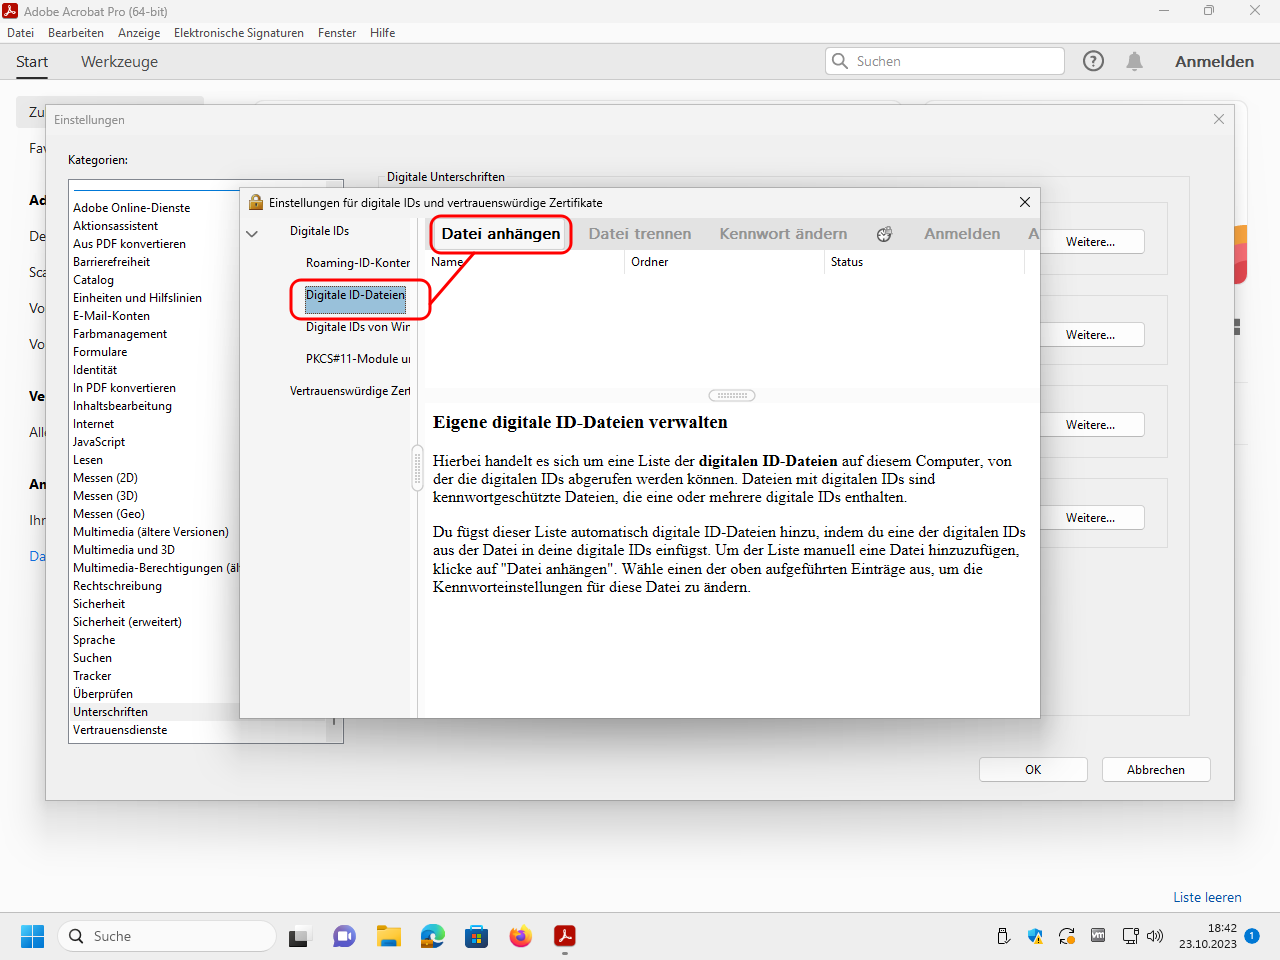
Under „Digitale IDs“ (“digital IDs”) select the area „Digitale ID-Dateien“ (“digital ID files”) and then click at the top on „Datei anhängen“ (“append file”):
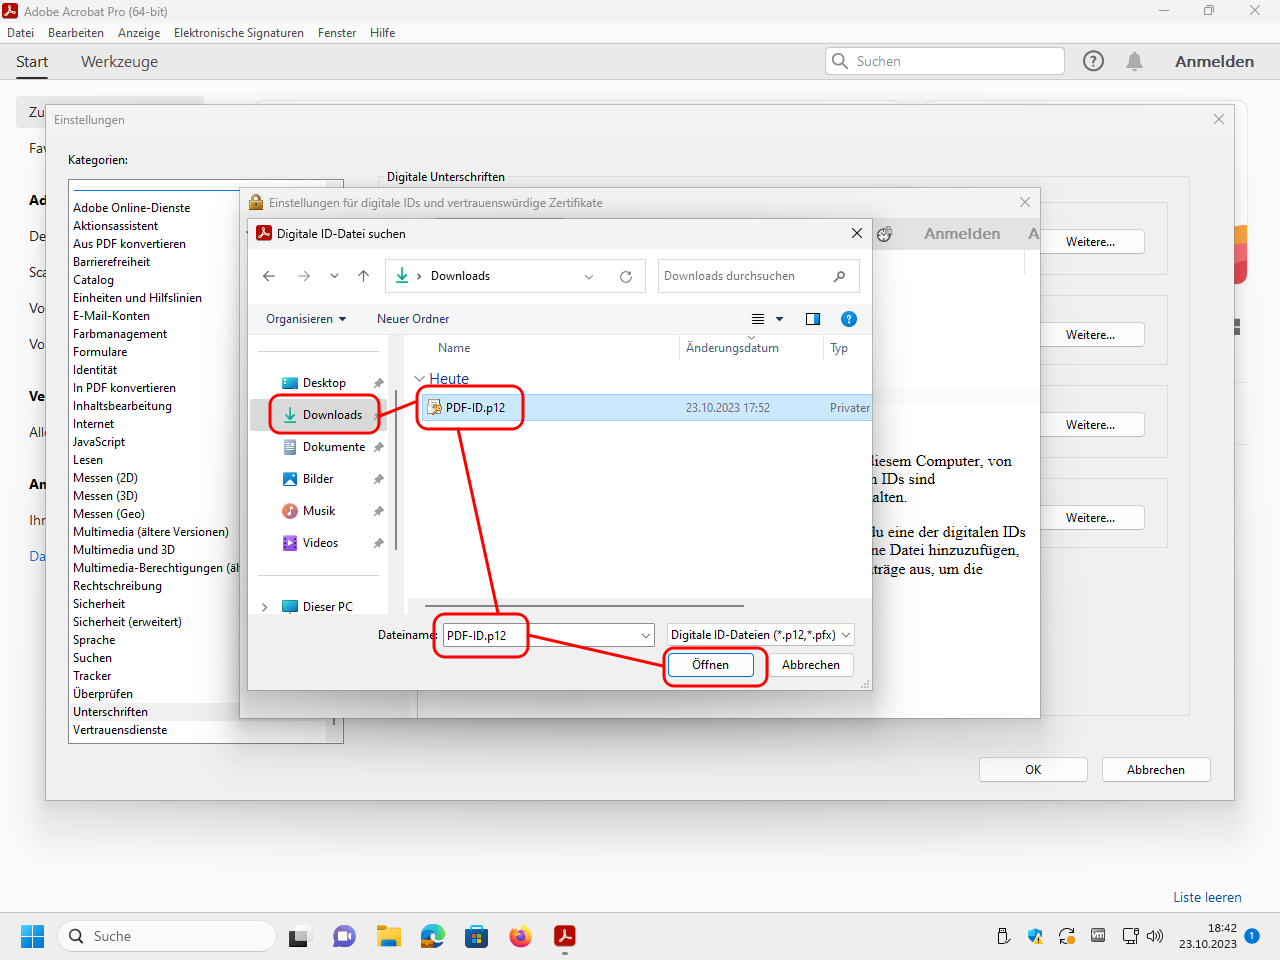
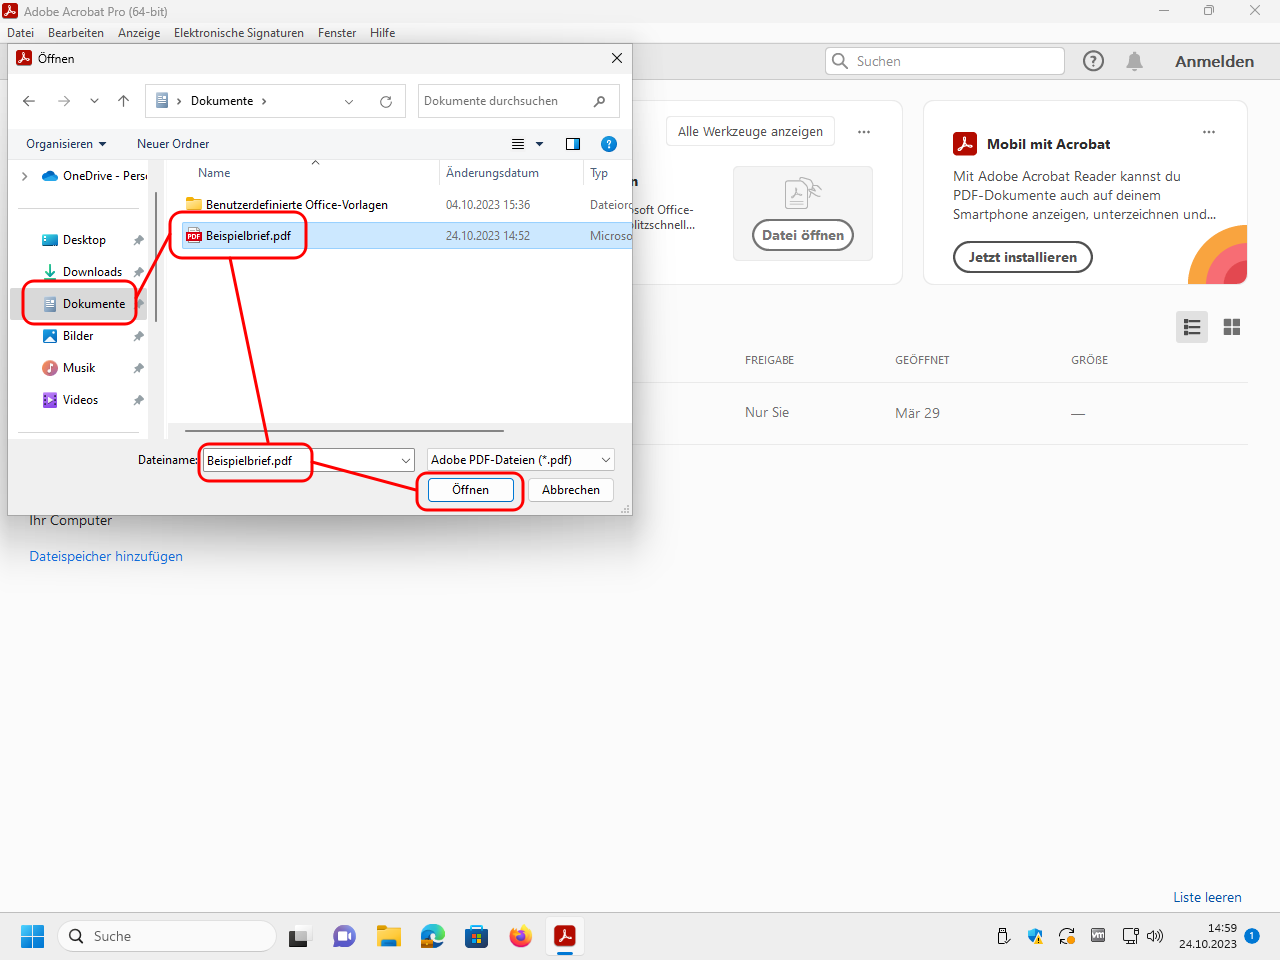
Select the file with your digital ID and click on „Öffnen“ (“open”):
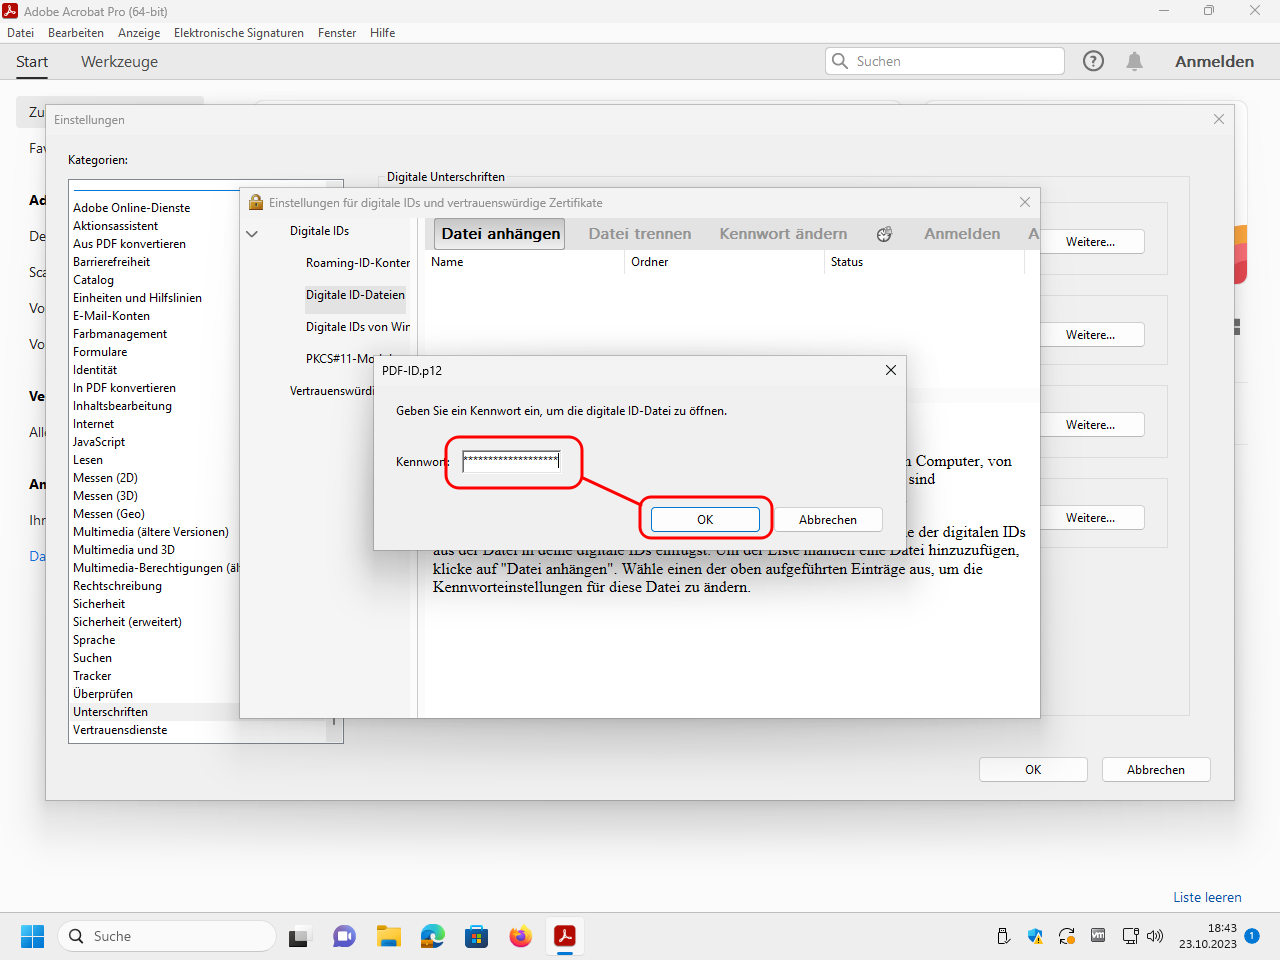
To open the encrypted file you have to enter the password:
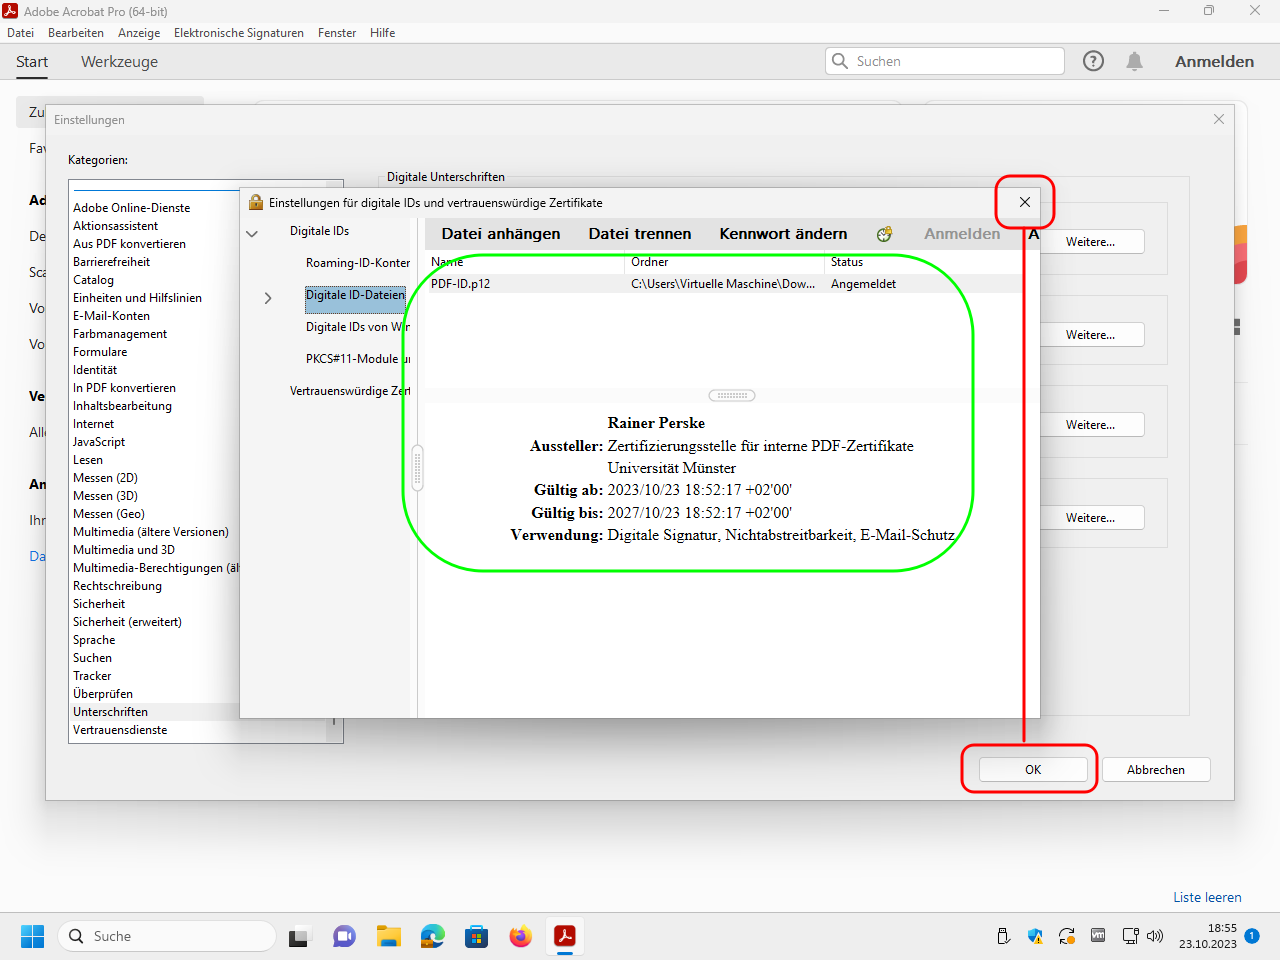
Your digital ID should now appear in the list. You can now close all open dialog windows:
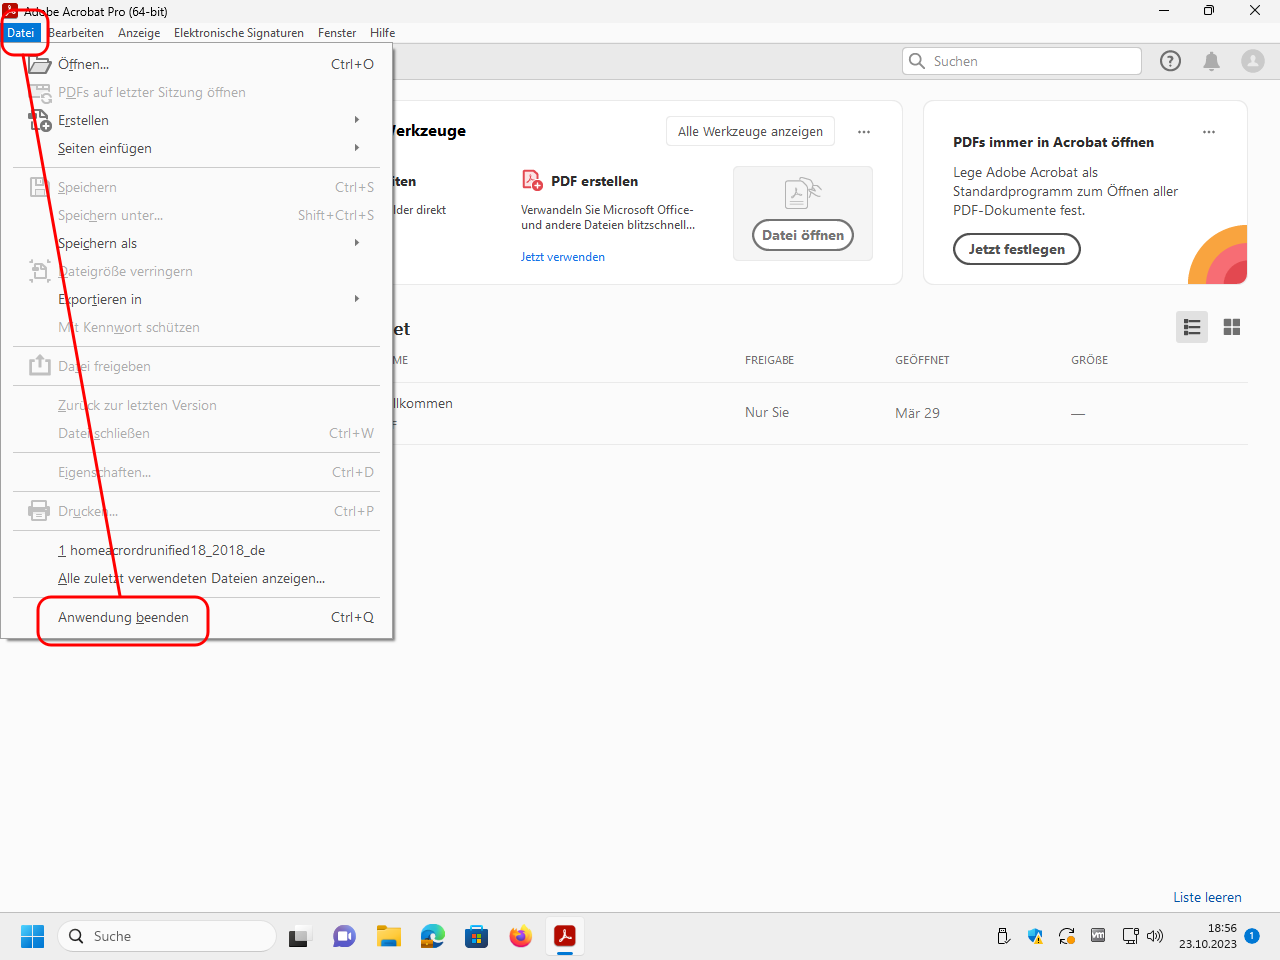
Guide: Sign PDF file electronically
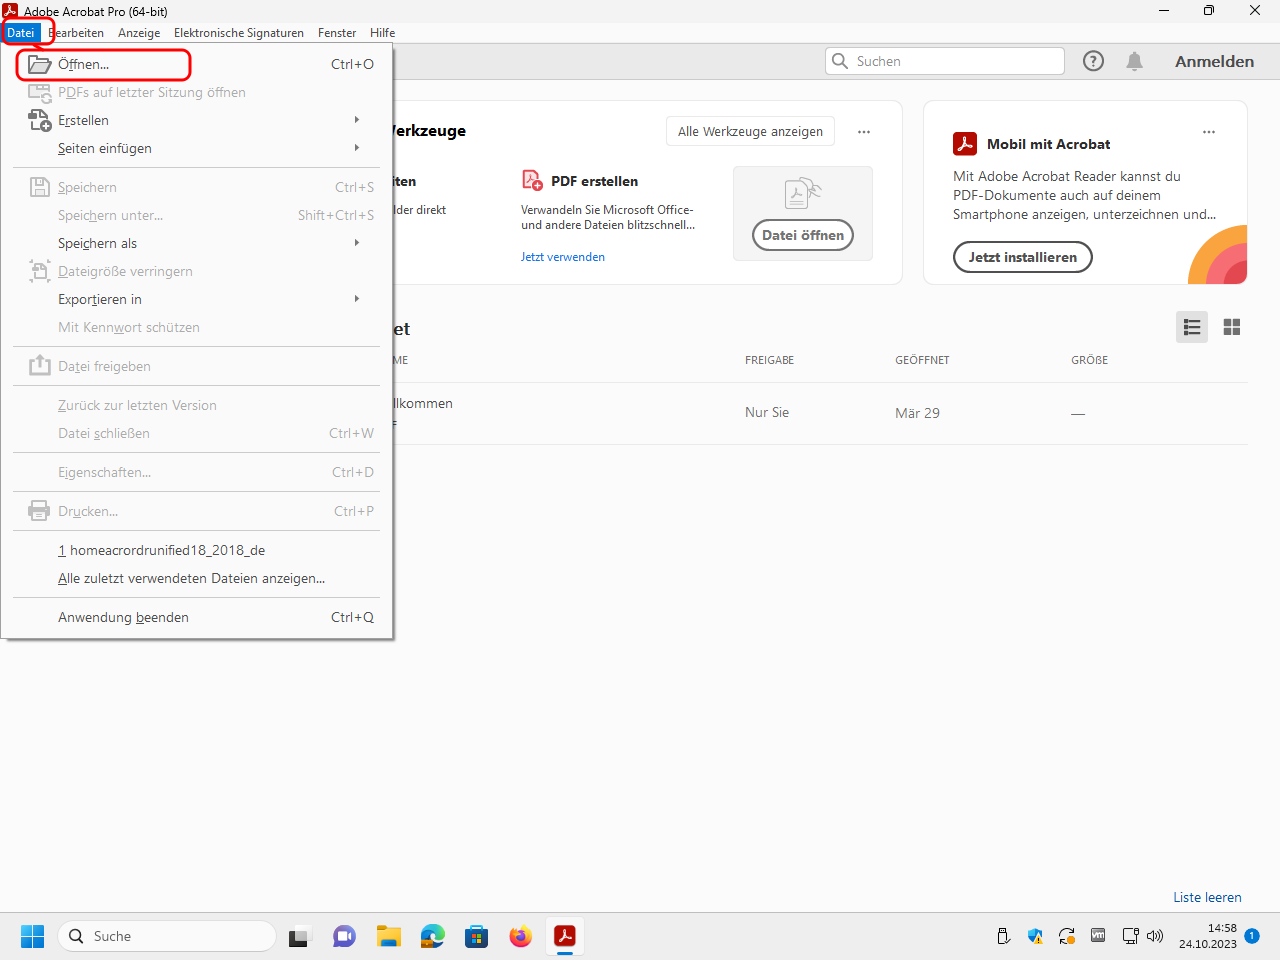
Open Adobe Acrobat Reader resp. Adobe Acrobat Pro, and in it, open the file you want to sign:

Click on „Werkzeuge“ (“tools”):
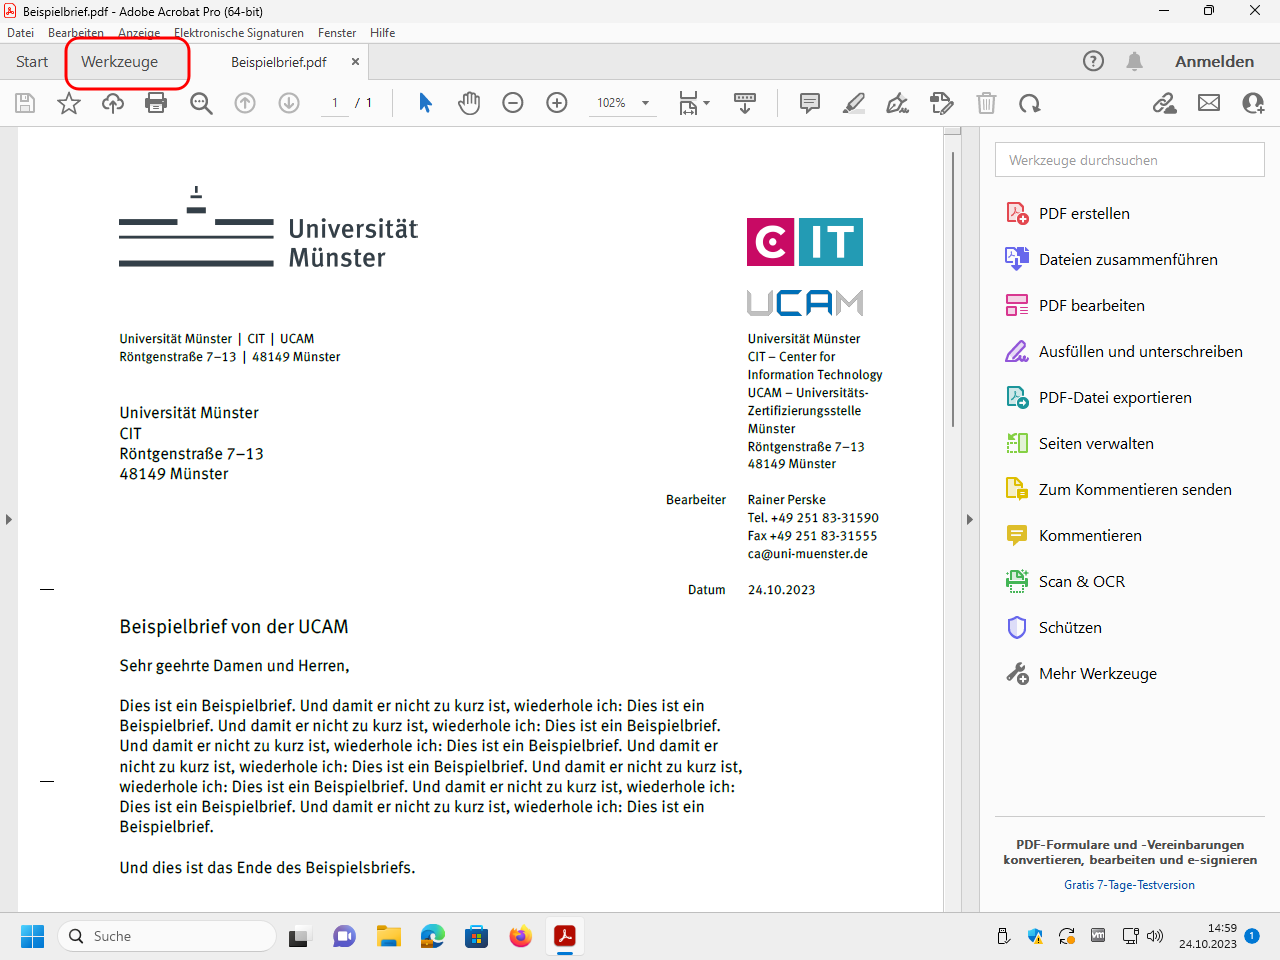
Open the tool „Zertifikate“ (“certificates”):
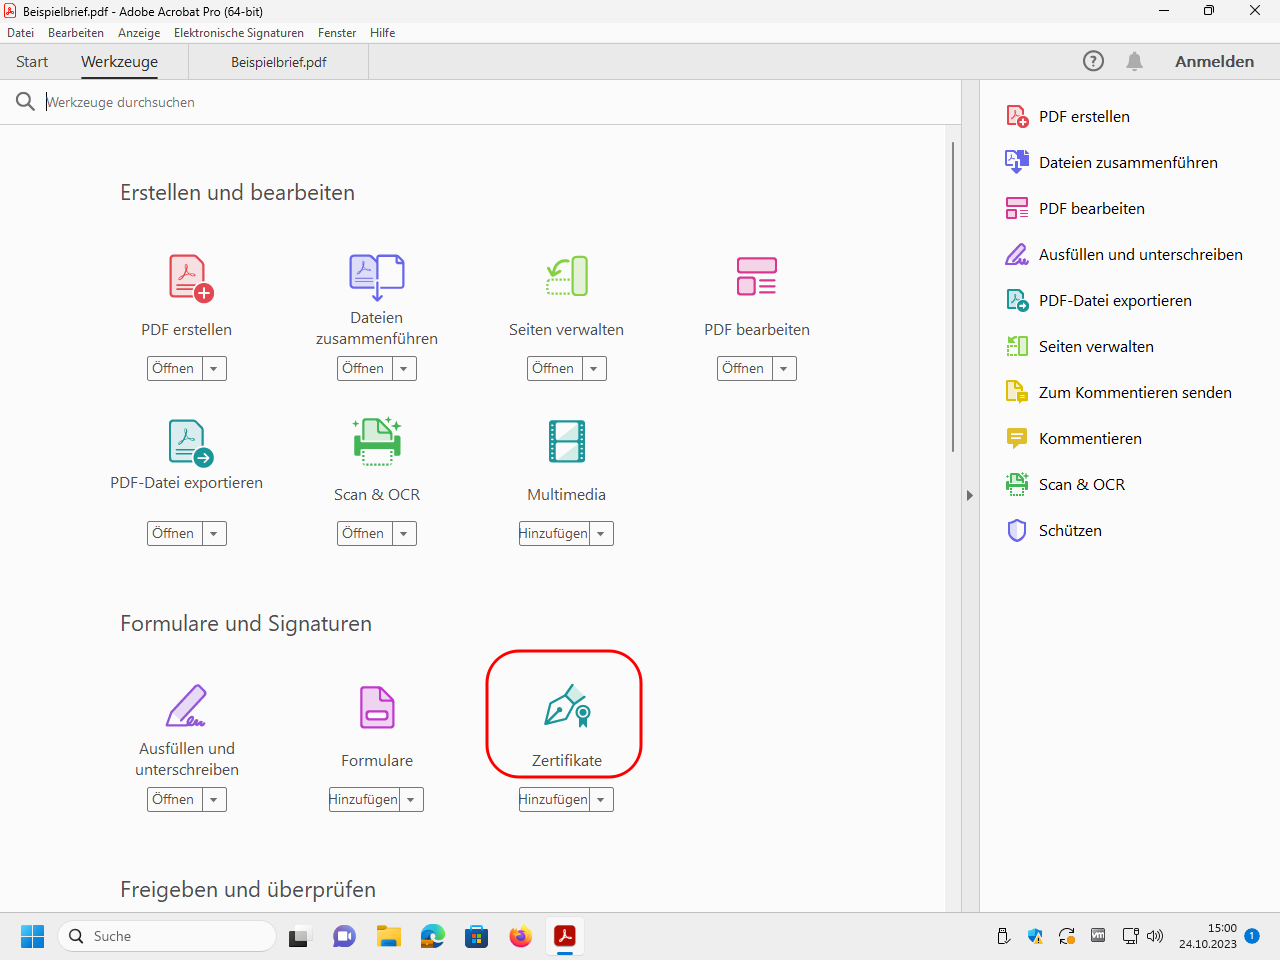
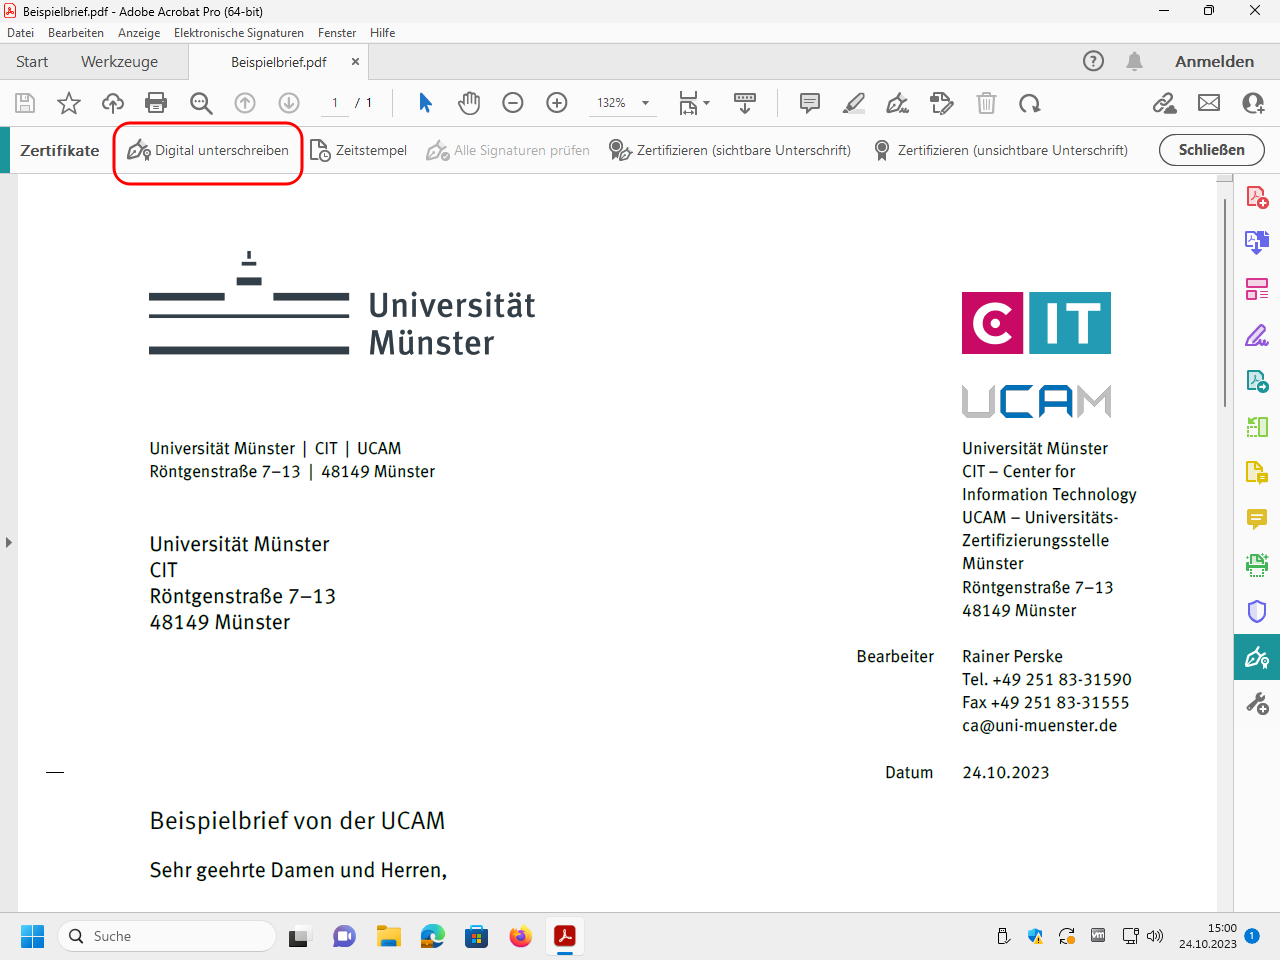
In the so added tool bar click on „Digital unterschreiben“ (“digitally sign”):
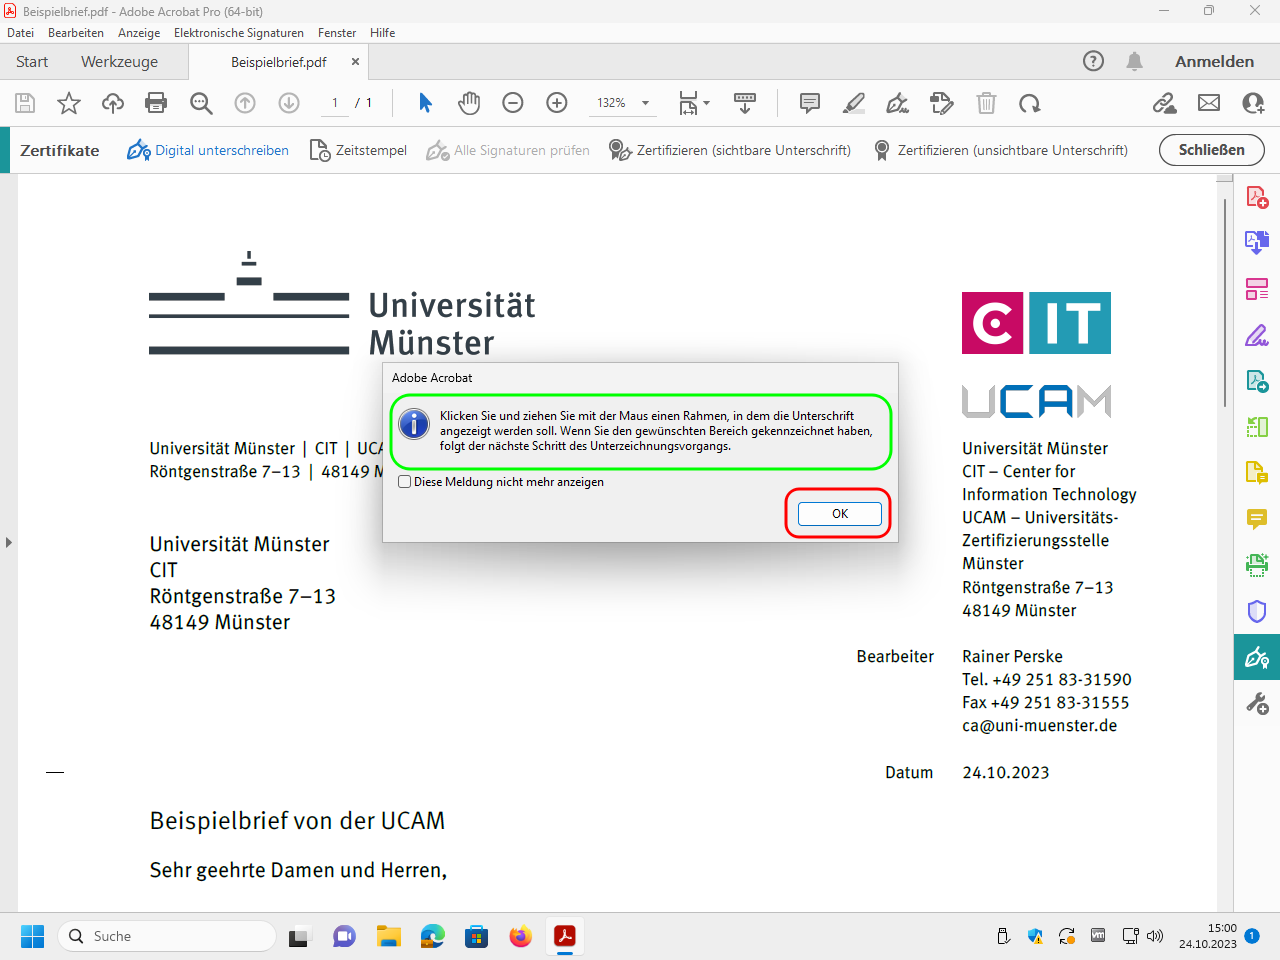
If a windows with a notice appears, close it with “OK”:
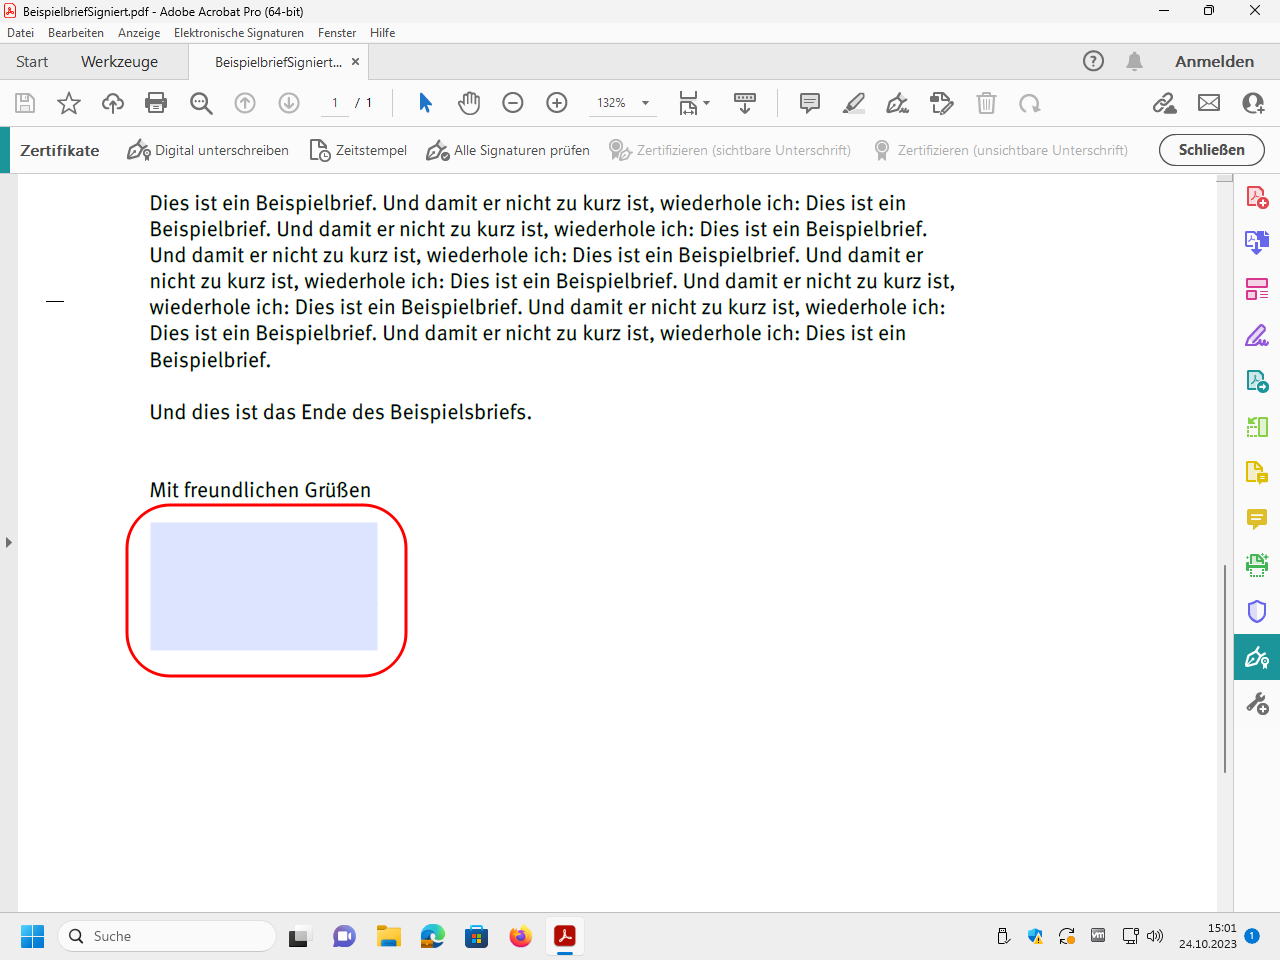
Now use the mouse to drag a rectangle to the point in the PDF file where you want the information about the electronic signature to appear:
Then a dialog box appears. Select your digital ID and click on „Weiter“ (“next”):
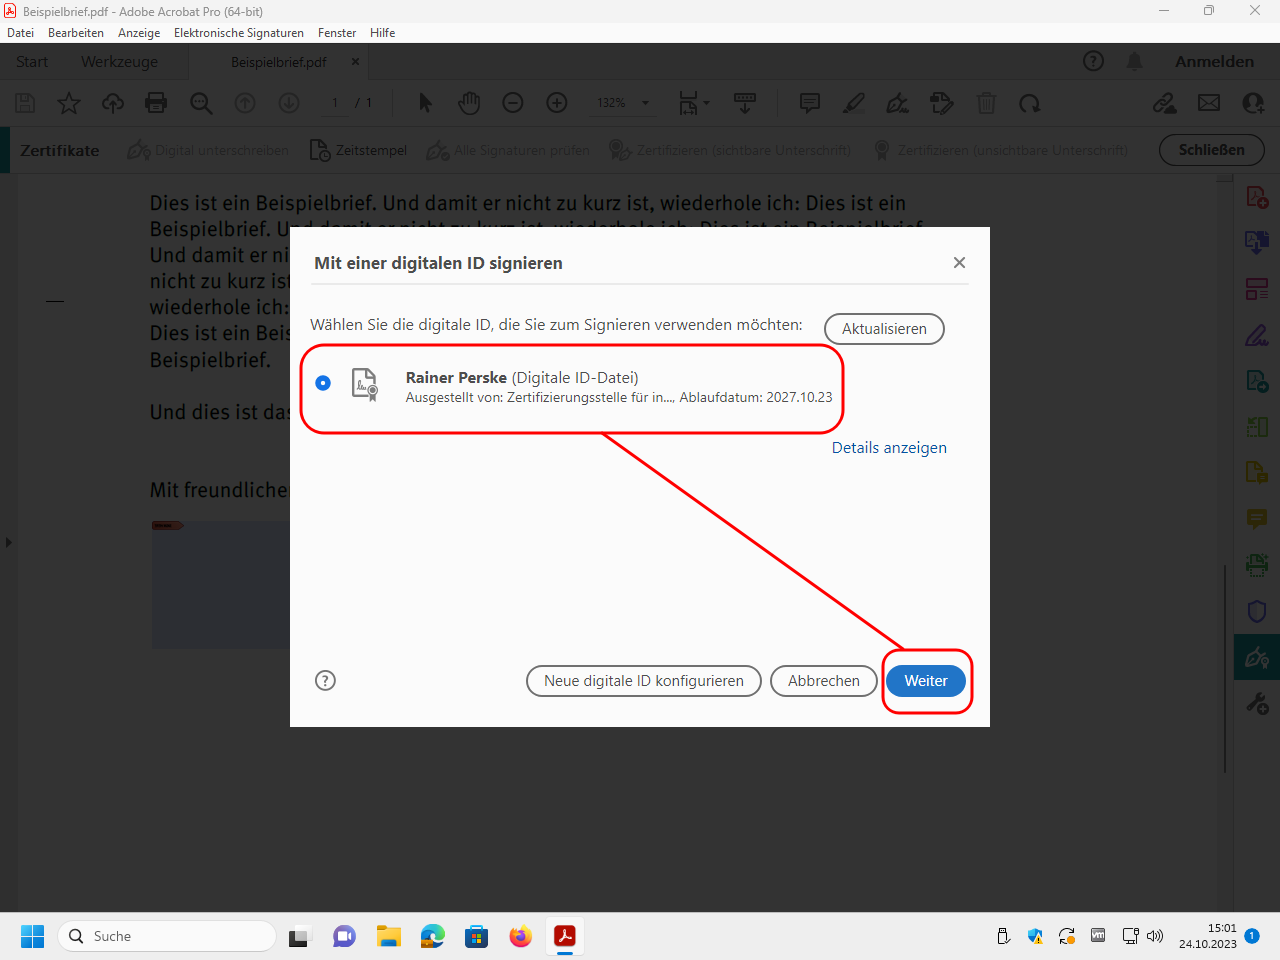
You can influence (not described here) the appearance of the overlay inserted into the signed document.
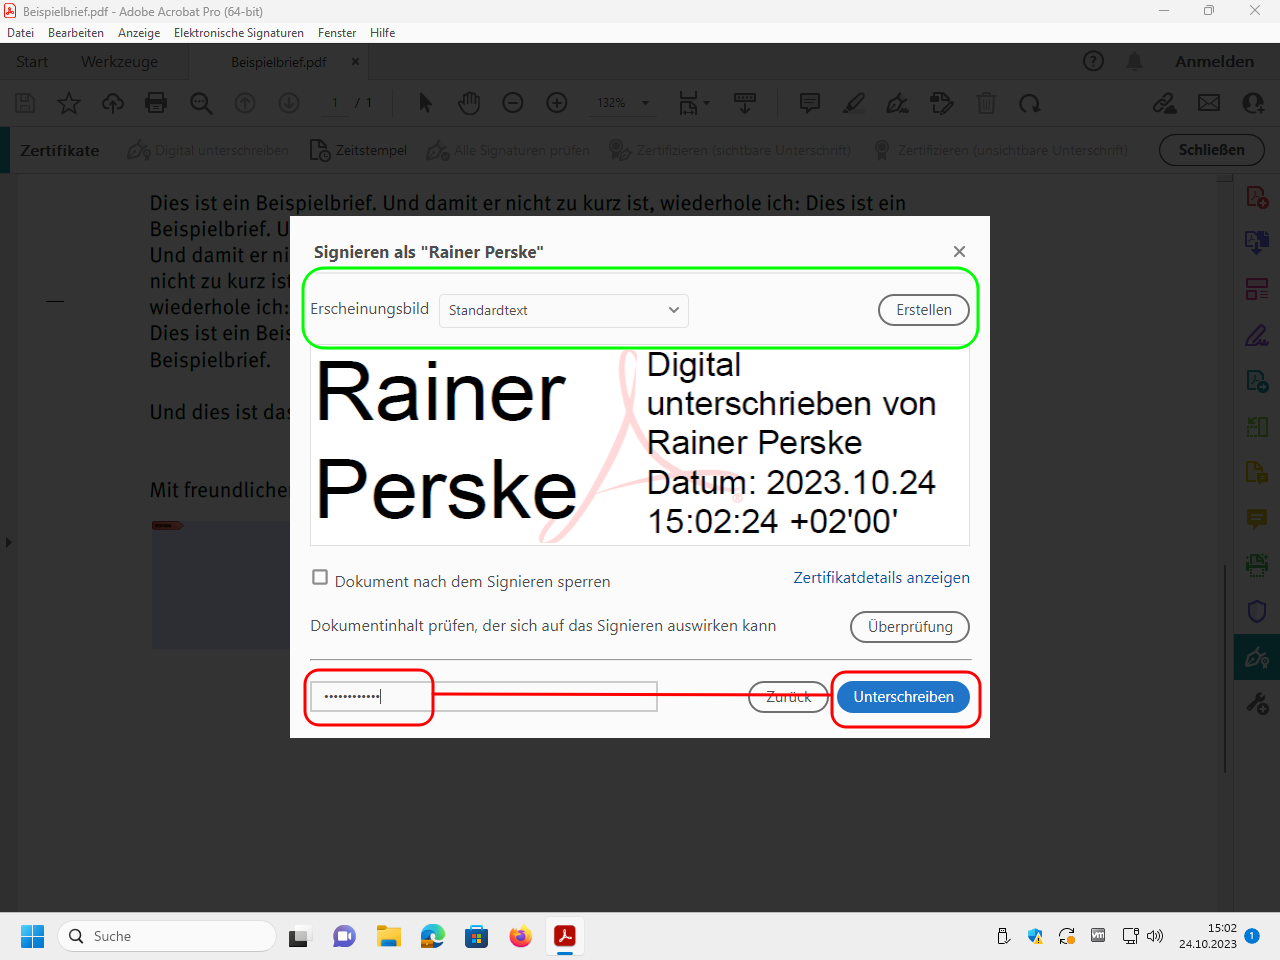
To actually sign the file, enter the password of your digital ID and click on „Unterschreiben“ (“sign”):
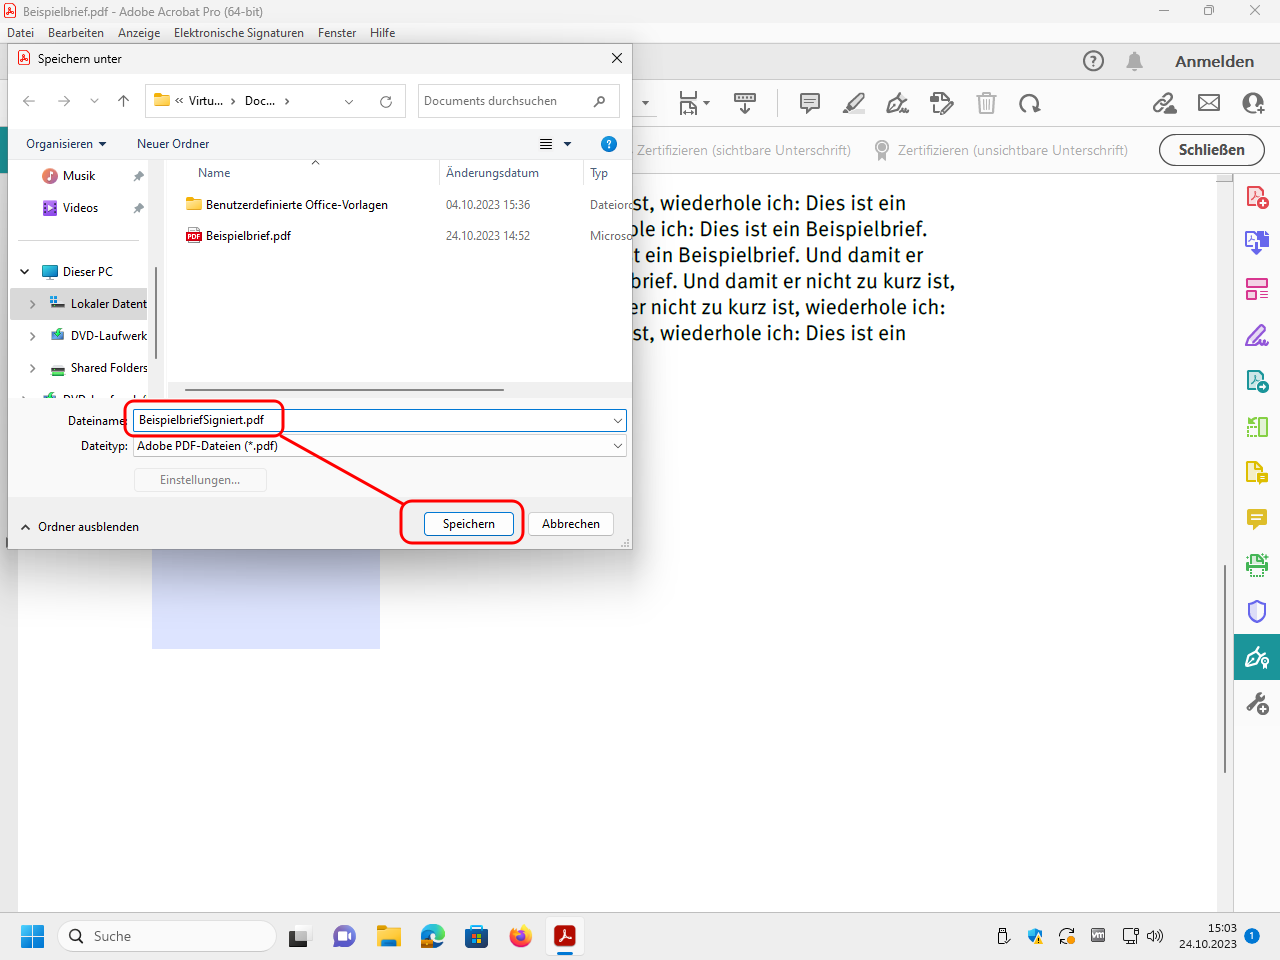
Select where and under which name the signed PDF file is to be saved and click on „Speichern“ (“save”). You should change the default file name, otherwise the original file will be overwritten:
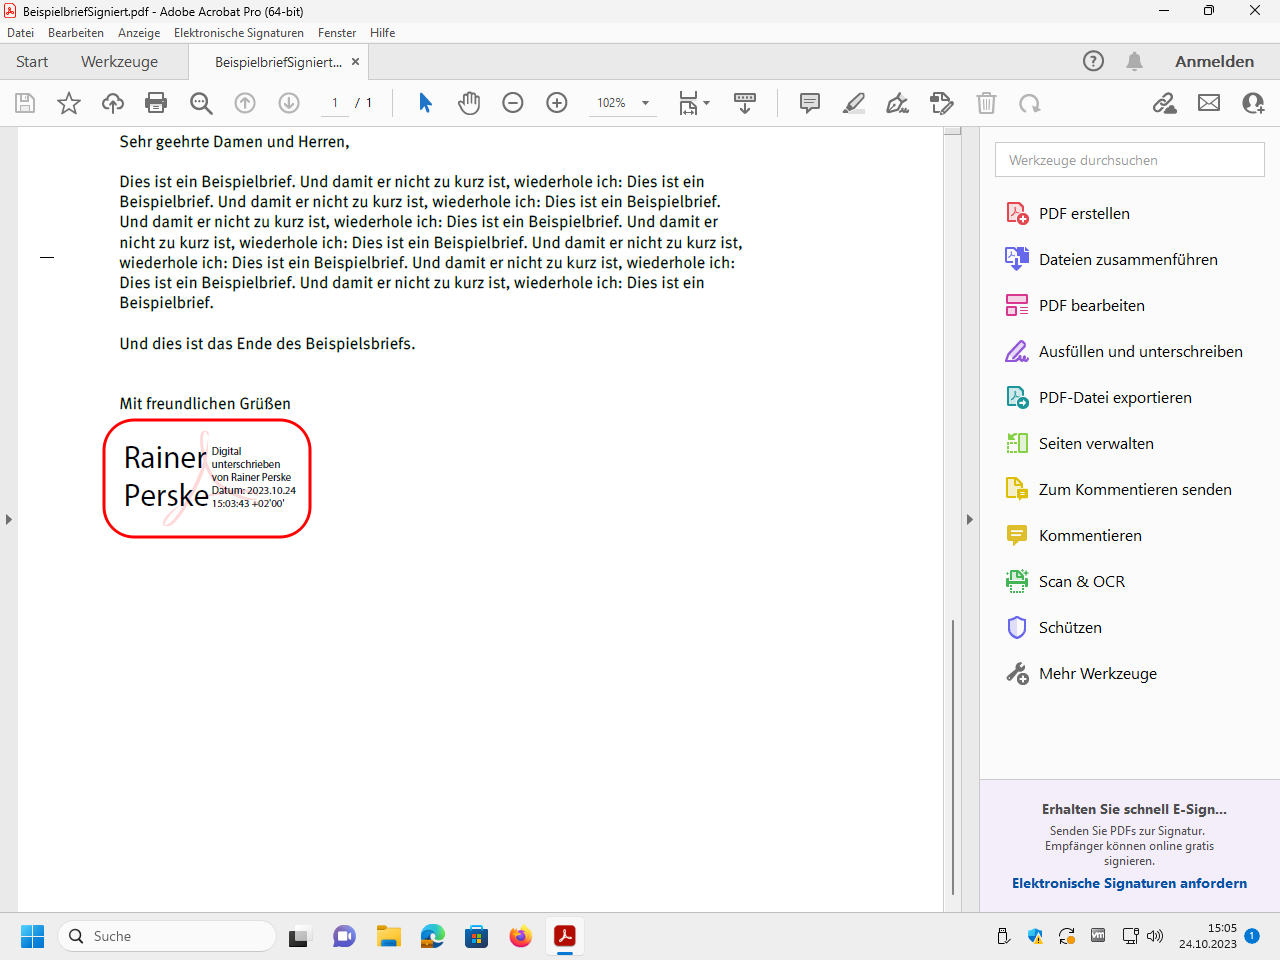
Now the signed file with the information area is displayed. This information describes the properties of the electronic signature. The electronic signature itself is invisible.
You can now close the tool bar:
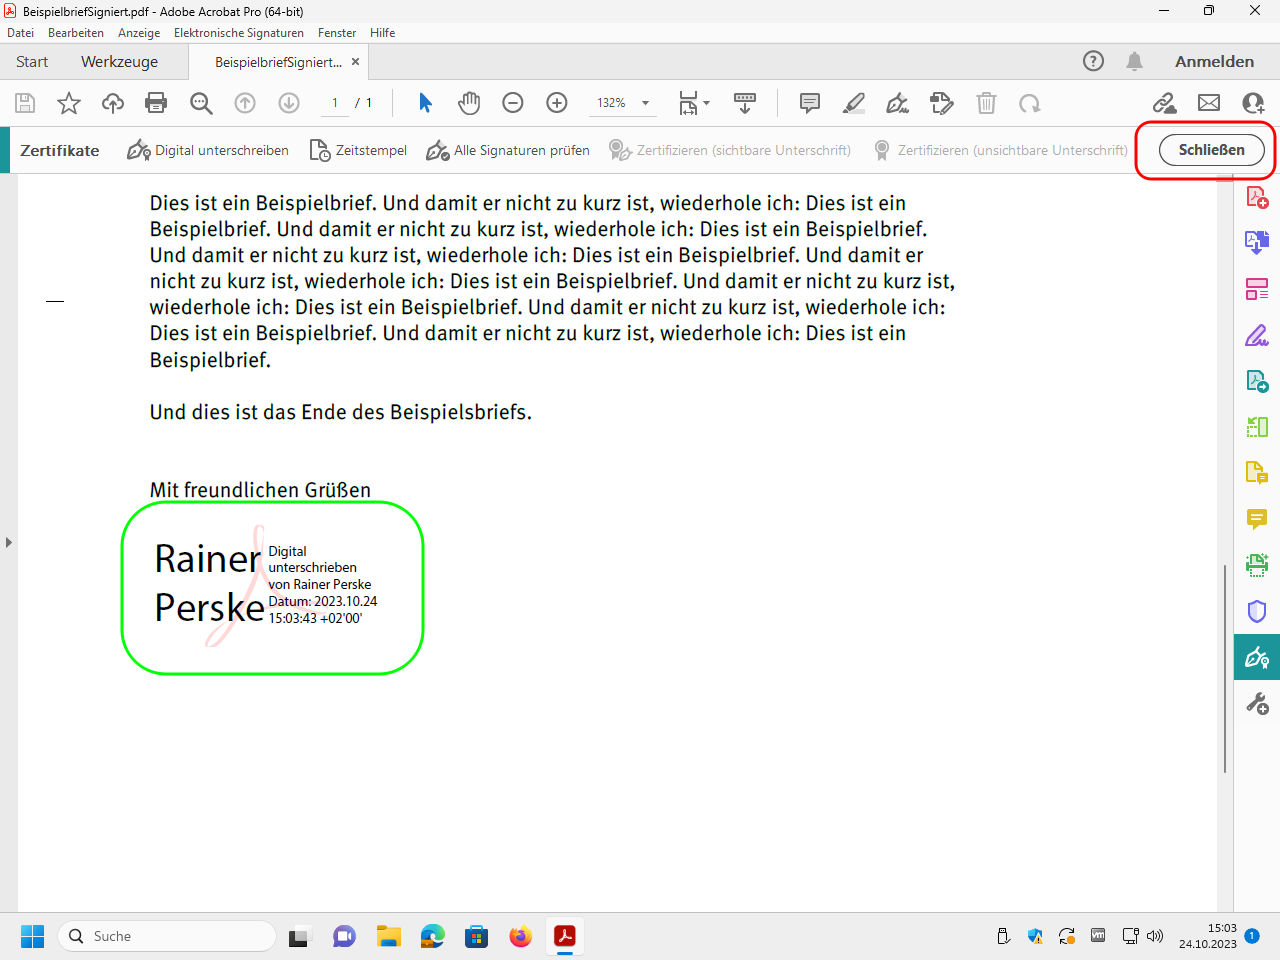
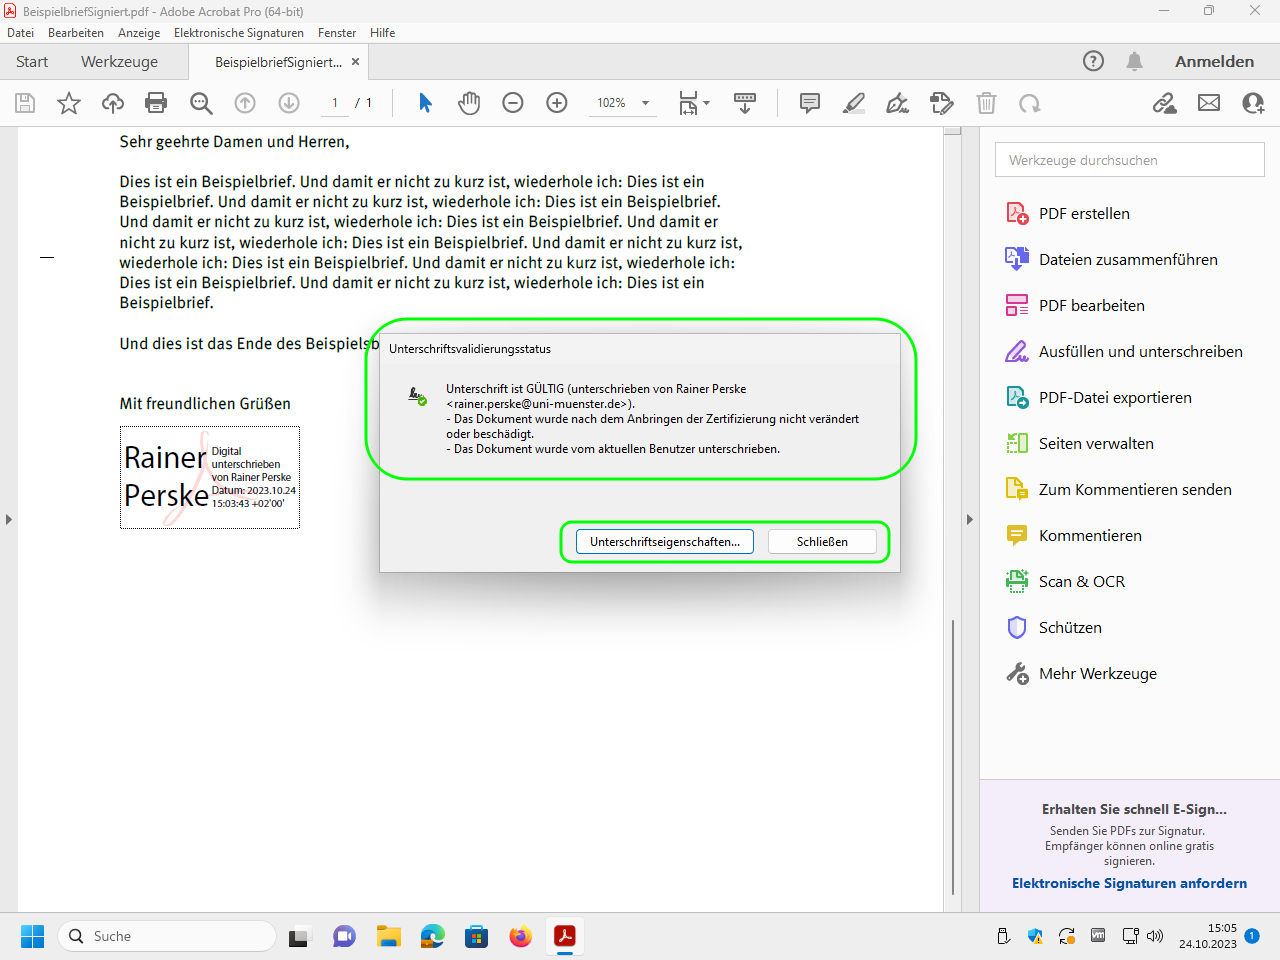
To display more information about the signature, click on the information area:
Guide: Verify electronic signature of a PDF file
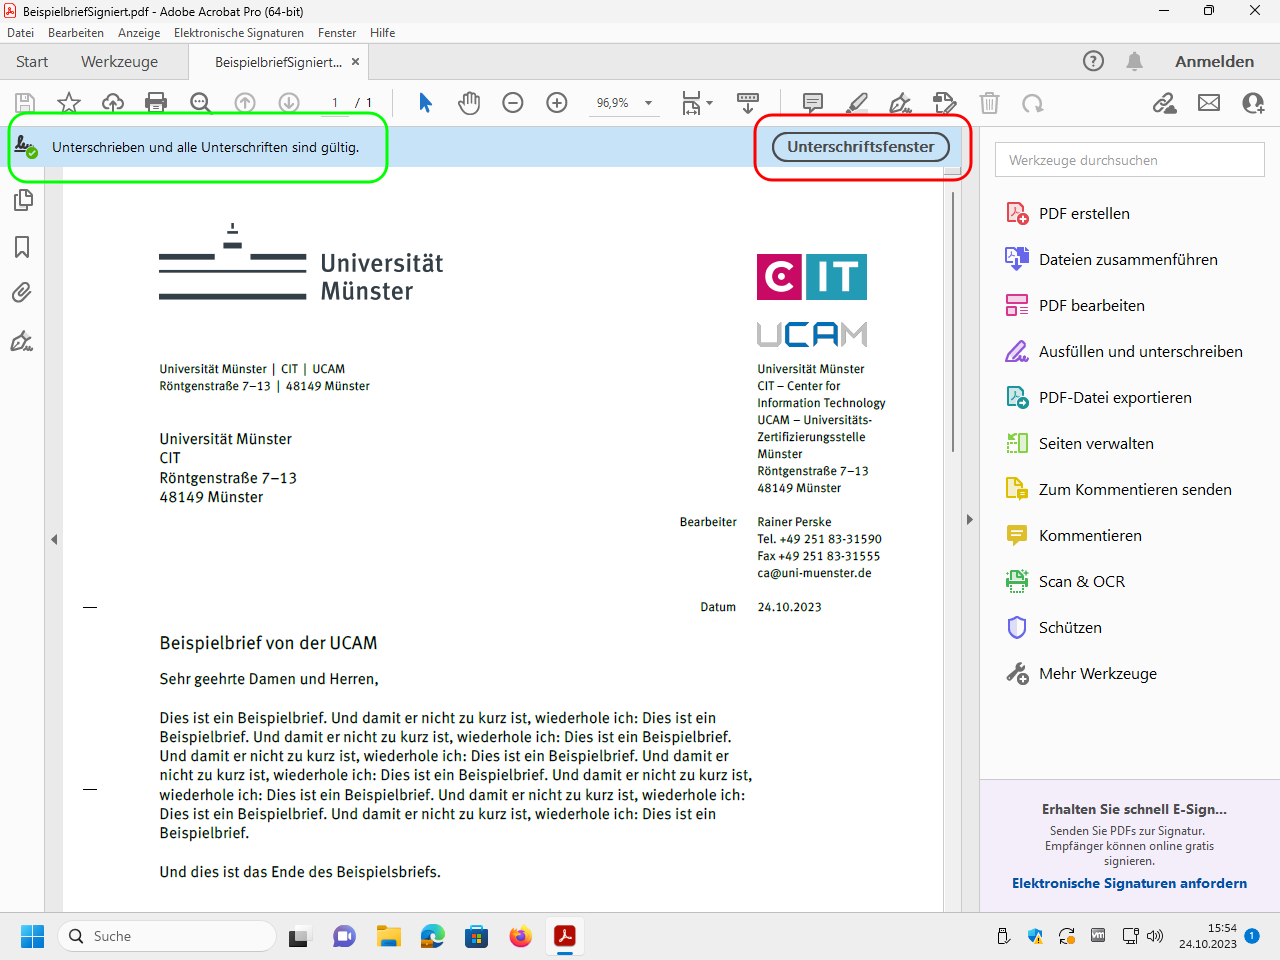
Actually, you don't need to do anything at all because Acrobat Reader and Acrobat Pro automatically verify each electronic signature and display the result.
However, you can click on „Unterschriftsfenstr“ (“signature window”) to get more information:
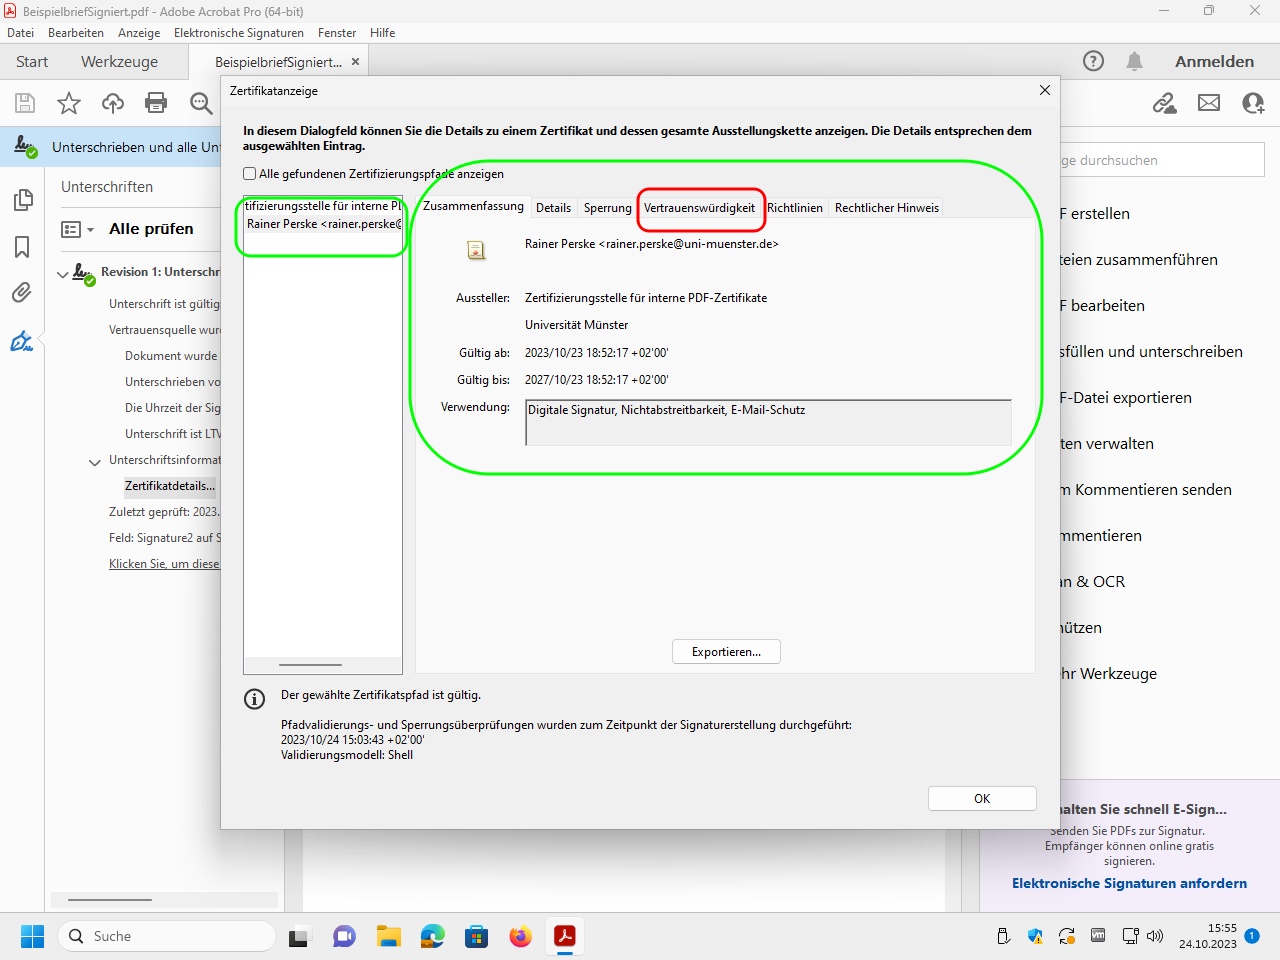
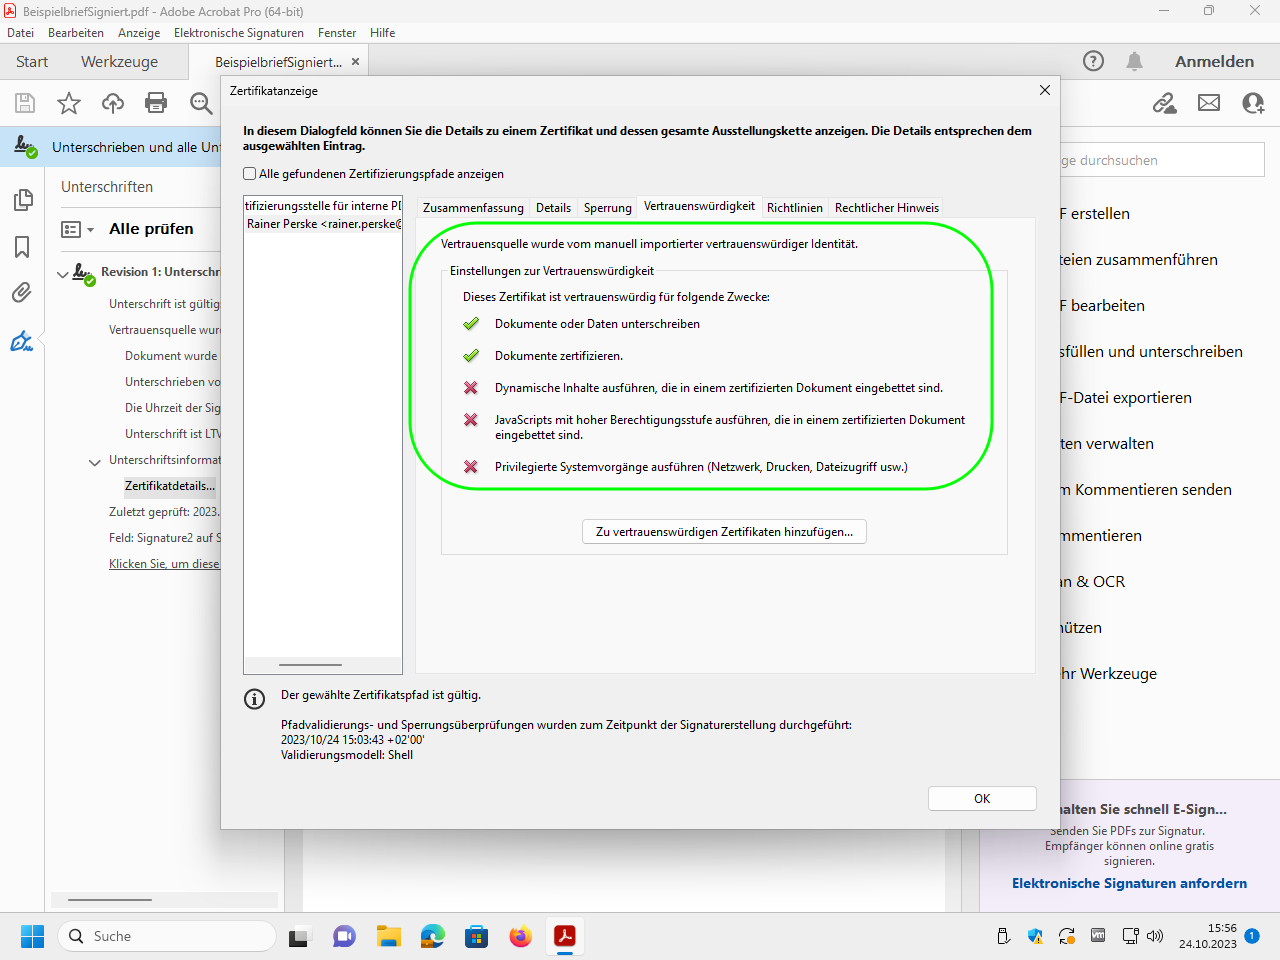
Expand the tree structure to display the different information to be displayed. For details on the signer, see„Zertifikatdetails“ (“certificate details”):

Test PDF files
These six files are signed with digital IDs that are issued by different issuers. Only the indicated signatures should be accepted as valid:
Qualified signature – always valid
Signature with PDF ID – valid in the Universität Münster
Signature with DFN Global ID – valid in the German research network
Signature with DFN Community ID – valid in the German research network
Signature with GÉANT TCS ID – invalid
Signature with selfsigned ID – always invalid
Which signatures are displayed as valid depends on whether the respective (root) CA certificate has been imported (see above).
(Only for special applications) Further guides
These guides only apply to the specified situations.
Only for PHP programming:
Guide: Creating a signed PDF document with PHPPDF signatures on Linux command line:
One-time preparation:
mkdir nssdir
certutil -A -d nssdir -n PDF-CA -t c,C,c -i PDF-CA.pem
Verify signature:
pdfsig -nssdir nssdir iname.pdf
Import own PDF ID (warning: the private key is then no longer password protected):
pk12util -d nssdir -i PDF-ID.p12
List imported IDs (PDF-CA and PDF-ID):
certutil -d nssdir -L
The own PDF ID has a (one-line) name like:
    NSS Certificate DB:Rainer Perske


    <rainer.perske@uni-muenster.de> (2025-01-17 15:53:01 +01:00)
Rename own PDF ID to a short name likeMyID(write in one line):
    certutil -d nssdir --rename --new-n MyID -n


    'NSS Certificate DB:Rainer Perske


    <rainer.perske@uni-muenster.de> (2025-01-17 15:53:01 +01:00)'
Sign PDF file unsigned.pdf and save it as signed.pdf:
pdfsig -nssdir nssdir unsigned.pdf signed.pdf -add-signature -nick MyID
Verify signature:
pdfsig -nssdir nssdir signed.pdf

Further note
In contrast to digital IDs for emails, you should not save backup copies of the digital ID:
Even after a long time, digital IDs for emails are still needed to decrypt encrypted emails.
Digital IDs for document signing, however, can be replaced by new digital IDs at any time because they are not used for encryption.
Unfortunately, the manufacturer Adobe Systems ships its Acrobat Reader and Acrobat Pro software with settings that explicitly prevent the use of our normal digital email and WWW IDs to electronically sign PDF documents. It is possible to change these settings. However, both those who want to sign PDF documents and those who want to verify the PDF signatures created in this way must make these setting changes. In addition, some settings changes are reset by Adobe with each update.
To prevent an unprepared recipient of a PDF file from being scared off by a signature-invalid warning, we can only strongly recommend:
Please never use our digital IDs intended for email and WWW to sign PDF files!
For all university internal PDF documents please use digital IDs from our own PDF-CA instead, as described above.
(All system administrators of the university are requested to provide all installations of Adobe Acrobat with the root certificate of the PDF-CA as described above.)
Please refrain from signing PDF documents that are forwarded to entities outside the University of Münster!
There is a simple alternative: Do not sign the PDF file, but the email you use to send the PDF file.
If you really need to send signed PDF files on behalf of the university to external entities, you need expensive qualified signing cards and special hard- and software. If you have a specific need, please contact the IT service desk of the university administration.
When verifying PDF signatures, please also note::
Before using third-party software to verify PDF signatures, be sure to read the notes at https://www.pdf-insecurity.org/.
If you are checking PDF signatures created with third-party digital IDs, please note that certification authorities may remove expired certificates from their revocation lists. This means: If you check a signature that was created with a revoked digital ID that has since expired, the signature may be incorrectly displayed as valid!
This cannot happen with our PDF-CA, which never deletes certificates from revocation lists.