
Text editor
With this editor you can use all common functions of word processing.
No HTML knowledge is required for text input in Imperia.
NOTE
Basically, you can copy text from word processors and browsers to the input window via the clipboard. Tables, images and even links can also be copied. However, this can transfer fonts and other formatting that does not comply with the design guidelines. You should avoid this at all costs by copying only unformatted text into the Text module and editing it there. This is easily possible with the help of the icon "paste as plain text".
If you do paste text from Word directly into the editor window, the following problems may occur on the web pages:
- Links are basically formatted in blue.
- The text can no longer be aligned.
- The text breaks out to the right.
- The text consists of different fonts.
- Instead of the desired letters or symbols there are whimsical characters.
Insert and format text
Most of the formatting functions are self-explanatory and already known from common word processing programs, so we will only go into specific functions below:

Sorted list
With this button you can create a sorted list. You can select the list afterwards and choose between the list characters "numbers" (1., 2., 3...), "lower case letters" (a, b, c), "upper case letters" (A, B, C), "lower case Roman numerals" (i., ii., iii...) and "upper case Roman numerals" (I., II., III.) via the context menu (right click) under "Numbered List Properties".
- This is an example
- for a sorted list
- with the list characters "Lower case letters".
Increase indent / Decrease indent
With "Increase indent" a paragraph is indented. Please take into account that the paragraph is not only indented on the left, but also on the right. The "Decrease indent" function only has an effect if an indent has already been created.
Insert horizontal line
With this icon you can insert a horizontal line. The width of the line always extends over the full content area and is therefore a very powerful element of text structuring that should only be used very sparingly. The lines can be deleted at any time by moving the cursor directly in front of the line and pressing DEL.
Define acronyms
Abbreviations are often used on web pages that readers of the page may assume to be familiar with. Unfortunately, screen readers that read the page content to blind people usually cannot interpret these abbreviations and then stammer the abbreviation, which makes understanding the text much more difficult. Abbreviations should therefore be used sparingly and always explained. For this purpose, the function "Insert acronym" is available in the text input.
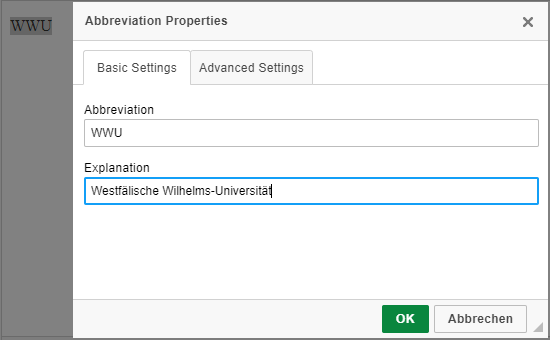
To insert an abbreviation (acronym), highlight the written abbreviation and click the "Insert abbreviation" function.
A window opens in which you can write out the abbreviation.
At the moment there are still differences in the display of such abbreviations: Most browsers do not mark abbreviations at all. The abbreviation is only displayed via mouseover.
In your browser, an acronym is displayed as follows: WWU
Special characters
The button "Insert special characters" can be used to insert various special characters, such as § or ©, into the text.
Insert/edit link
The Insert/edit link button brings up a menu that allows you to create different link variants.
Internal link
University internal links refer to pages within the university's web offer. Internal links are opened in the same window. When you click on this icon, a simple input field appears in which you can enter the link. You can enter an absolute link here (e.g. https://www.uni-muenster.de/ImperiaHandbuch/index.html - an absolute link must always start with "https://", simply starting with "www." is not enough!). Relative links also work. With relative links, only the path that comes after the main path is specified. So at https://www.uni-muenster.de/ImperiaHandbuch/index.html the relative link would be "/ImperiaHandbuch/index.html".
In the CIT central web server park, please always specify relative links to University Münster pages.
External link
External links will have a different icon and will open in a new window or tab. When you click on this icon, as with internal links, a simple input field appears in which you can enter the URL. Only absolute links are accepted here.
Intranet links refer to areas of the intranet or to generally restricted areas.
Download link
If you want to offer content for download, e.g. PDF or Word documents, select "Download link". Here you can either directly enter the internet address of the file or click on "Browse Assets". To update a file, simply upload the new file with the same name to the MAM, checking the "Overwrite existing file" box. Then run the document through the workflow again and release it, and the new version of the file will be included.
E-mail
Enter an e-mail address in the corresponding field. In the output, an e-mail can be sent directly with a left mouse click using your own mail client or copied using the right mouse button and pasted into any webmail service. For security reasons, it is no longer possible to link to a contact form.
The link symbols ( ) are inserted automatically. If they are not desired, for example when linking images or in lists, you should select
To delete a link, click on the linked text and then on the "Remove Link" button. If you want to change a link afterwards, click on "Insert/edit link".
Anchor
Anchors are internal links within a document. Place the cursor at the position you want to link to. Click on the icon and enter a name for the anchor (corresponds to the content of the attribute name="anchor" in the HTML code). If you were successful, you will see a corresponding icon at the place: Paste the URL of the web page where the anchor can be found followed by "#anchorname" to generate a link that jumps directly to the set up anchor of the respective web page.
Little link lore
For absolute links, enter the full path as you see it in the address bar, including "https://".
With relative links, on the other hand, you move in the directory structure, starting from the directory in which the page is located, for example:
Starting from the page
http://www.uni-muenster.de/Ingenieurwissenschaften/index.html
The relative link
- /arbeitsschritte/index.html refers to https://www.uni-muenster.de/ImperiaHandbuch/arbeitsschritte/index.html
- /sitemap.html refers to https://www.uni-muenster.de/ImperiaHandbuch/sitemap.html
- /index.html refers to https://www.uni-muenster.de/ImperiaHandbuch/index.html
Tables
Edit table
The context menu (right-click in the table) takes you to the "Table properties" menu, where you can make further settings. You can also make these settings for individual cells or rows.
Row/Column
Here you specify how many rows and columns the table should have.
Label
The caption is displayed at the bottom right of the table as a description.
Table of contents
To enable barrier-free use of the page, a description can be entered here that a screen reader recognizes and reads aloud to a blind user, for example.
Headers
Here you decide whether you want to bold all texts of the first row ("First Row"), whether you want to bold the texts of the first column ("First column") or whether you want to implement both ("both").
Width
In Width you specify how much space you want to give to the table. By default, the "Fixed column width" checkbox is not checked, so that the column width is determined by the amount of space required by the text in the respective column. This is a mandatory prerequisite for the table to be displayed reasonably on mobile devices such as smartphones.
Layout
The layout of single or multiple previously selected cells can be adjusted via "Cell properties", e.g. in terms of color (context menu). You also have the possibility to connect several cells with each other, but they must be selected before right-clicking.
TIPS FOR ACCESSIBILITY
Accessible highlighting If you want to highlight the text, please note that there are color-blind users who cannot recognize color highlighting and blind users whose screen readers do not read along with the font color change. Therefore, you should always use the italic and bold buttons for highlighting.
Accessible lists and bulleted lists
Never create lists and enumerations by hand, for example, because you want to use your own bullets or display the list as continuous text. Such a bulleted list would be read out incorrectly, making it difficult to understand the text. Please always use the button (bulleted list) for enumerations.
Accessible links
Links should always be named in such a way that the target of the link can be understood independently of the context of the link. So please avoid link texts such as "Continue here" or "Click here". It is better to use, for example, "More information on master's degree programs".
Accessible tables
Tables are very difficult to design barrier-free and should therefore be avoided if possible. In general, tables should also only be considered if they are logically a data table and not if you simply want to align text or images with the table.
Please keep the following in mind with tables:
- Design tables so that they can be read line by line and references are clear.
- Using the context menu (right-click), you have the option under "Table Properties" to specify a summary for the table under "Content Summary". This summary should indicate which facts are presented in the table.