Inhalt
Introduction
Generally there are two ways of checking emails. POP3 downloads your emails from the email server of the university to your computer. IMAP leaves the emails on the server and you can only check them locally. If you only use one PC to check your emails, the best option is to choose POP3. If you have several computers to check your emails, choose IMAP. Please not that with IMAP an Internet connection is always necessary when you want to check your emails.Configuration of Thunderbird for the checking of emails
Step 1 : Start Thunderbird and set up a new email account. This is done by choosing the item Account Settings in the menu Tools. You will now see the account administration as shown in image 1. Now click add account.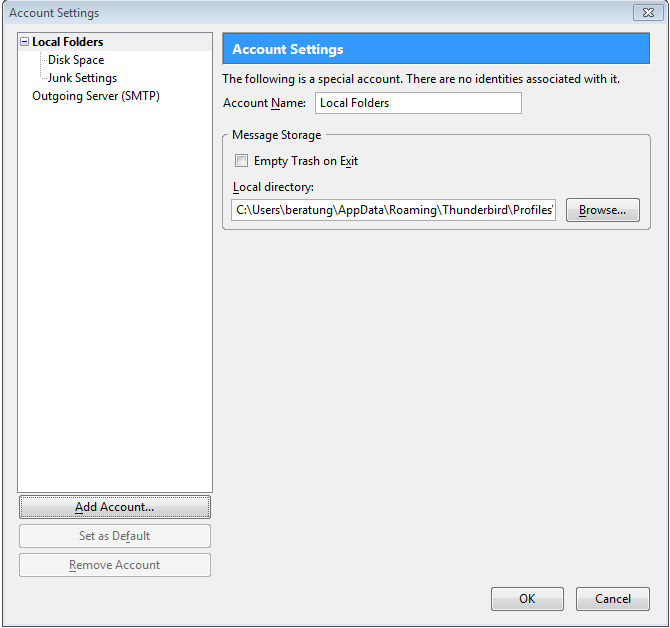 image 1
Step 2 : In the following menu dialog choose Email account and click next. Next you will be asked for your name and email address. Now enter your full name and your university email address. The university email adress is userid@uni-muenster.de or a specific one (e.g. yourname@uni-muenster.de) that you created in Mein ZIV.
image 1
Step 2 : In the following menu dialog choose Email account and click next. Next you will be asked for your name and email address. Now enter your full name and your university email address. The university email adress is userid@uni-muenster.de or a specific one (e.g. yourname@uni-muenster.de) that you created in Mein ZIV.
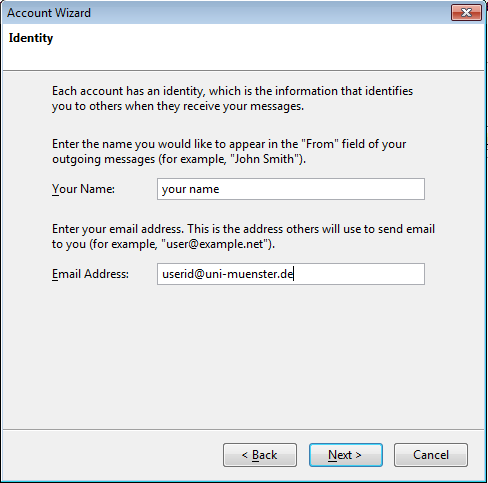 image 2
Step 3 : The following dialog asks you for the way in which you would like to check your emails. As described in the introduction, you should use the POP3, if you intend to check your emails on one computer only. Use IMAP, if the emails will be checked on more than one computer and those computers are always connected to the Internet. The two images below show the settings for each method.
image 2
Step 3 : The following dialog asks you for the way in which you would like to check your emails. As described in the introduction, you should use the POP3, if you intend to check your emails on one computer only. Use IMAP, if the emails will be checked on more than one computer and those computers are always connected to the Internet. The two images below show the settings for each method.
- POP method:
 image 3
- IMAP method:
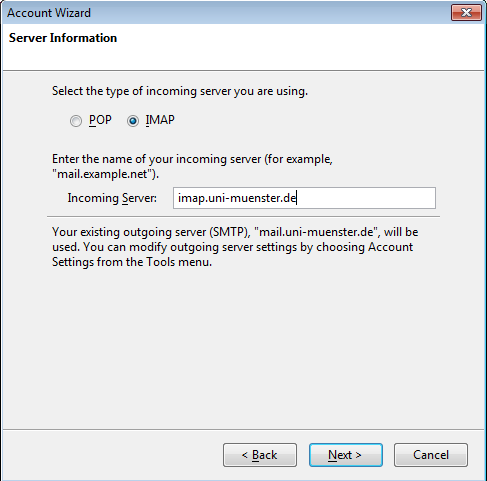 image 4
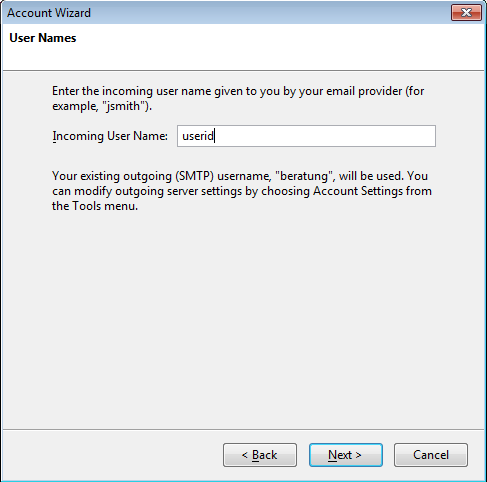 image 5
Step 5: The last page sums up all the settings. The finish button completes the assistant.
Step 6: The assistant is now complete. But in order to be able to check your emails, you must adjust the encryption of the data transfer. In the open accounts-window, choose the server-settings on the left of the account that you have just set up. If you have proceeded according to the instruction, the correct account is called "Uni-Mails". Under the section Security and Authentication activate the SSL encryption. All other options have already been adjusted correctly. The two images below again show the right settings for POP3 and IMAP.
image 5
Step 5: The last page sums up all the settings. The finish button completes the assistant.
Step 6: The assistant is now complete. But in order to be able to check your emails, you must adjust the encryption of the data transfer. In the open accounts-window, choose the server-settings on the left of the account that you have just set up. If you have proceeded according to the instruction, the correct account is called "Uni-Mails". Under the section Security and Authentication activate the SSL encryption. All other options have already been adjusted correctly. The two images below again show the right settings for POP3 and IMAP.
- Activate POP3 SSL:
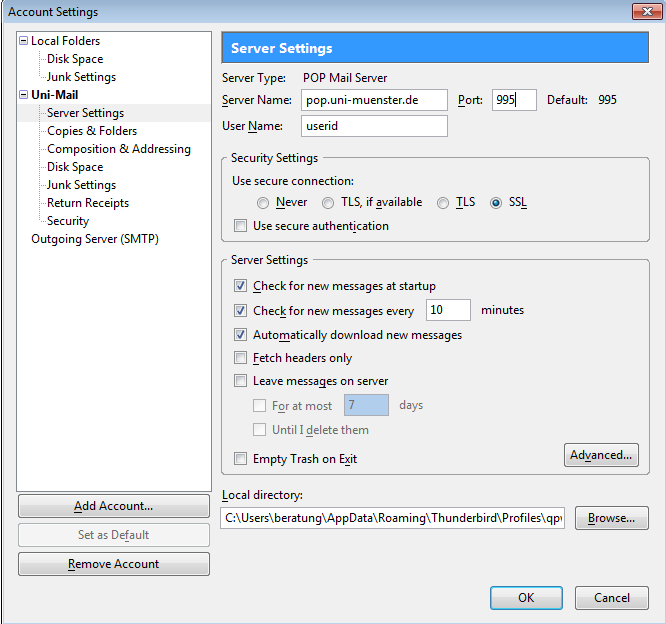 image 6
- Activate IMAP SSL:
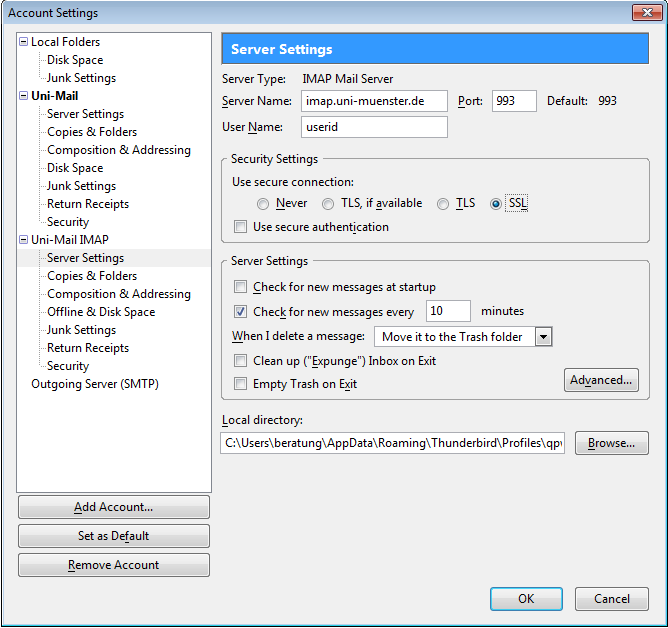 image 7
- Advanced settings IMAP:
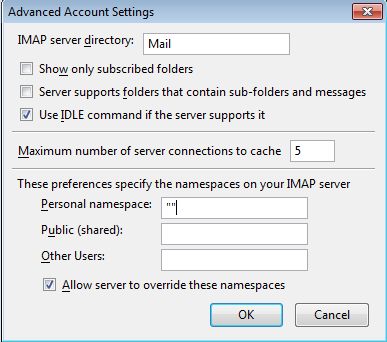 image 8
Configuring Thunderbird for the sending of emails
The sending of emails is done via a different server. Therefore, it must be configured separately. Once more open the account administration via the menu item Tools -> Account Settings. Now choose Outgoing Server(SMTP) in the left menu bar of the starting dialog. As shown in the image 9 below you can now set up a new outgoing mail server by clicking the button add in the right part of the window.- New SMTP account:
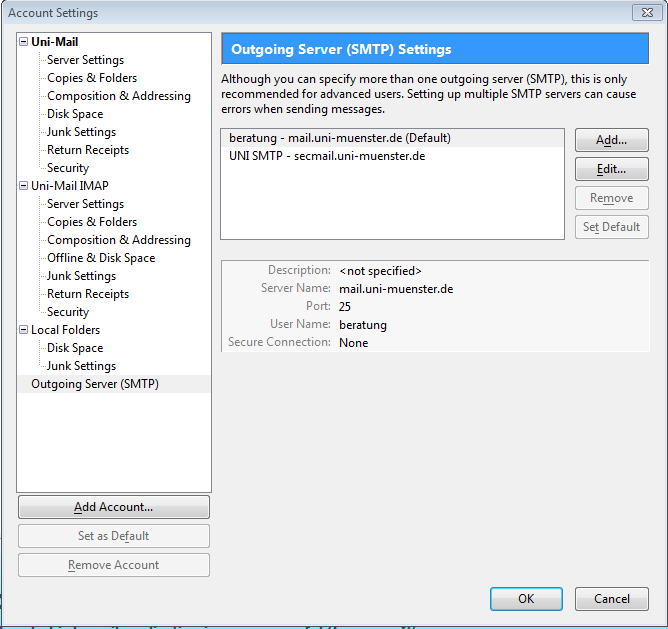 image 9
- SMTP settings:
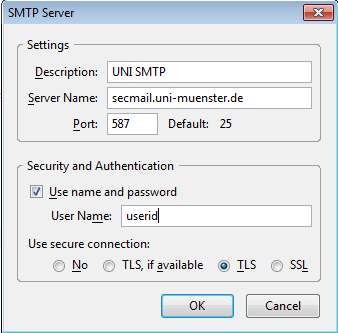 image 10
-- MatthiasSchelp - 11 Jun 2008
-- Update ChrisF - 2011-08-23
Topic revision: r6 - 2013-08-29 - JoergenSchwerdt


Ideas, requests, problems regarding ZIVwiki? Send feedback
Datenschutzerklärung Impressum