Preconditions
- ZIV user id (you can get a user ID at the ZIV Mein ZIV)
- central user password
- *Microsoft Outlook 2010 (it is reommended to use the latest version with newest updates)
Introduction
Generally there are two ways of checking emails. POP3 downloads your emails from the email server of the university to your computer. IMAP leaves the emails on the server and you can only check them locally. If you only use one PC to check your emails, the best option is to choose POP3. If you have several computers to check your emails, choose IMAP. Please note that with IMAP an Internet connection is always necessary when you want to check your emails.Configuration of Outlook 2010
Step 1 : Start Outlook 2010 and set up a new email account. This is done by choosing the item File in the menu bar (see image 1).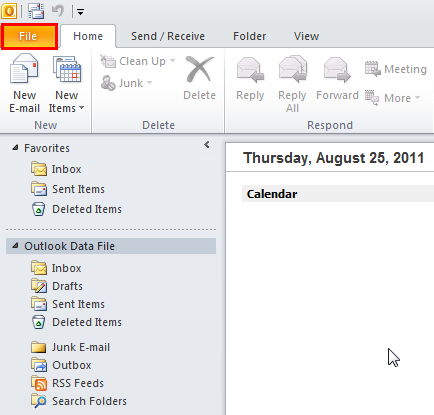 image 1
Step 2 : Click on Add Account (see image 2).
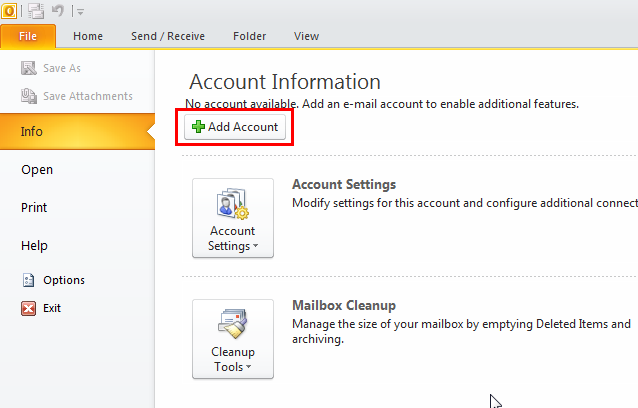 image 2
Step 3 : Select Manually configure server settings or additional server types and click Next (see image 3).
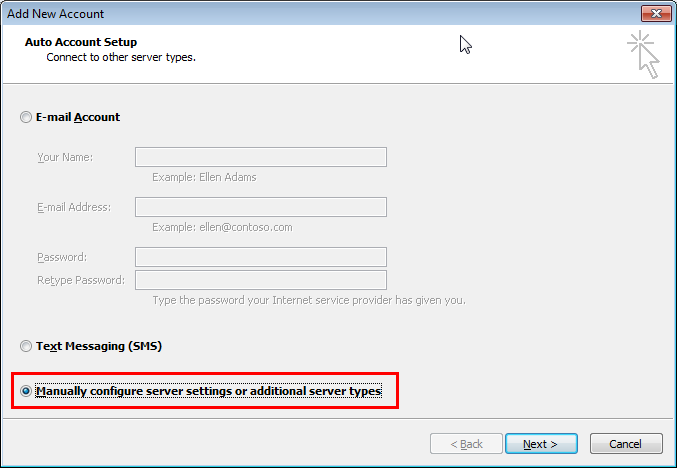 image 3
Step 4 : Select Internet E-Mail and click Next (see image 4).
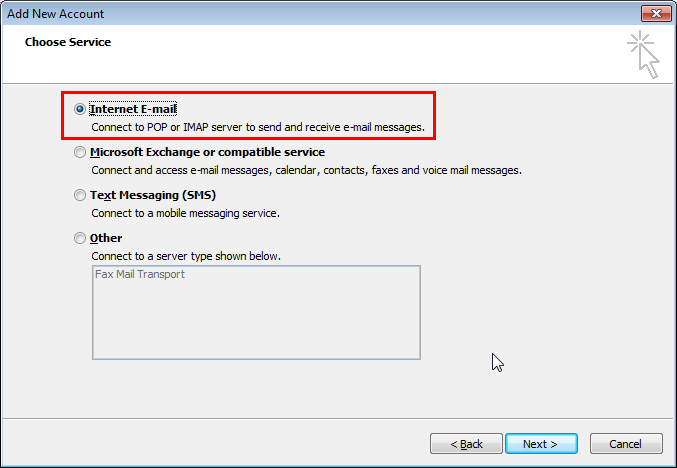 image 4
Step 5 :
image 4
Step 5 :
If you want to use POP3 look at step 6. For IMAP account settings look at step 7.
Step 6 : Fill in the form as shown in image 5a.
- E-mail Address: userid@uni-muenster.de (or a specific one you created in Mein ZIV, e.g. yourname@uni-muenster.de)
- User Name: your university user id
- Password: central user password
- POP3 Settings:
 image 5a
In the red marked rectangle you can define a name to identify the POP3 account (e.g. "Uni Mails).
- More Settings:
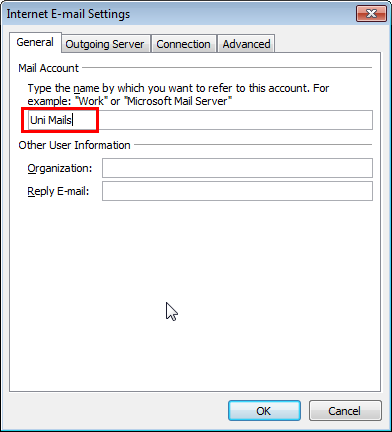 image 5b
- Outgoing Server:
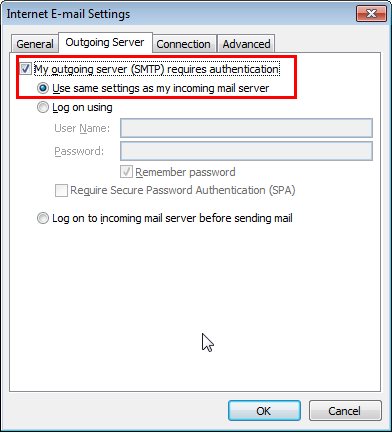 image 5c
- Outgoing Server:
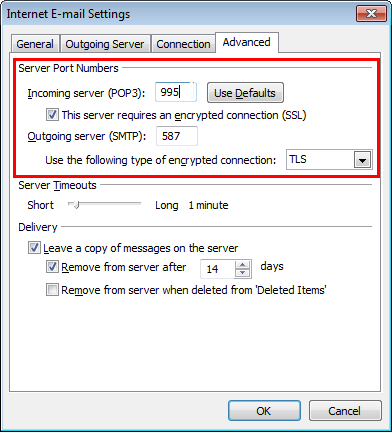 image 5d
- E-mail Address: userid@uni-muenster.de (or a specific one you created in Mein ZIV, e.g. yourname@uni-muenster.de)
- User Name: your university user id
- Password: central user password
- IMAP Settings:
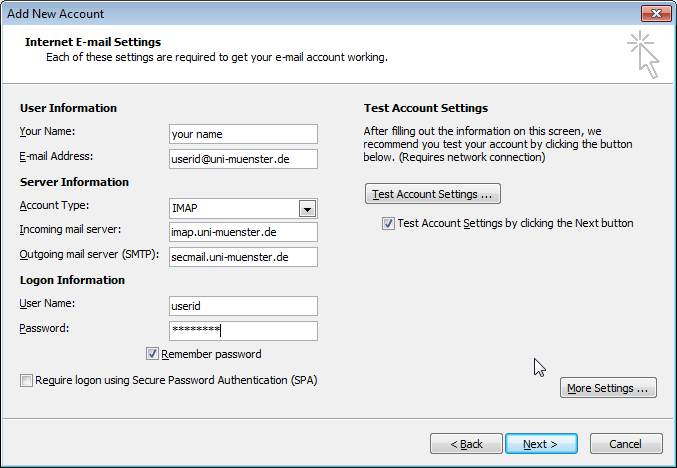 image 6a
In the red marked rectangle you can define a name to identify the IMAP account (e.g. "Uni Mails).
- More Settings:
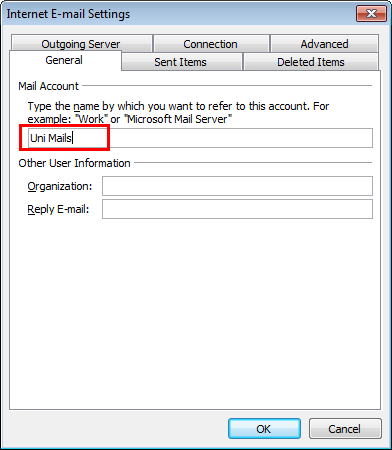 image 6b
- Outgoing Server:
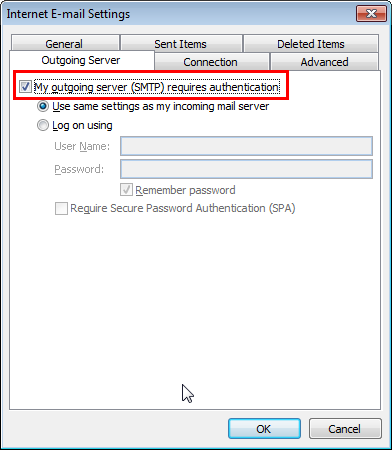 image 6c
- Outgoing Server:
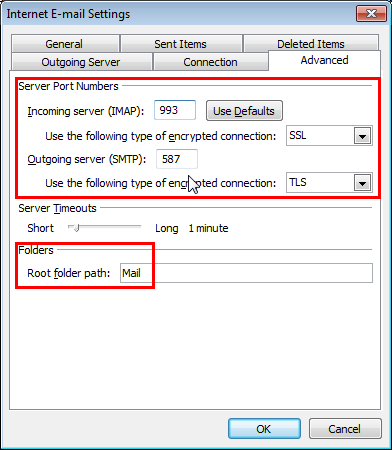 image 6d
The configuration is now complete and the receiving of emails should work.
-- ChrisF - 2011-08-19 
 |
|
|
Ideas, requests, problems regarding ZIVwiki? Send feedback
Datenschutzerklärung Impressum