Setting up the IVV1Cloud
Further information on the advantages and disadvantages of a cloud can be found in the service area under Data Storage.
Here you will find information on how to apply for and set up the IVV1Cloud we offer.
If you are interested in sciebo: Instructions and information on setting up sciebo can be found on the CIT website.
Instructions IVV1-Cloud:
Application
To gain access to the IVV1Cloud, you must be an employee of the University of Münster and belong to the areas supervised by IVV1. You must also be a member of the ‘u0ivv1oc’ group. You can apply for this group quickly and easily via the IT portal and the sub-item ‘User ID and group memberships’ -> ‘New application’. You can search for ‘u0ivv1oc’ in the list. Now select this entry.
Click on ‘Next’ and follow the instructions until you have sent the application. Ideally, you should select the e-mail function to inform the user group leader. This request is usually processed on the same day and enables you to use the IVV1Cloud on the next working day at the latest.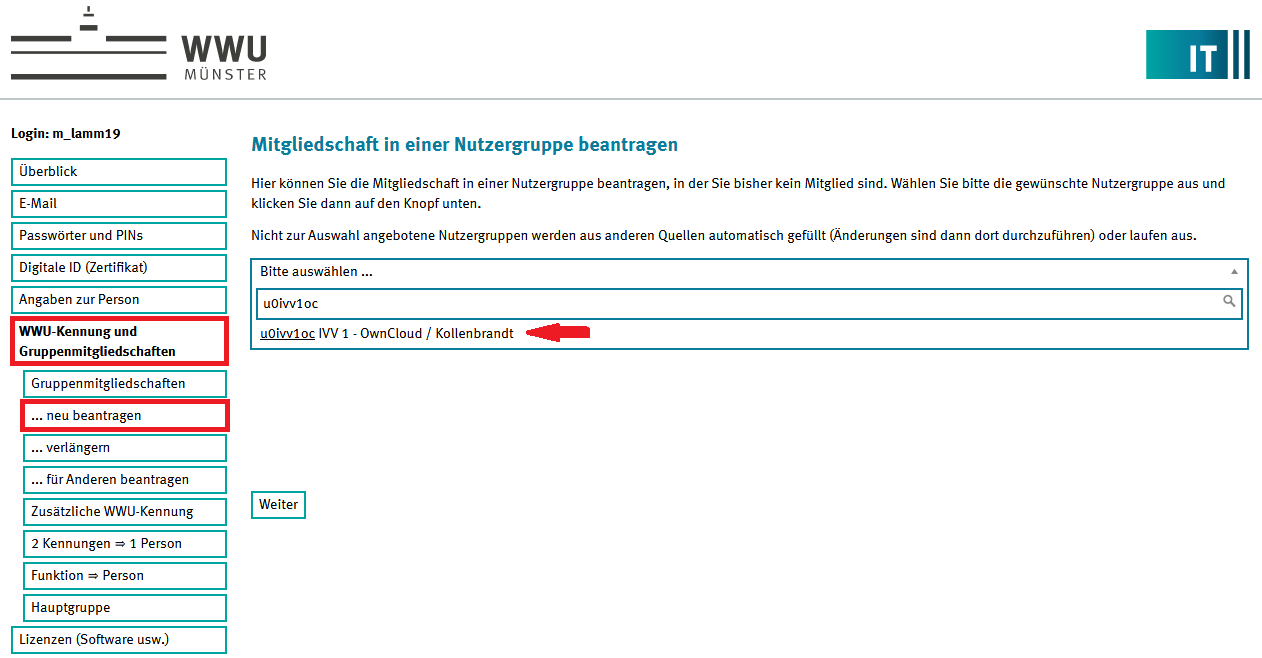
© IVV1-Geisteswissensachaften
Access via web browser
Open a web browser of your choice and enter https://ivv1cloud.uni-muenster.de. When logging in, use your university ID and the central password.
Synchronisation with the IVV1Cloud (WIN)
Step 1:
Install the IVV1Cloud Sync Client (Nextcloud). This is freely available on all domain computers via the software centre. You do not need administration rights to install it. For home computers, you can obtain the software via the following link:
https://nextcloud.com/install/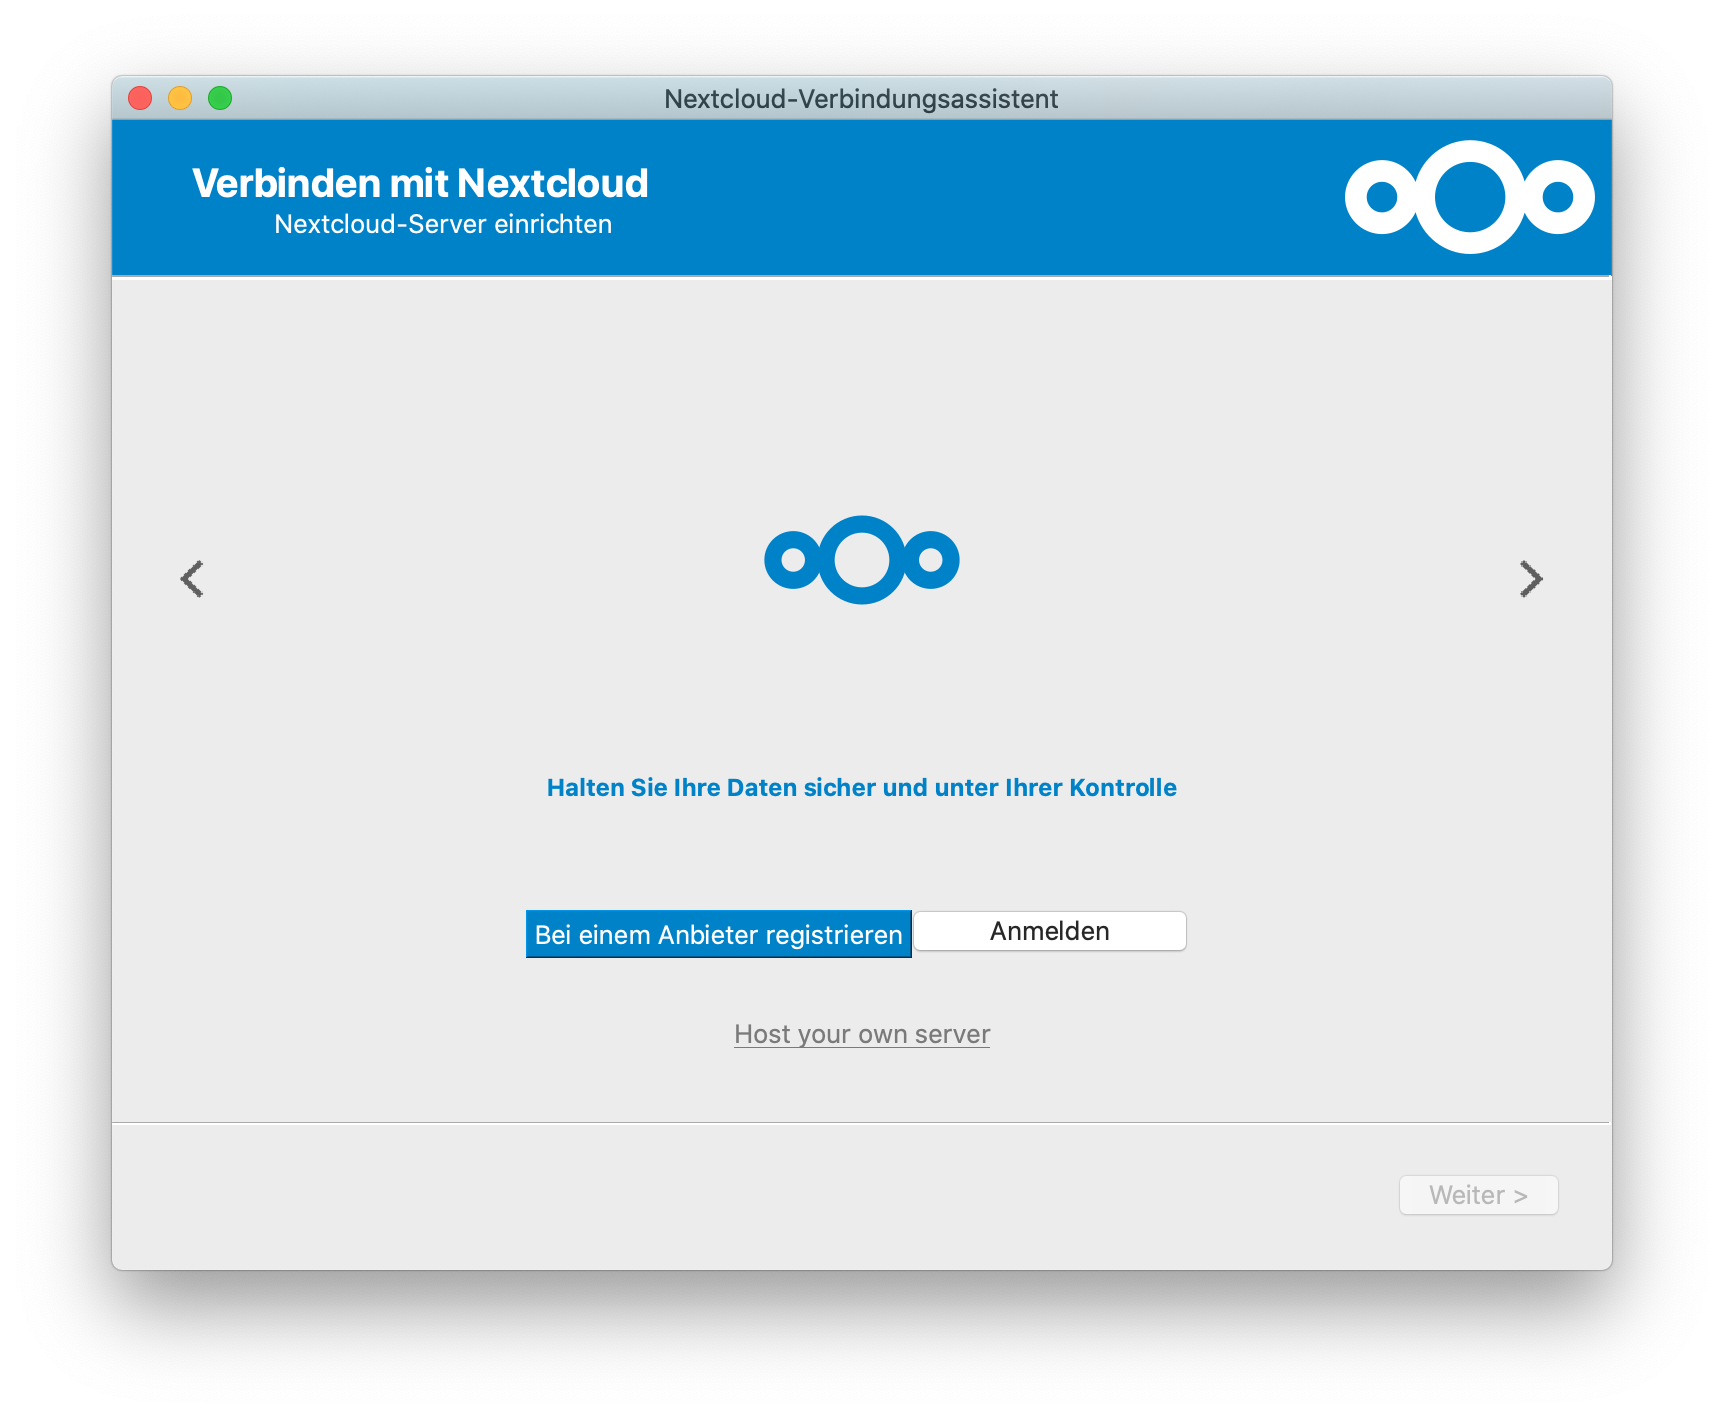
© IVV1-Geisteswissenschaften Step 2:
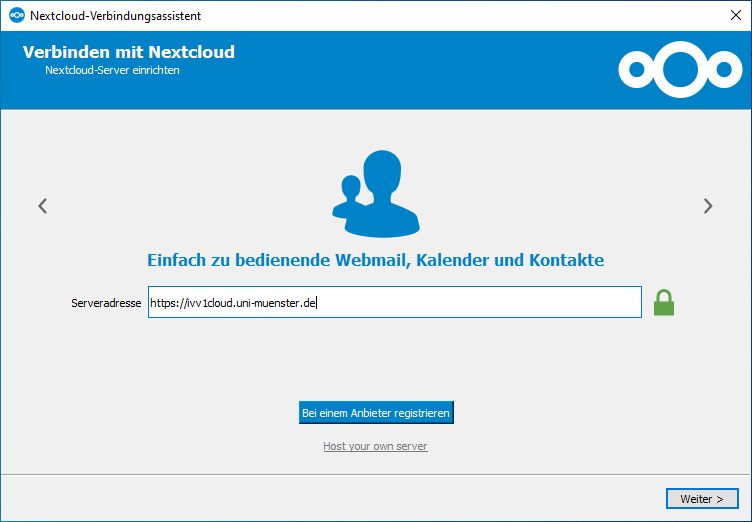
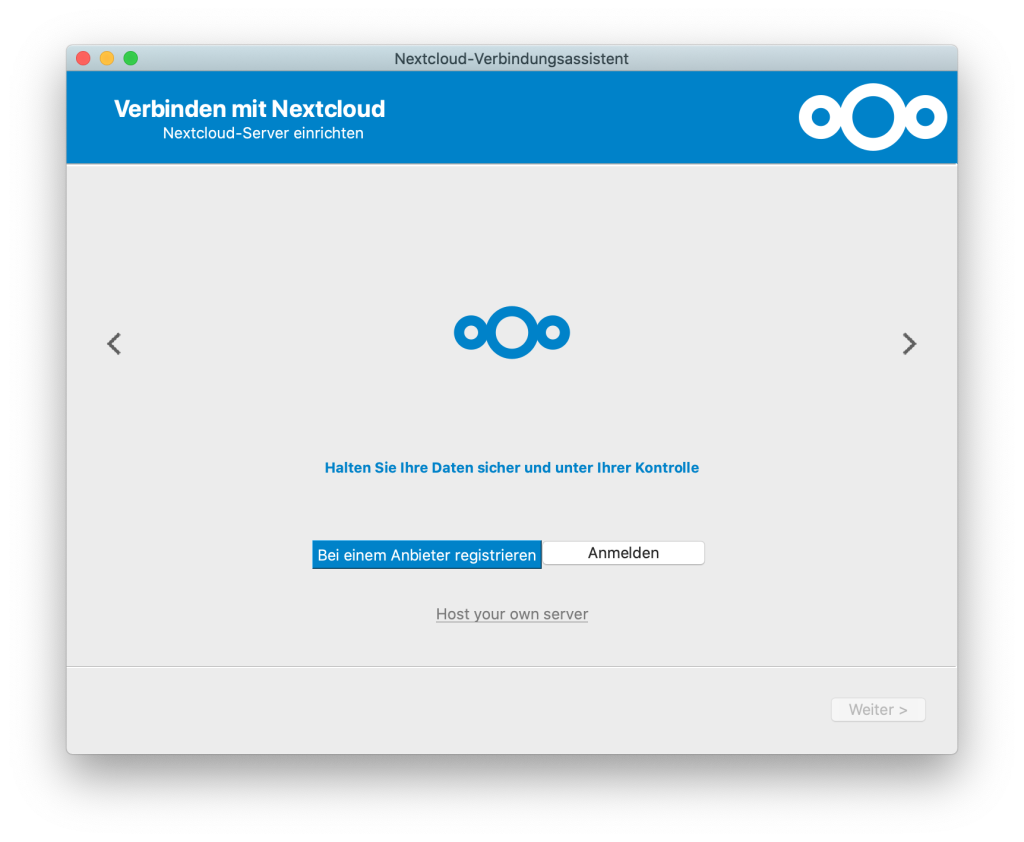
After installation, you must start the client and configure it once. Click on ‘Log in’ in the window and enter the server address ‘https://ivv1cloud.uni-muenster.de’. Then click on ‘Next’.
© IVV1-Geisteswissenschaften Step 3:
You must now authorise access. A login page should open automatically in the web browser. If the login page does not open automatically in the web browser, you can click ‘Copy link’ in the installation window to paste the address manually in the web browser and then continue.
Click on ‘Login’ on the website in the browser, enter your university user ID and your central password and confirm again with ‘Next’. The login attempt will fail if your access data is incorrect or you are not yet a member of the ‘u0ivv1oc’ group. You must now grant the sync client access. Once you have successfully connected, you can return to the installation process.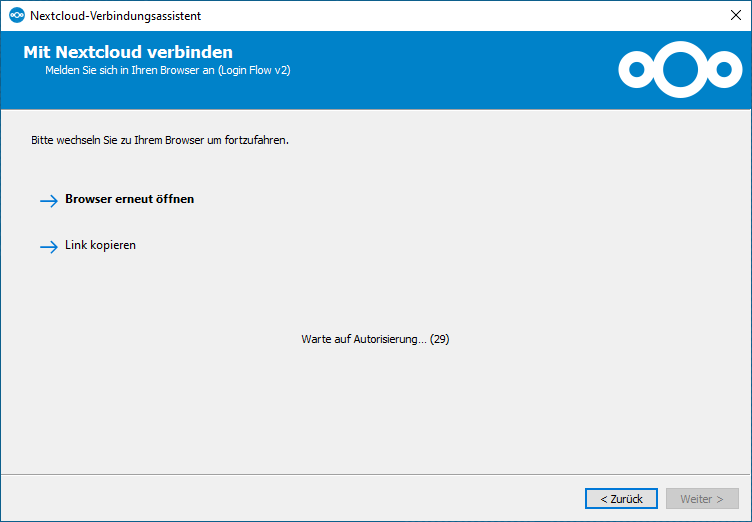
© IVV1-Geisteswissenschaften Step 4:
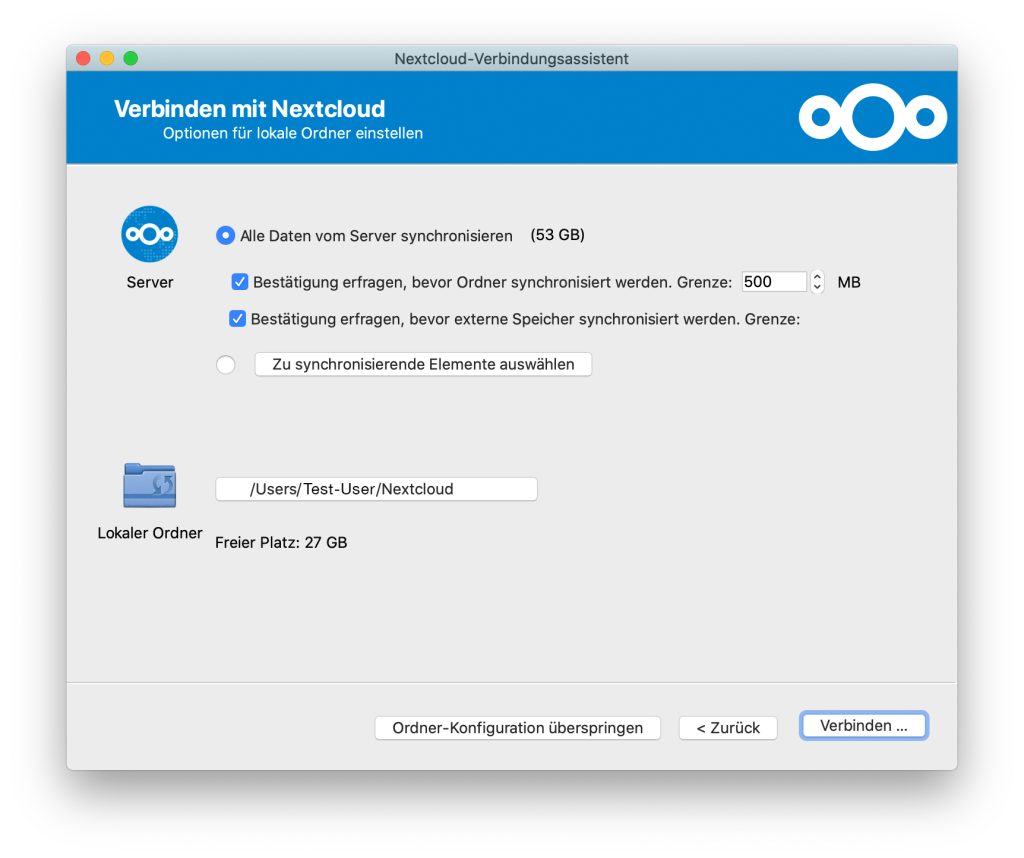
In the installation window, you can now set/create a folder on your computer that is to be synchronised with your IVV1Cloud account. By clicking on the path, a new window will appear in which you can select a folder.
Once you have defined your folder, click on ‘Connect’.
Everything is now set up and you can use your IVV1Cloud client.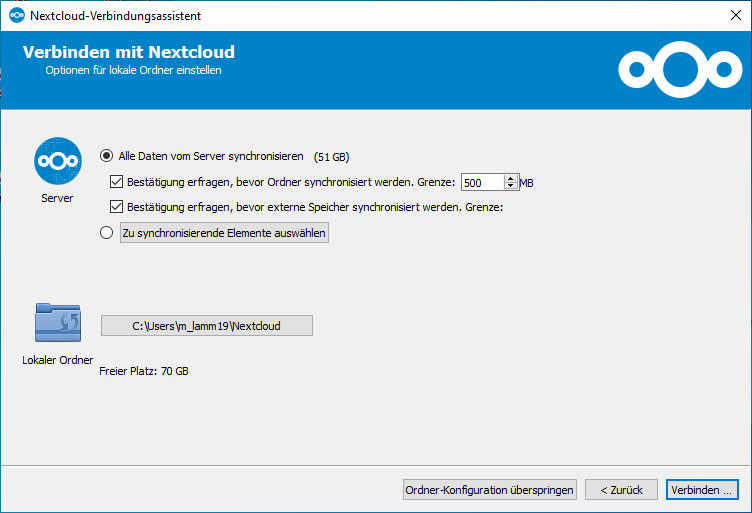
© IVV1-Geisteswissenschaften Step 5:
From now on, you will find an IVV1Cloud icon in your tray bar on the right-hand side of the task bar after clicking on the ‘arrow’. The green icon means that your cloud folder is up to date. You can make settings by clicking with the left mouse button. Right-clicking on the icon gives you various selection options, including direct access to the folder.
You can also open the folder via the file explorer. It should appear in the left sidebar.
Synchronisation with the IVV1Cloud (MAC)
Step 1:
Install the IVV1Cloud Sync Client (Nextcloud). You can obtain the software via the following link: https://nextcloud.com/install/. Confirm the message that appears during the installation process with the user name and password of your Mac user account. Also authorise the programme's access rights to documents and data.
© IVV1-Geisteswissenschaften Step 2:
After installation, you must start the client and configure it once. Click on ‘Log in’ in the window and enter the server address ‘https://ivv1cloud.uni-muenster.de’. Then click on ‘Next’.

© IVV1-Geisteswissenschaften Step 3:
You must now authorise access. A login page should open automatically in the web browser. If the login page does not open automatically in the web browser, you can click ‘Copy link’ in the installation window to paste the address manually in the web browser and then continue.
Click on ‘Login’ on the website in the browser, enter your university user ID and your central password and confirm again with ‘Next’. The login attempt will fail if your access data is incorrect or you are not yet a member of the ‘u0ivv1oc’ group. You must now grant the sync client access. Once you have successfully connected, you can return to the installation process.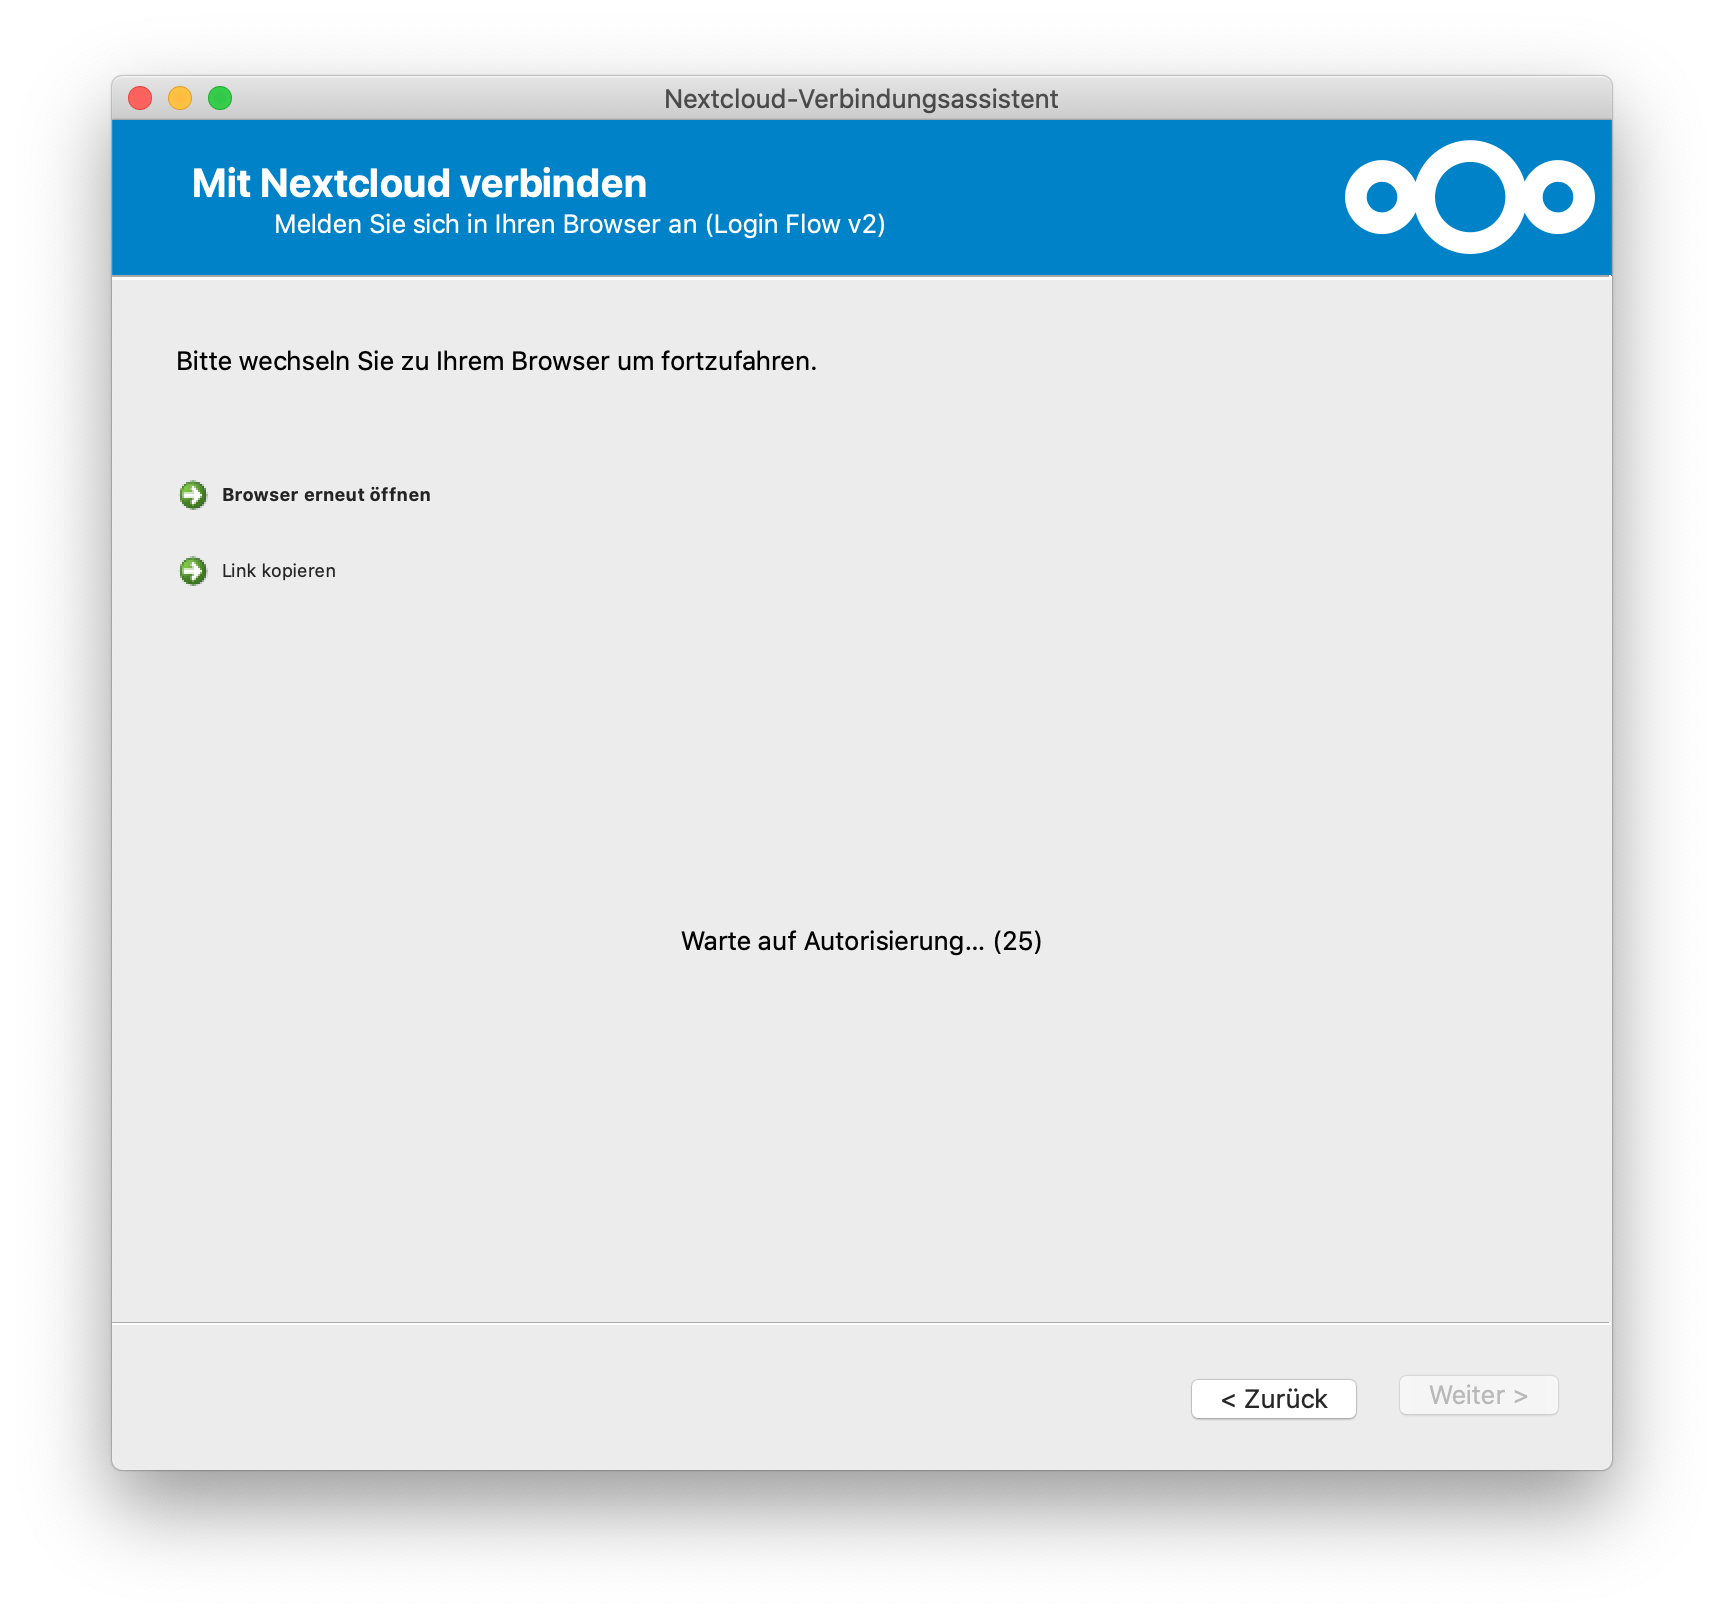
© IVV1-Geisteswissenschaften Step 4:
In the installation window, you can now set/create a folder on your computer that is to be synchronised with your IVV1Cloud account. By clicking on the path, a new window will appear in which you can select a folder. Once you have selected your folder, click on ‘Connect’.
Now everything is set up and you can use your IVV1Cloud client.
© IVV1-Geisteswissenschaften Step 5:
From now on, you will find an IVV1Cloud icon in your menu bar after clicking on the ‘arrow’. The green icon means that your cloud folder is up to date. By clicking with the left mouse button, you can make a further configuration via ‘Settings’. You can open the folder via the Finder. It should appear in the left sidebar.

© IVV1-Geisteswissenschaften