Printing with MacOS
Instruction
First, the drivers for the multifunction devices (MFD) must be downloaded and installed.
After downloading, run the installation (you may need to enter your local password for the MAC!).
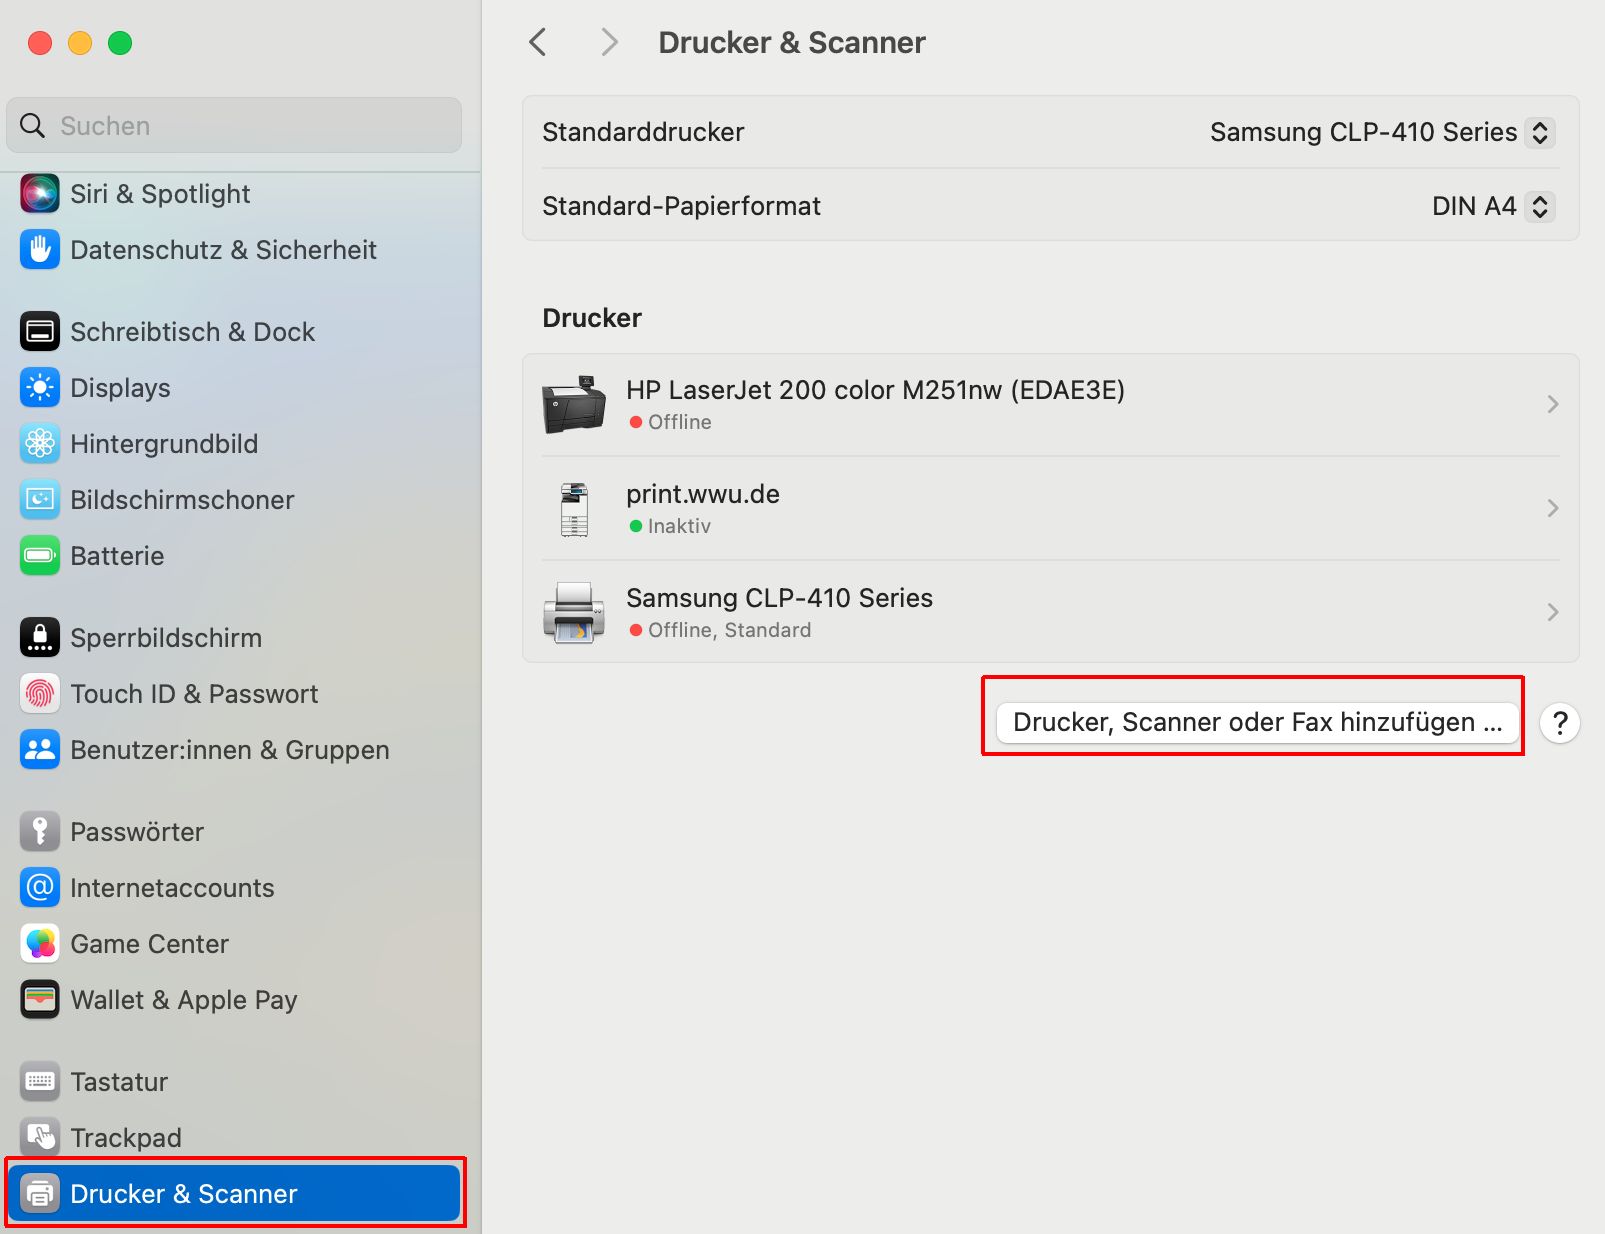
Step 1:
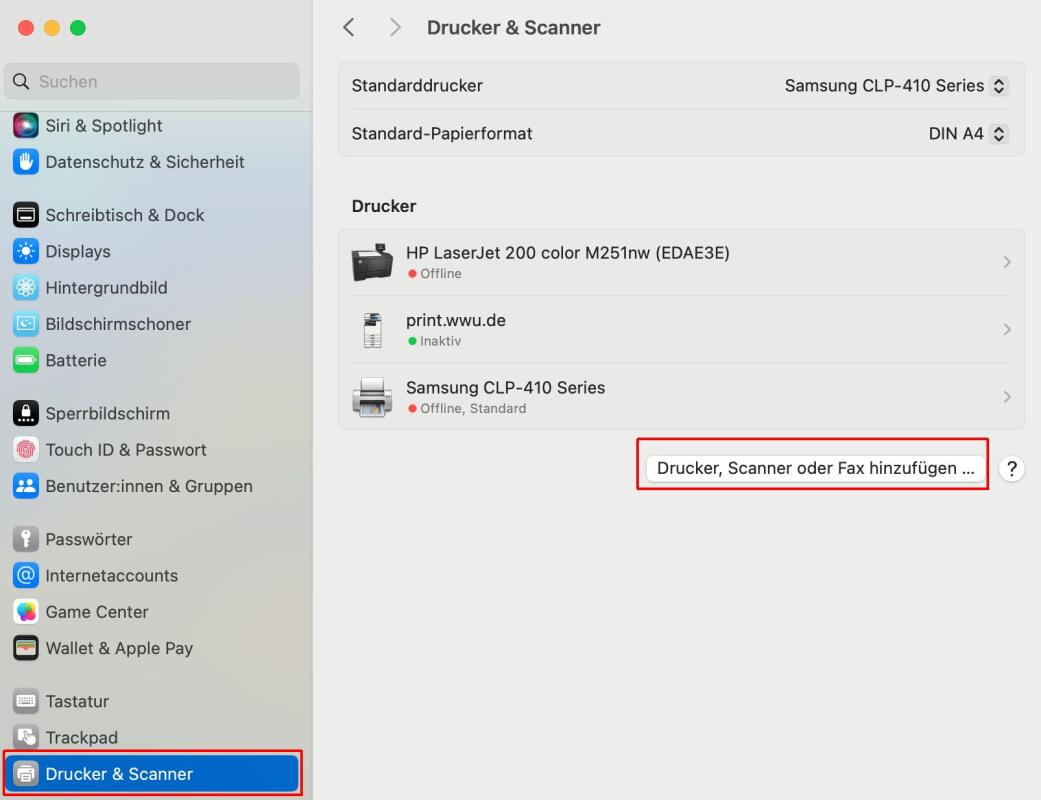
Go to Settings > Printers and scanners
© IVV1 Step 2:
Note: If the “Advanced” item does not appear
does not appear, click with the right
right-click in the empty area.
Then select Customize toolbar
and drag the “Advanced” icon next to
the printer icon.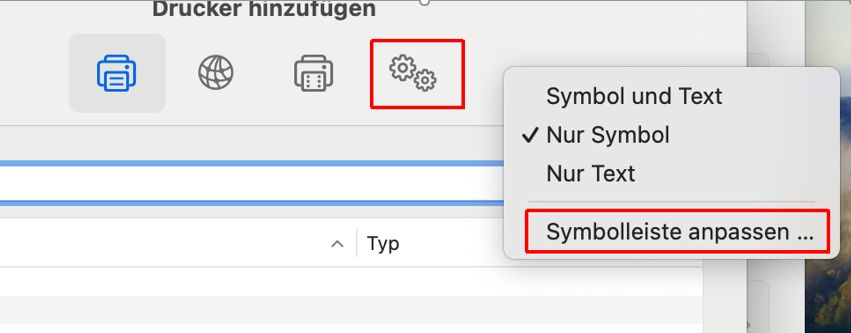
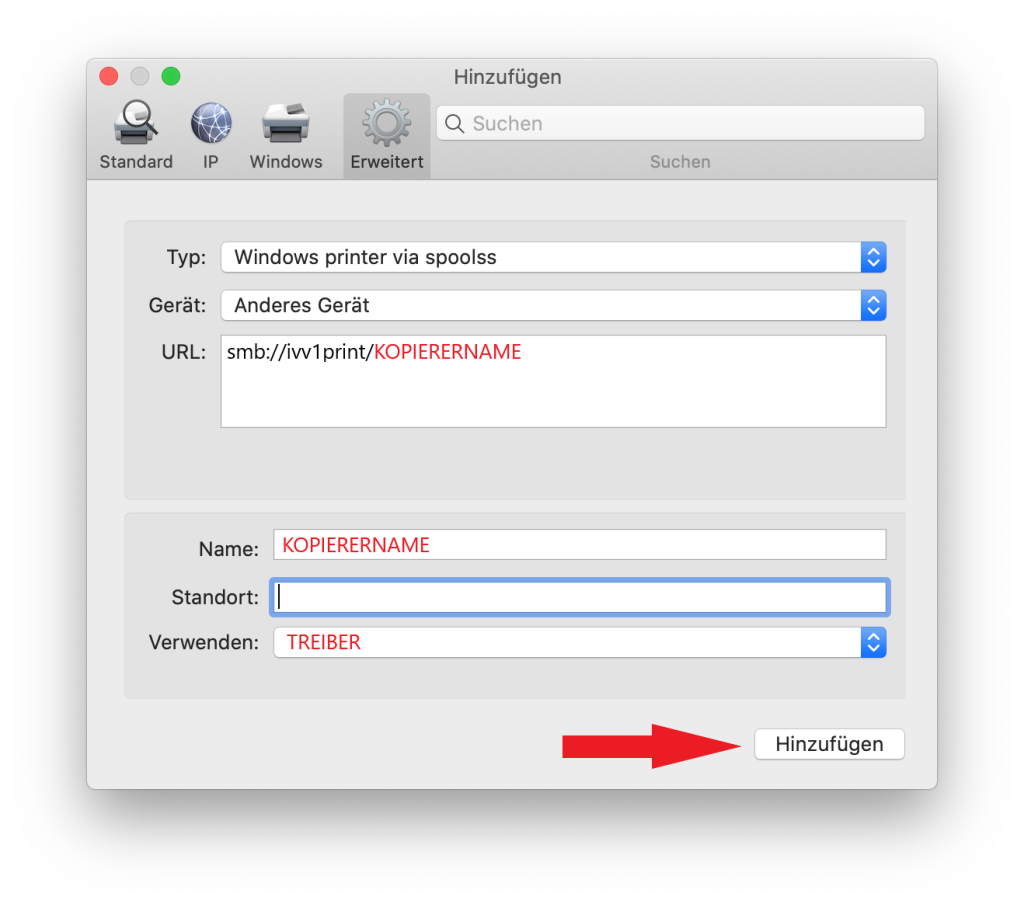
© IVV1 Step 3:
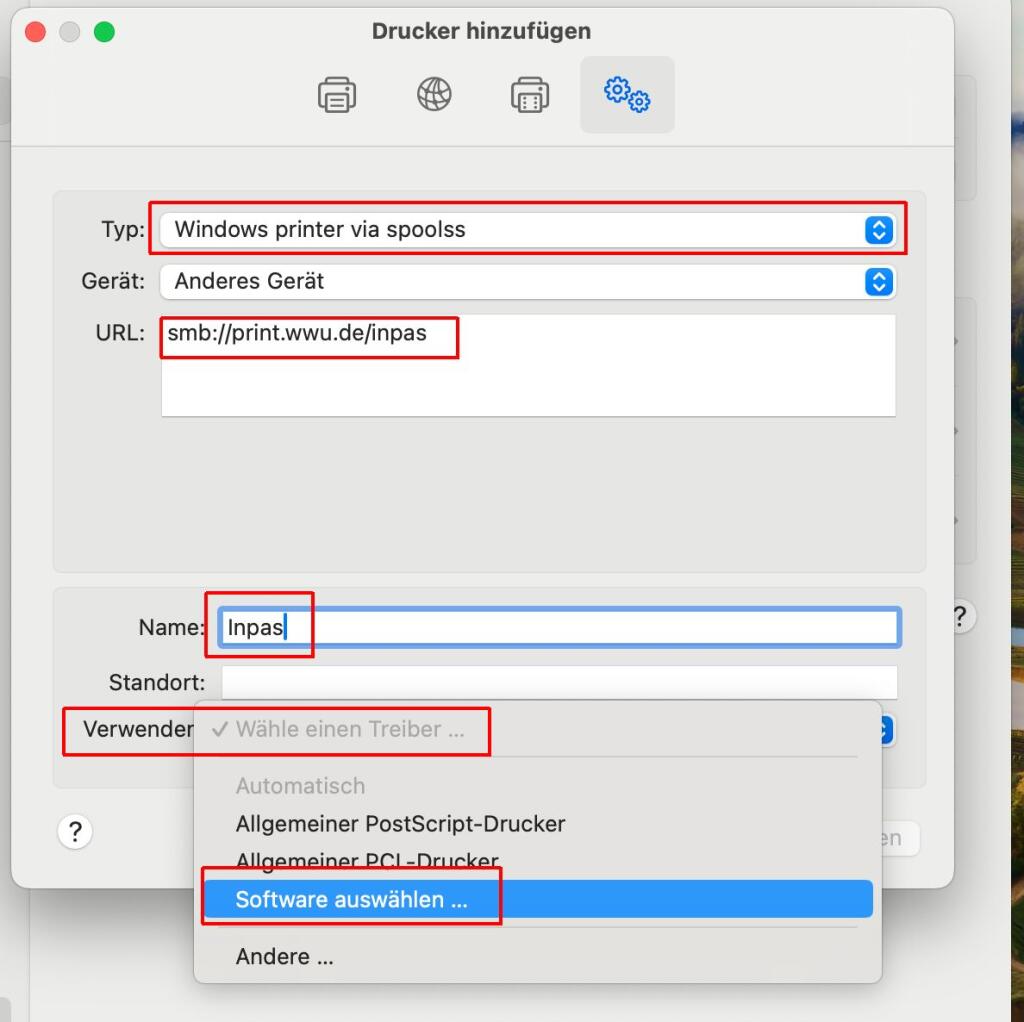
After clicking on the “Advanced” icon
icon, select under “Type”
the entry “Windows printer via spoolss”
under “Type”.
Enter one of the following addresses in the “URL” input field
the following addresses.
smb://print.wwu.de/inpas
In the “Name” input field, you can enter the
name “INPAS”. This name
appears in subsequent print dialogs and
serves to identify the printer.
Click on the drop-down field
“Use” and select the item
“Select software”. You will be
a list of the printer drivers installed in step 1
printer drivers installed in step 1.
Translated with DeepL.com (free version)
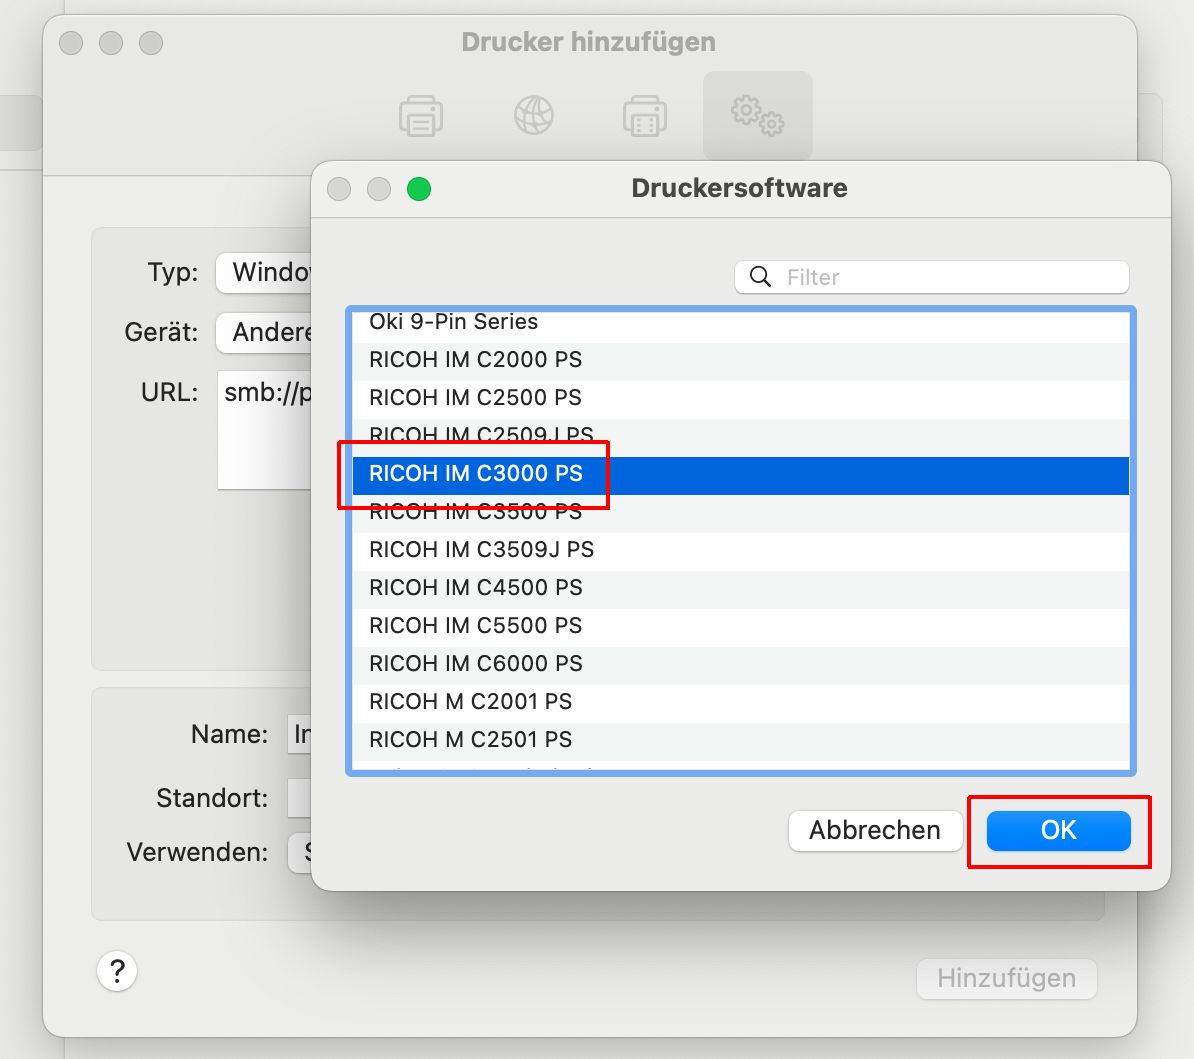
© IVV1 Step 4:
You must now select the correct driver. Due to the previous installation, suitable drivers should be displayed. Select the correct entry here and confirm with “OK”.
© IVV1 Step 5:
Now open a document to be printed!
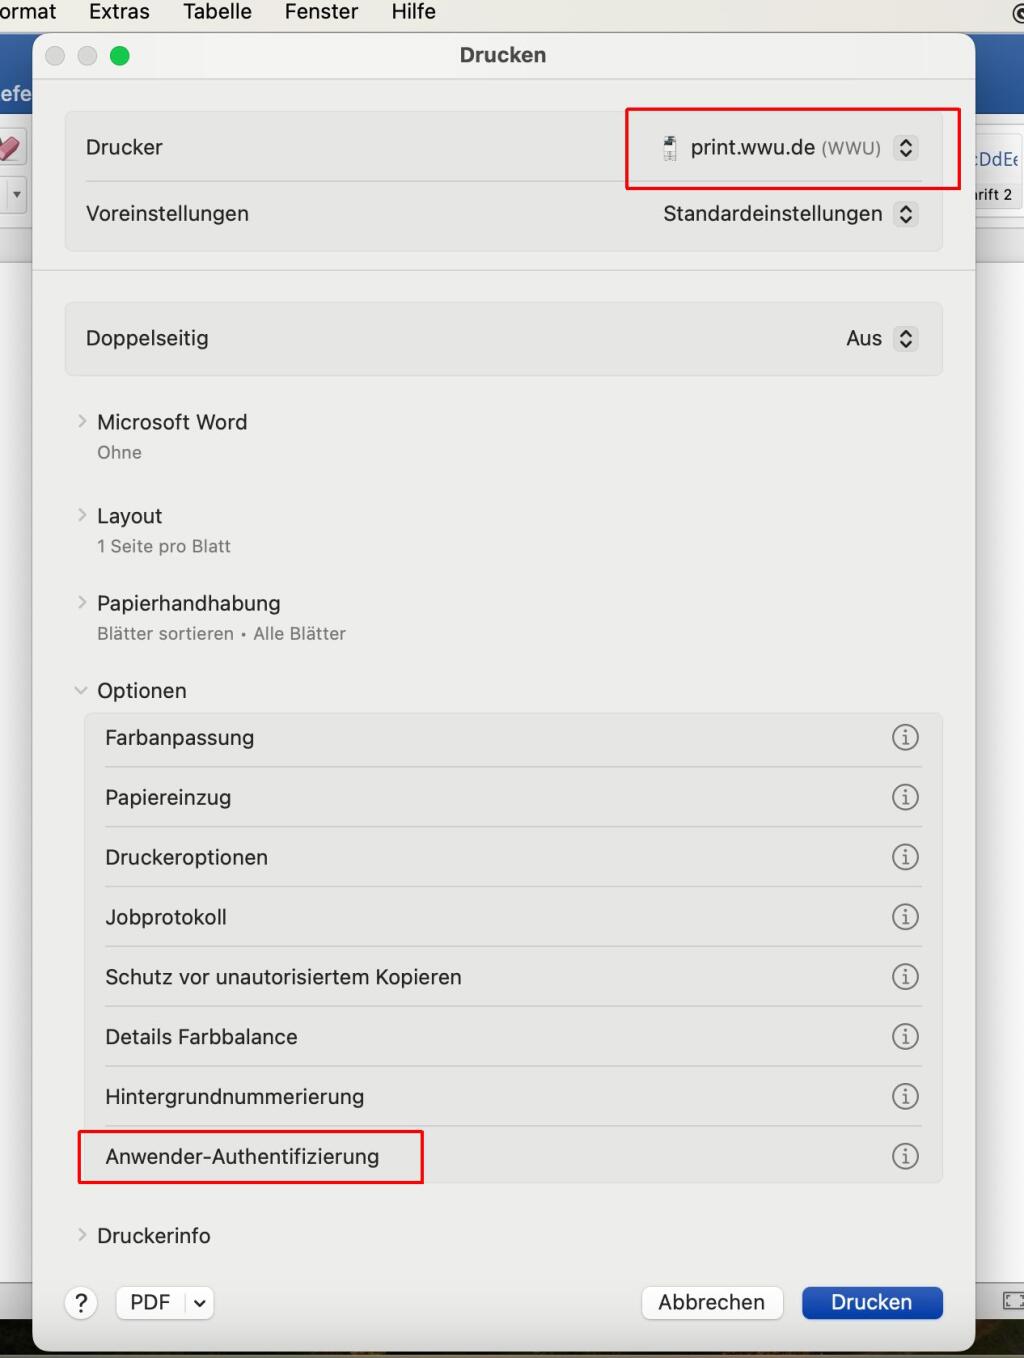
Before you send your print job, you must
in the print options of the respective
program, the user
authentication must be activated. Please
check whether the “Printer” entry
print.wwu.de is also displayed. There
your local default printer could
default printer could be displayed first.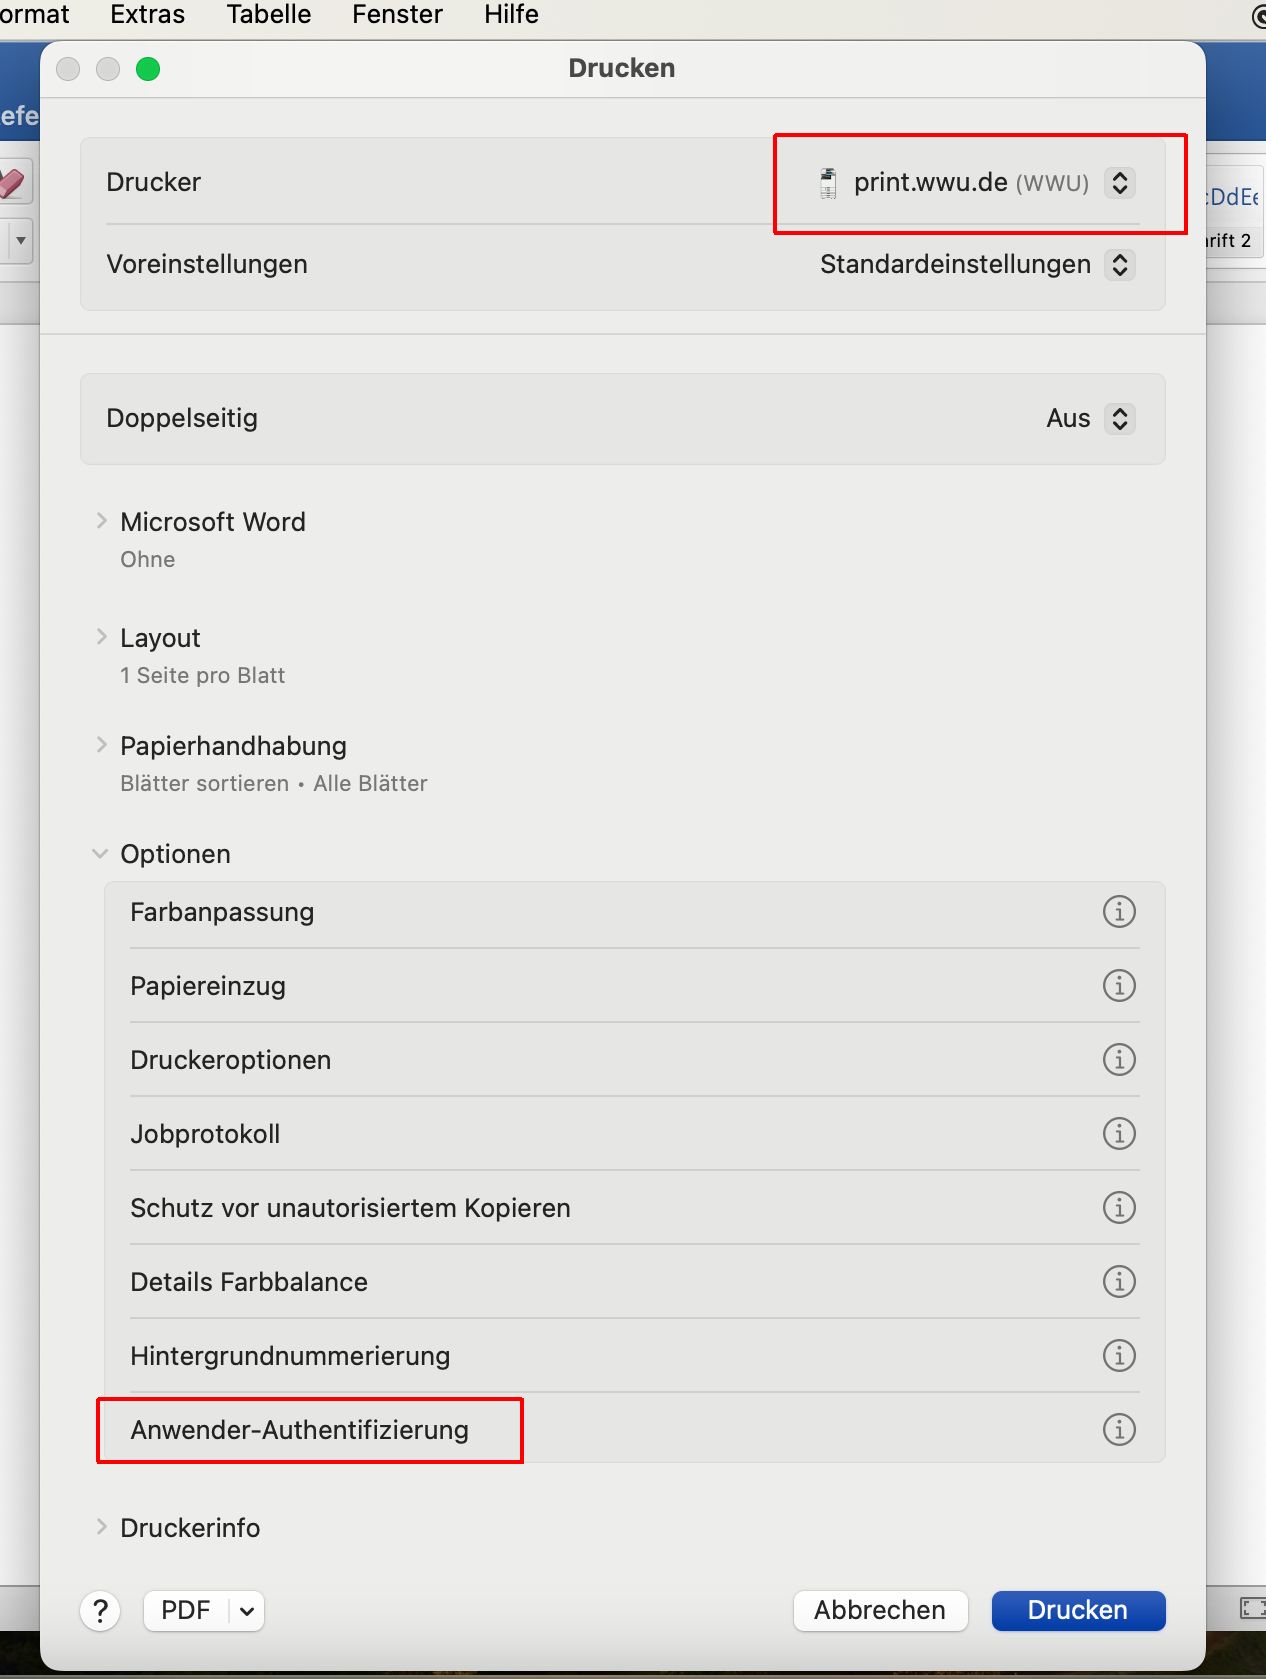
© IVV1 Step 6:
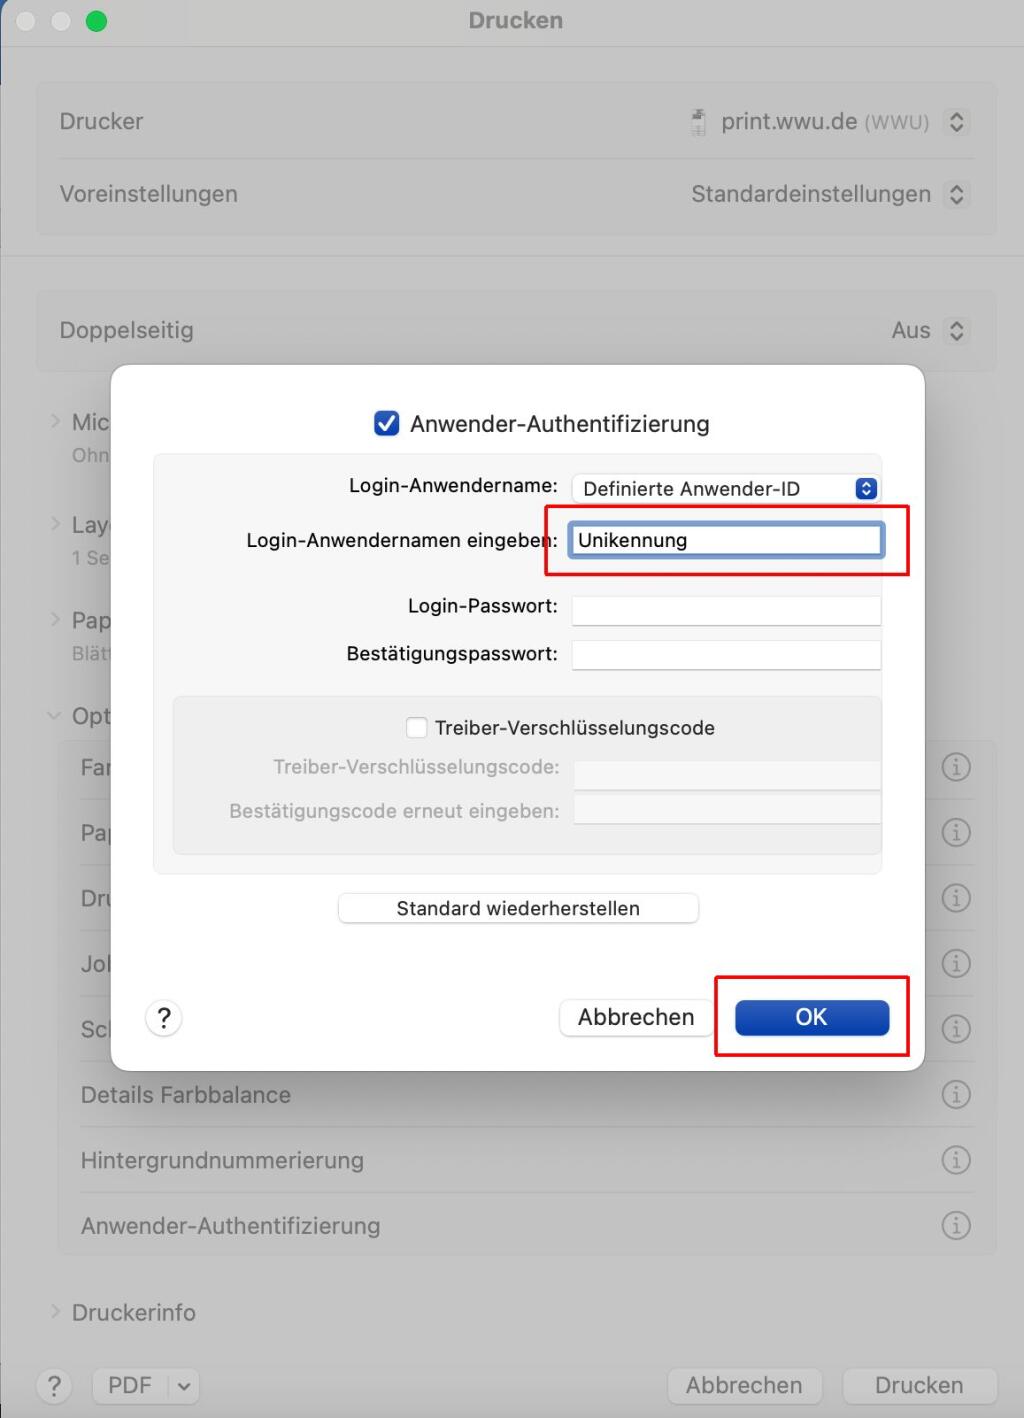
How and where user authentication is available,
unfortunately varies depending on the program.
It is important that you only enter
your university ID and not a password
here.
Confirm the dialog and then go to
then click on Print!
© IVV1 Step 7:
After the print job, the window
window appears to request authentication. Here you enter
enter your university ID and your university password.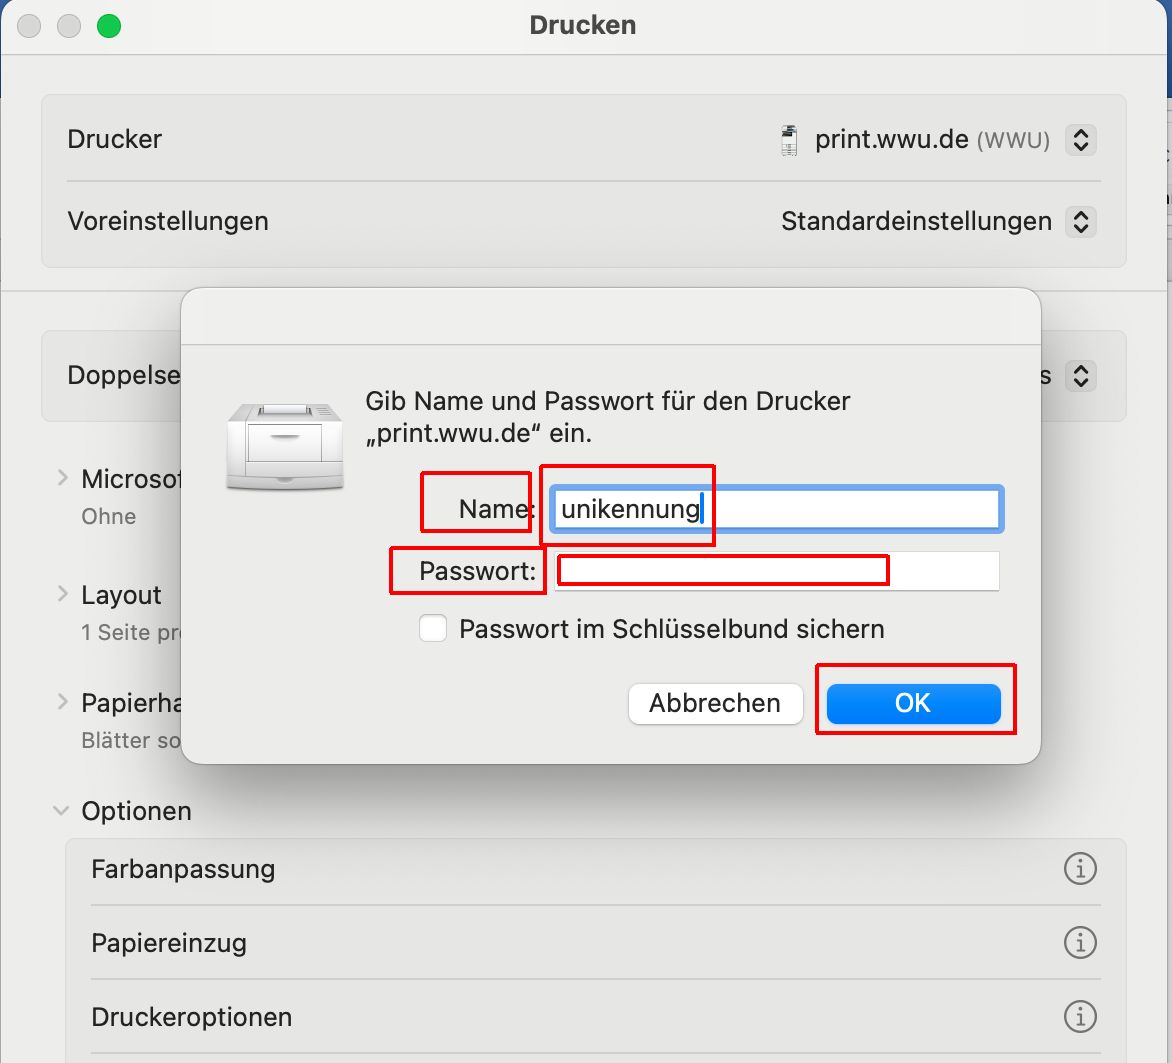
© IVV1 Step 8:
When using the printer for the first time
the printing process may stop with the message “Waiting for
Waiting for authentication”. This only appears
only if the window does not appear automatically.
appears automatically.
Therefore, click on the symbol (circular
arrow) to call up the authentication input screen
manually.
Then enter your university ID and the university
password. After clicking on the
“OK” button, the print job is sent to the
with the previously entered login data to the
MFG. You can now log on to the
copier and see and process the print job!
and process it!
© IVV1-Geisteswissenschaften