

| I | Attachment | History | Action | Size | Date | Who | Comment |
|---|---|---|---|---|---|---|---|
| |
Vista_unims_WLAN_Patch.exe | r1 | manage | 32.0 K | 2008-11-12 - 15:08 | LinusStehr | |
| |
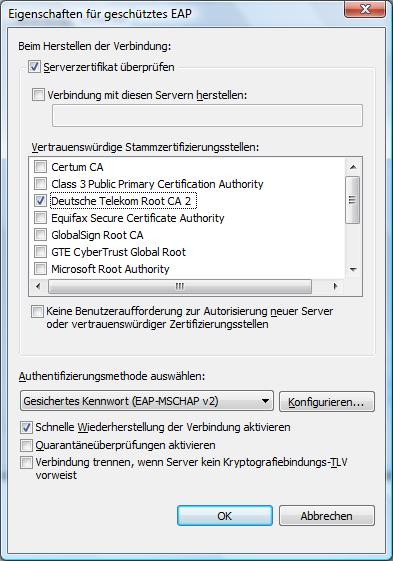
wlan_vista_zertifikat.jpg | r1 | manage | 46.3 K | 2010-11-25 - 10:18 | NicoleMarutz | Zertifikatsprüfung |
Topic revision: r37 - 2011-05-11 - l_5foest01


Ideas, requests, problems regarding ZIVwiki? Send feedback
Datenschutzerklärung Impressum