Inhalt
Introduction
Generally, there are two ways of checking your emails. POP3 downloads your emails from the University email server onto your computer. IMAP leaves the emails on the server and shows them locally. If you check your emails on one PC only, we advise you to use POP3. If you wish to check your emails on more than one PC, use IMAP. Please note that with IMAP an Internet connection is always necessary if you want to check your emails..Configuration of Windows Mail/Outlook Express for the checking of emails
1. Setting up a new account
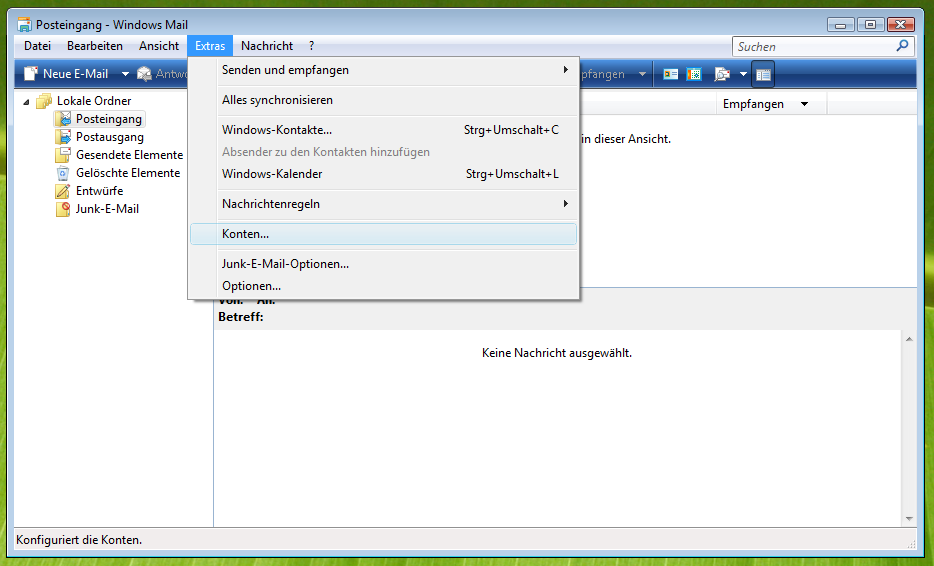
First you must open a new email account. Open Windows Mail/Outlook Express and choose the menu item "Extras -> accounts" as shown in the image below. This will open the account administration.- Set up an account with Windows Mail:
2. Adding an email account
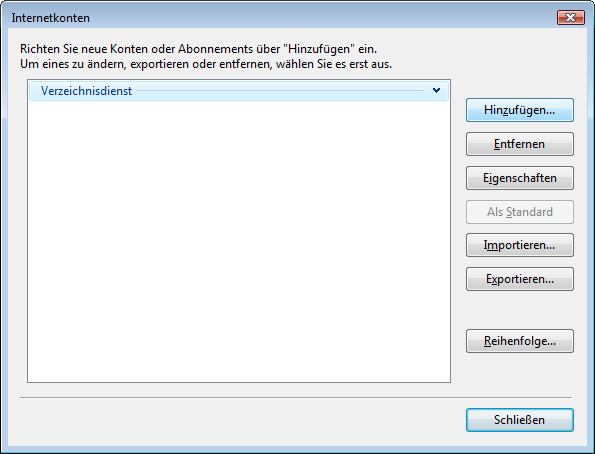
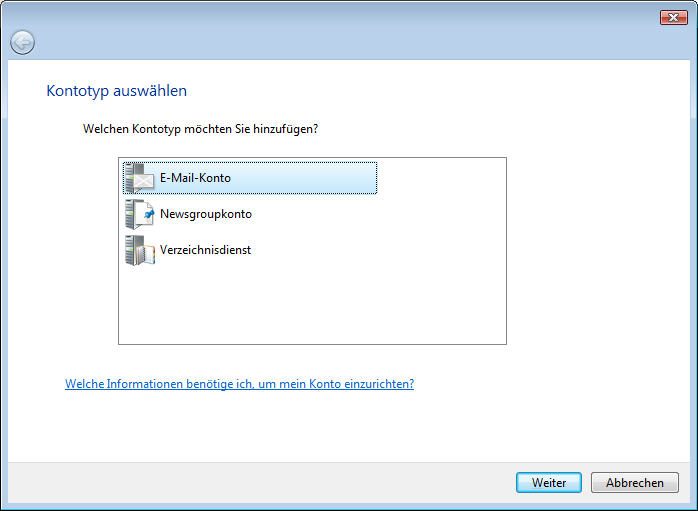
Next you must set up a new account of the email type. Click the button "add" and choose "Email account".- Add a new account:
- Choose email account:
3. Enter name
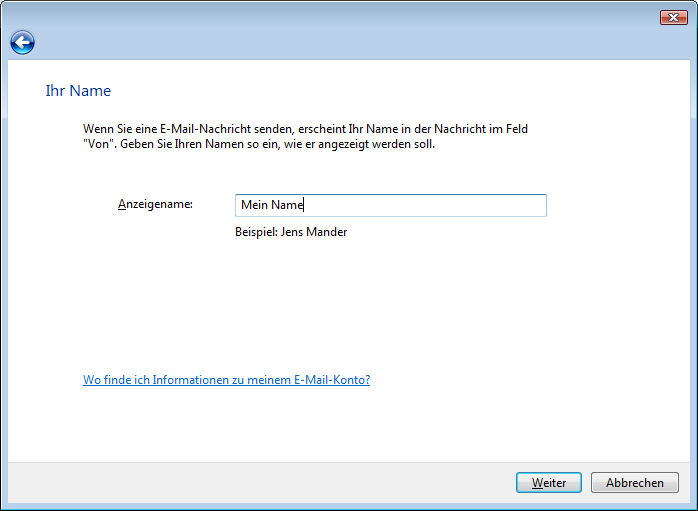
You will see a dialog where you must enter your name. We advise you to give your full name, as the name will also be shown to the recipient of your emails.- Input mask for your name:
4. Enter email address
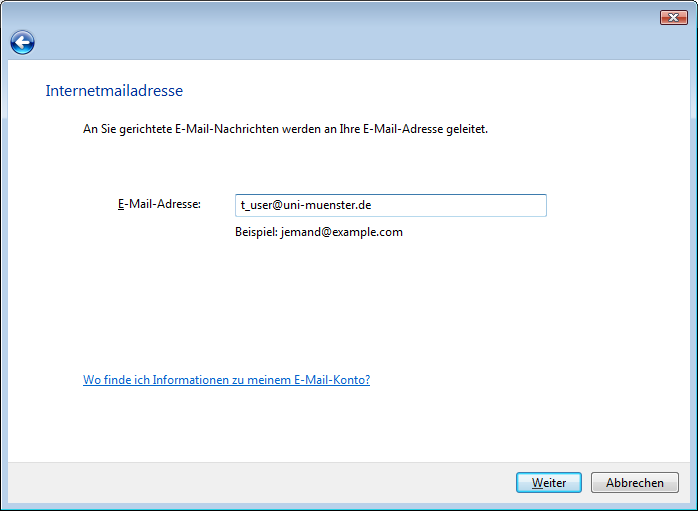
You will now be asked to enter your email address, i.e. your „uni-muenster“-address.- Enter email address:
5. Entering server
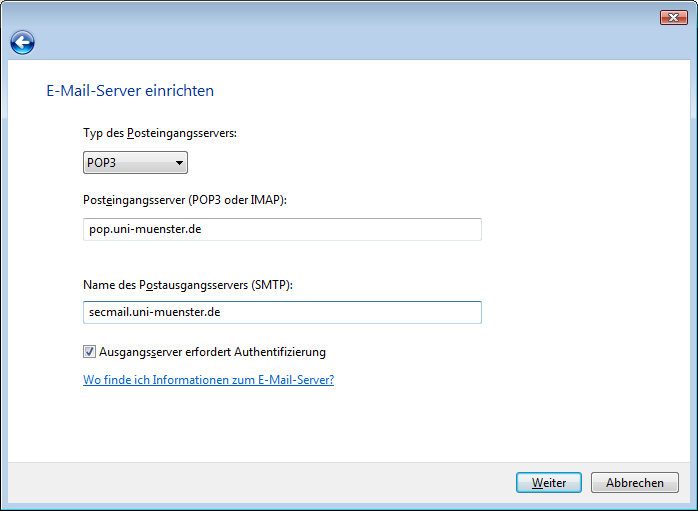
This is the most important part: The configuration of the mail server. When you decide which incoming mail server you want to use, you can choose between "POP3" and "IMAP". Generally, POP3 is more suitable, if you want to check your emails on one computer only. If you plan to check them on more than one computer (e.g. at home and at work), IMAP is the right choice. In the dialog, configure the type of the incoming mail server accordingly. If you have decided for POP3, enter "pop.uni-muenster.de" as server name. If you have chosen IMAP, enter "imap.uni-muenster.de". The outgoing mail server is the same for both servers "secmail.uni-muenster.de". The image below shows the configuration for the POP3 server. Do not forget to activate the authentication.- Server configuration:
6. User name and password
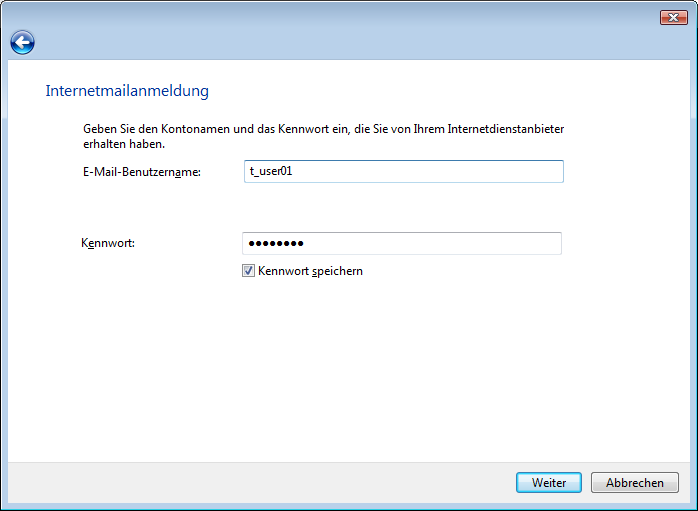
Enter your user name and the matching central standard password here. That is identical with the password that you use to log into the computers in the ZIV pools.- User name + password:
7. Complete
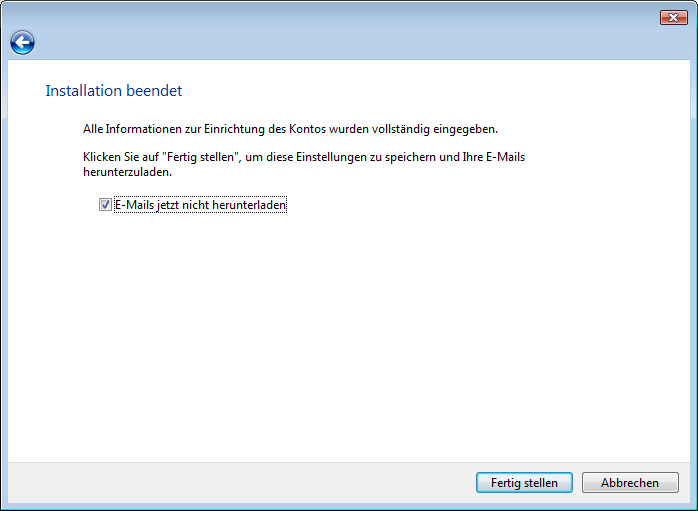
Done! The configuration is now almost complete. In the last dialog, mark that the email should not be checked directly from the server yet and click on „complete“.- Complete:
Securing connection
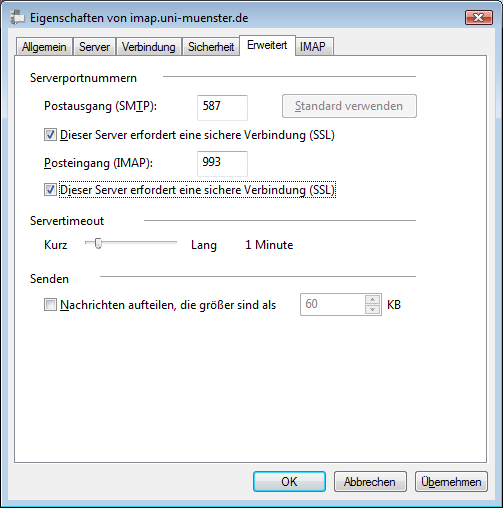
As a standard, both emails and password are transferred in the clear text. Therefore, the risk of third parties reading them is very high. That is the reason why nowadays we use encryption in order to prevent others from spying out our data. To activate the encryption, open the account administration via "Extras -> accounts" (as described in steps 1 and 2). Now mark the newly set-up account and click “settings”. In the popping up dialog choose the tab "Advanced" and activate the SSL encryption of both the incoming mail server and the outgoing mail server (see image). From now on the data transfer will be encrypted.- Secure connection:
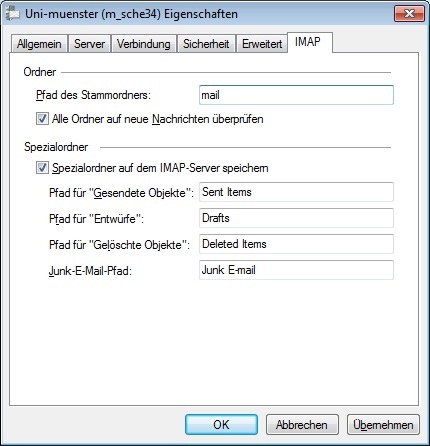
- Enter IMAP root directory:
-- MatthiasSchelp - 30 Jun 2008
Troubleshooting/notes
If you have found errors or problems in this manual, enter your experiences and suggestions for improvement here. You may also change the instructions directly.
In Outlook 2007 and 2010 (inter alia), you can choose an encryption method for the connection (SSL/TLS/...). For the outgoing mail server, you must then choose "TLS", rather than „SSL“, as suggested in the image. Note: Generally it is better to leave the emails on a server than on a local computer, as that way the emails do not get lost if the hard drive is damaged. Another advantage is that you can also check your mails via Permail if you are away from home. You should think about changing to IMAP!Topic revision: r2 - 2011-06-06 - NicoleMarutz
Ideas, requests, problems regarding ZIVwiki? Send feedback
Datenschutzerklärung Impressum

