Setting up the Wireless-LAN under Windows XP
Content
Preconditions
The necessary preconditions for the use of the Muenster University WLAN are a ZIV user ID and a password for network access. You can get a user ID at the ZIV (Mein ZIV), or from an event assistant for the duration of the event. The password for network access can also be set up at Mein ZIV.Setting up wireless-LAN-connection
Choose Start -> Settings -> Network connections -> Wireless network connections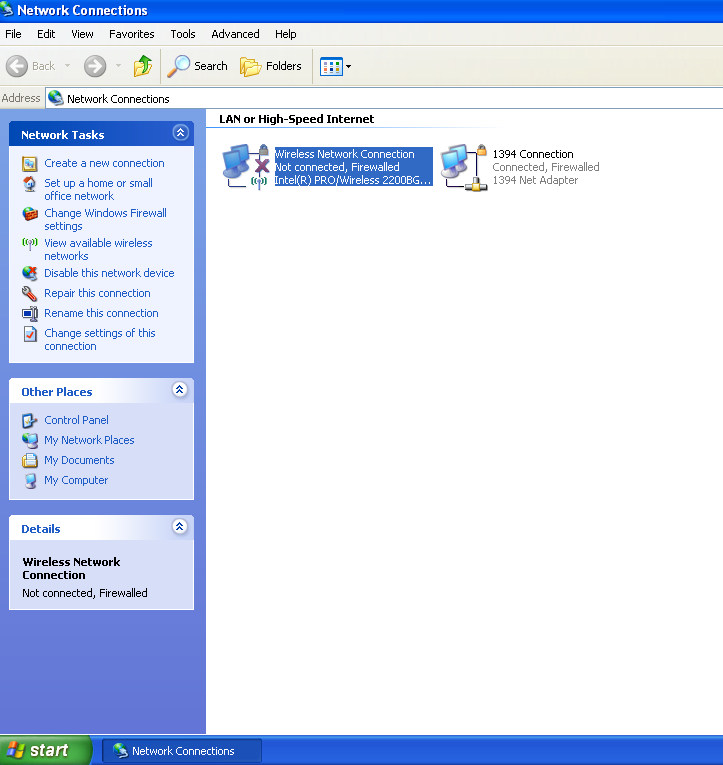 image 1
Choose the icon wireless network connections and click View available wireless networks (image 1) on the left.
image 1
Choose the icon wireless network connections and click View available wireless networks (image 1) on the left.
 image 2
Click Change advanced settings (image 2) on the left.
image 2
Click Change advanced settings (image 2) on the left.
 image 3
Choose the entry Internet protocol (TCP/IP) and click properties (image 3).
image 3
Choose the entry Internet protocol (TCP/IP) and click properties (image 3).
 image 4
Activate the options obtain an IP-Address automatically and obtain DNS server address automatically and click OK (image 4).
You will now get back to image 3. There click the tab wireless networks.
image 4
Activate the options obtain an IP-Address automatically and obtain DNS server address automatically and click OK (image 4).
You will now get back to image 3. There click the tab wireless networks.
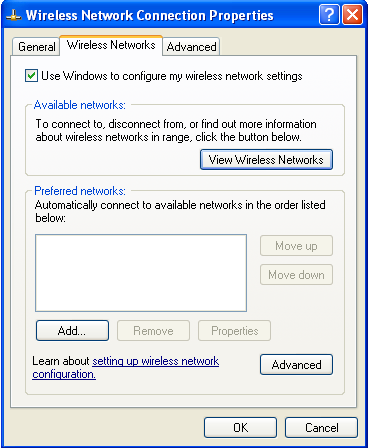 image 5
Click Add (image 5).
image 5
Click Add (image 5).
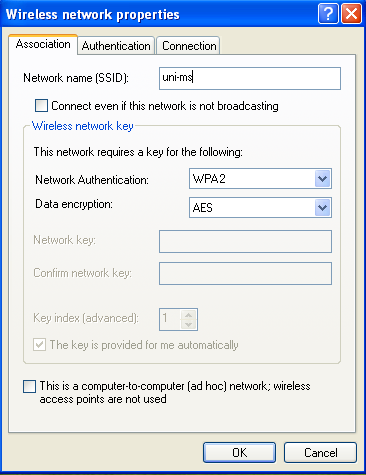 image 6
As network name (SSID) enter uni-ms (image 6).
Choose WPA 2 as the type of the network authentication (image 6). If WPA 2 is not available, either your wireless-LAN-card or the driver does not support it. Try to update the driver or get newer hardware. Use of the wireless-LANs is not possible, if your driver or your wireless-LAN-card do not at least support WPA 2.
Adjust the _data encryption on AES (image 6). From 12.03.2013 forward our hotspots support only AES.
Now click the tab authentication (image 6).
image 6
As network name (SSID) enter uni-ms (image 6).
Choose WPA 2 as the type of the network authentication (image 6). If WPA 2 is not available, either your wireless-LAN-card or the driver does not support it. Try to update the driver or get newer hardware. Use of the wireless-LANs is not possible, if your driver or your wireless-LAN-card do not at least support WPA 2.
Adjust the _data encryption on AES (image 6). From 12.03.2013 forward our hotspots support only AES.
Now click the tab authentication (image 6).
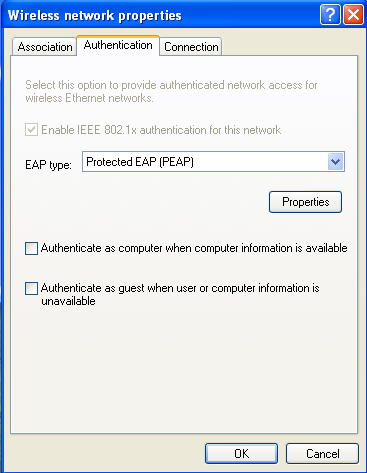 image 7
As EAP type choose Protected EAP (PEAP) (image 7).
Deactivate the option authenticate as computer when computer information is available (image 7).
Deactivate the option authenticate as guest when user or computer information is unavailable (image 7).
Then click properties (image 7).
image 7
As EAP type choose Protected EAP (PEAP) (image 7).
Deactivate the option authenticate as computer when computer information is available (image 7).
Deactivate the option authenticate as guest when user or computer information is unavailable (image 7).
Then click properties (image 7).
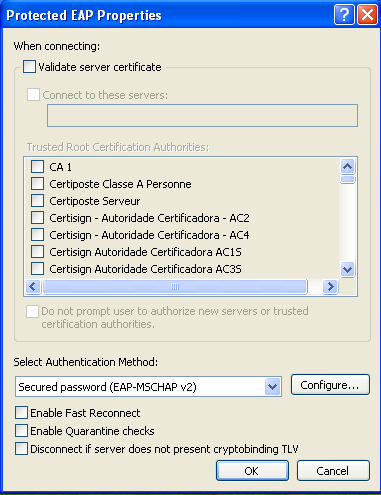 image 8
Deactivate the option Validate server certificate, Enable Fast Reconnect, Enable Quarantine checks and Disconnect if server does not present cryptobinding TLV (image 8).
Click configure (image 8). Please make sure that you choose the entry Secured password (EAP-MSCHAP v2) from the menu Select Authentication Method.
image 8
Deactivate the option Validate server certificate, Enable Fast Reconnect, Enable Quarantine checks and Disconnect if server does not present cryptobinding TLV (image 8).
Click configure (image 8). Please make sure that you choose the entry Secured password (EAP-MSCHAP v2) from the menu Select Authentication Method.
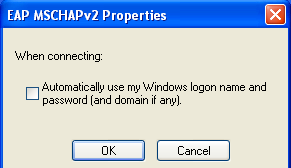 image 9
Deactivate the option Automatically use my Windows logon name and password (and domain if any) (image 9).
Click OK (image 9). Now you get back to image 7.
Click the tab connection (image 7).
image 9
Deactivate the option Automatically use my Windows logon name and password (and domain if any) (image 9).
Click OK (image 9). Now you get back to image 7.
Click the tab connection (image 7).
 image 10
Activate the option Connect when this network is in range (image 10).
Click OK (Bild 10). Now you get back to image 5. There you will find a new entry in the menu preferred networks (image 11).
image 10
Activate the option Connect when this network is in range (image 10).
Click OK (Bild 10). Now you get back to image 5. There you will find a new entry in the menu preferred networks (image 11).
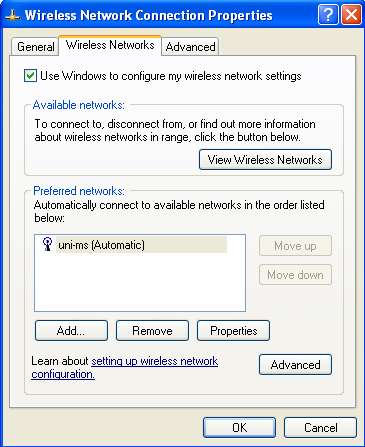 image 11
Click OK (image 11). Now you get back to the window wireless network connection (image 2 respectively image 12).
image 11
Click OK (image 11). Now you get back to the window wireless network connection (image 2 respectively image 12).
Connecting to wireless LAN
When a wireless-LAN-cell is within range, the window will look like the one in image 12. It is possible that on your server there is still a connection to the wireless-LAN with the network (SSID) Funk-Hoer1 eingerichtet. The wireless-LAN Funk-Hoer1 will no longer operate. It should therefore no longer be used.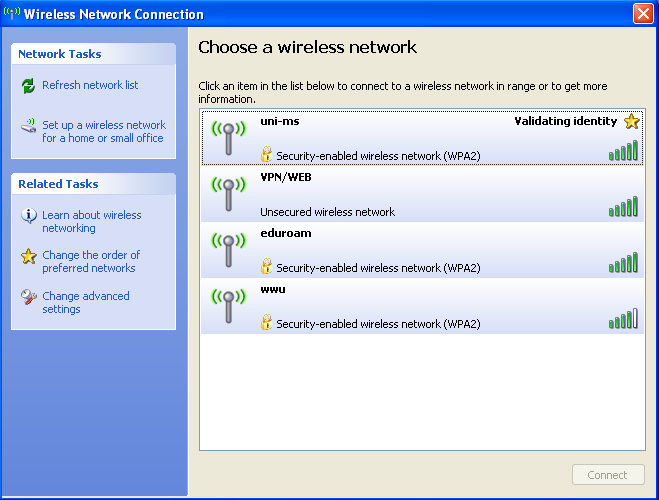 image 12
When the server has set up a connection with the wireless-LAN-cell (network name uni-ms) you will see an information window in the task menu below (popup, image 13).
image 12
When the server has set up a connection with the wireless-LAN-cell (network name uni-ms) you will see an information window in the task menu below (popup, image 13).
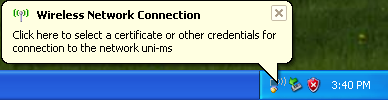 image 13
Click the information window. You will now be asked to enter your user ID (image 14).
image 13
Click the information window. You will now be asked to enter your user ID (image 14).
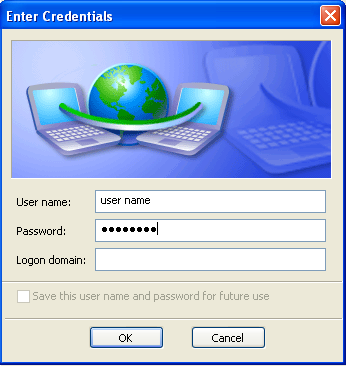 image 14
As user name and password enter your central user ID and your password for network access (not the central standard password). Do not enter a registration domain.
Then click OK (image 14). User name and password will now be checked. If the connection has been set up successfully, you will again see an information window (Popup, image 15).
image 14
As user name and password enter your central user ID and your password for network access (not the central standard password). Do not enter a registration domain.
Then click OK (image 14). User name and password will now be checked. If the connection has been set up successfully, you will again see an information window (Popup, image 15).
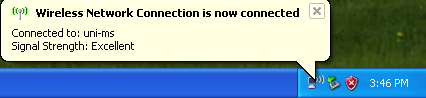 image 15
This completes the installation of the wireless-LAN connection and you are connected with the wireless-LAN.
image 15
This completes the installation of the wireless-LAN connection and you are connected with the wireless-LAN.
Resorting to a bag of tricks (delete user information)
HKEY_CURRENT_USER\Software\Microsoft\Eapol\UserEapInfo
More detailed information can be found in the following Microsoft article:
http://support.microsoft.com/kb/823731/en-us
The key can also be deleted with the following batch-file.
Download the batch file and execute the file with a double click..
-- Update ChrisF - 2011-08-16


| I | Attachment | History | Action | Size | Date | Who | Comment |
|---|---|---|---|---|---|---|---|
| |
Image06.png | r2 r1 | manage | 31.6 K | 2013-02-25 - 14:29 | JessicavonAhlen |
Topic revision: r6 - 2013-02-25 - JessicavonAhlen


Ideas, requests, problems regarding ZIVwiki? Send feedback
Datenschutzerklärung Impressum