

| I | Attachment | History | Action |
Size | Date | Who | Comment |
|---|---|---|---|---|---|---|---|
| |
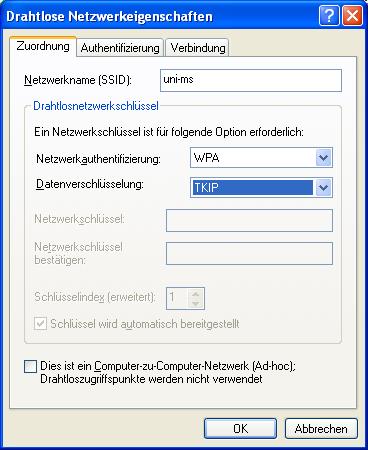
Bild6.jpg | r2 r1 | manage | 92.4 K | 2013-02-25 - 14:20 | JessicavonAhlen | |
| |
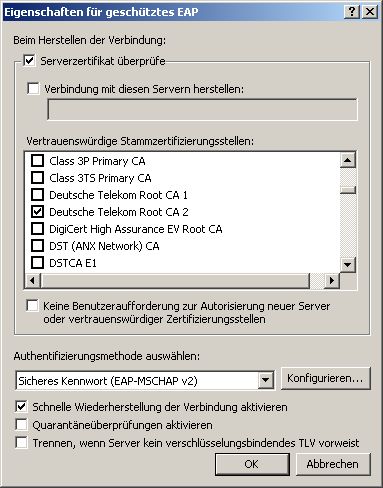
WLAN_Zertifikat_ueberpruefen_XP.jpg | r1 | manage | 43.5 K | 2013-03-07 - 10:01 | ArneScheffer |
Topic revision: r36 - 2013-10-09 - m_5faget01


Ideas, requests, problems regarding ZIVwiki? Send feedback
Datenschutzerklärung Impressum