Securing email receipt with KMail
Configuration
1. Start KMail by pressing Alt+F2 and entering "kmail" in the opening dialog. Or just open Kmail via the menu.
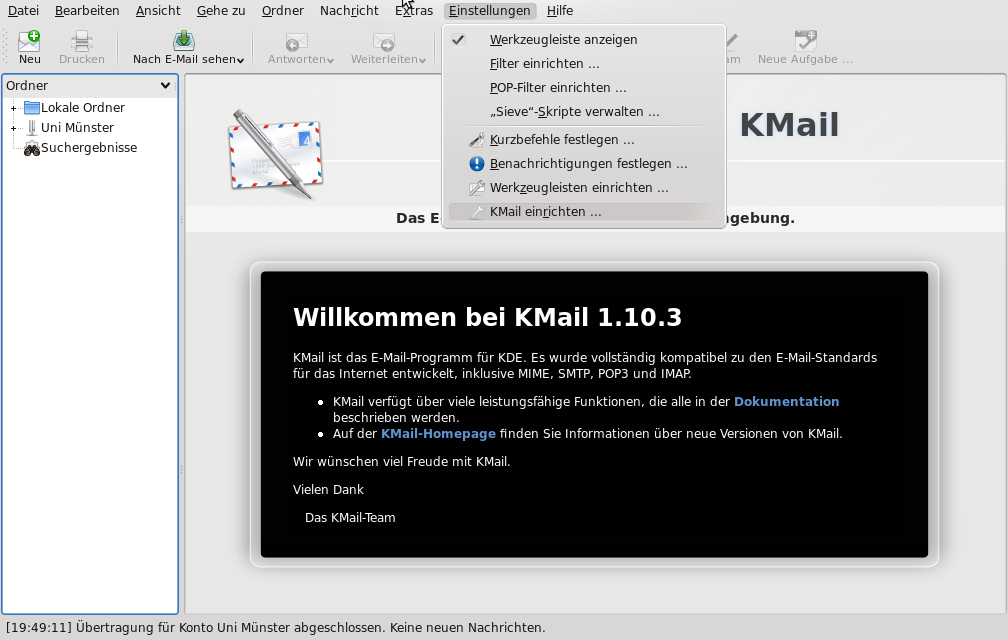
2. First choose »Settings« in the upper menu bar. Then choose »Set up KMail«.
- Open settings:
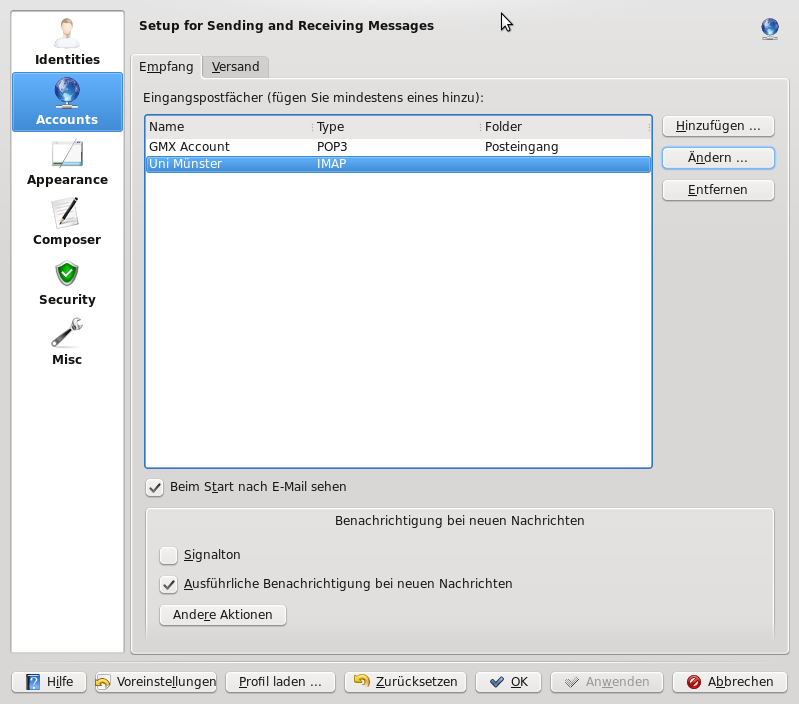
3. Then choose the item »Accesses« or »Accounts« in the left menu list and set the tab »Receipt« on the right part of the screen. You will now see all existing accounts. Choose the account used for the receipt of university emails. A click on »Change« will adjust the already existing entry, which may have a different name than in this example.
- Adjust account:
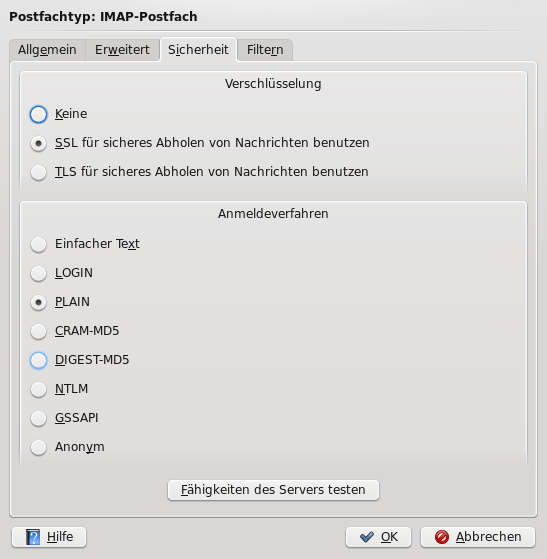
4.In the opening window choose the tab »Security”. In the following window there is a button »Test server features«. Click this button. Now you can only choose from the encryption methods supported by the server. Choose SSL as encryption as well as any of the available login procedures. Confirm your settings with the OK button.
- Start encryption:
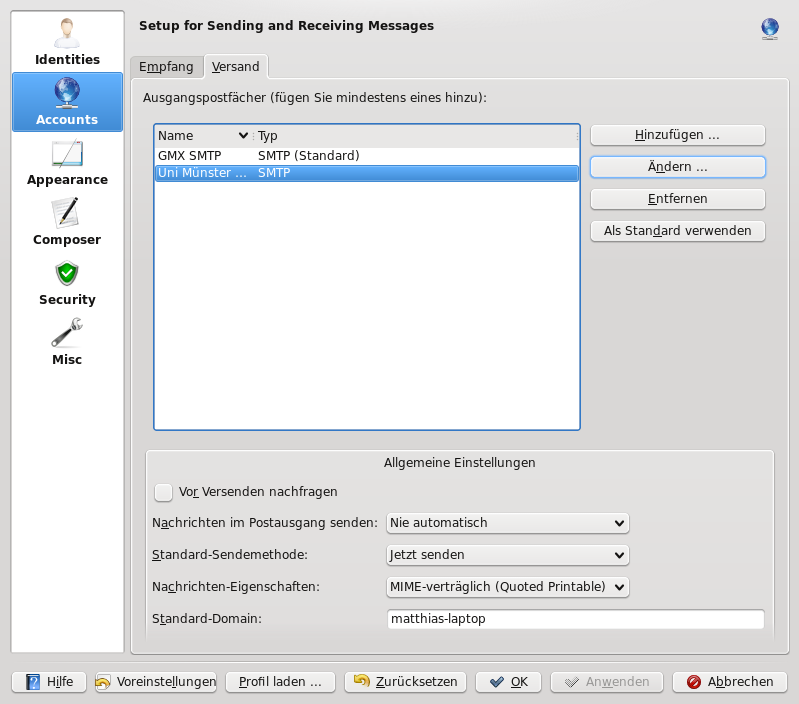
5. All you need to do now is activate the encryption for the sending of emails. Choose the tab »sending« as well as the account for the sending of university emails. You can adjust the account by clicking on »change«.
- Choose the account for the sending of emails:
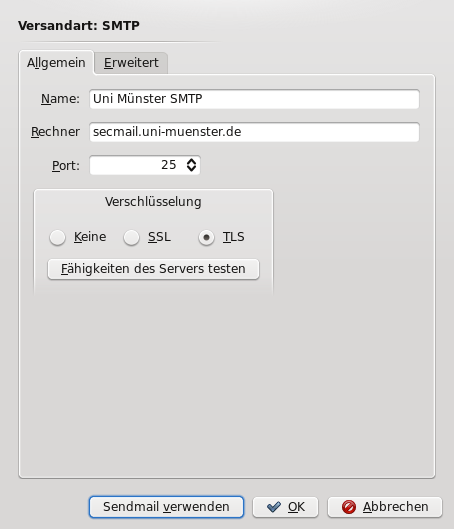
6. Activate the TLS encryption. Check whether the server address is "secmail.uni-muenster.de". Otherwise it must be changed accordingly.
- Activate encryption:
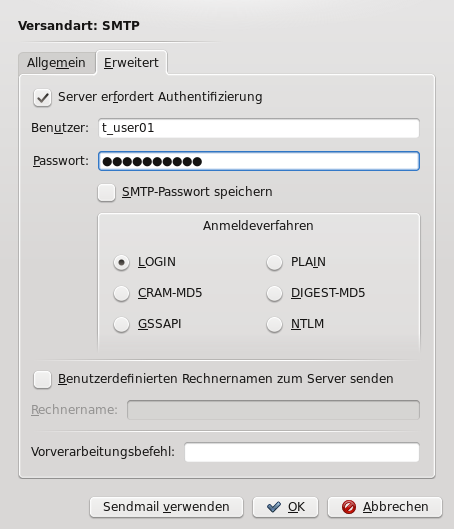
7. Choose the tab »Advanced« and tick the box at »Server requires authentication«. The right log-in procedure is "LOGIN". You may also enter your user name and password, or Kmail will ask you to enter it every time you send emails.
- Activate authentication:
--
MatthiasSchelp - 31 May 2008
Troubleshooting/notes
If you have found problems or errors in this manual that only concern part of the users of this tutorial, please enter these experiences and suggestions for improvement here. If the problem concerns all users, you may change the instructions directly.
--
LauraOeste - 2011-05-10


