Setting Up the Remote Desktop under Windows 7
Note: Do not save your documents locally on the remote desktop (desktop, drives C: and D:). User profiles and all locally stored data are deleted at the latest 10 days after the last use (or earlier if necessary).
Step-by-Step Instructions
1. Remote Desktop Menu
Click on the start button in your taskbar and select "All Programs".
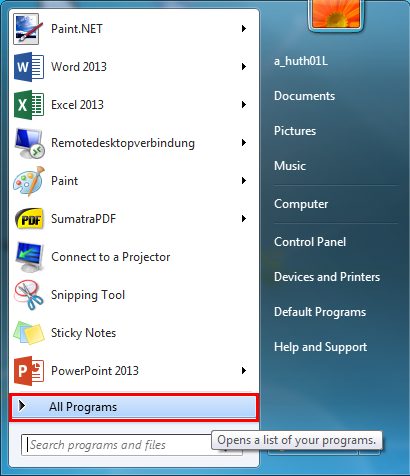
Click on "Accessories" and choose "Remote Desktop Connection".

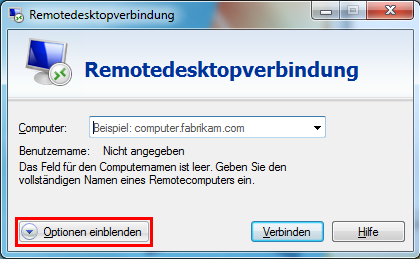
2. Options Menu
Click on "Show Options".
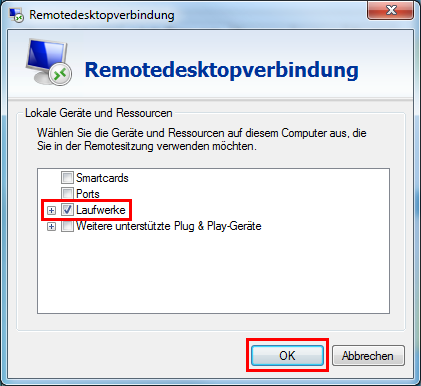
3. Access to Local Resources
Afterwards, click on the tab "Local Resources" and choose "More" at the "Local Devices and Resources" section.
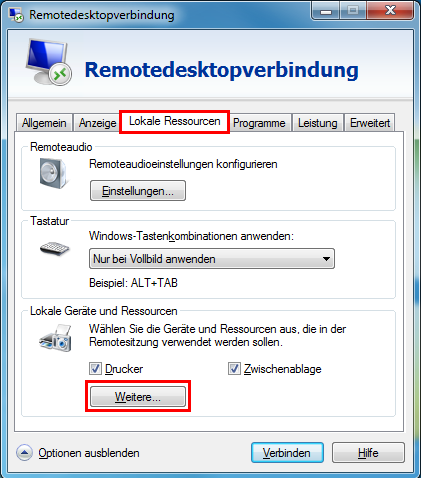
Tick "Drives" and confirm with "OK" to get access to your local files while using the remote desktop.
4. General Settings
In the "General" tab, enter the following information:
- Computer: remotedesktop.wwu.de
- Username: YourWWU-ID@wwu.de

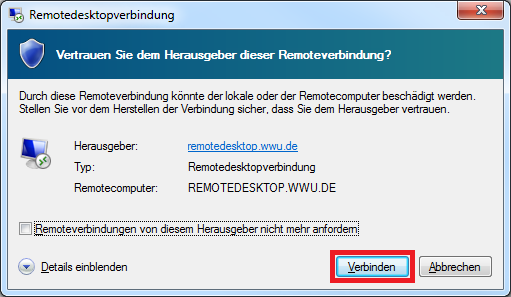
5. Trusting the Remote Connection
Click on "Connect" to trust the remote connection and to continue.
6. Logon to the Remote Desktop
Login to the remote desktop with YourWWU-ID@wwu.de and your WWU password.
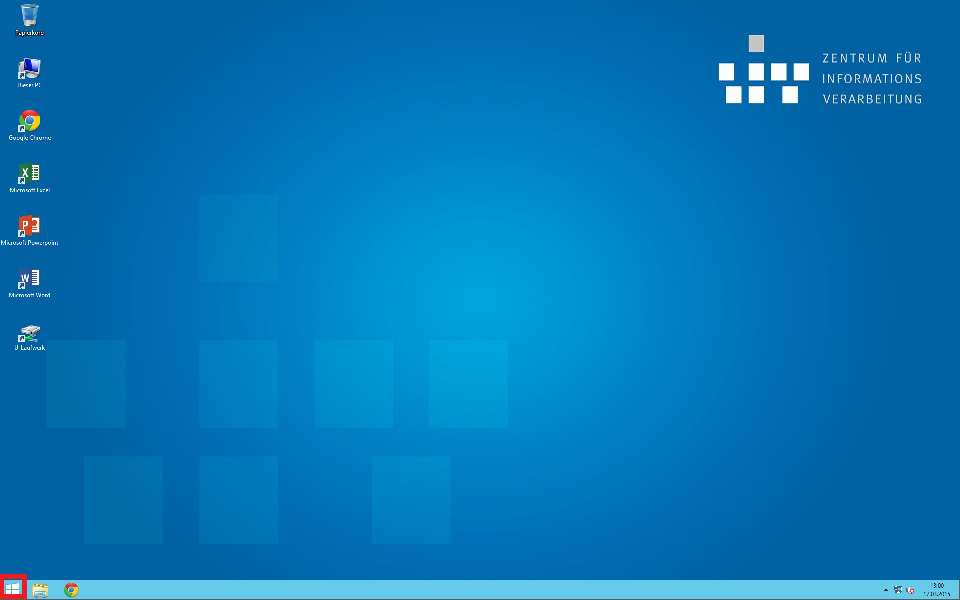
7. Established Connection
You are now successfully connected to the remote desktop and can use the installed programs.
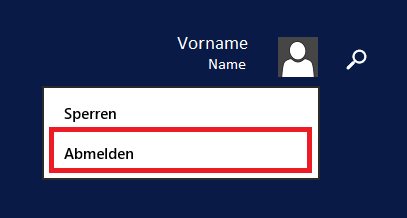
8. Ending the Connection
To end the connection, click on the Windows logo in the remote desktop taskbar, then on your name and on "Logout".