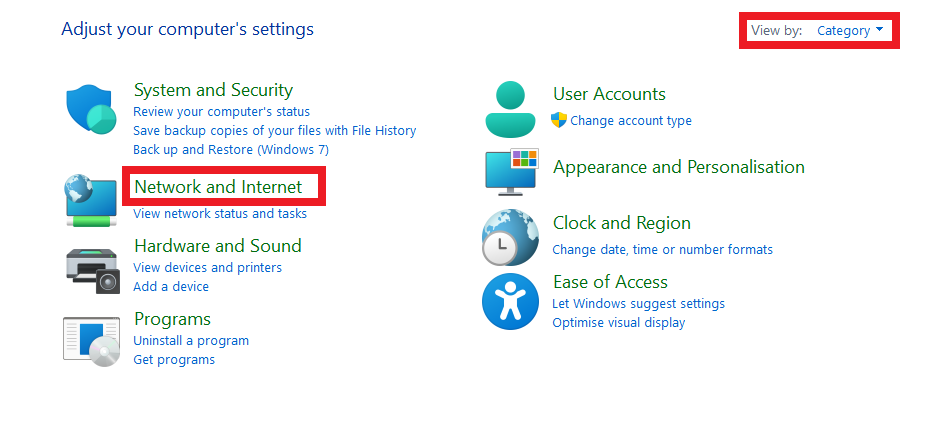
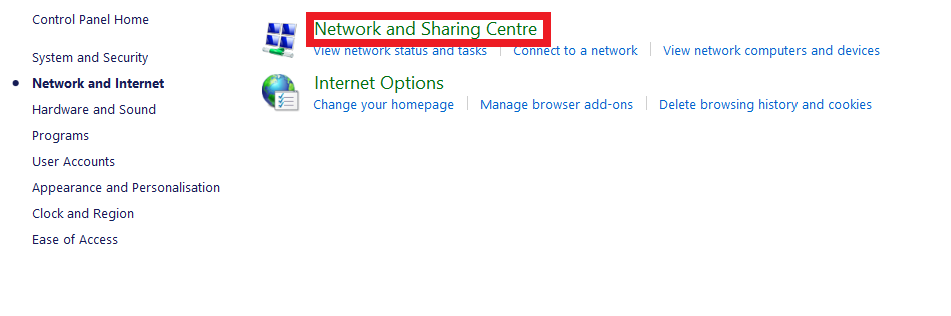
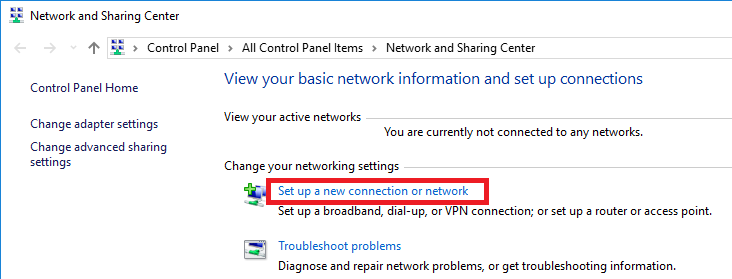
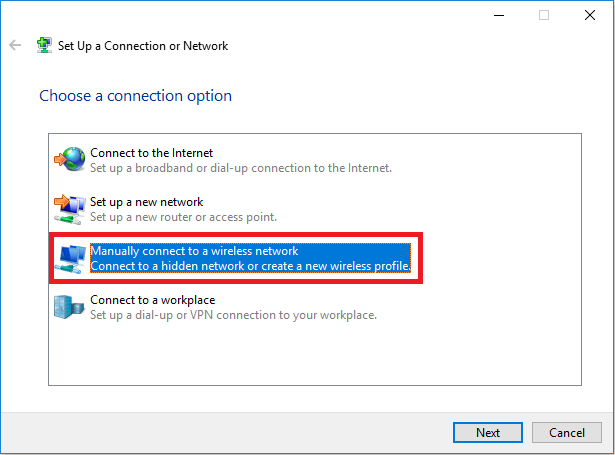
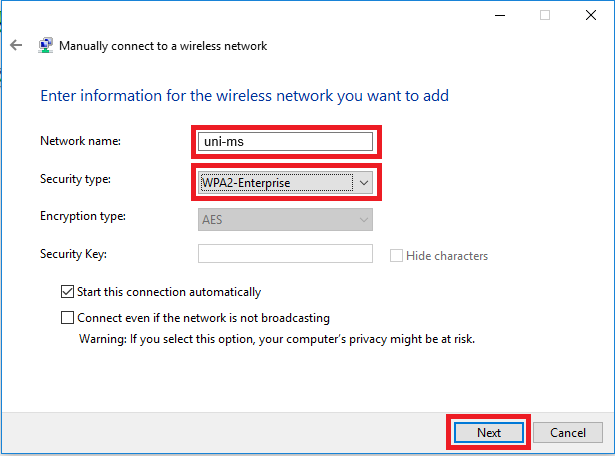
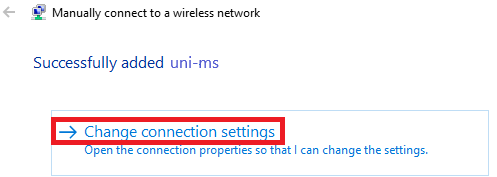
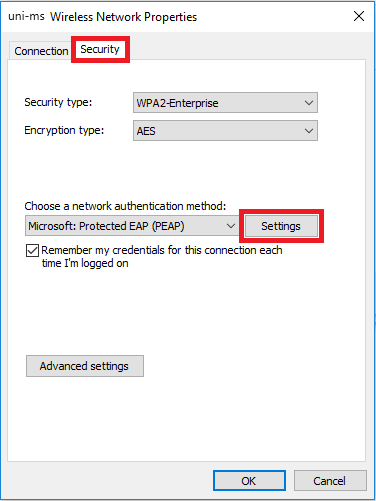
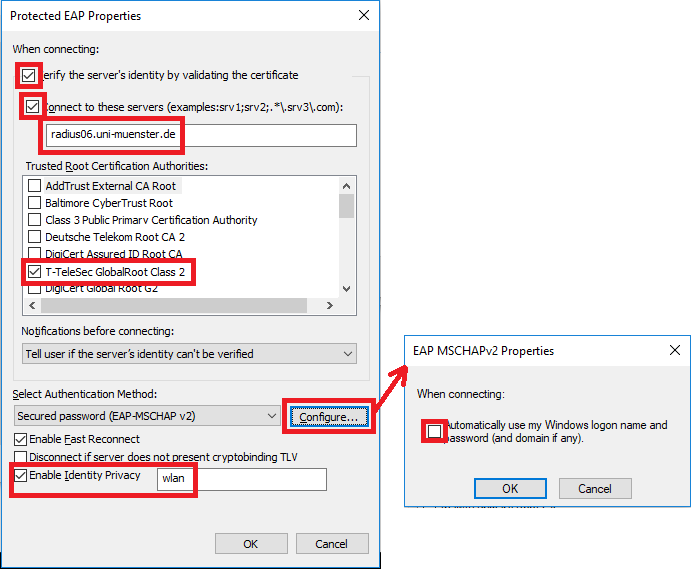
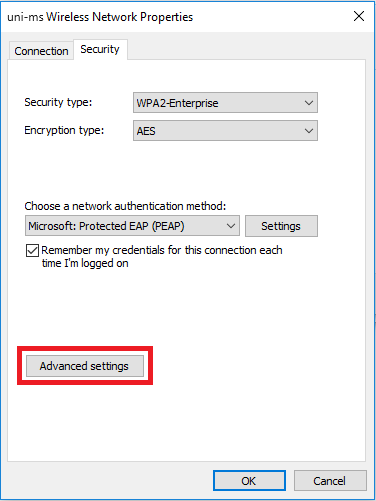
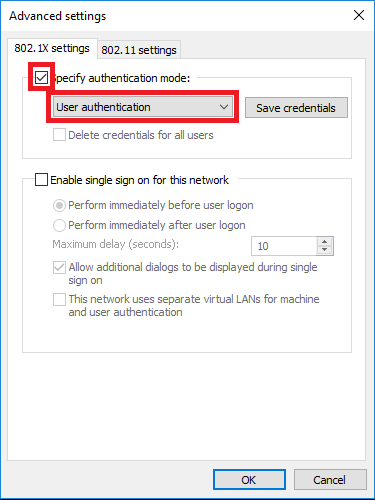
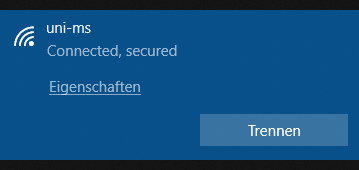
Setting up Wi-Fi under Windows

Requirements:

  • Your device supports WPA2
  • Windows 10 or higher

Note:

  • To download the University Münster installation package or the certificate, you can use our guest WiFi GuestOnCampus.
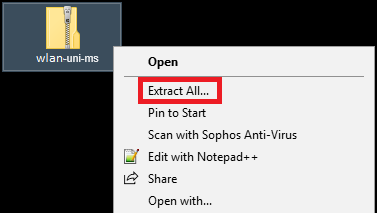
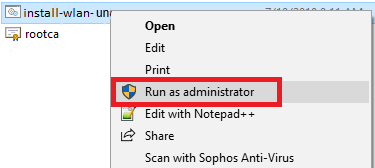
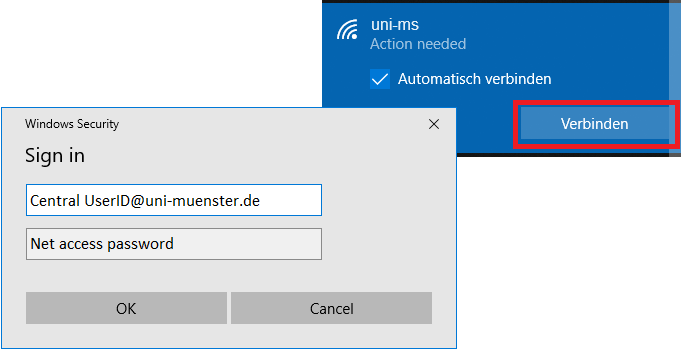
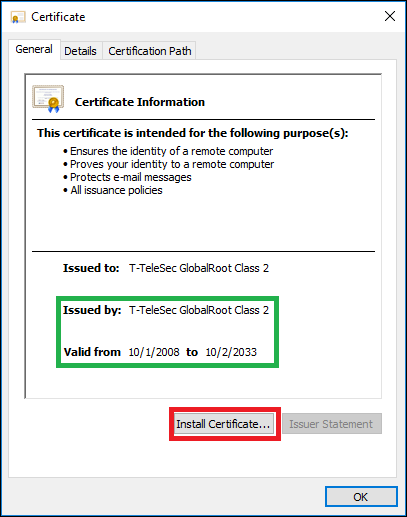
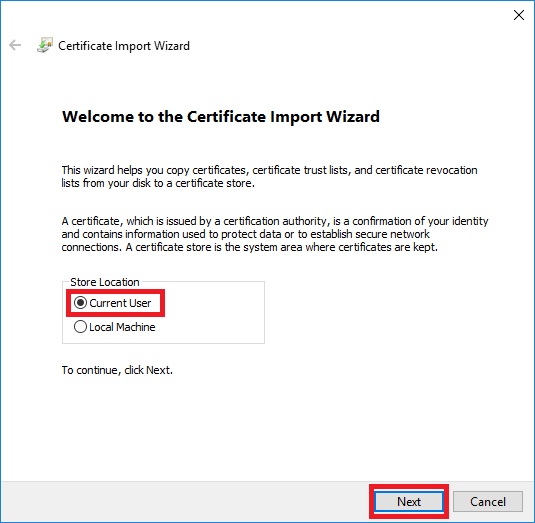
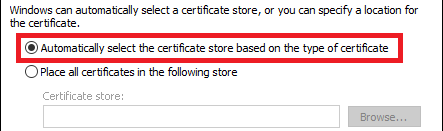
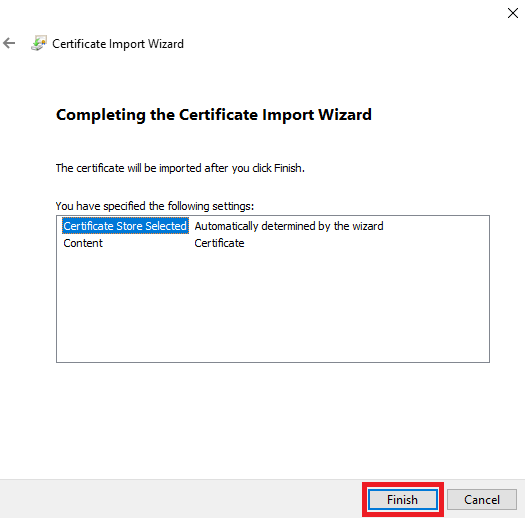
  • We recommend that you use the University Münster installation package for setting up Wi-Fi, as this will automatically set up both WiFis of the Uni-MS (uni-ms, eduroam). If this is not possible, please follow the instructions "Manual installation of the Wi-Fi Certificate" first and then "Manual Configuration of the Wi-Fi" for each SSID.
  • Automatic WiFi Configuration with the University Münster Installation Package (Recommended)

    1. Downloading the Installation Package

    Download the following ZIP-File for the uni-ms (and eduroam) network. Extract the file to your computer by right-clicking on the ZIP file and selecting "Extract all".

    1. Downloading the Installation Package
    © CIT

    2. Installation of the Package

    Open the unpacked folder, right-click on the "install-wlan-uni-ms" file and select "Run as administrator". A black window appears, which closes automatically after a few seconds.  (Note: IF "uni-ms" (or "eduroam") do not appear in the list, you are not in range of the network or your WiFi is disabled.)

    2. Installation of the Package
    © CIT

    3. Login to the WiFi

    After the window has closed, click on the WiFi symbol in the lower right corner, then on "uni-ms" (or "eduroam") and on "Connect". In the appearing login window, enter your university e-mail address (YourUniversity-ID@uni-muenster.de) and your network access password and confirm with "OK".
    Note: Please note that email aliases, such as firstname.surname@uni-muenster.de will not work. The form Uni-Kennung@uni-muenster.de is mandatory for the setup.

    3. Login to the WiFi
    © CIT
  • Manual Installation of the WiFi Certificate

    1. Download and Installation of the Certificate

    Download the following certificate and install it: WiFi certificate.

    1. Download and Installation of the Certificate
    © ZIV

    2. Store Location of the Certificate

    The store location should be "Current User".

    2. Store Location of the Certificate
    © ZIV

    3. Select certificate store

    Select "Automatically select the certificate store based on the type of certificate".
    Confirm all messages.

    3. Select certificate store
    © CIT

    4. Finish

    After clicking on "Finish", a message should confirm that the import process has been completed successfully.

    4. Finish
    © ZIV
  • Manual WiFi Configuration

    1. Open Control Panel

    Enter Control Panel at the bottom of the Windows search and then open the search suggestion Control Panel App.

    1. Open Control Panel
    © CIT

    2. Network and Internet

    In the Control Panel, make sure that you have selected Category at View by in the top right-hand corner. Then open Network and Internet with a single click.

    2. Network and Internet
    © CIT

    3. Network and Sharing Centre

    Now open the Network and Sharing Centre.

    3. Network and Sharing Centre
    © CIT

    4. Setting Up a New Connection

    Select "Set up a new connection or network".

    4. Setting Up a New Connection
    © ZIV

    5. Connection Option

    Click "Manually connect to a wireless network" and "Next".

    5. Connection Option
    © ZIV

    6. Information for the Wireless Network

    Enter "uni-ms" (or "eduroam") as network name, as security type select "WPA2-Enterprise" and then click on "Next".

    6. Information for the Wireless Network
    © CIT

    7. Change Connection Settings

    Click on "Change connection settings".

    7. Change Connection Settings
    © CIT

    8. Security

    Select the tab "Security" and there "Settings".

    8. Security
    © CIT

    9. Security Settings

    In the following window select the following options:

    • Verify the server’s identity by validating the certificate: Tick
    • Connect to these servers: Tick (server name "radius06.uni-muenster.de")
    • List of Trusted Root Certification Authorities: T-TeleSec GlobalRoot Class 2
    Under "Configure…" make sure that the check box is not selected. Finally enable the "Identity Privacy" at the bottom and enter "wlan" in the text field.

    9. Security Settings
    © ZIV

    10. Advanced Settings

    Click on "OK" to return to the previous window in which you click on "Advanced Settings".

    10. Advanced Settings
    © CIT

    11. User Authentication

    In the following window check "Specify authentication mode" and select "User authentication" in the drop-down menu.

    11. User Authentication
    © ZIV

    12. Connect to the WiFi

    You can now confirm / close all windwos and click on the WiFi symbol in the bottom right corner. Select the WiFi "uni-ms" (or "eduroam") there and click on "Connect". You will be asked to log in with your university e-mail address (YourUniversity-ID@uni-muenster.de) and your net access password.
    Note: Please note that email aliases, such as firstanme.surname@uni-muenster.de will not work. The form Uni-Kennung@uni-muenster.de is mandatory for the setup.

    12. Connect to the WiFi
    © CIT

    13. Connected

    Finally the connection will be established with the Wi-Fi.

    13. Connected
    © CIT